Material Resin
Quantity 4 pcs
Price Range $1-100
Lead Time 3 workdays
Gallery
About Project
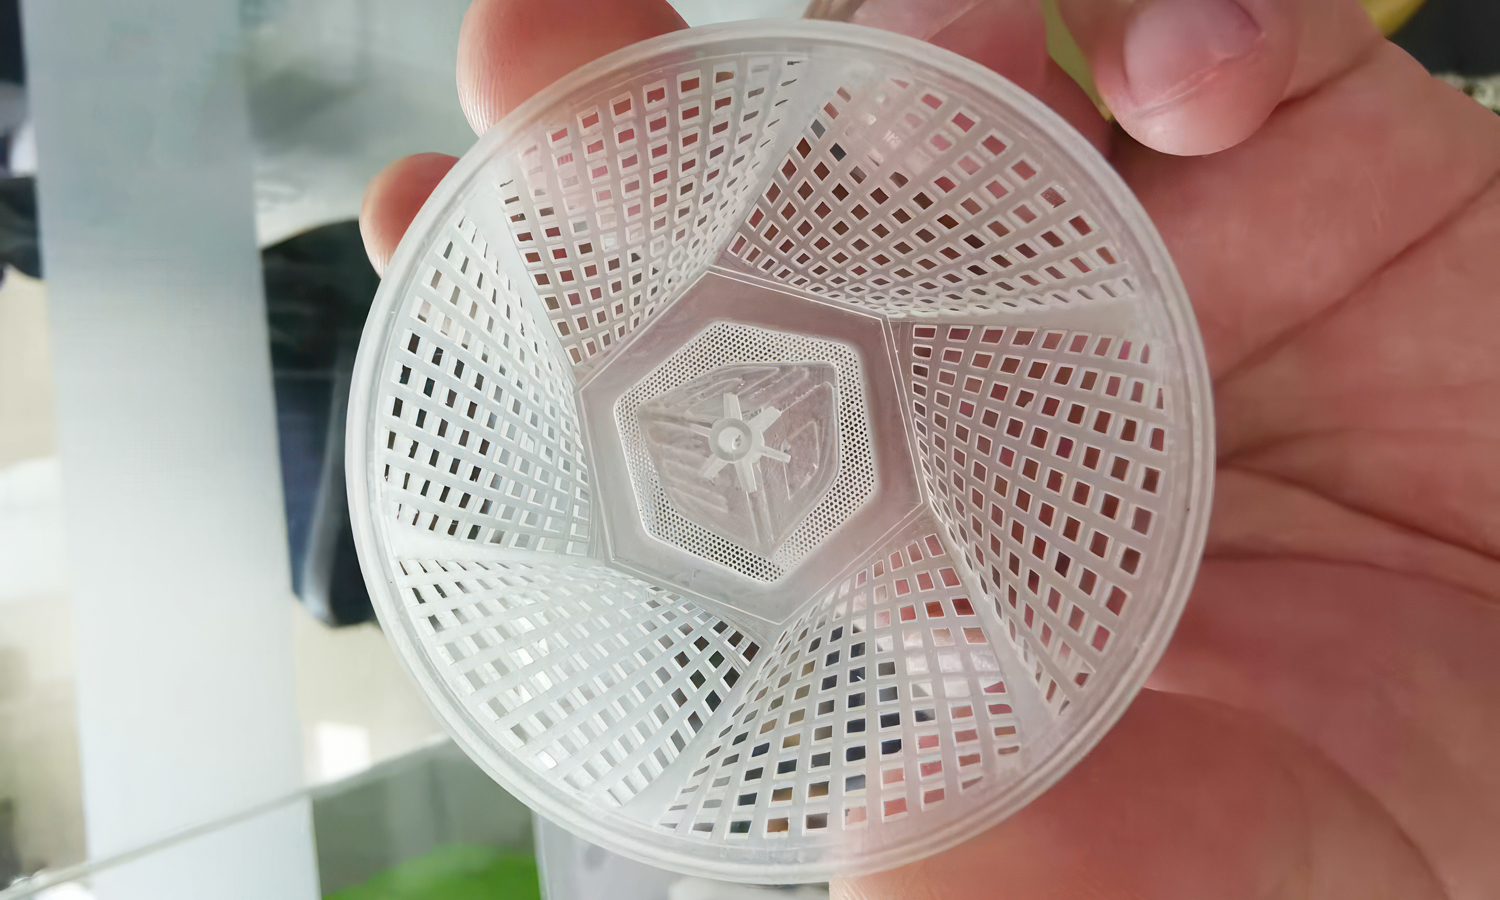
Check out these stunning frosted-clear prototypes! Manufactured through high-resolution SLA 3D printing and enhanced with professional finishing, they combine technical accuracy with refined surface aesthetics.
¤ö╣ Outstanding Detail: From intricate connector housings to fine mesh structures, every feature is faithfully reproduced.¤ö╣ Functional Transparency: Semi-clear resin lets engineers inspect internal geometries while maintaining a sleek, frosted appearance.¤ö╣ Enhanced Post-Processing: Each part has been carefully polished and sandblasted, giving them a uniform matte finish while improving durability.¤ö╣ Versatile Applications: Ideal for automotive, consumer electronics, appliances, and fluid system prototypes, where both performance and looks matter.
At FacFox, we specialize in high-quality transparent and frosted parts, providing clients with realistic, presentation-ready models that support design validation and marketing needs. Whether you need visual prototypes, functional testing, or short-run production, our team ensures precision and consistency in every project.
¤ÜĆ Bring your designs to life with professional-grade frosted clear 3D prints – only at FacFox.
Solution
- Step 1: CAD files were received and a DFM review was completed for wall thickness, lattice integrity, text legibility, and assembly tolerances.
- Step 2: Print orientation and support strategy were optimized in the slicer to protect optical faces and delicate pins/features.
- Step 3: Clear SLA resin was prepared, and the machine build platform was cleaned and leveled.
- Step 4: Parts were SLA-printed at high resolution (25-50 ┬Ąm layers) to capture fine details and sharp edges.
- Step 5: The build was drained and washed in two stages of fresh IPA; internal channels were flushed to remove uncured resin.
- Step 6: Supports were removed, witness marks were trimmed, and edges were lightly deburred.
- Step 7: UV post-curing was performed in a controlled cycle to achieve full mechanical properties while minimizing yellowing.
- Step 8: Surfaces were equalized by progressive wet-sanding (Ōēł600ŌåÆ1200 grit) to smooth joints and blend support interfaces.
- Step 9: A uniform frosted finish was created by fine glass-bead sandblasting at low pressure; critical fit/optical areas were masked.
- Step 10: Local polishing was selectively performed where semi-clear windows were required; the frosted texture was retained elsewhere.
- Step 11: Final cleaning and anti-static drying were completed; parts were inspected for dimensional accuracy, surface uniformity, and assembled fit, then packaged in dust-free pouches.


