
Material Resin
Quantity 1 pcs
Price Range $100-1,000
Lead Time 5 workdays
Gallery
About Project
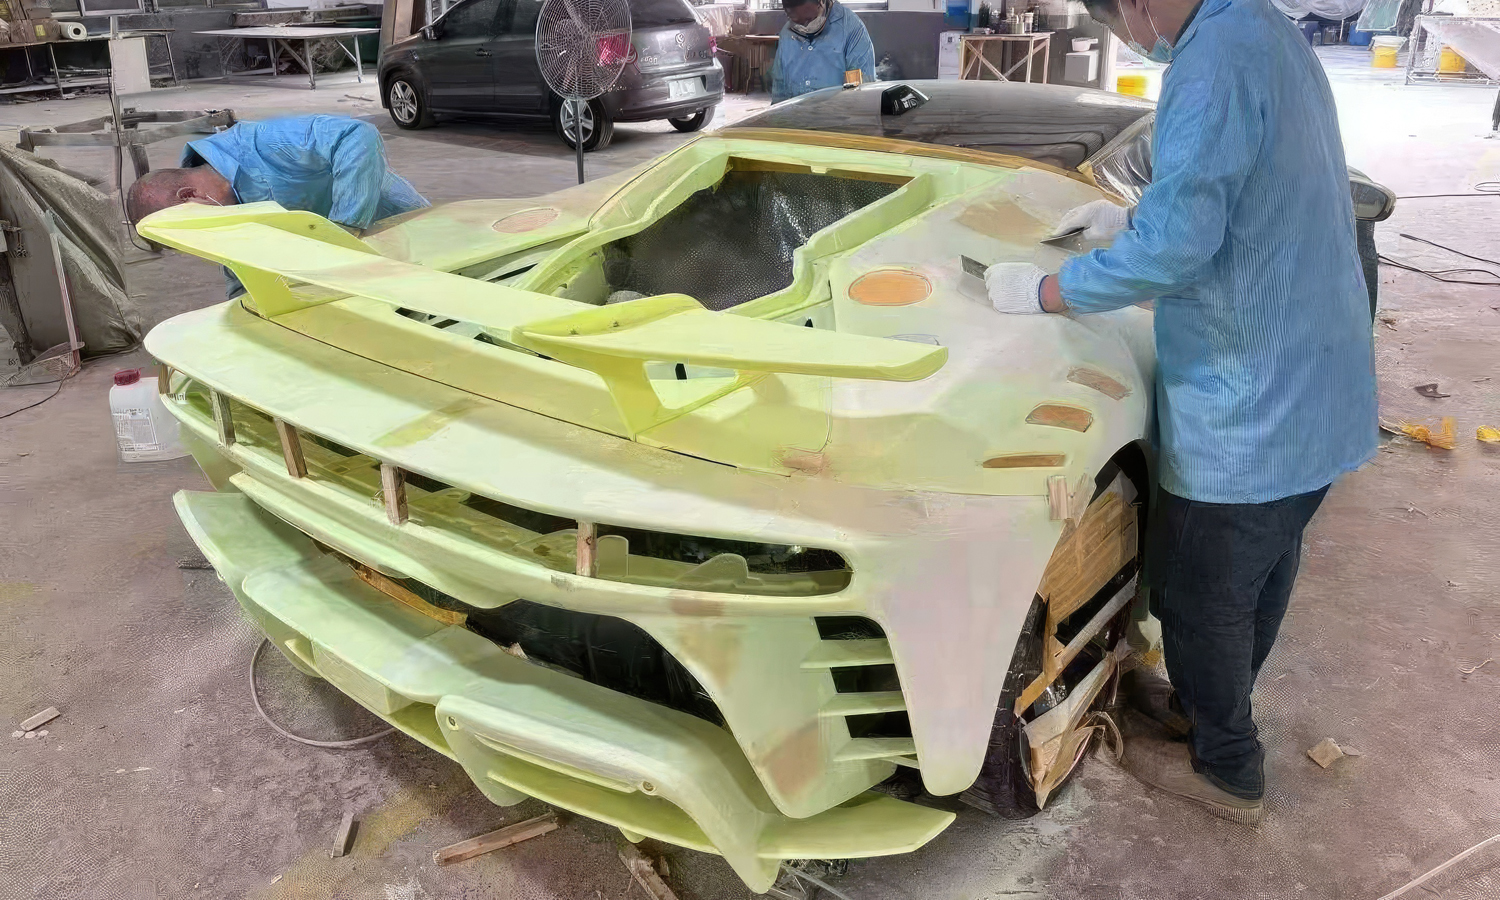
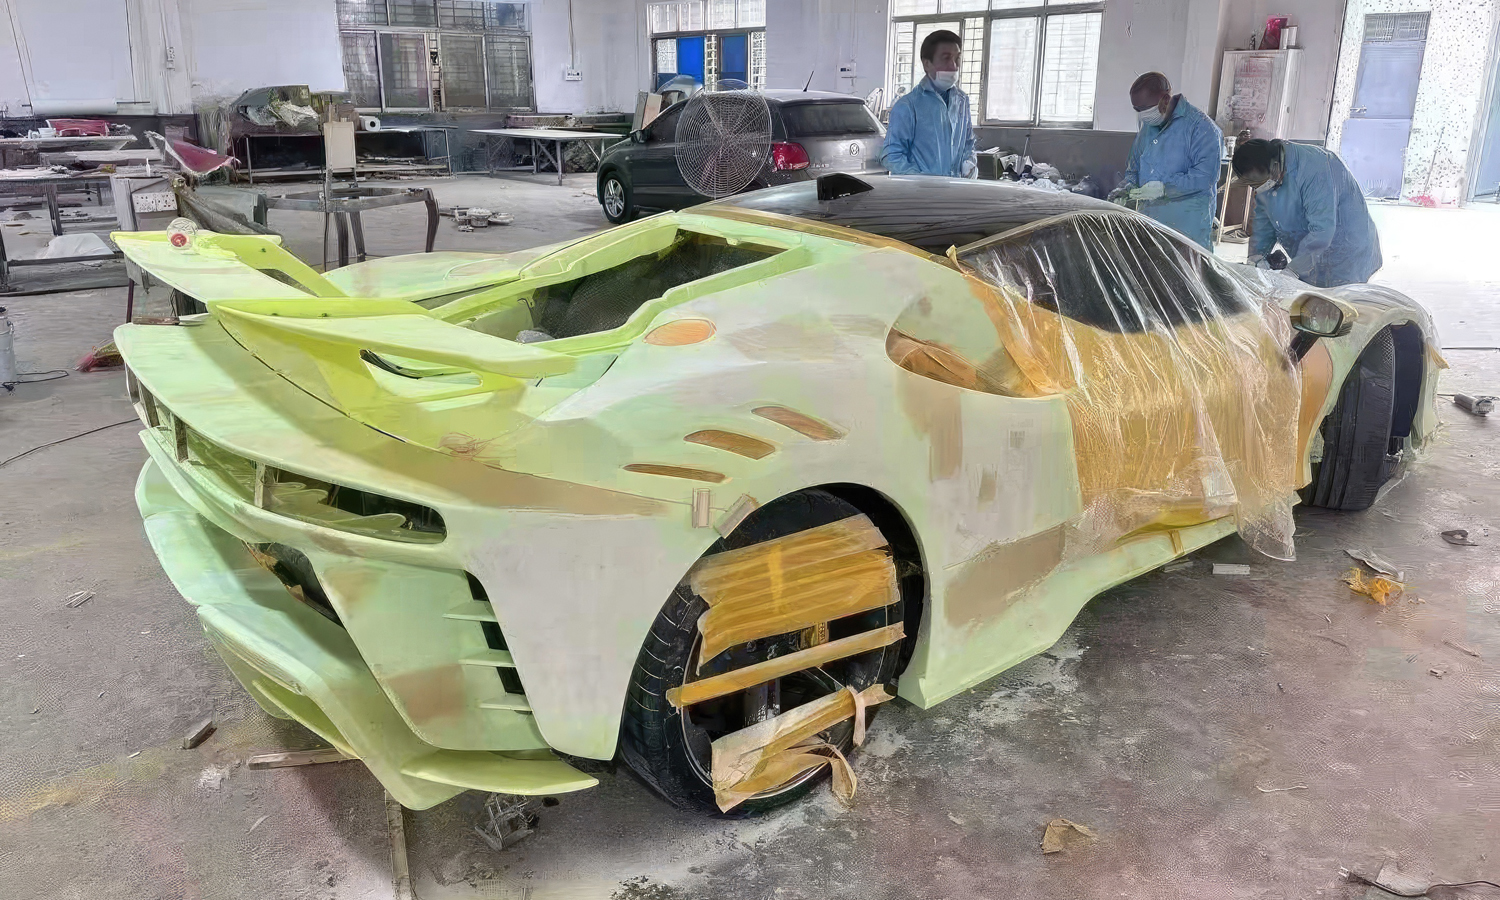
When the project involves a million-dollar hypercar, “close enough” is never enough. FacFox provides the digital precision required for full-body conversions that maintain factory aerodynamics while pushing aesthetic boundaries.
This project showcases a complete body redesign. Unlike traditional manual sculpting, our 3D scanning services in China allowed us to capture the FerrariŌĆÖs complex mid-engine architecture in a high-fidelity digital environment. This ensured that every new vent, wing, and duct aligned perfectly with the original mounting points and cooling intakes.
The large-scale components you seeŌĆöthe front fascia, rear diffuser, and integrated wingŌĆöwere prototyped using SLA 3D printing. By printing these massive sections in industrial-grade resins, the workshop can:
- Audit Surface Continuity: Ensure the “flow” of the car remains consistent from nose to tail.
- Verify Functional Clearances: Test active aero components and suspension travel before committing to expensive carbon fiber molds.
- Minimize Post-Processing: The smooth finish of our SLA resins significantly reduces the labor hours needed for sanding and surfacing.
At FacFox, we don’t just print parts; we provide the blueprint for automotive perfection.
Solution
- Step 1: The entire vehicle chassis was digitized using high-speed 3D laser scanners at our China facility to create a 1:1 master CAD file.
- Step 2: New aerodynamic body panels were engineered over the digital chassis to ensure perfect integration with factory cooling and structural points.
- Step 3: The massive body components were segmented digitally to fit the build plates of our industrial SLA 3D printers.
- Step 4: Each section was printed using high-performance, dimensionally stable resins to prevent warping over large surface areas.
- Step 5: The printed segments was assembled and temporarily secured to the vehicle using specialized automotive adhesives and masking for fitment auditing.
- Step 6: The interface between the 3D-printed parts and the OEM body was refined by technicians to achieve sub-millimeter gap tolerances.
- Step 7: These finalized 3D-printed assemblies were treated as the master plugs for the creation of high-temperature carbon fiber production molds.


