Material Resin
Quantity 2 pcs
Price Range $100-1,000
Lead Time 3 workdays
Gallery
About Project
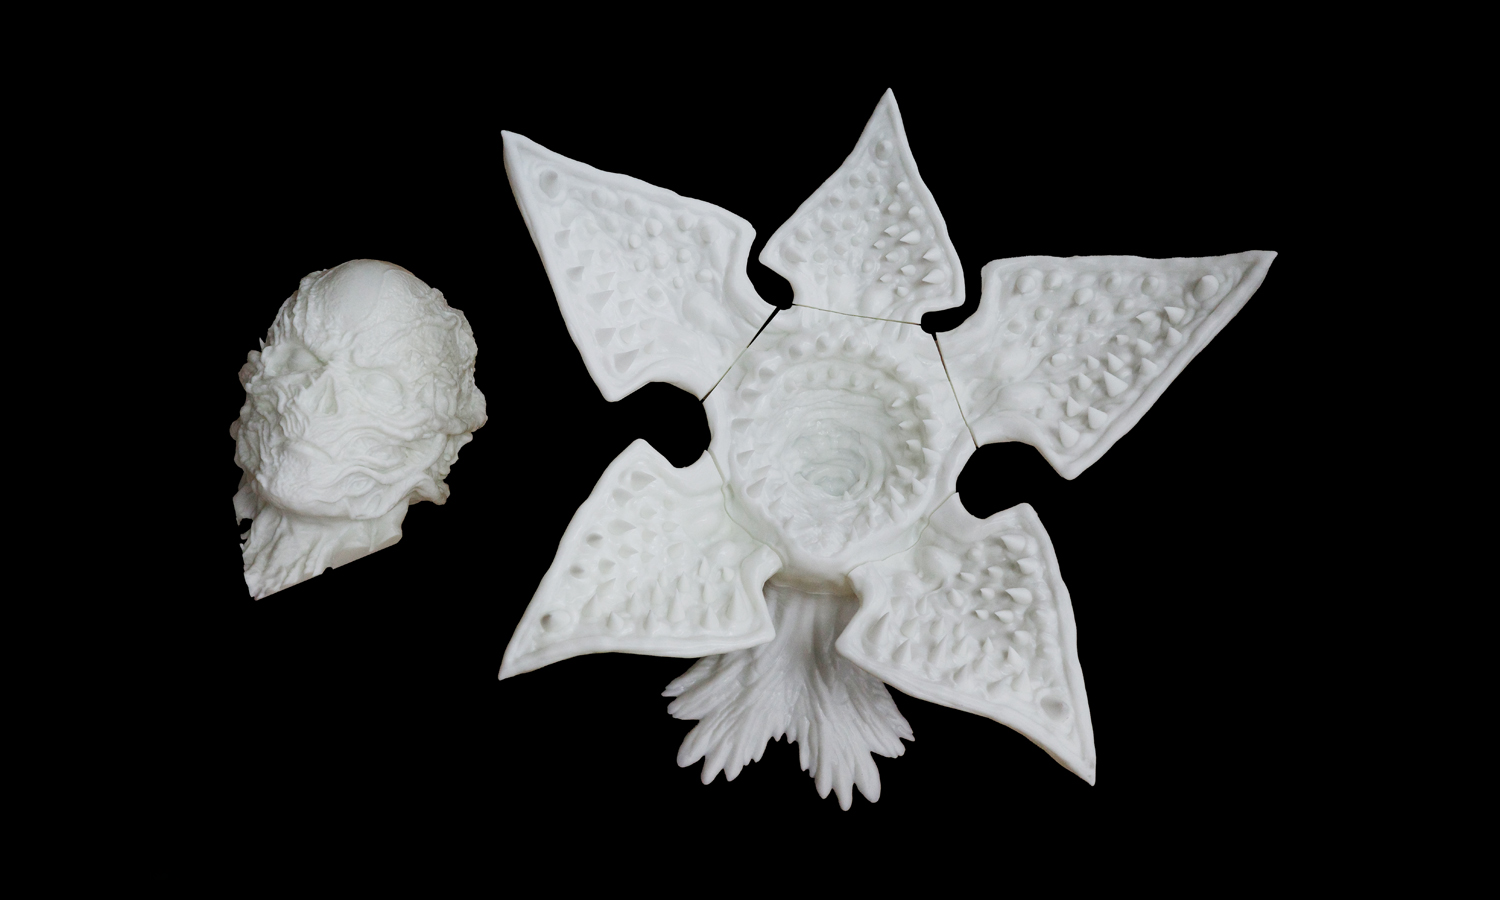
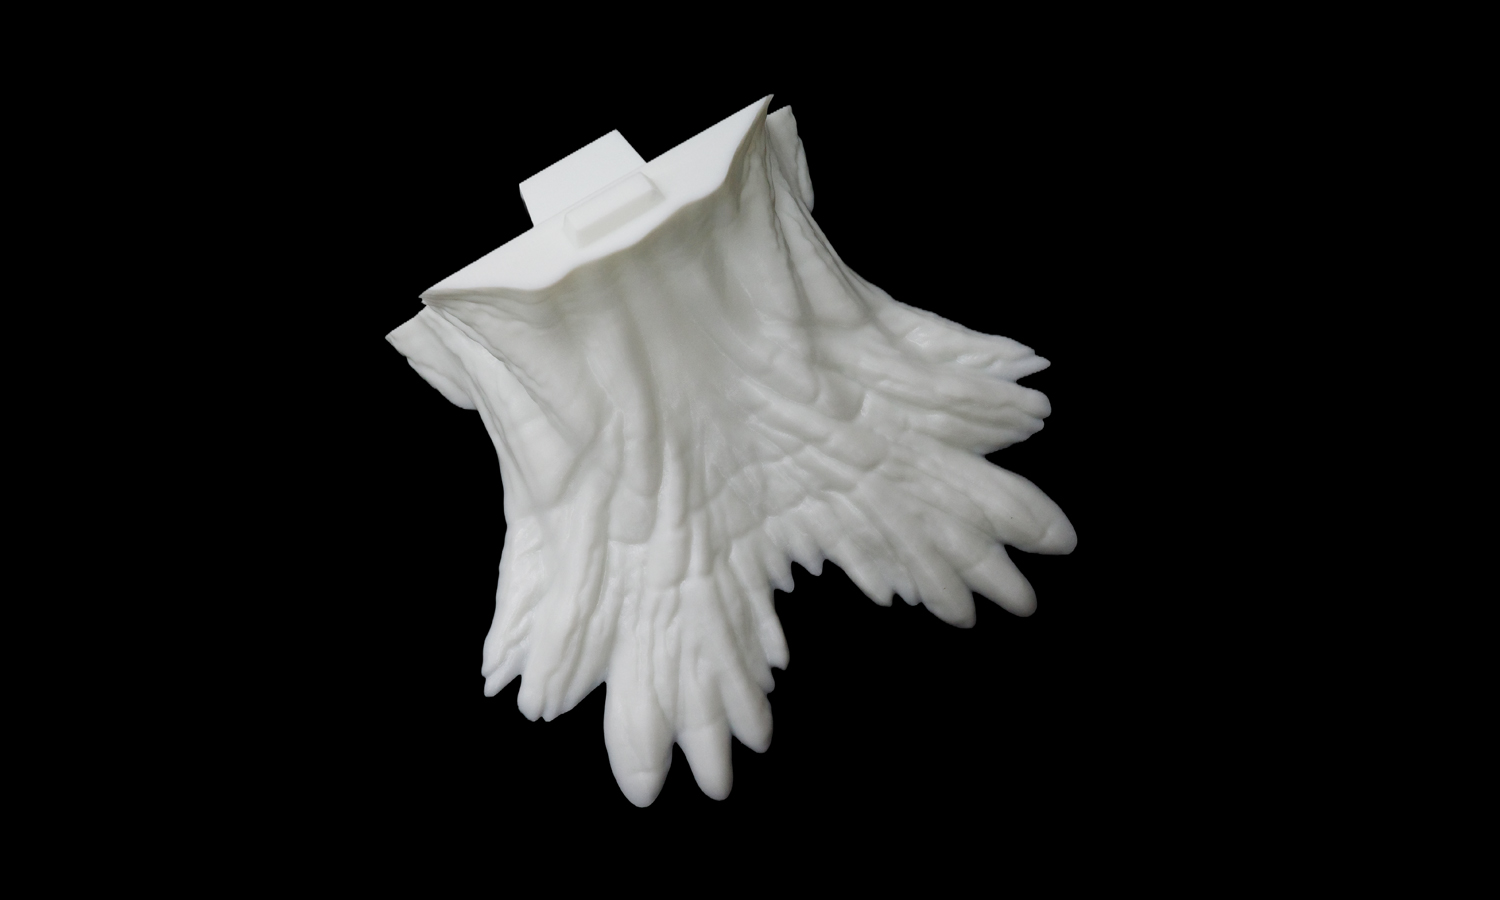
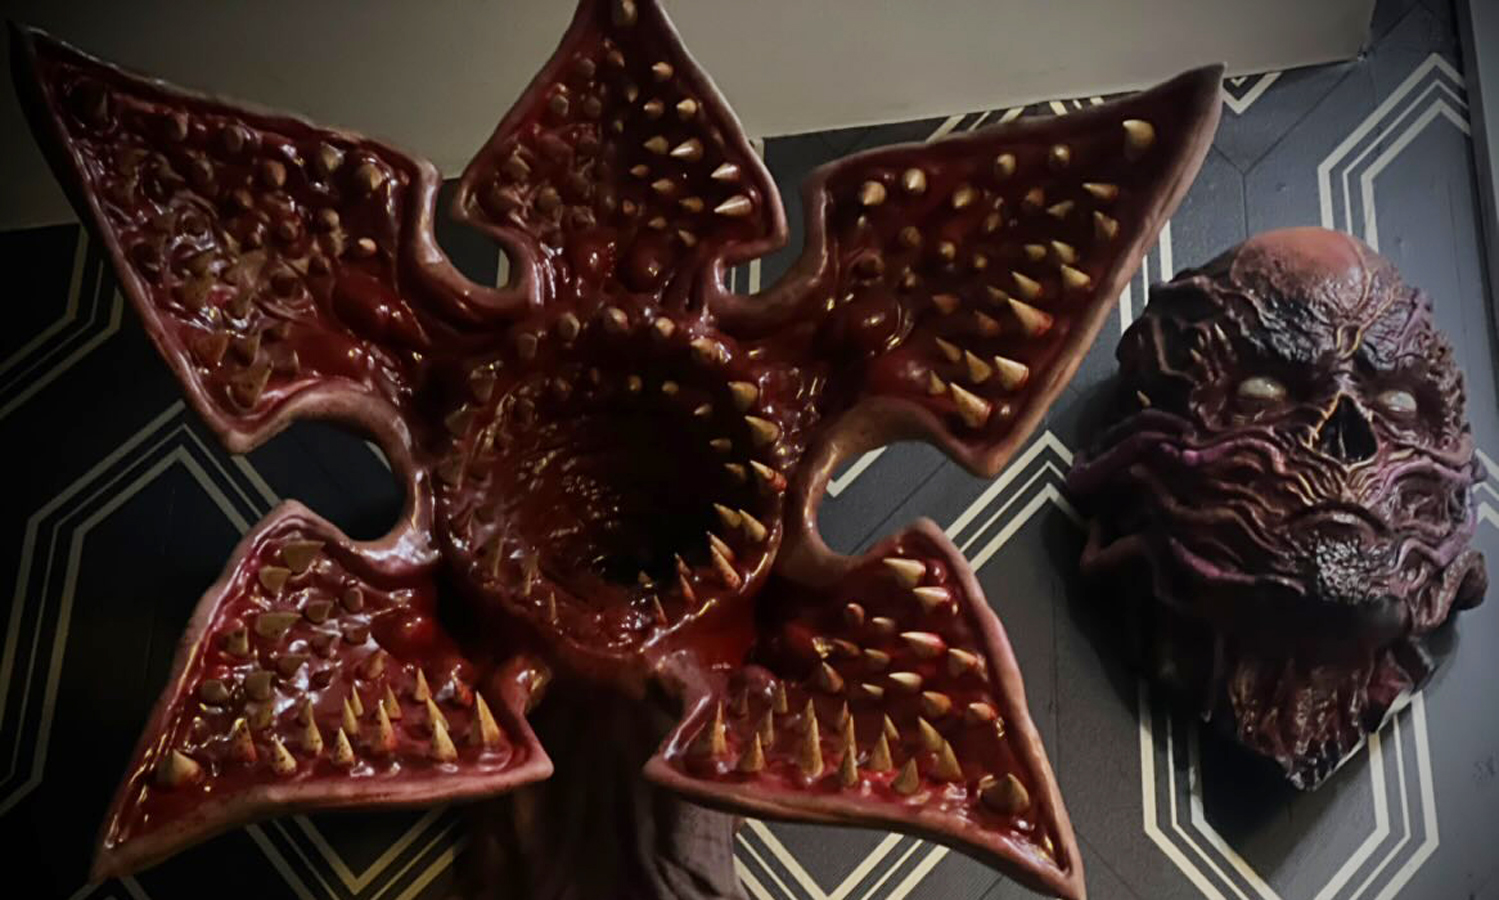
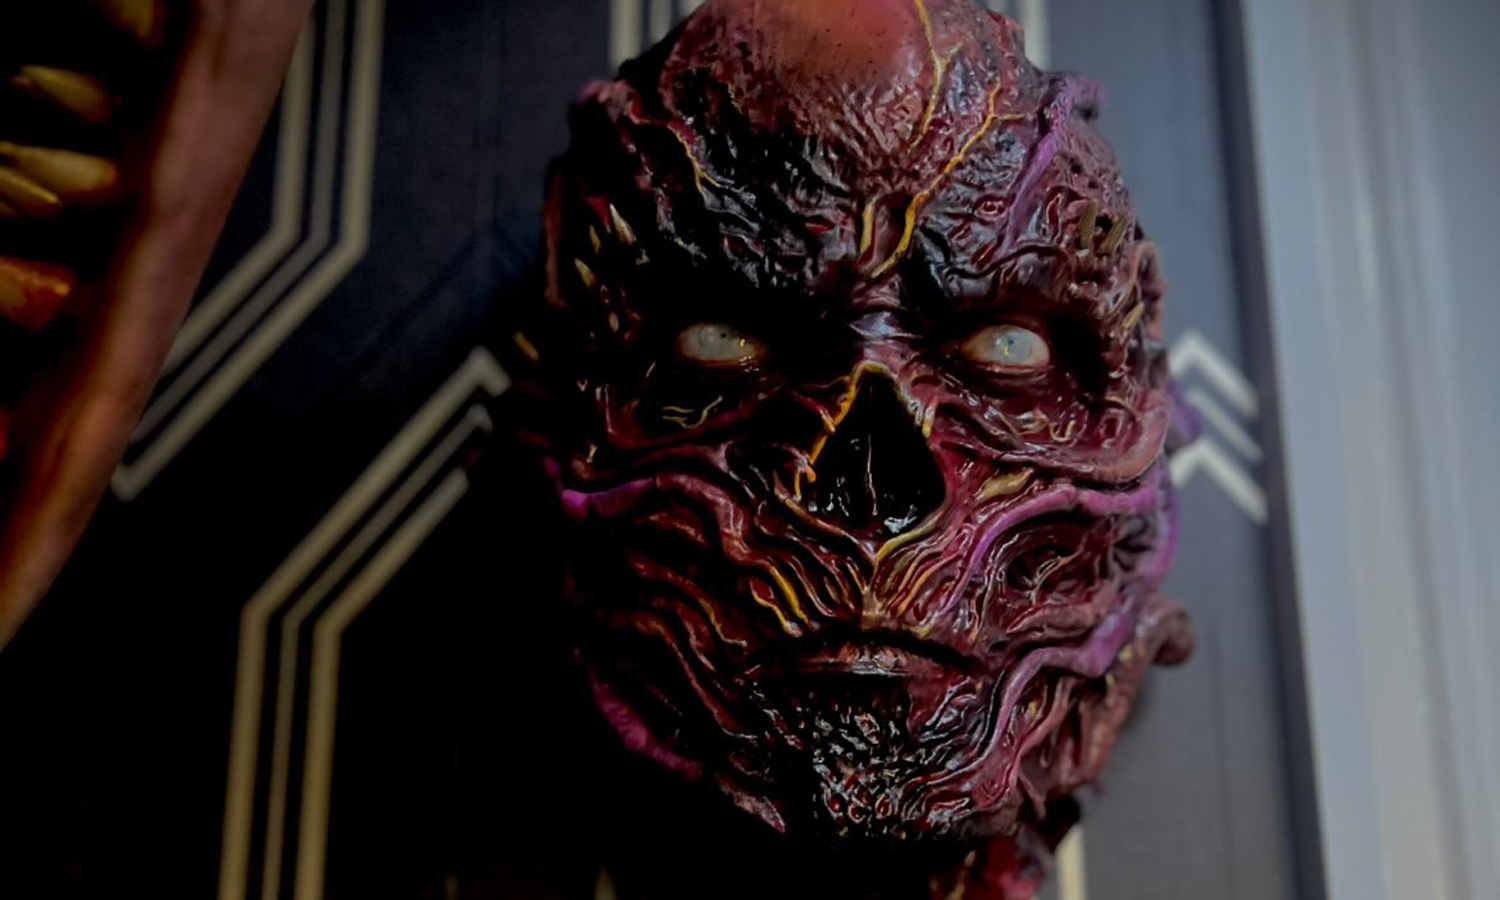
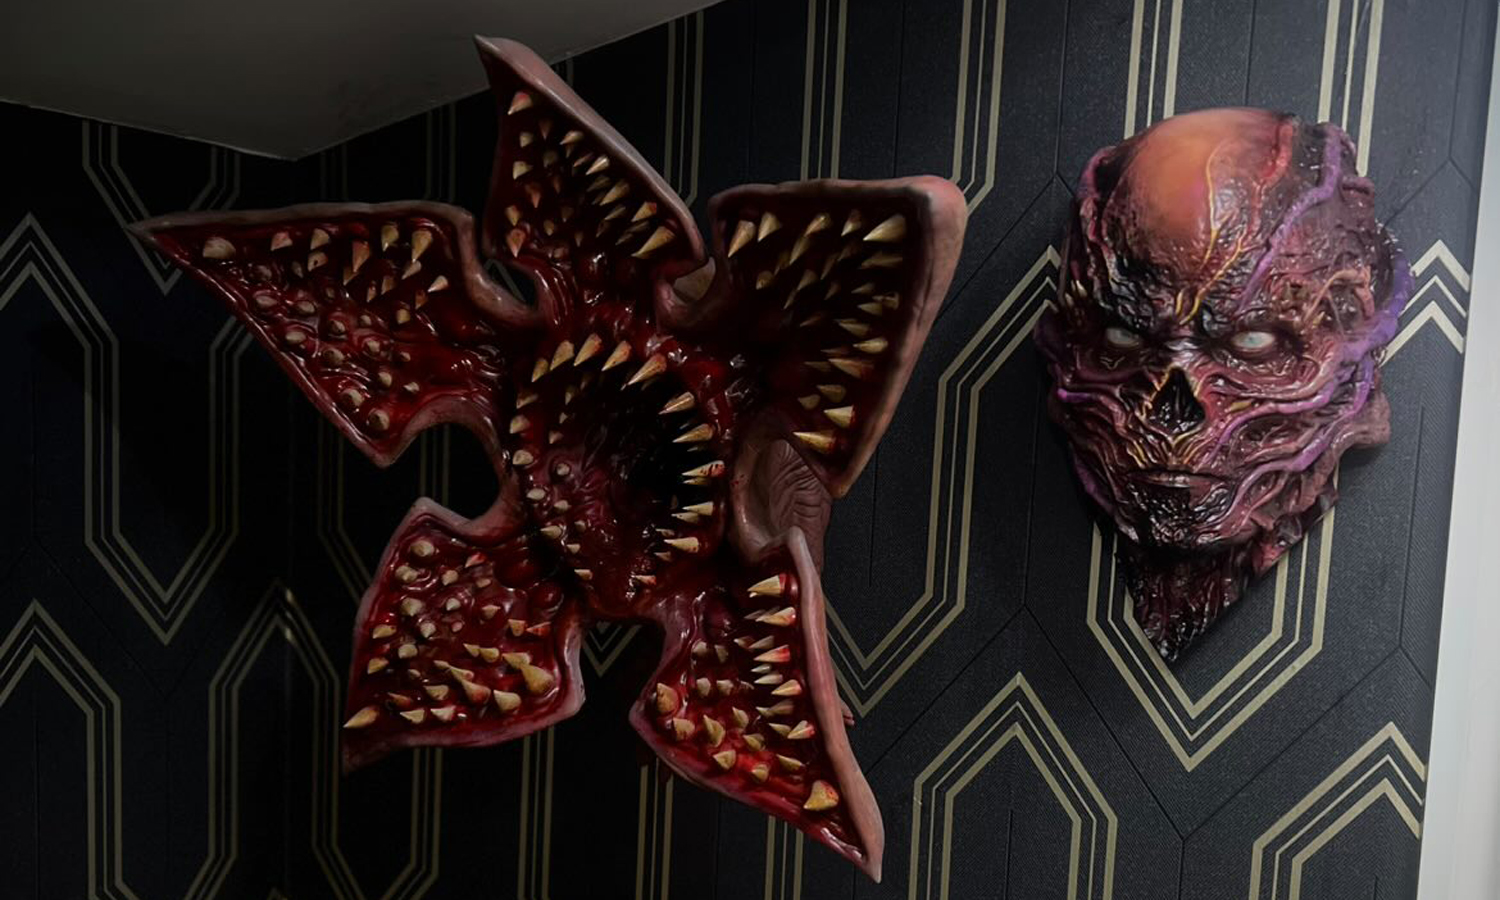
Step into the Upside Down! We are absolutely thrilled to share these incredible 3D prints of two of Hawkins’ most terrifying icons: the Demogorgon and the chillingly detailed Vecna.
These masterfully crafted models were designed by the incredibly talented artist @deadmouse_producer. We are already blown away by the raw detail in these white resin prints, and we can’t wait to see the final, fine-painted versions from the artist himself!
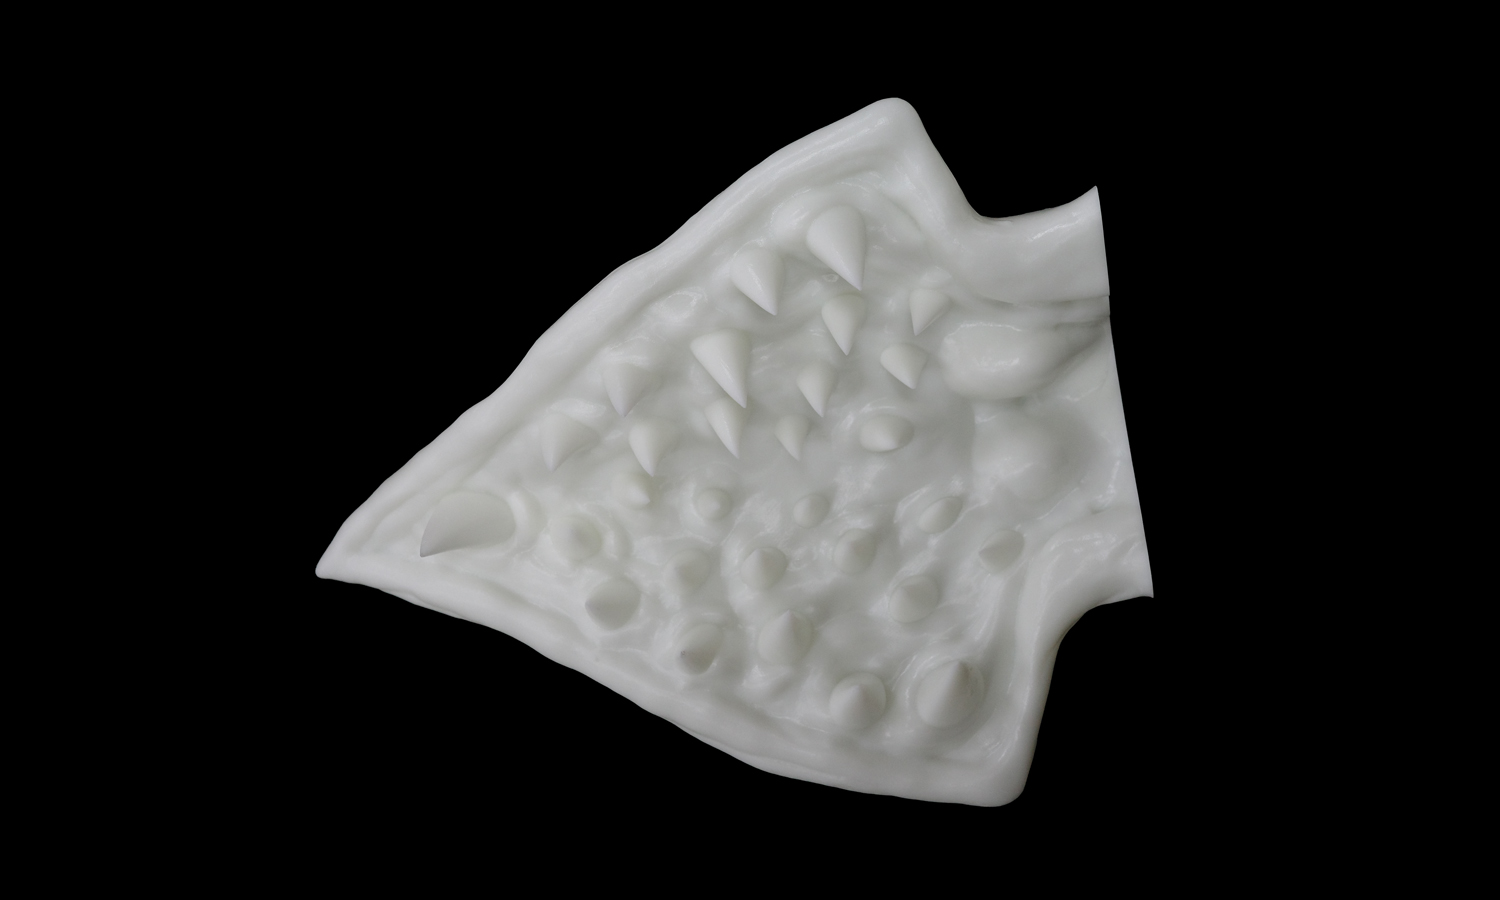
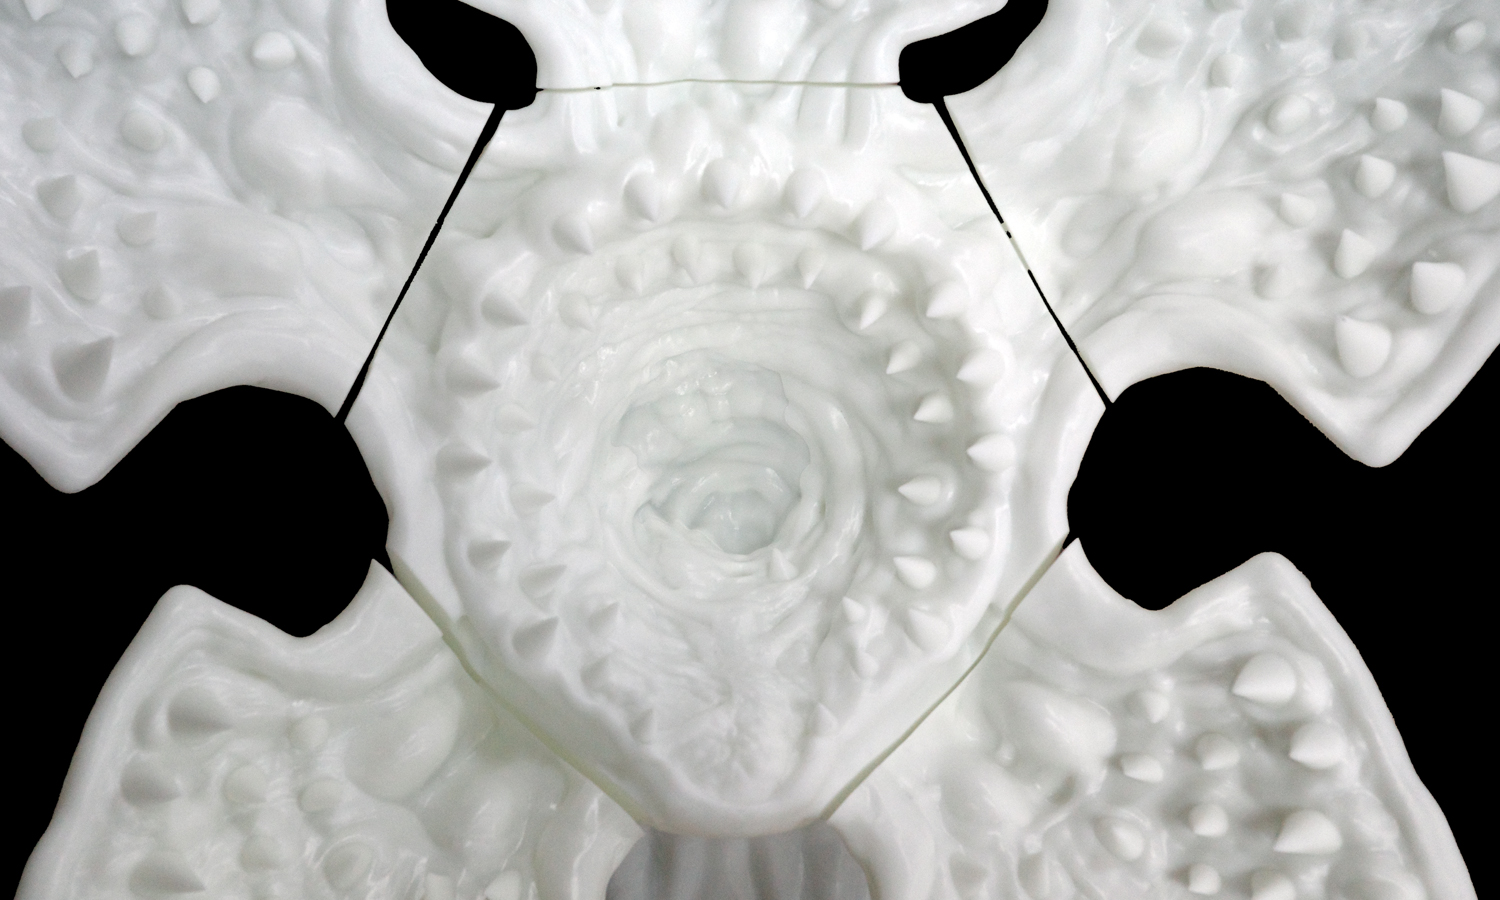
Precision in Every Petal
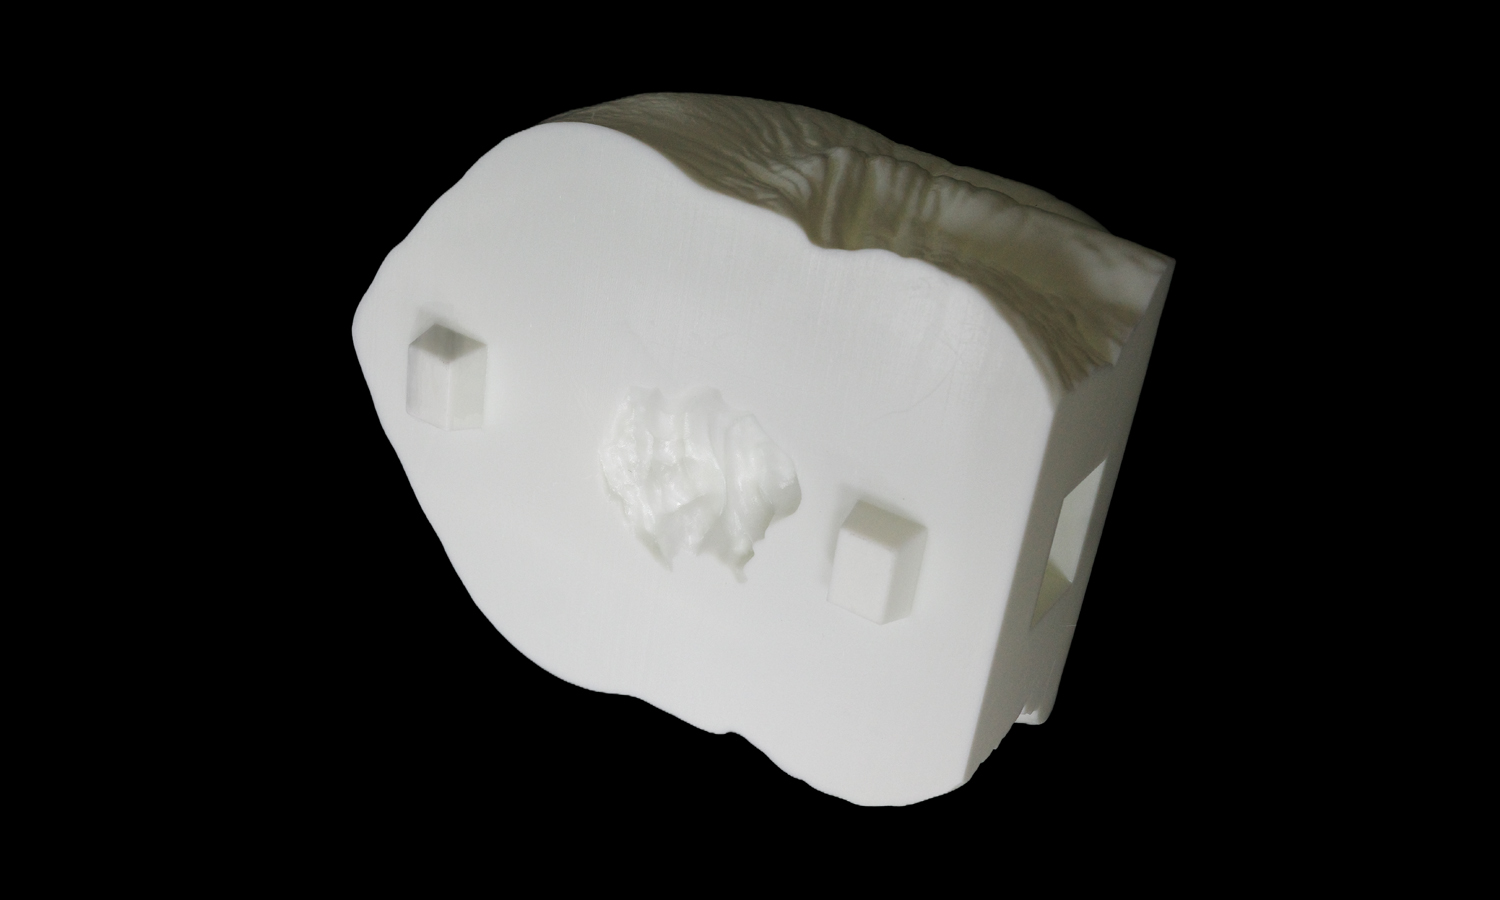
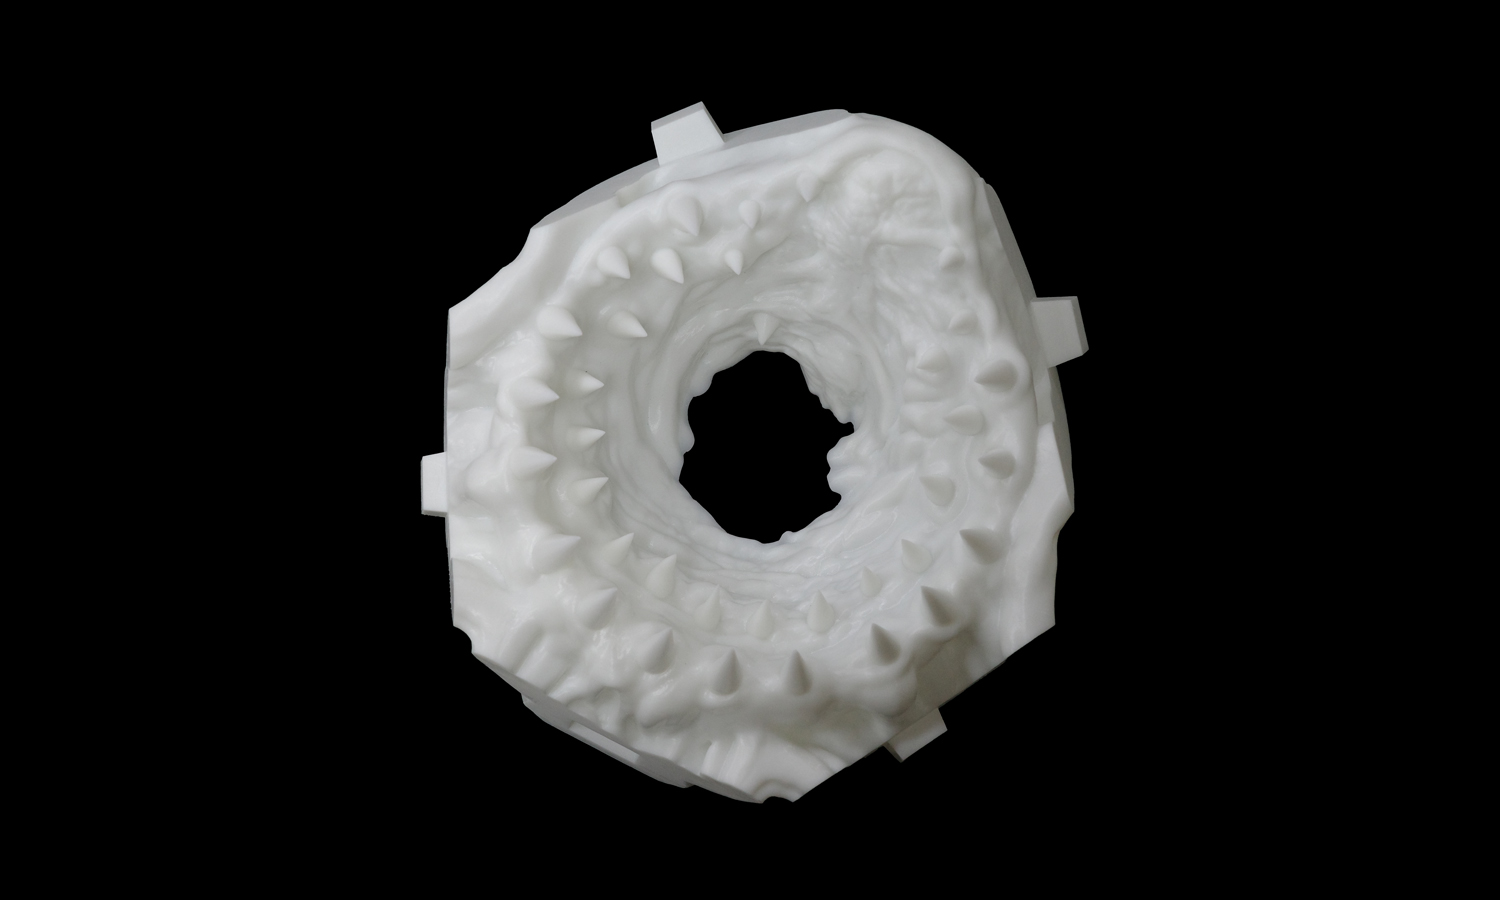
The Demogorgon head is actually a complex assembly of 6 individual parts. While you might notice some gaps in these photos, that’s actually due to the thick nano-tape we used for a quick temporary mock-up during the photoshoot!
In reality, the engineering here is top-tier. When properly assembled, the parts fit together seamlessly, proving that our tolerance control is precise enough to capture even the most intricate biological textures of a monster from another dimension.
Bring Your Creatures to Life with FacFox
Are you a designer or a fan looking to bring your own high-detail collectibles to life? At FacFox, we specialize in ultra-high-resolution 3D printing that captures every tooth, vein, and scale. Whether it’s a multi-part assembly with tight tolerances or a massive display piece, our industrial-grade resin printing ensures your models look professional right off the platform.
Ready to print your next masterpiece? Contact FacFox today and let’s turn your digital designs into reality!
Solution
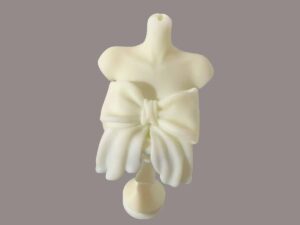
- Step 1: Digital models prepared and optimized. The high-poly 3D designs created by the artist were imported into slicing software. For the Demogorgon, the head was digitally partitioned into six separate components to ensure maximum detail and ease of printing.
- Step 2: Supports generated. Custom support structures were added to each part to stabilize the intricate “teeth” and organic textures during the printing process. These were positioned to minimize contact marks on the visible surfaces.
- Step 3: High-Resolution SLA 3D Printing. The components were printed using Stereolithography (SLA) technology. A high-precision laser was used to selectively cure layers of white photosensitive resin, ensuring that the strict tolerances required for a seamless fit were maintained.
- Step 4: Prints were cleaned and post-Cured. Once the printing was completed, the parts were submerged in an isopropyl alcohol bath to remove excess resin. Afterward, they were placed in a UV curing chamber where the material properties were fully stabilized through uniform light exposure.
- Step 5: Support structures removed. The resin supports were carefully detached by hand. The contact points were then sanded and polished to ensure that the skin textures remained fluid and the assembly joints remained flush.
- Step 6: Trial assembly. To prepare for the photoshoot, the six segments of the Demogorgon were temporarily joined. Thick nano-adhesive tape was utilized for this mock-up, though the parts were engineered to fit seamlessly during final permanent assembly.


