Gallery
About Project
For public art installations, museums, cultural parks, and themed attractions, traditional sculpting methods often require long production cycles and high labor intensity. Large-format FDM 3D printing has emerged as a transformative alternative, enabling artists and fabricators to create monumental sculptures with improved speed, accuracy, and structural consistency.
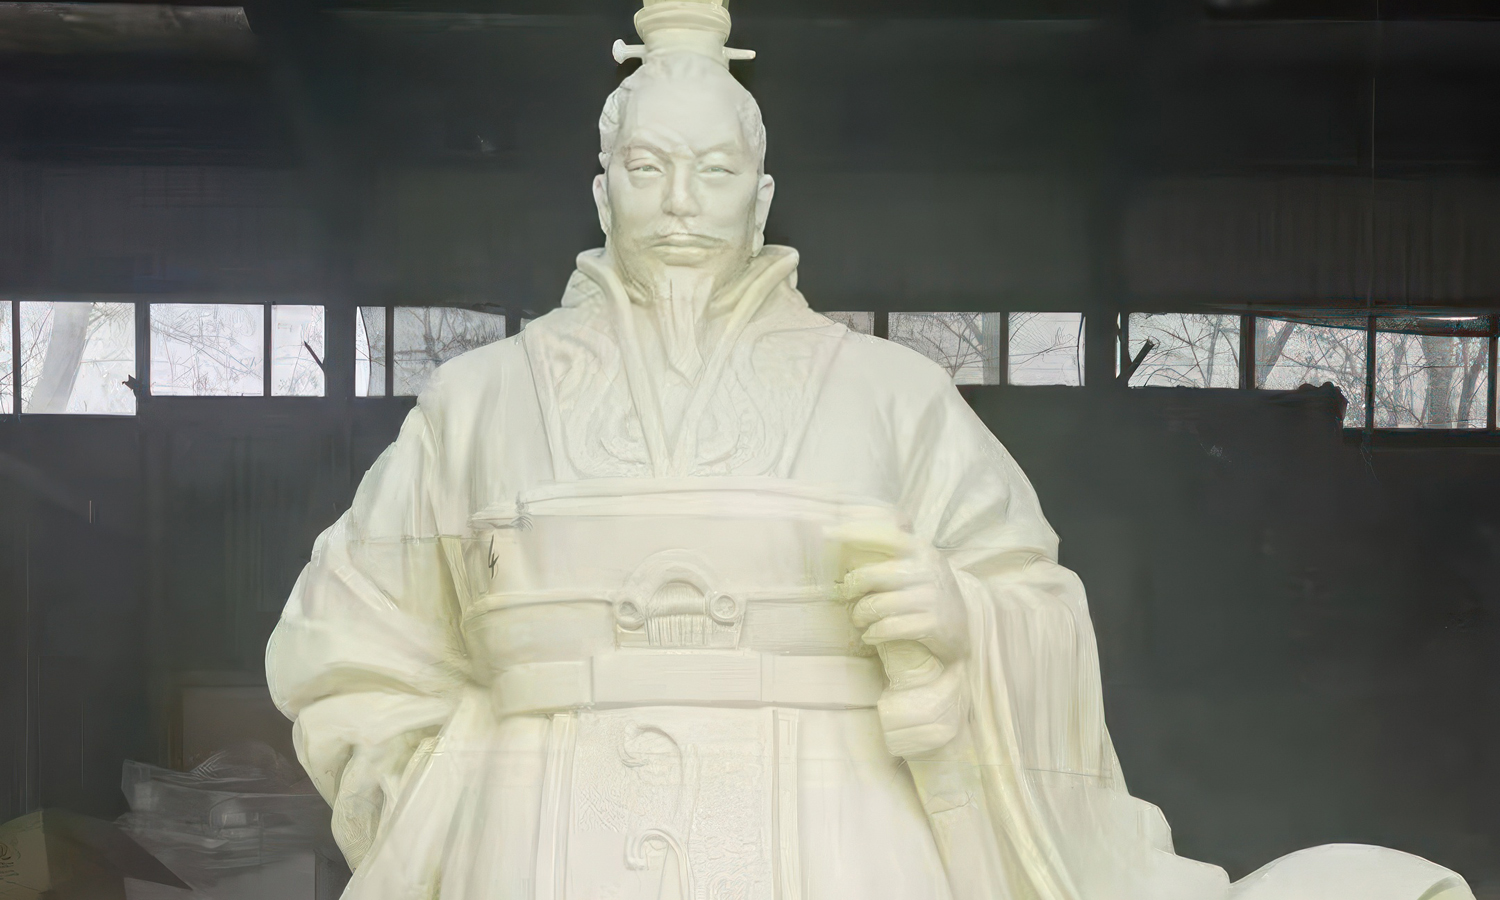
This project features a multi-meter-tall historical figure sculpture, produced entirely through large-format FDM printing and finished by an experienced fabrication team. The printed result serves as a master form for molding, surface refinishing, or direct outdoor display depending on client needs.
Project Overview
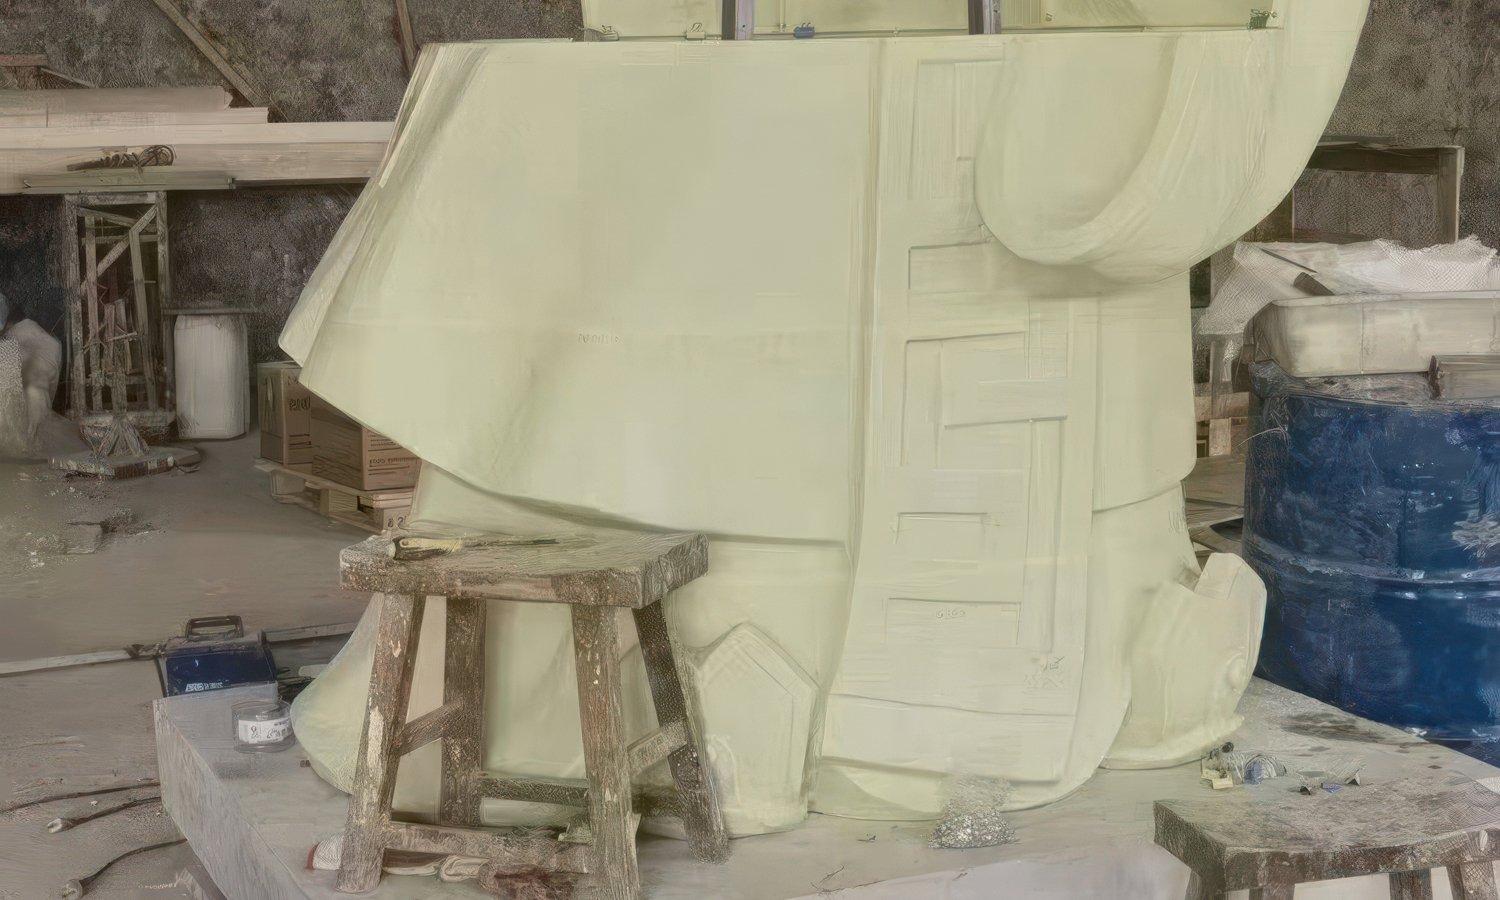
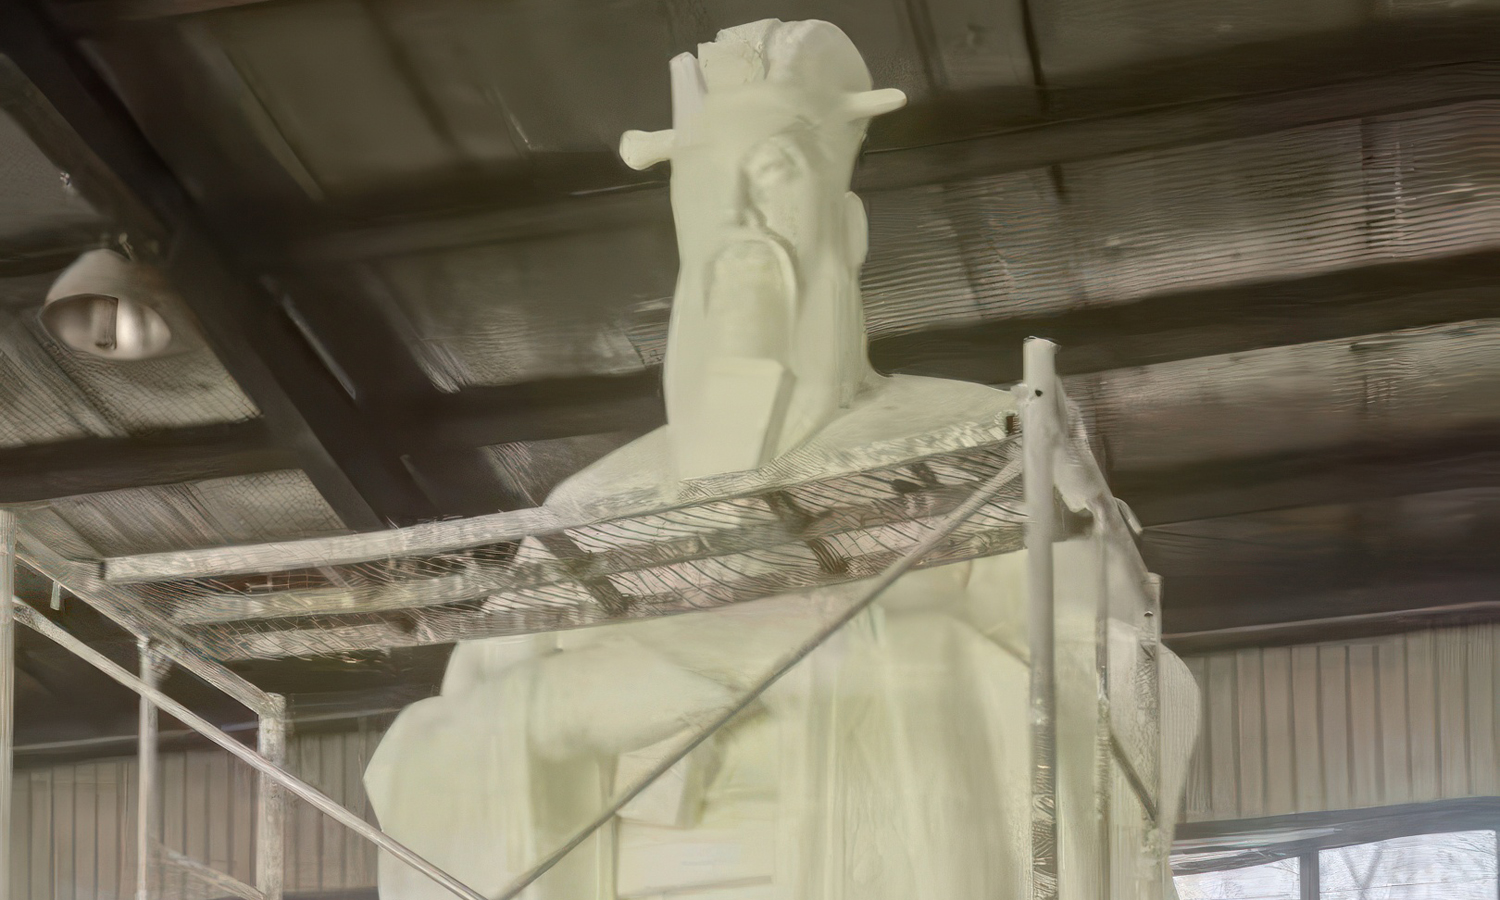
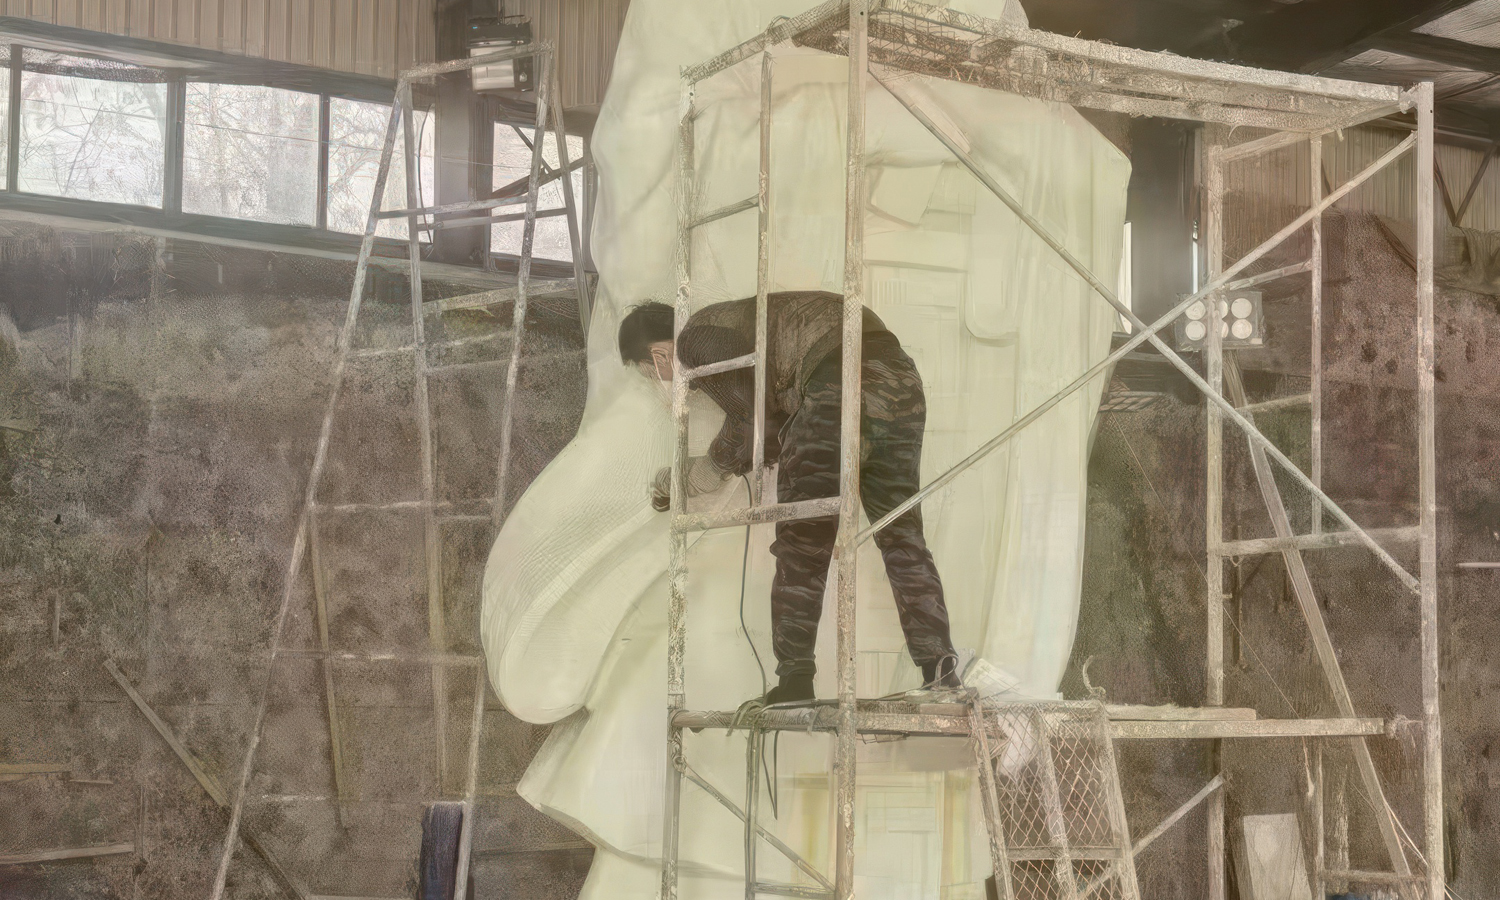
To build a statue of this scale, the digital model was precisely segmented into large printable panels. Each component was produced using industrial FDM equipment with high-strength, low-warping materials suitable for architectural applications. Once printed, the parts were reinforced internally, aligned on a structural frame, bonded, and hand-finished to restore the fine ornamental details.
The statue’s intricate robes, layered textures, facial features, and ceremonial headpiece demonstrate how large-format FDM can preserve design intent even at monumental scale.
Why Large-Format FDM for Monumental Art?
- Fast production for oversized objects – weeks instead of months.
- Precise digital reproduction of sculpted or scanned heritage designs.
- Modular assembly allows efficient transport and on-site construction.
- Material versatility for indoor exhibits, outdoor pieces, mold masters, and FRP fabrication workflows.
- Lower cost compared with traditional full-manual clay or foam sculpting.
FacFox Large-Format 3D Printing Services
Whether you’re creating cultural statues, theme-park characters, architectural forms, museum replicas, or large advertising props, FacFox provides end-to-end solutions:
- Industrial FDM machines capable of multi-meter structures
- Professional segmentation, reinforcement, and assembly
- Finishing options including sanding, texturing, painting, and FRP molding
- Fast lead times and nationwide logistics support
From concept to installation, we help creators realize monumental visions with precision and efficiency.
Solution
- Step 1: The concept artwork and proportions were confirmed with the client.
- Step 2: A high-resolution 3D model was sculpted in digital software and scaled to the target height (several meters).
- Step 3: Structural requirements were evaluated, and an internal metal spine/base frame was designed.
- Step 4: The model was segmented into large printable modules, and registration keys, lap joints, and alignment holes were added.
- Step 5: Print orientation and slicing parameters were set for a large-format polymer printer; coarse layers and thick walls were selected for speed and rigidity.
- Step 6: Each module was 3D printed on industrial equipment and labeled for position and orientation.
- Step 7: Dimensional checks were performed; warpage and shrinkage were measured and recorded.
- Step 8: The metal frame was fabricated (cut, drilled, and welded) according to drawings, and lifting points were prepared.
- Step 9: A dry-fit trial was conducted; modules were temporarily clamped to the frame to verify alignment.
- Step 10: Bonding surfaces were abraded and cleaned to ensure adhesion.
- Step 11: Modules were permanently bonded to one another and to the frame using structural adhesive; hidden screws/pins were added where needed.
- Step 12: All seams and fastener recesses were filled with putty/fairing compound and were allowed to cure.
- Step 13: The surface was rough-sanded to knock down high spots, then progressively sanded to blend joints.
- Step 14: A high-build primer/undercoat was sprayed to unify the surface; pinholes and low areas were spot-filled and re-primed.
- Step 15: Where higher durability was required, a fiber-reinforced coating (FRP or polyurethane hard-coat) was applied and post-cured.
- Step 16: Final sanding to finish grit was completed, and the surface was dust-blown and degreased.
- Step 17: Color coats and artistic finishes were applied (matte, satin, or metallic as specified), followed by a protective UV-resistant clear coat.
- Step 18: The base/footing was prepared with anchors; the statue was mounted, leveled, and torque-checked.
- Step 19: On-site seams and touch-ups were blended, and final inspection and documentation were completed.
- Step 20: The piece was photographed, packaged (if required), and handed over for exhibit.

