Material Resin
Quantity 200 pcs
Price Range $1,000-5,000
Lead Time 21 workdays
Gallery
About Project
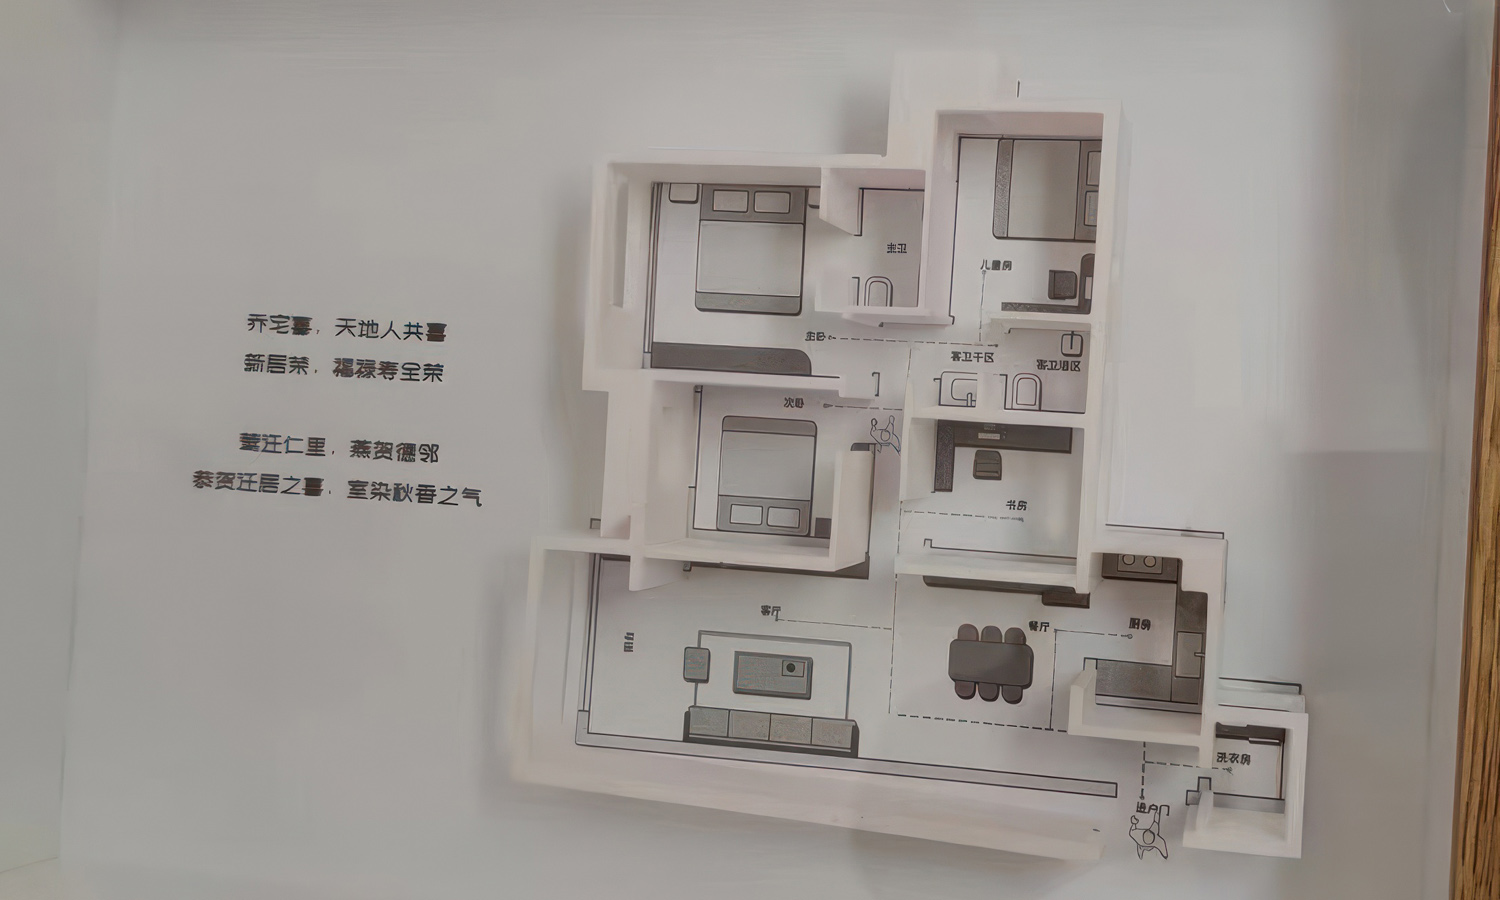
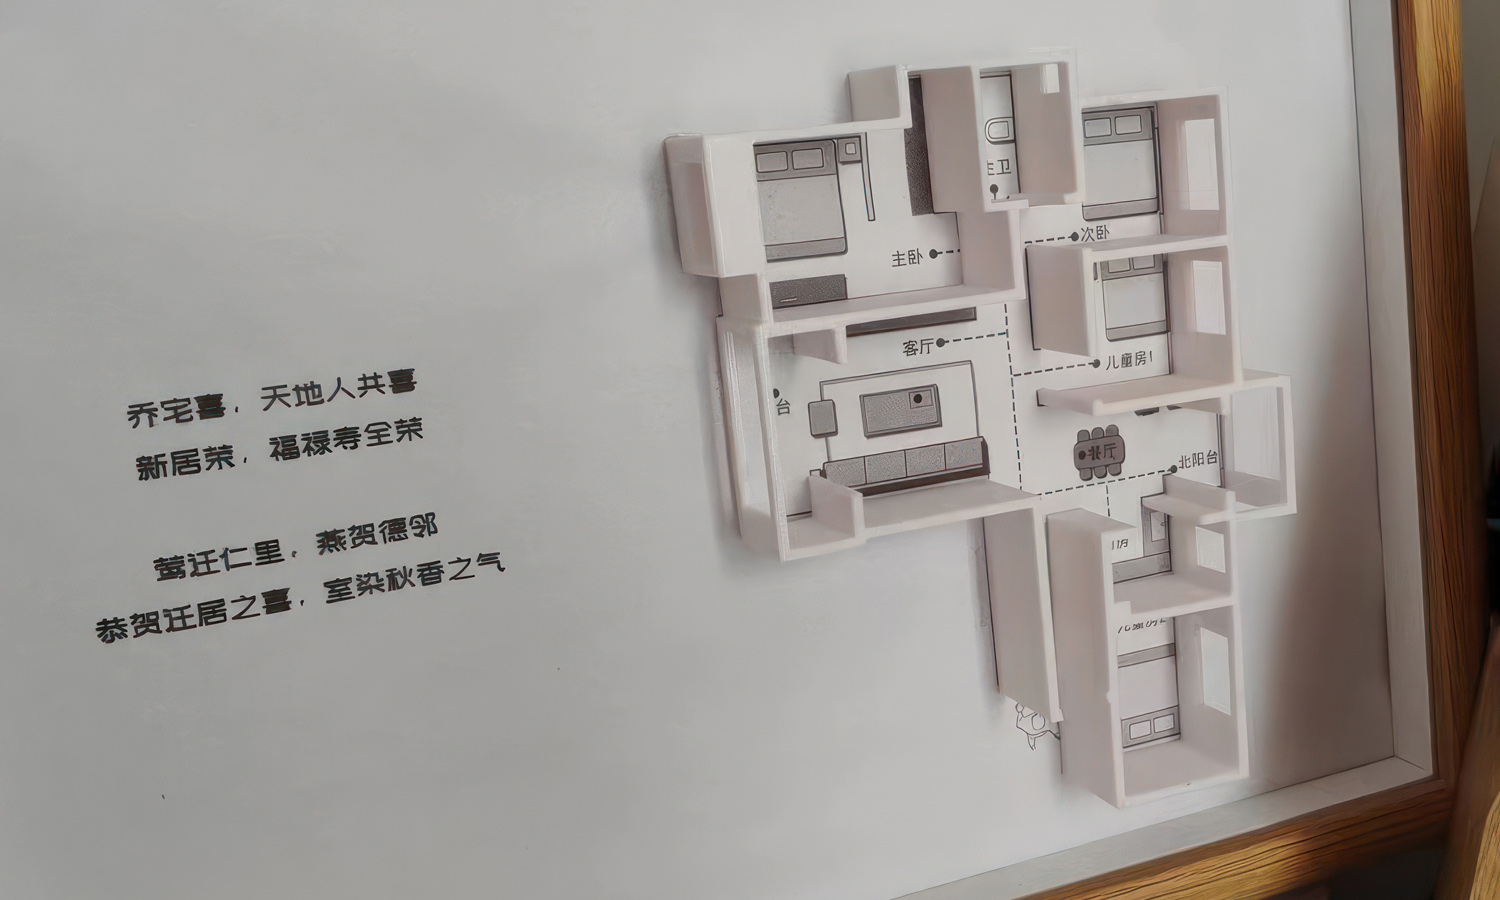
In an era where visuals play a crucial role in capturing attention, innovative marketing strategies are essential. One such strategy that has gained popularity is the use of 3D models. A real estate developer recently made a splash by offering their first 200 buyers a unique and personalized gift: a 3D-printed floorplan resin model of their new home.
These custom models, created using SLA (Stereolithography) 3D printing technology, offer a tangible representation of the buyers’ future living spaces. The 3D-printed walls are set vertically on a 2D floorplan, providing a realistic and immersive experience. To enhance the personalized touch, the models also include letters welcoming the new residents, adding a warm and inviting element.
The models are encased in a wooden picture frame, transforming them into elegant pieces of art that can be proudly displayed in the home. This not only adds value to the purchase but also creates a lasting impression and fosters a strong connection between the buyers and their new property.
Interested in creating custom 3D models for your real estate projects? FacFox offers a wide range of 3D printing services, including SLA, tailored to meet the needs of architectural applications. Our team of experts can work with you to design and produce high-quality, visually stunning models that will captivate your clients and elevate your brand. Contact us today to learn more about our custom 3D printing solutions.
Solution
- Step 1: Design Creation. The 3D floorplan was designed using CAD software. The design included vertical walls set on a 2D floorplan and letters welcoming the new residents.
- Step 2: File Preparation. The CAD file was converted into a format compatible with the SLA 3D printer, typically an STL file. The file was then sliced into layers using slicing software.
- Step 3: Printer Setup. The SLA 3D printer was prepared by filling the resin tank with the SLA Generic Resin material. The build platform was cleaned and leveled.
- Step 4: Printing Process. The sliced file was uploaded to the printer. The printing process was initiated, and the laser selectively cured the resin layer by layer to build the model.
- Step 5: Post-Processing. Once printing was completed, the model was removed from the build platform. Excess resin was cleaned off using isopropyl alcohol.
- Step 6: Curing. The model was placed in a UV curing chamber to ensure that the resin was fully hardened and stable.
- Step 7: Finishing Touches. Any support structures were removed, and the model was sanded and polished to achieve a smooth finish.
- Step 8: Assembly. The 3D-printed walls were carefully set vertically on the 2D floorplan.
- Step 9: Framing. The completed 3D floorplan model was placed in a wooden picture frame for presentation.


