Material Resin
Quantity 1 pcs
Price Range $100-1,000
Lead Time 2 workdays
Gallery
About Project
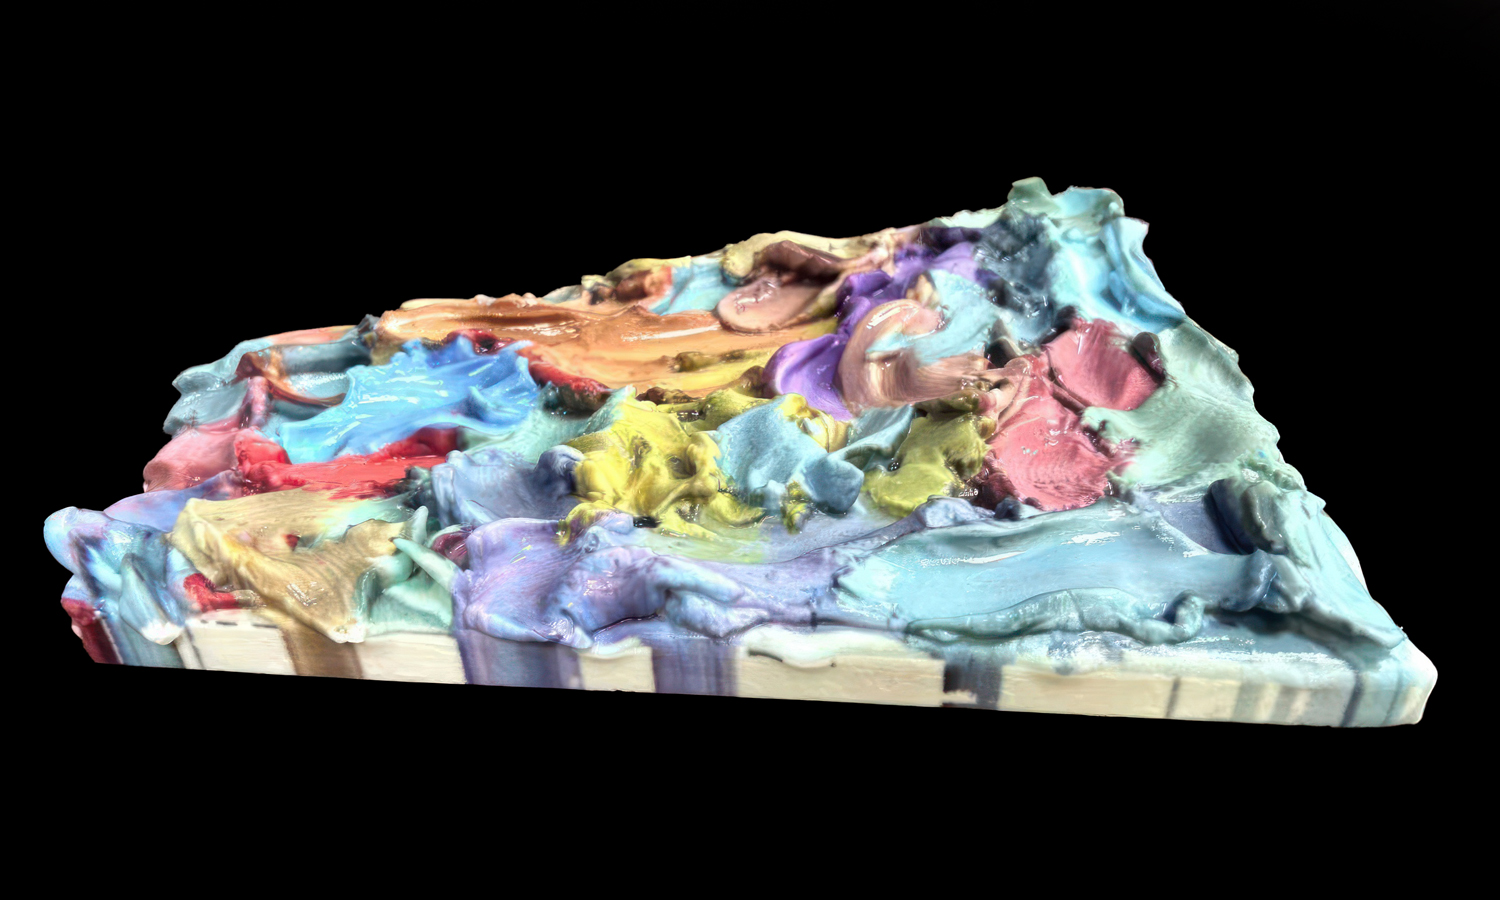
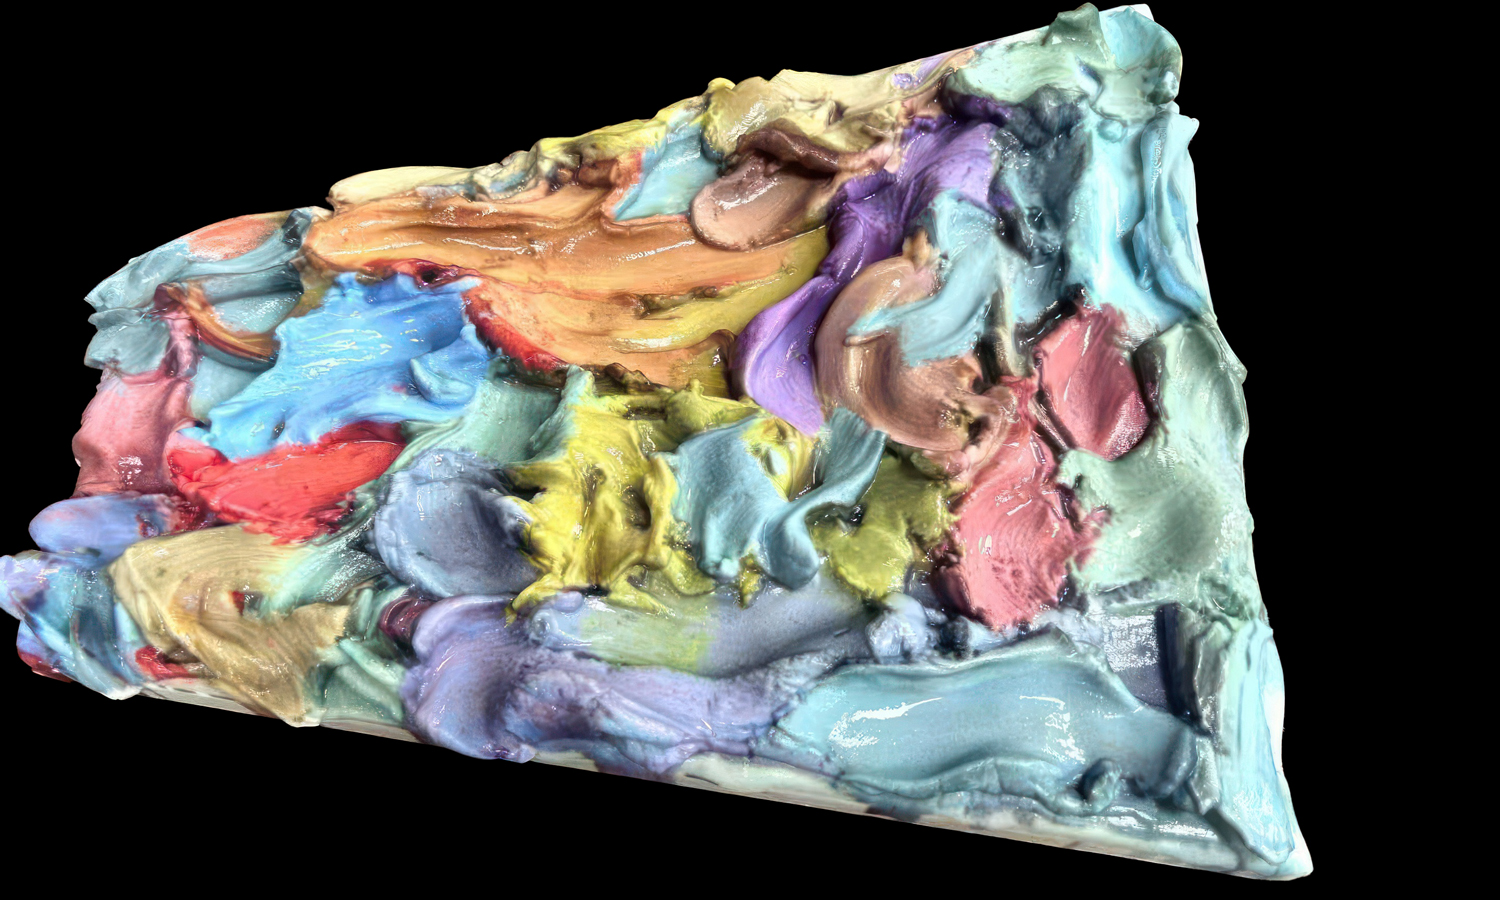
At first glance, this piece looks like a chaotic artist’s palette left behind after a long painting session. Thick blue, pink, yellow, purple, beige, and gray “paint” seems to have been squeezed, dragged, mixed, and dried across the board. But the surprising part is that this realistic paint palette sculpture was not made from actual wet pigments—it was reproduced through WJP full-color 3D printing.
The visual trick works because the model captures both color and relief. The surface is filled with raised brush-like textures, messy pigment edges, muddy mixed-color zones, glossy highlights, and soft gradients. Instead of clean, flat color blocks, the print preserves the kind of accidental color blending that usually happens when real paint is pushed around by a brush or palette knife. That controlled chaos is exactly what makes the piece feel alive.
This is a great example of how WJP full-color 3D printing can be used for more than character figurines. It can also reproduce complicated artistic surfaces where color, texture, and shape are inseparable. Whether you are making gallery props, art replicas, display samples, creative product prototypes, or experimental visual objects, FacFox can help bring your digital textures into the physical world. Get an instant quote online or email us for your projects.
Solution
- Step 1: The 3D model was checked before production, including the raised paint ridges, uneven palette surface, thin edges, recessed color areas, and complex relief textures.
- Step 2: The full-color texture data was prepared for WJP printing, so the mixed blue, pink, yellow, purple, beige, gray, and dark pigment areas could be reproduced directly from the digital file.
- Step 3: The sculpture was printed with full-color photopolymer resin materials, which were jetted and UV-cured layer by layer to form the integrated color-and-texture surface.
- Step 4: Support material was removed after printing, and the raised pigment textures and edge details were carefully cleaned without flattening the irregular surface.
- Step 5: The surface was finished to enhance the wet-paint-like visual effect, allowing the glossy highlights and color transitions to appear more realistic under light.
- Step 6: The finished piece was inspected from different angles to confirm the color complexity, relief depth, mixed-pigment effect, and overall realism of the printed paint palette.