Material Resin
Quantity 3 pcs
Price Range $1-100
Lead Time 2 workdays
Gallery
About Project
Think 3D printed resin always looks frosty, cloudy, or yellow? Think again. At FacFox, we turn your complex digital designs into optically clear, head-turning masterworks that mimic high-end molded glass or polished acrylic.
Take a look at what our industrial-grade SLA and PolyJet printing technologies can achieve when paired with our master-level post-processing workflow:
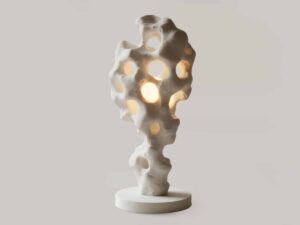
The Flawless Rippled Cup
Look closely at the organic, water-like texture. Thanks to our progressive wet-sanding and compound-polishing techniques, this piece achieves perfect optical transparency. Light refracts beautifully through its undulating surface without a single visible layer line.
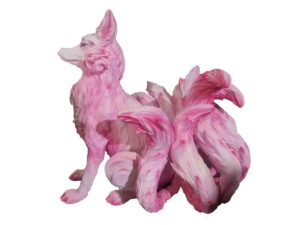
The Two-Tone Abstract Ribbon
This sweeping sculpture highlights our advanced translucent dyeing capabilities. We seamlessly transition from an incredibly pure transparent top to a rich, amber-hued base. By immersing the part in heated dye baths and fixing it with a UV-locking varnish, we ensure vibrant, lasting colors with total internal visibility.
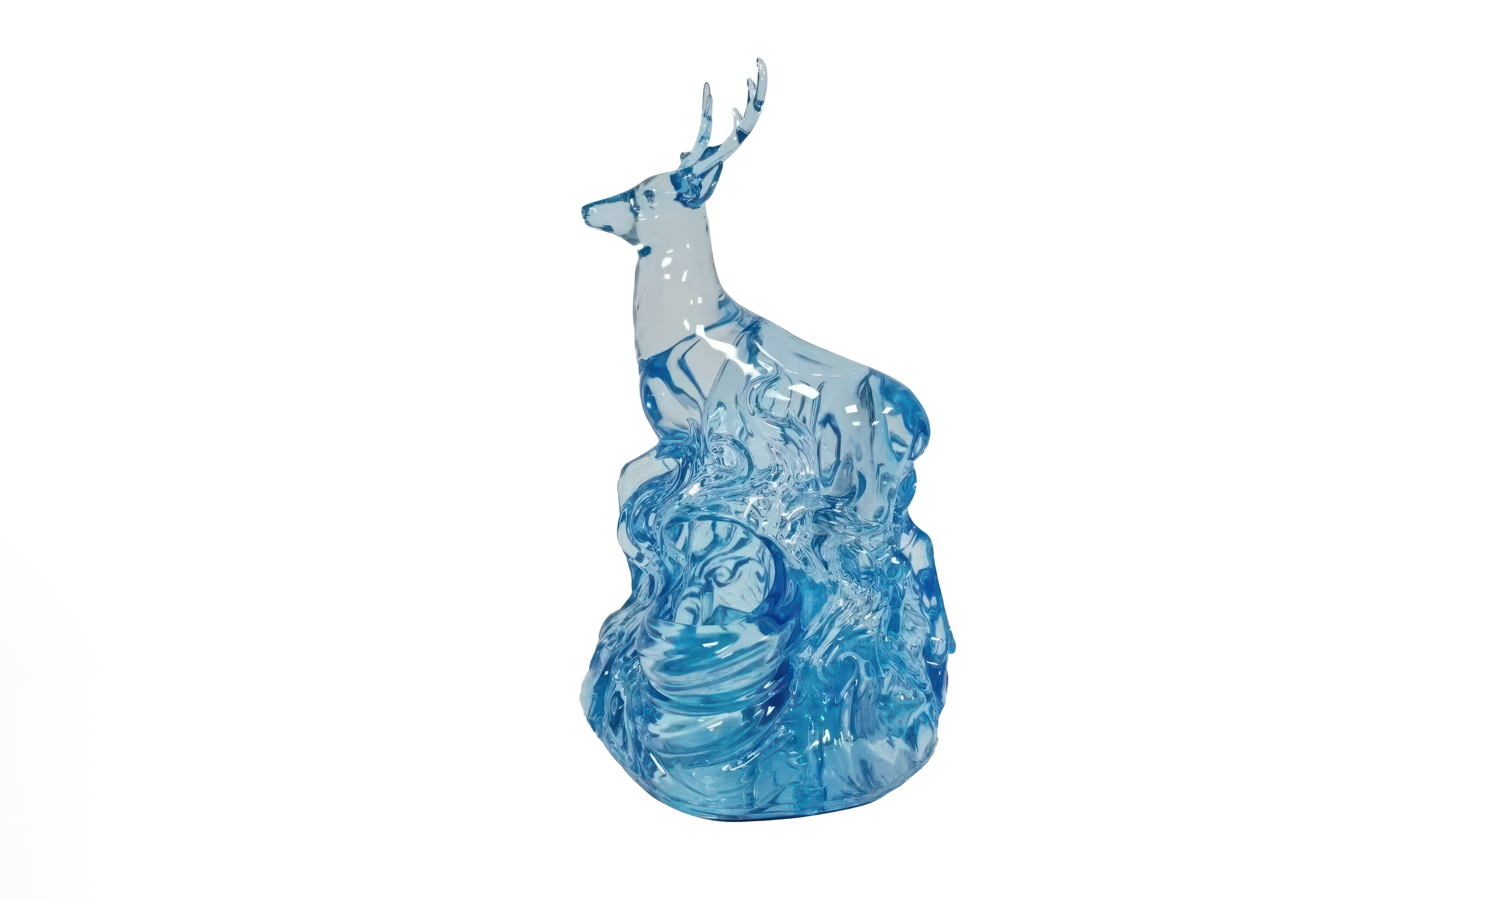
The Translucent Blue Deer
This stunning figurine showcases micro-detail precision. From the delicate, thin antlers to the complex, wave-like base, the translucent sapphire-blue pigment is uniform throughoutвҖ”completely free of trapped air bubbles or rough support marks.
Why Choose FacFox?
Whether you are prototyping optical lenses, fluidic devices, clear housings, or high-end artistic displays, we deliver production-grade quality. Our industrial setups allow for ultra-thin layers, which our finishing team pairs with rigorous hands-on micro-sanding (up to 12,000 grit) and protective UV-resistant clear coats to block future yellowing
Bring glass-like realism to your rapid prototyping and custom art without the staggering cost of traditional injection molding.
Ready to elevate your project? Upload your CAD files to FacFox today for a rapid manual or auto-quote, and letвҖҷs bring your clearest visions to life!
Solution
- Step 1: Digital Preparation and Slicing.В The digital CAD models were analyzed, oriented optimally to minimize support marks on critical surfaces, and sliced into ultra-thin layers using proprietary preparation software.
- Step 2: SLA 3D Printing.В The parts were printed using high-precision industrial Stereolithography (SLA) technology, where a UV laser was utilized to selectively cure liquid clear photosensitive resin layer by layer.
- Step 3: Solvent Washing.В The green (uncured) printed components were immersed in an ultrasonic isopropyl alcohol (IPA) bath, and all excess, uncured liquid resin was thoroughly washed away from the surfaces and intricate crevices.
- Step 4: Support Removal and Post-Curing.В The temporary support structures were carefully clipped away from the models, after which the parts were placed into a specialized UV curing chamber where maximum polymer cross-linking and structural strength were achieved.
- Step 5: Coarse Sanding.В Initial manual sanding was executed using low-grit sandpaper to grind down the remaining support nibs and smooth out the primary layer lines.
- Step 6: Progressive Wet-Sanding.В A rigorous wet-sanding process was performed, utilizing escalating micro-abrasive sandpaper grits up to 12,000 grit to systematically eliminate surface frostiness and micro-scratches.
- Step 7: Translucent Dyeing.В For the colored sculptures, the polished models were submerged into heated, specialized translucent dye baths, allowing the sapphire-blue and amber pigments to be absorbed uniformly into the resin matrix.
- Step 8: Polishing and Clear-Coating.В High-grade optical polishing compounds were applied to buff the surfaces to a high gloss, followed by the application of a premium, UV-resistant clear acrylic coat to completely seal the parts, optimize optical clarity, and prevent future yellowing.


