Material Plastic, Metal
Quantity 1 pcs
Price Range $1-100
Lead Time 4 workdays
Gallery
About Project
When designing a smart device enclosure, the devil is truly in the details. What looks perfect on a CAD screen can turn into a manufacturing nightmare during injection molding.
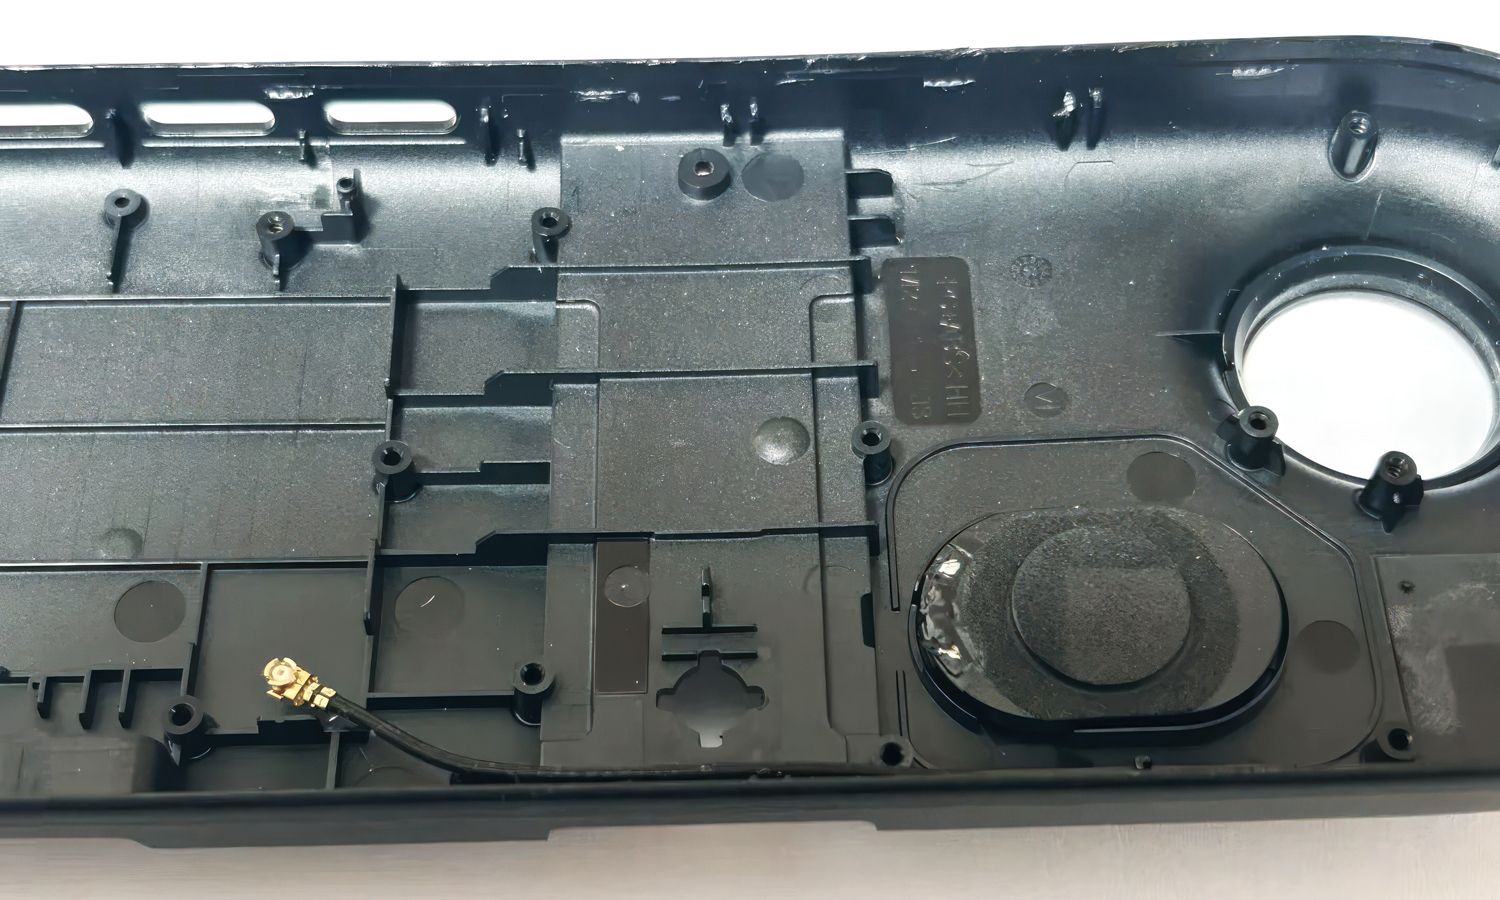
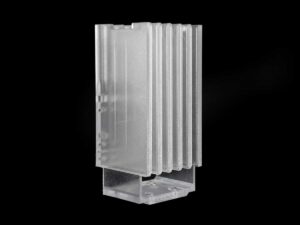
Take a look at the internal structure of this smart enclosure base we are currently review-inspecting. At first glance, itŌĆÖs a standard, well-laid-out design featuring integrated speaker acoustic foam, routing for the RF coaxial antenna cable, and a neat lens bezel opening.
But as experienced hardware engineers know, the real challenge lies in the rib thickness.
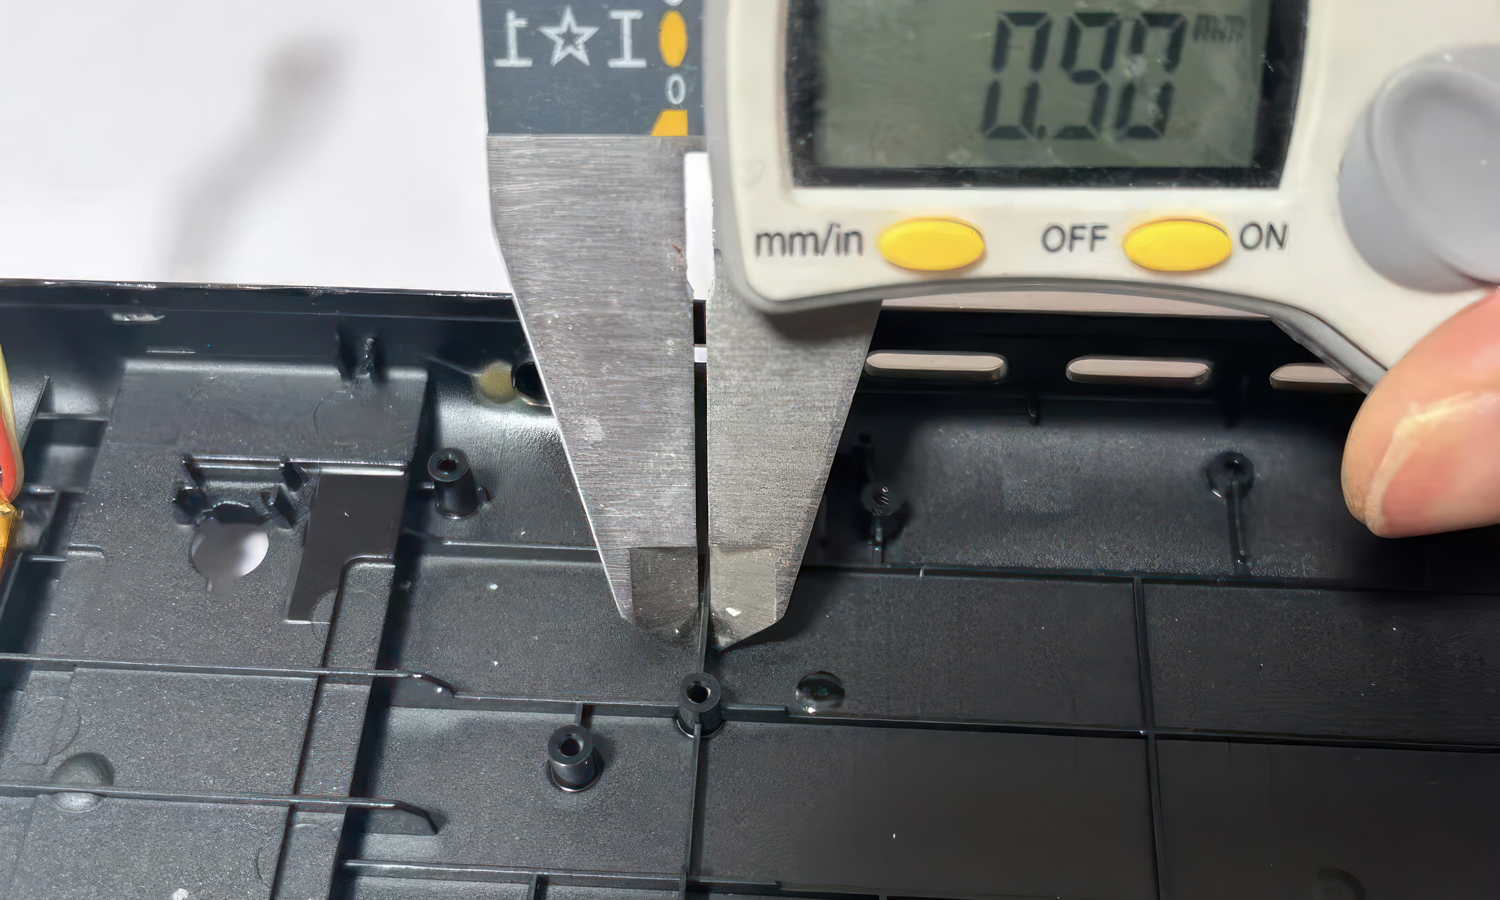
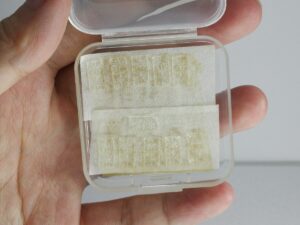
If you zoom in on our QC measurement, our caliper shows a rib thickness of exactly 0.90 mm. Why does this specific number matter?
- The Rule of Thumb: In injection molding (especially with PC/ABS blends), internal ribs should generally be 40% to 60% of the main wall thickness.
- The Risk: If the rib is too thick, you get ugly sink marks on the cosmetic exterior surface. If it’s too thin, the plastic won’t flow properly (short shot), or the structure will fail the drop test.
Achieving that sweet spot where acoustics, RF cable clearance, and structural integrity meet requires more than just standard machinesŌĆöit requires a molding partner who reviews your DFM (Design for Manufacturability) with a microscope.
At FacFox, we donŌĆÖt just press “start” on the injection molding press. We act as an extension of your engineering team.
Whether you need rapid tooling for functional prototypes or high-volume production for complex enclosures, our team ensures your wall thicknesses, draft angles, and gating locations are optimized before the steel is cut.
Got a complex enclosure design that you’re ready to bring to life? ¤æē Let’s talk. Send your STEP files to FacFox today for a complimentary DFM analysis and quote!
Solution
- Step 1: DFM Analysis and Tooling Design. The 3D CAD model of the enclosure was thoroughly reviewed by the FacFox engineering team. A Design for Manufacturability (DFM) analysis was conducted, with specific attention paid to the internal features. The internal ribs were intentionally optimized to a thickness of 0.90 mm to maintain a perfect balance between structural rigidity and cosmetic surface integrity, preventing potential sink marks.
- Step 2: Mold Tooling Fabrication via CNC and EDM. High-grade tool steel was selected for the mold base. The core and cavity plates were precision-machined using advanced CNC milling. Intricate internal details, including the fine structural dividers, the specific lens bezel opening, and the 0.90 mm rib cavities, were eroded into the steel via Electrical Discharge Machining (EDM).
- Step 3: Melt Preparation and Injection Molding. A high-performance PC/ABS resin blend was selected for its superior impact resistance. The plastic pellets were fed into the hopper, heated inside the injection barrel to a molten state, and then forcefully injected under high pressure into the securely clamped steel mold.
- Step 4: Pressure Holding and Controlled Cooling. Optimal packing pressure was maintained within the mold cavity to counteract material shrinkage. Cooling water was continuously circulated through internal conformal channels, allowing the plastic structure to solidify uniformly without twisting or warpage.
- Step 5: Ejection and Degating. The mold was opened, and the solid black enclosure base was smoothly pushed out by the ejector pin system. The residual feeding gates and flashing were precisely trimmed off by manual and automated degating tools to ensure clean, burr-free edges.
- Step 6: Post-Processing and Sub-Component Assembly. The raw molded enclosures were transferred to the assembly line. The circular acoustic foam ring was applied around the dedicated speaker bay, and the audio speaker module was securely bonded. Simultaneously, the thin RF coaxial antenna cable was carefully routed and snapped into the molded-in plastic retaining clips.
- Step 7: Metrology and Metical Quality Control (QC). Critical dimensions were verified during the final quality assurance stage. A digital caliper was utilized to measure the internal rib thickness. The caliper readout was recorded at exactly 0.90 mm, confirming that the injection pressure, mold alignment, and material shrinkage matched the theoretical engineering specifications perfectly.

