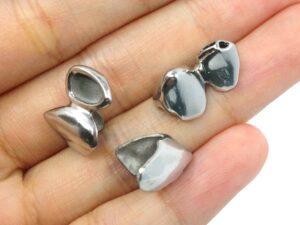
Material Porcelain
Quantity 6 pcs
Price Range $1-100
Lead Time 2 workdays
Gallery
About Project
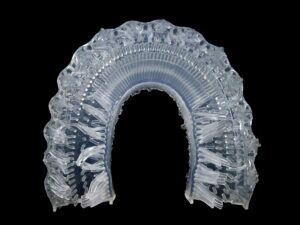
Check out these incredible 3D Printed Zirconia “Statues”! While they look like giant props for a dental museum, they are actually hyper-realistic, life-sized replicas of the components that make modern smiles possible.
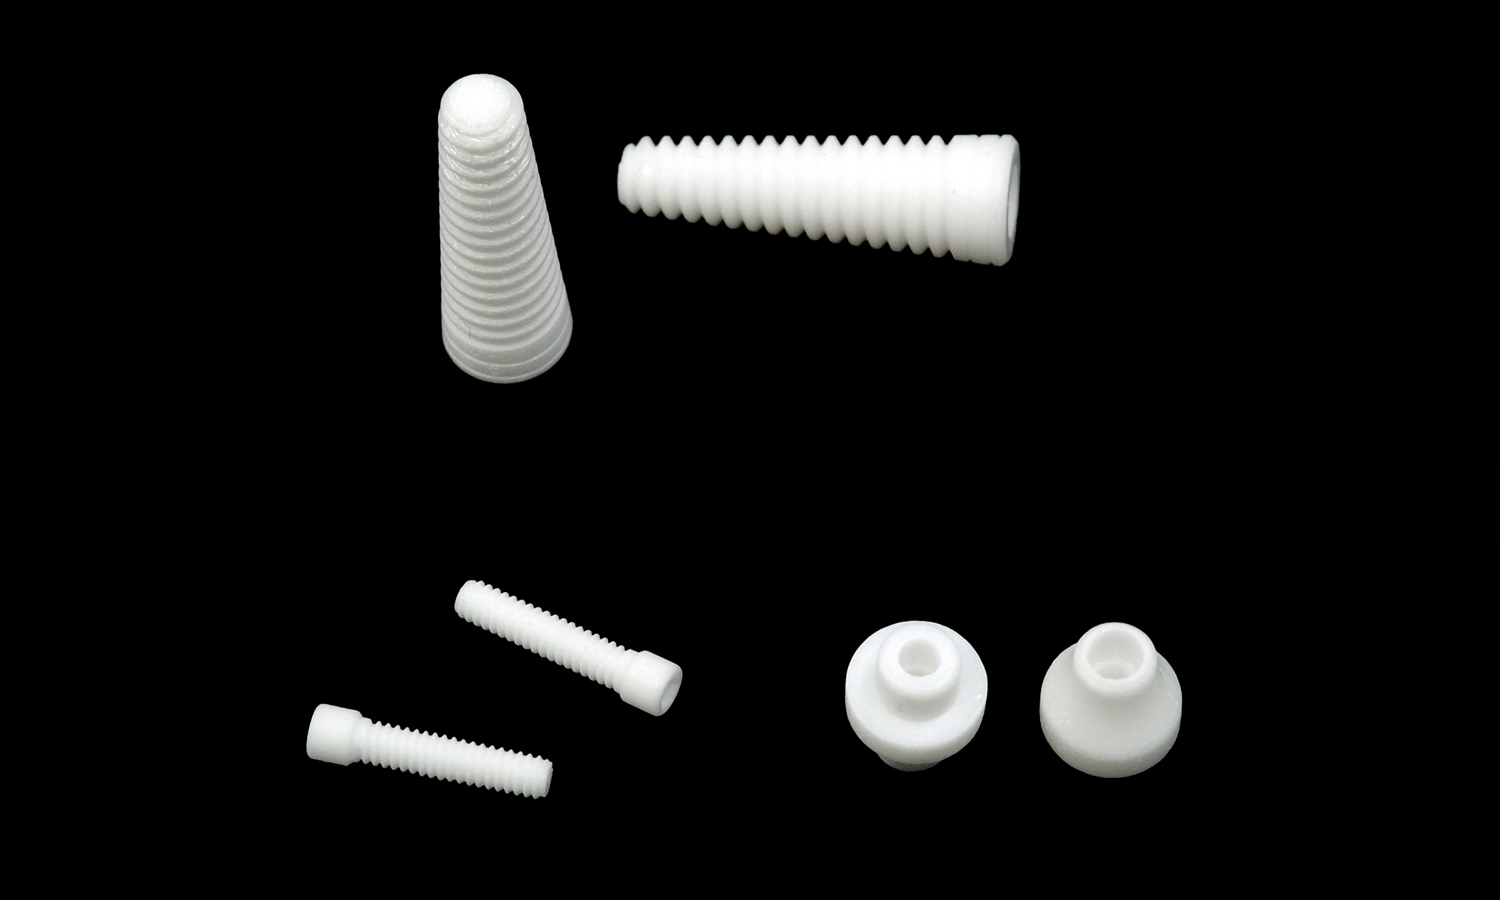
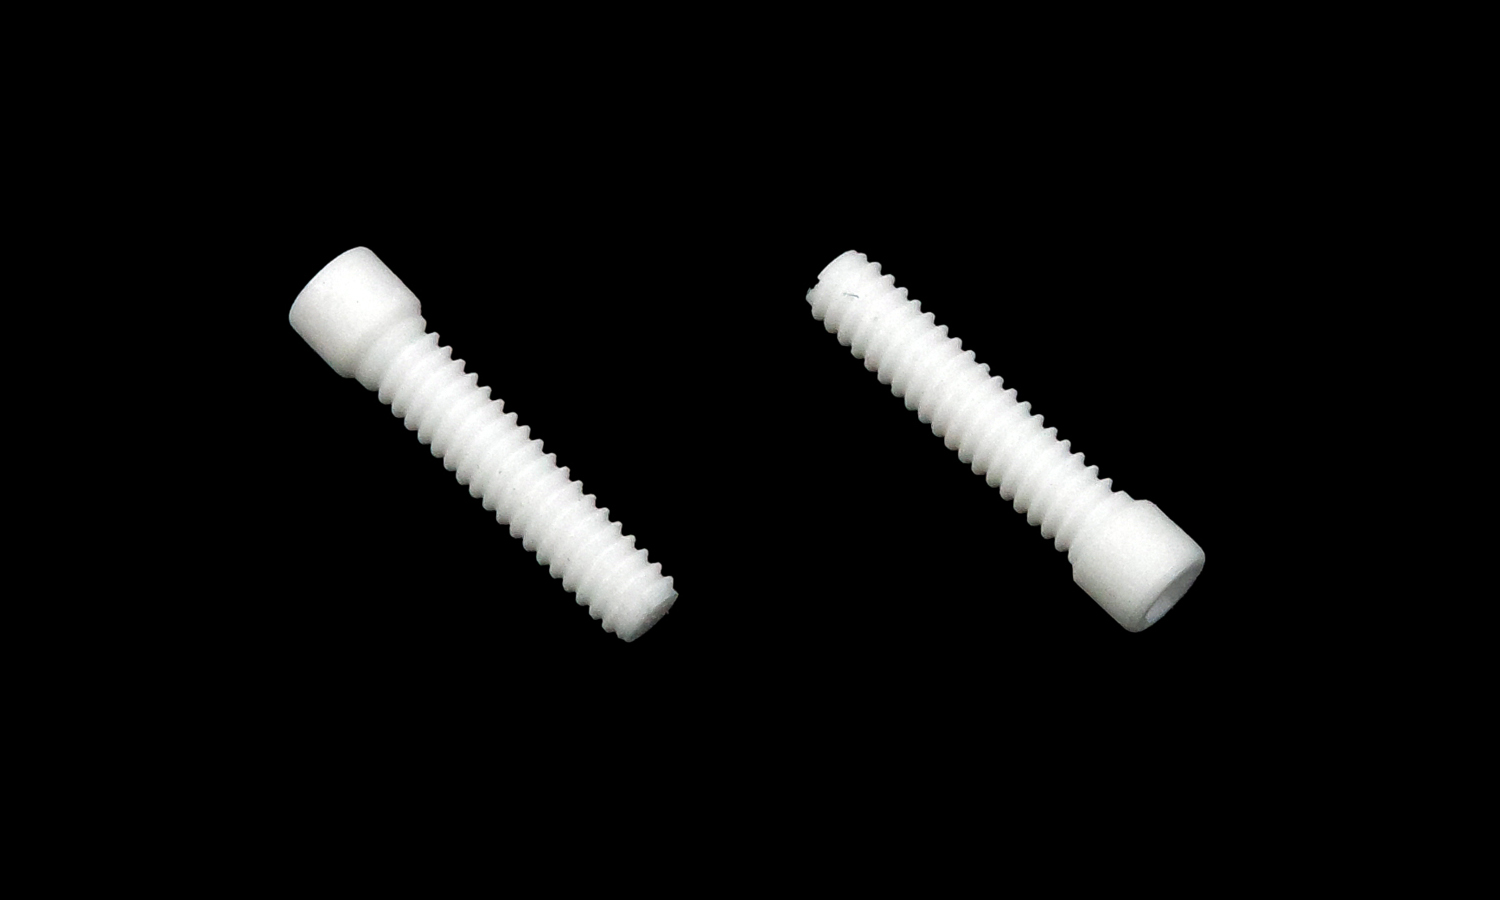
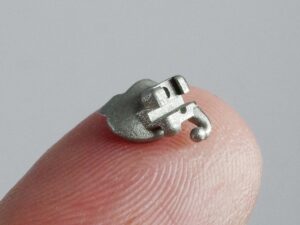
Meet the Dental “Big Three”
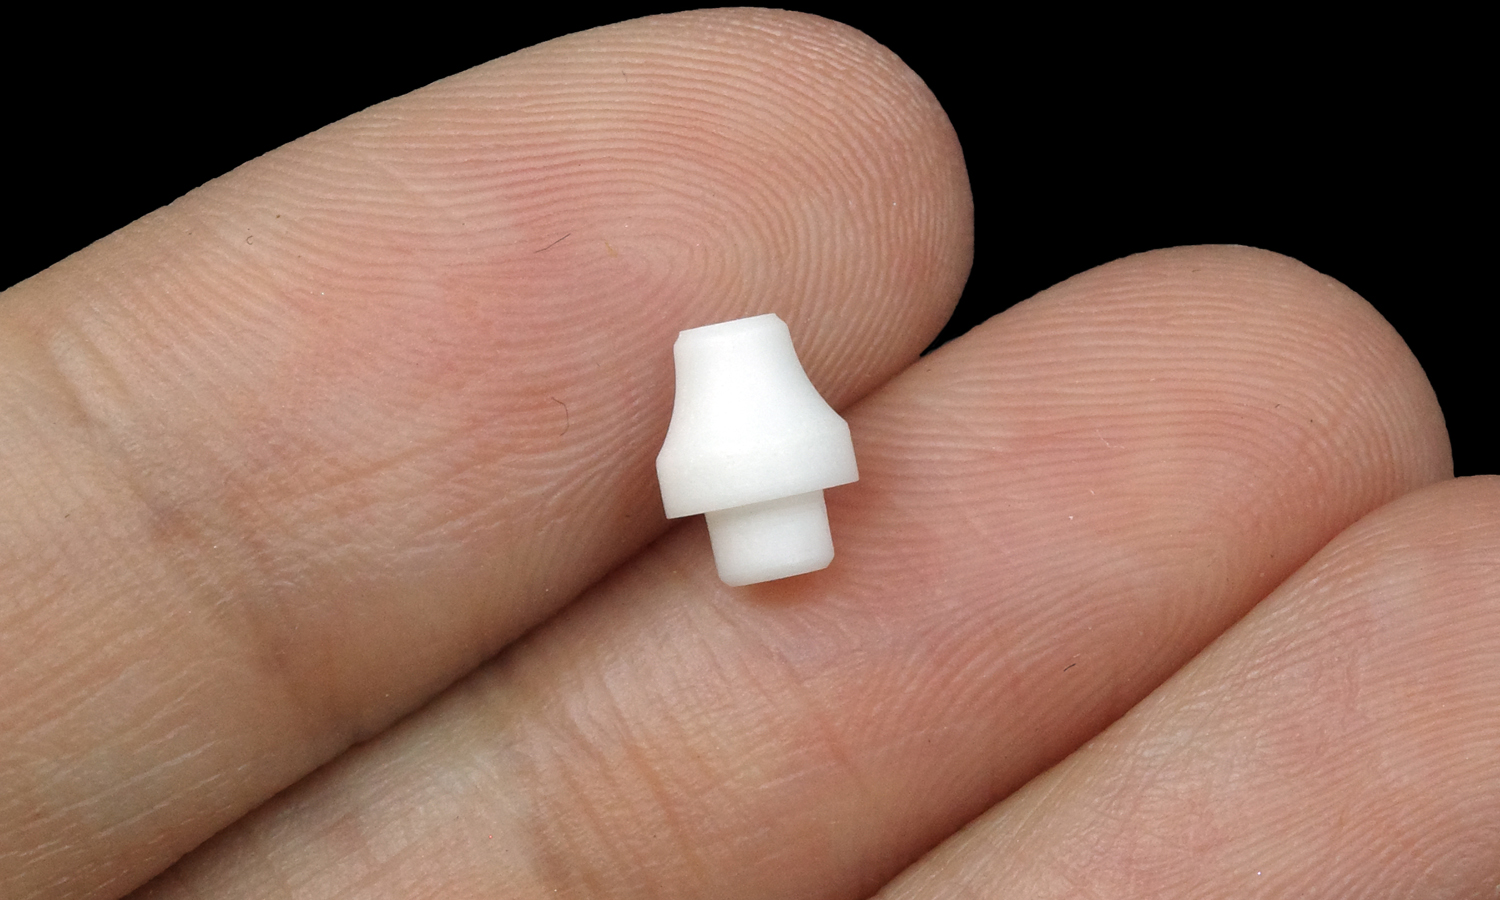
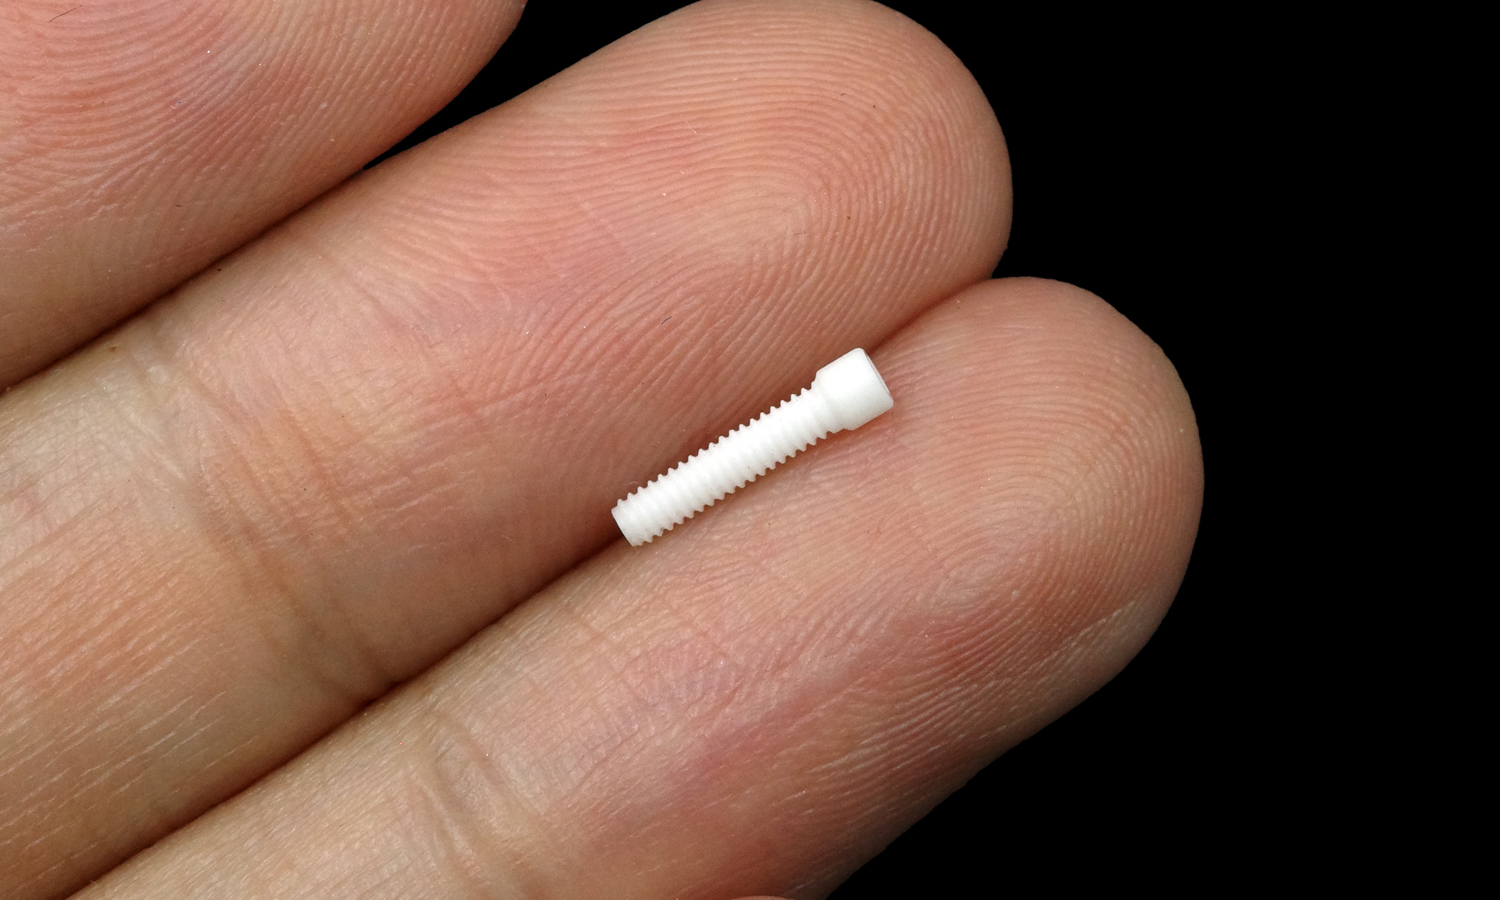
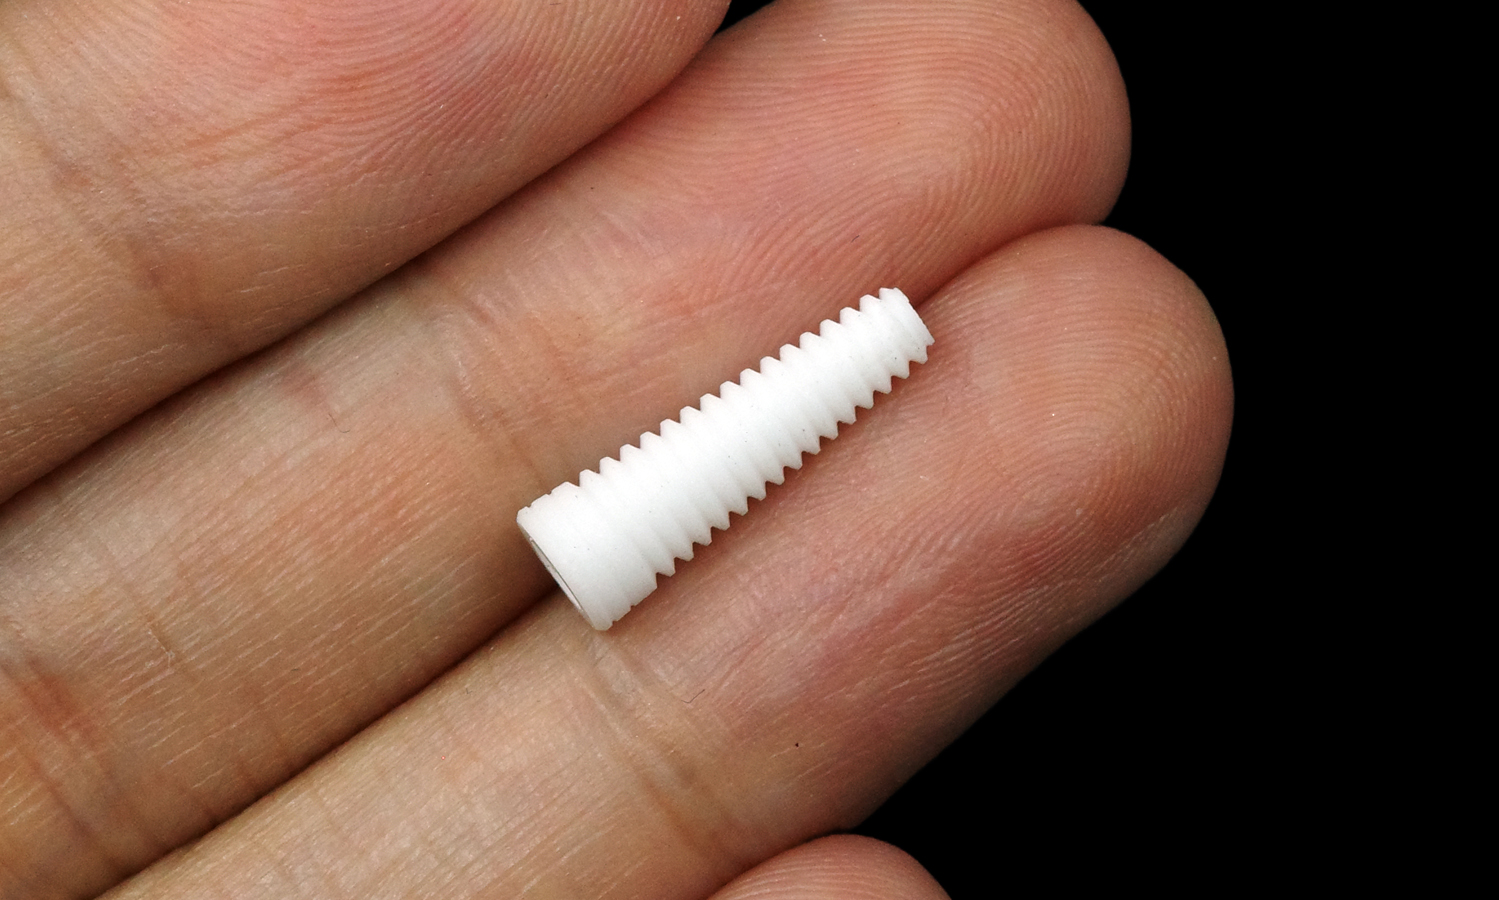
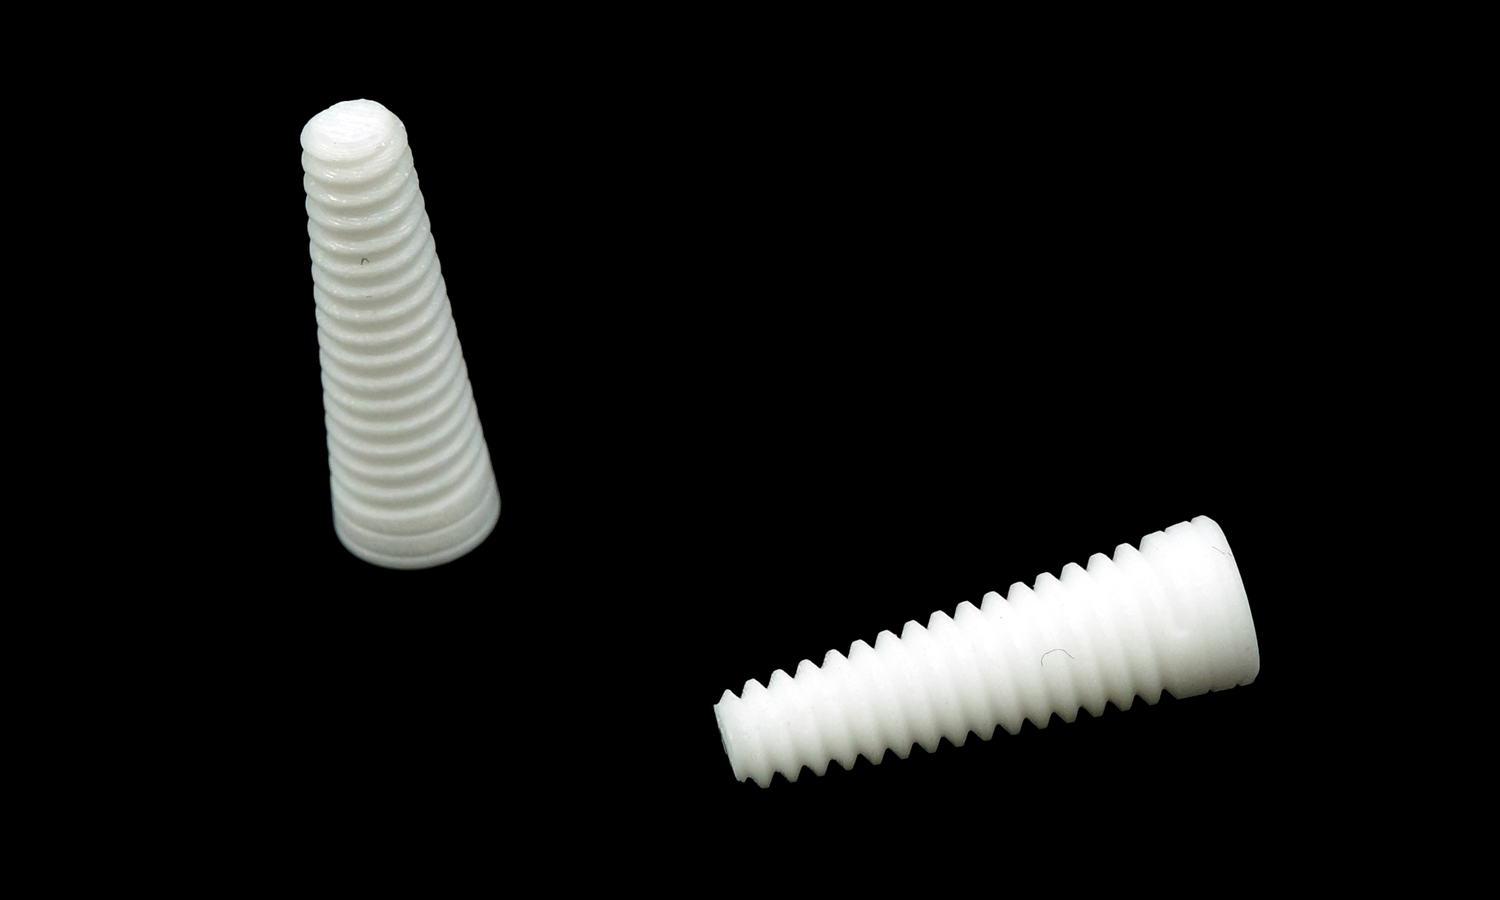
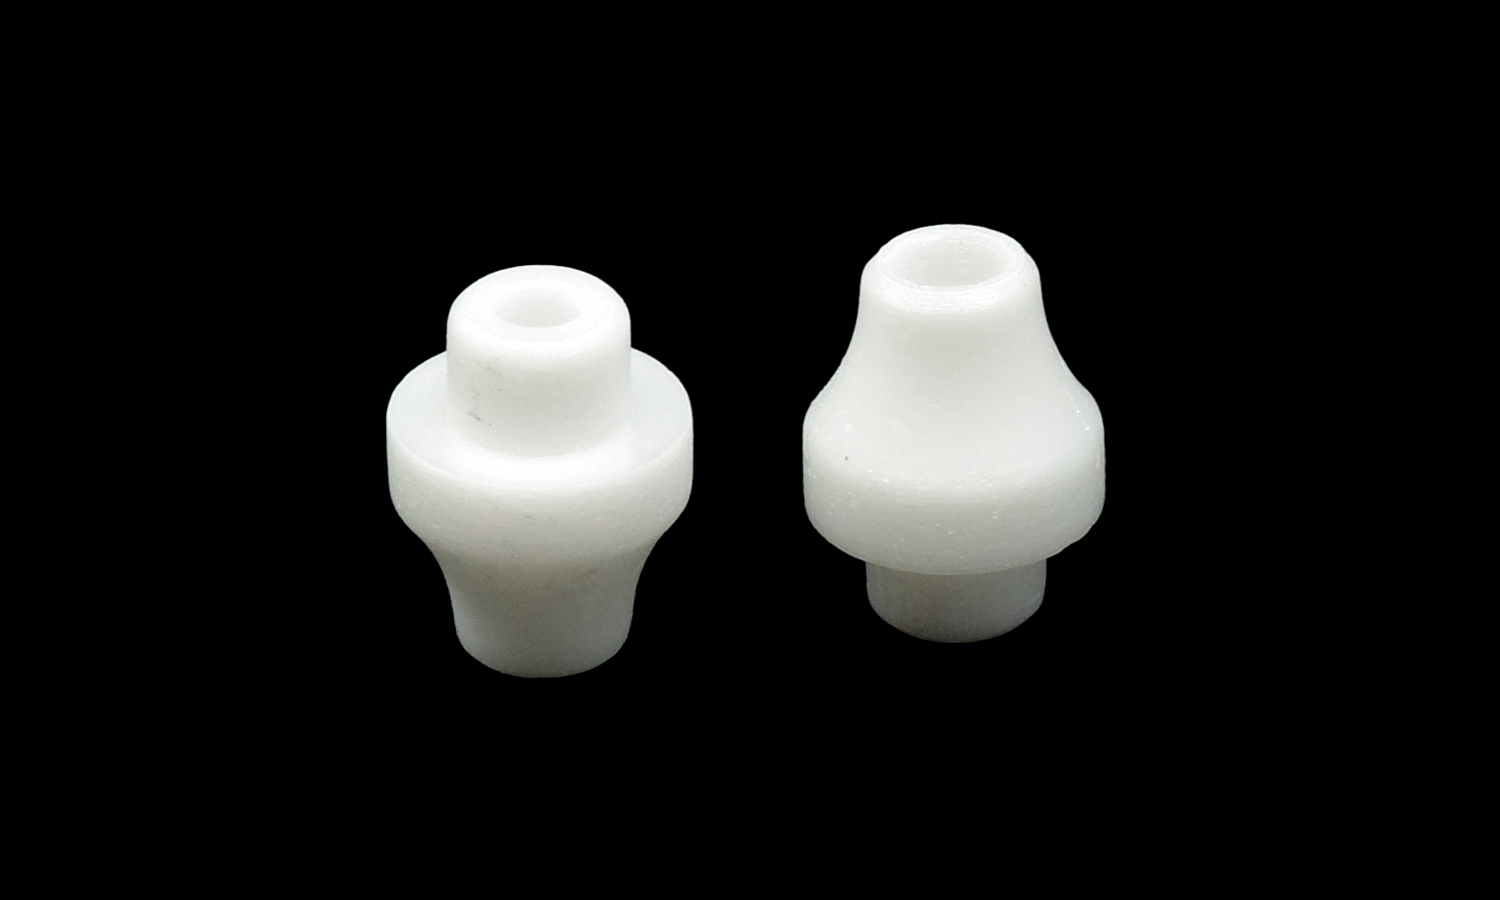
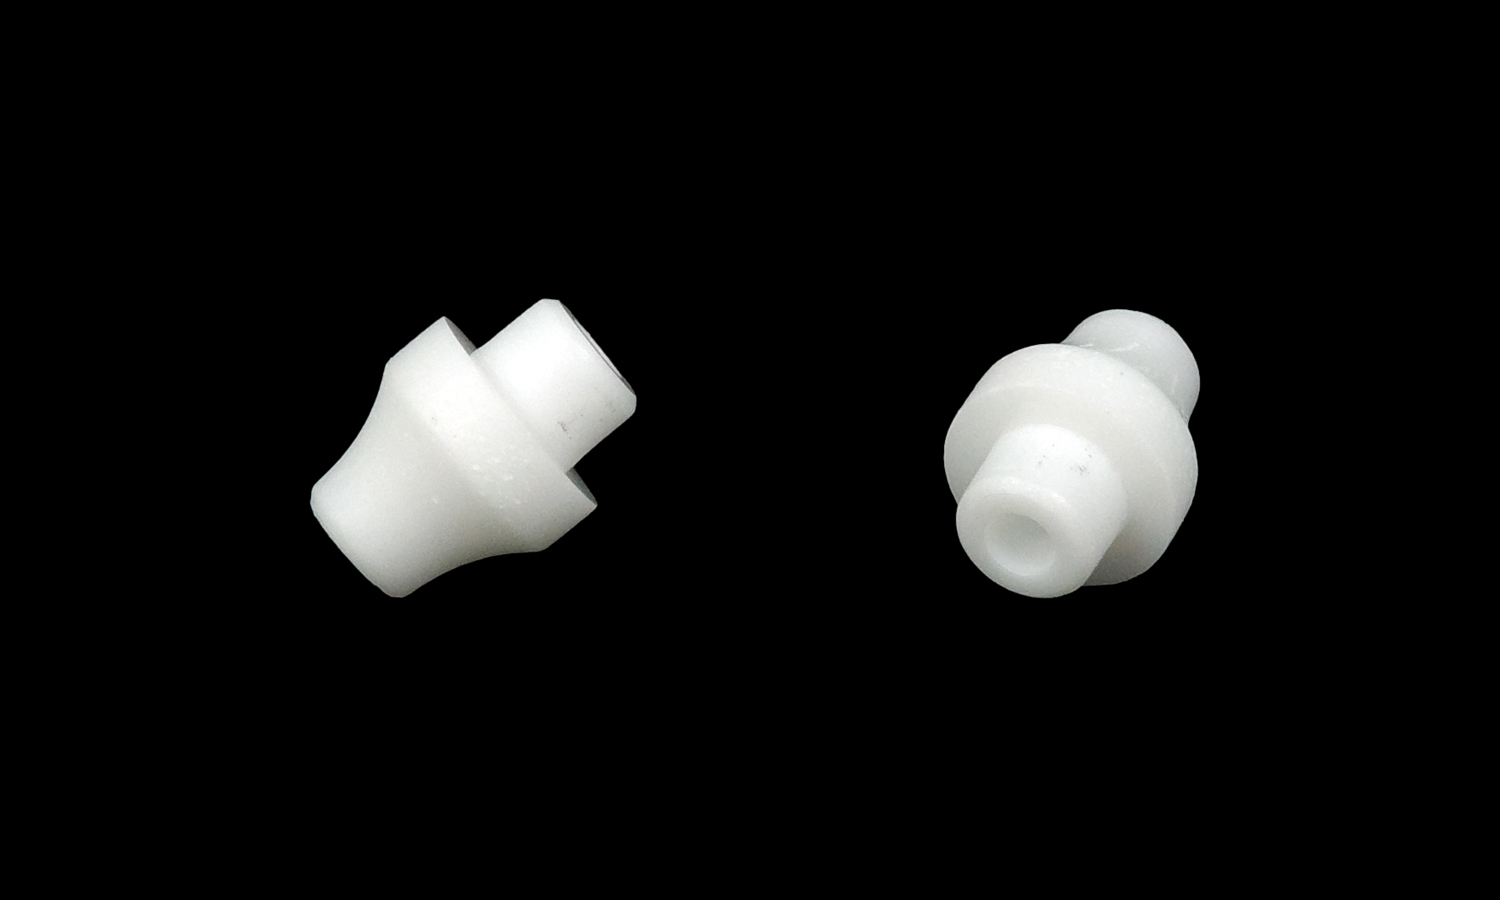
Looking at these pieces, you can really appreciate the engineering that goes into every tooth replacement. Even at this tiny scale (seen here resting on a fingertip!), the level of detail is staggering:
- The Implant Screw: Notice the aggressive, precision-engineered threads. In a real procedure, these are designed to bond with your bone to create a foundation as strong as a natural root.
- The Abutment: This is the elegant connector. ItŌĆÖs the “bridge” that sits between the implant and your new tooth, and its smooth, tapered shape is vital for healthy gum attachment.
- The Healing Cap: These little “hats” protect the implant while your body heals, ensuring everything stays clean and perfectly shaped for the final crown.
Printing these in Zirconia (ZrO2) isn’t just for showŌĆöit’s the same material used in actual surgery because itŌĆÖs incredibly tough and 100% metal-free. Seeing them like this, they look less like medical parts and more like tiny, polished works of art!
Whether you need life-sized models for patient education or high-precision, end-use zirconia restorations, FacFox is your ultimate partner. Our specialized ceramic 3D printing services use cutting-edge DLP and LCM technology to deliver parts with extreme dimensional accuracy and a flawless surface finish. From customized implants to complex dental bridges, we help dental professionals push the boundaries of whatŌĆÖs possible. Ready to bring your digital designs to life? Choose FacFox for the future of dental manufacturing.
Solution
- Step 1: Anatomy Modeling and Thread Design. High-resolution CT scans were used to design the implant geometry. Precise thread pitches and internal hex connections were modeled in CAD software, with dimensions increased to account for uniform sintering shrinkage.
- Step 2: Slurry Homogenization. Sub-micron zirconia particles were blended into a light-curable resin matrix. This slurry was vacuum-degassed to ensure no air bubbles would compromise the structural integrity of the threaded sections.
- Step 3: DLP Layer Projection. The dental components were printed using high-definition UV light projection. Each layer was cured individually, allowing for the creation of intricate external threads and hollow internal channels that would be difficult to reach with traditional cutting tools.
- Step 4: Centrifugal Cleaning. The “green” implants were cleaned using a combination of solvent baths and centrifugal force. This ensured that no liquid slurry remained trapped within the fine threads or the internal screw holes.
- Step 5: Staged Debinding. The parts were subjected to a tightly controlled thermal cycle. The organic binders were slowly evaporated, leaving a “brown body” structure that maintained the exact high-fidelity shape of the dental threads.
- Step 6: Dense Sintering. The implants were fired in a high-temperature furnace. The ceramic grains were fused into a fully dense, polycrystalline structure, resulting in a component with the high mechanical strength required to withstand biting forces.
- Step 7: Surface Treatment and Sterilization. The final parts were polished or etched to optimize the surface for bone attachment. Following a final quality check for thread tolerance, the components were prepared for clinical application.


