Material Resin
Quantity 1 pcs
Price Range $1-100
Lead Time 3 workdays
Gallery
About Project
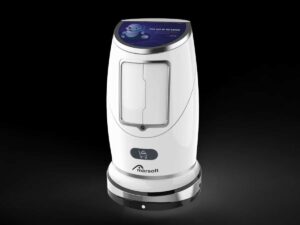
Can 3D printing achieve a true “retail-ready” look? This custom enclosure project proves that with the right technology and finishing expertise, the line between additive manufacturing and traditional production is thinner than ever.
Design Meets Precision
The goal for this project was to create a sophisticated, two-tone housing that feels as good as it looks. By utilizing SLA (Stereolithography) printing, we were able to capture incredibly fine details and maintain tight tolerances-critical for parts that must snap together perfectly. The smooth, non-porous nature of SLA resin provides the perfect canvas for high-quality paint application.
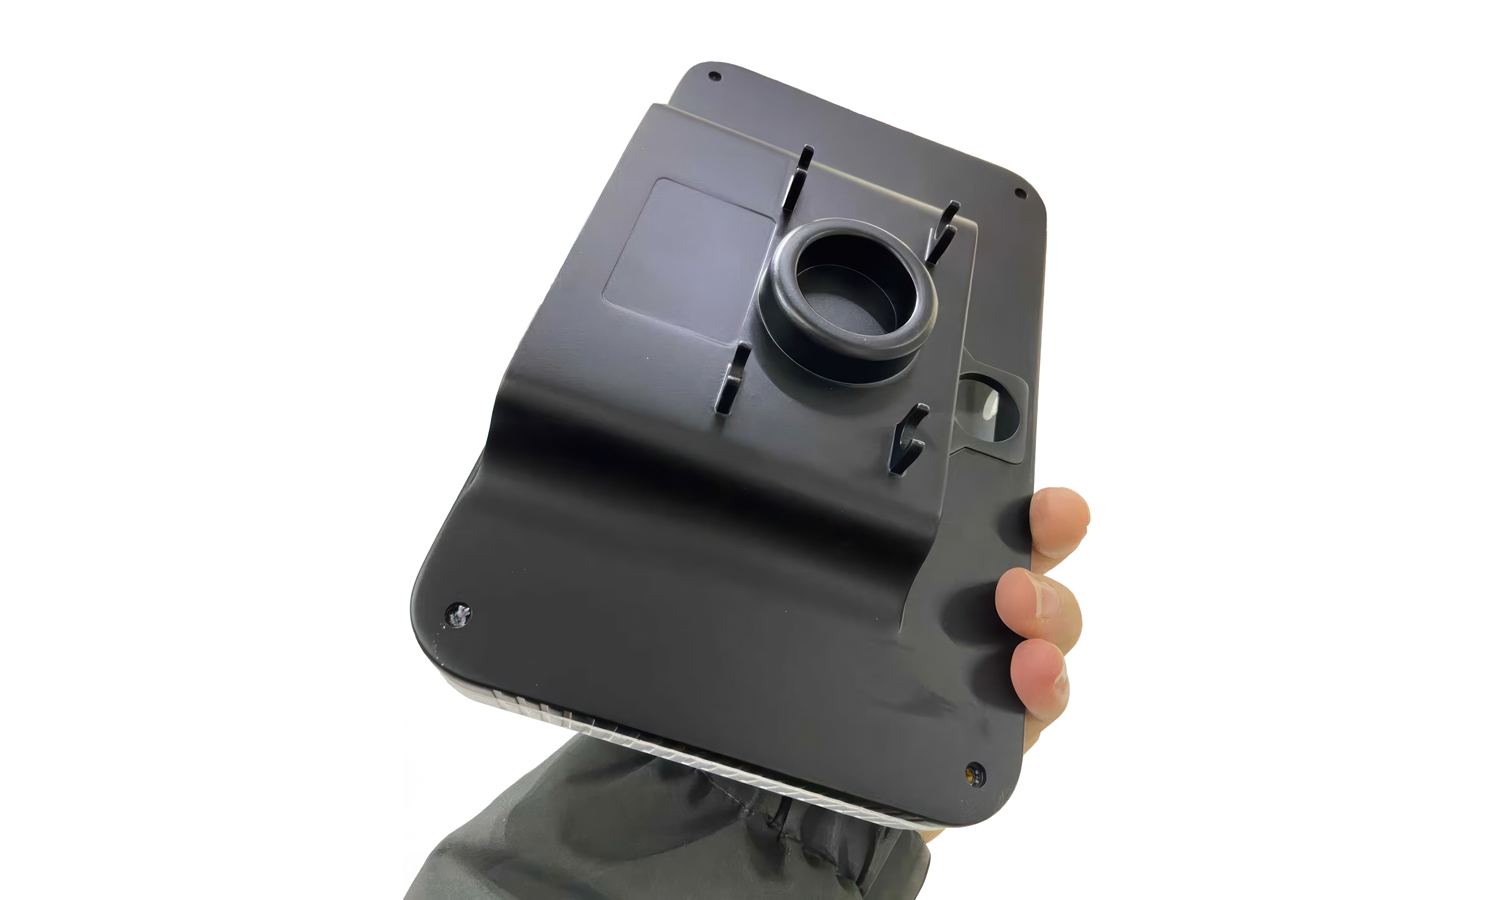
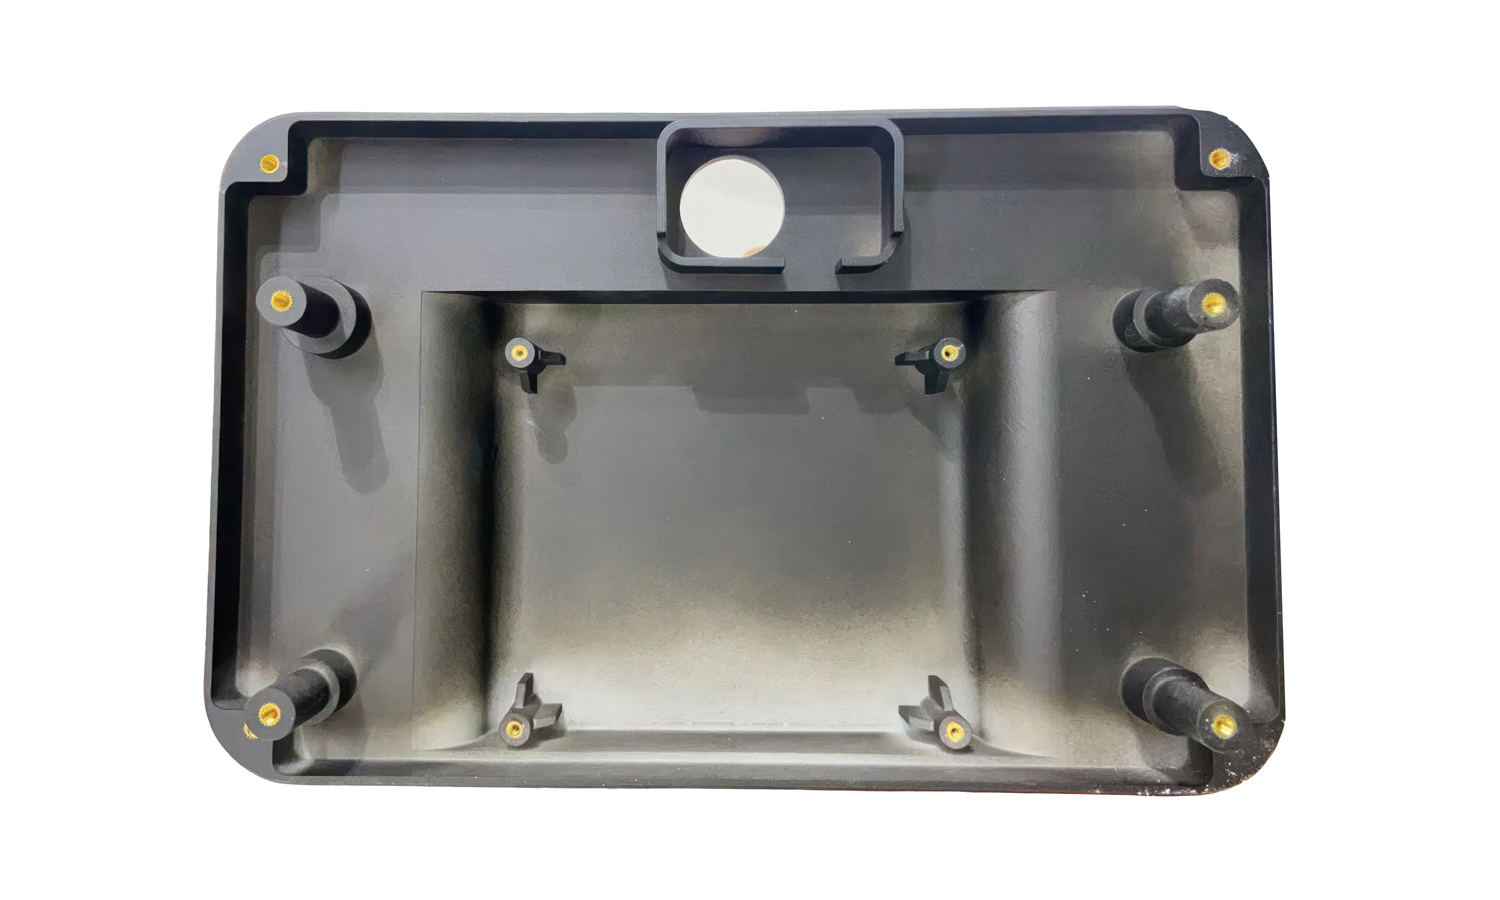
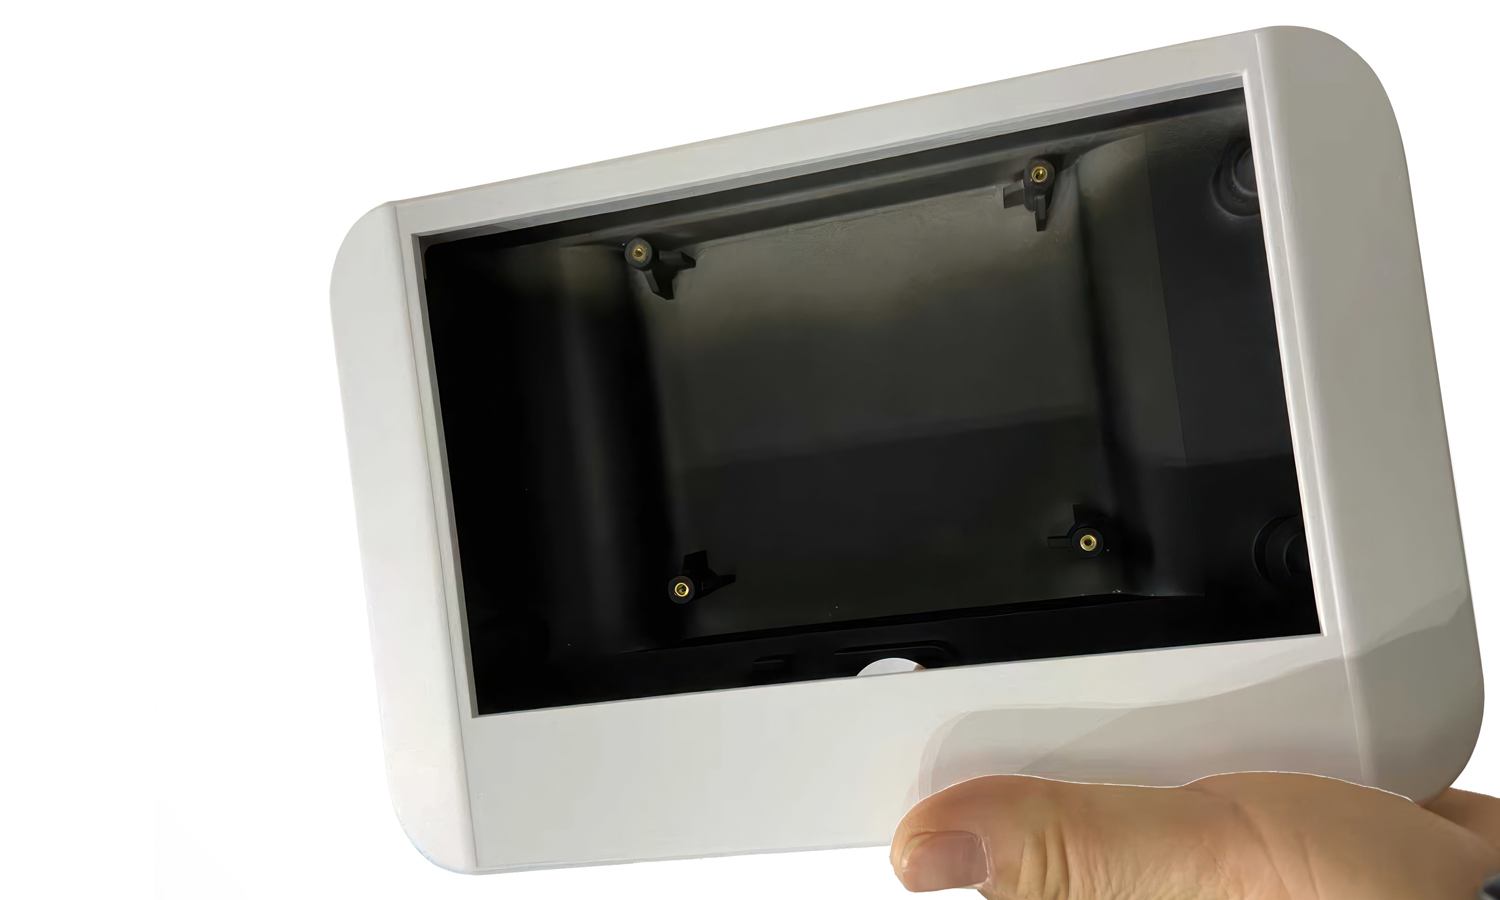
A Study in Contrast
The aesthetic appeal comes from the intentional contrast between the crisp white front bezel and the deep, matte black rear housing. The finish is uniform and velvety, completely free of the texture typically associated with 3D prints.
Beyond aesthetics, this enclosure is built for real-world use. We’ve integrated brass heat-set inserts into the mounting posts, ensuring that the assembly is robust enough for repeated opening and closing without the risk of stripping the plastic. From the recessed mounting interface on the back to the internal component standoffs, every element is designed for a professional user experience.
Bring Your Vision to Life with FacFox
Achieving this level of quality requires a partner who understands the nuances of both printing and post-processing. At FacFox, we specialize in high-precision 3D printing services that bridge the gap between a digital concept and a market-ready product. Whether you need the ultra-smooth surfaces of SLA printing, functional prototypes, or fully finished enclosures like the one shown here, our team is ready to deliver.
Want to elevate your next project? Visit FacFox today to get an instant quote and discover how our end-to-end manufacturing solutions can help you create something extraordinary.
Solution
- Step 1: The digital 3D model was sliced into thin layers and the enclosure components were printed using SLA (Stereolithography) technology, where a UV laser was used to selectively cure liquid resin.
- Step 2: The printed parts were removed from the build plate, and all sacrificial support structures were carefully detached from the geometry.
- Step 3: The components were submerged in an isopropyl alcohol (IPA) bath to remove any uncured resin, followed by a secondary UV light treatment in a curing chamber to reach full structural integrity.
- Step 4: All surfaces were manually sanded using progressively finer grits of sandpaper until a completely smooth, glass-like texture was achieved and all visible layer boundaries were eliminated.
- Step 5: High-quality primer was applied to the surfaces to ensure paint adhesion, followed by multiple thin coats of matte black and white automotive-grade paint.
- Step 6: Brass threaded inserts were thermally pressed into the internal standoffs and mounting holes using a heat-setting tool to provide durable, metal-on-metal fastening points.
- Step 7: A final inspection was conducted to verify the alignment of the two-tone assembly and the integrity of the finished surfaces before final assembly.


