
Gallery

About Project
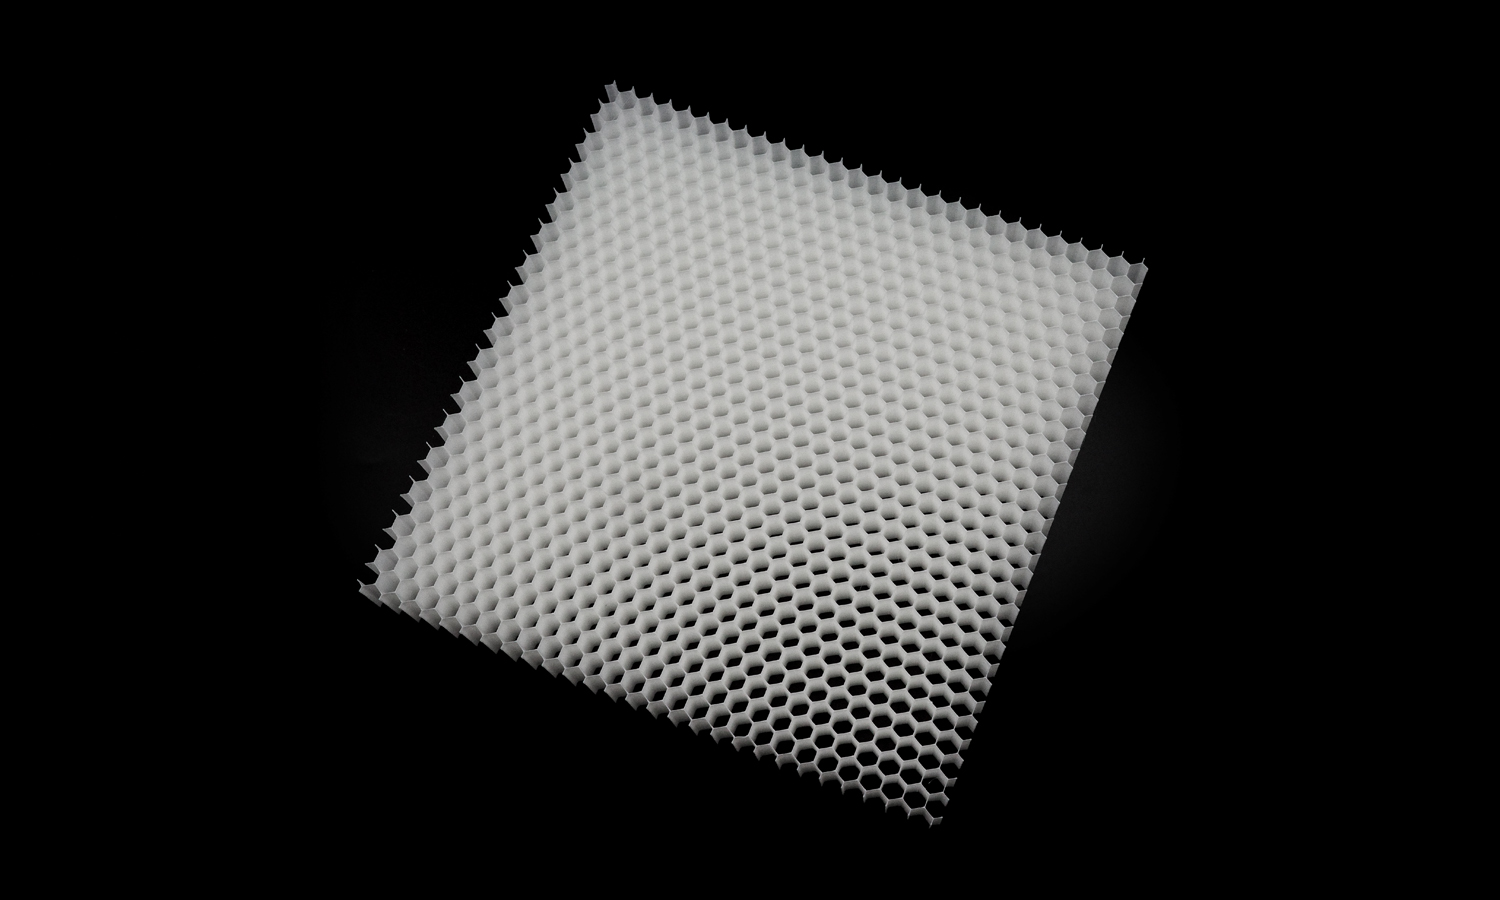
This project showcases a deceptively simple yet technically challenging print: a large, ultra-lightweight honeycomb panel fabricated in PLA using FDM technology. At first glance it looks like a regular grid, but its thin walls, deep cells, and high aspect ratio create a structure that pushes the limits of extrusion consistency and machine stability.
The goal of the print was to evaluate how well FDM handles repetitive thin-wall geometry across a wide surface area. Each hexagonal tube acts like a tall, narrow column-meaning any issues with temperature, retraction, vibration, or extrusion flow would quickly accumulate into visible defects. Maintaining uniformity from the center of the panel all the way to its outer edges required careful calibration and stable hardware.
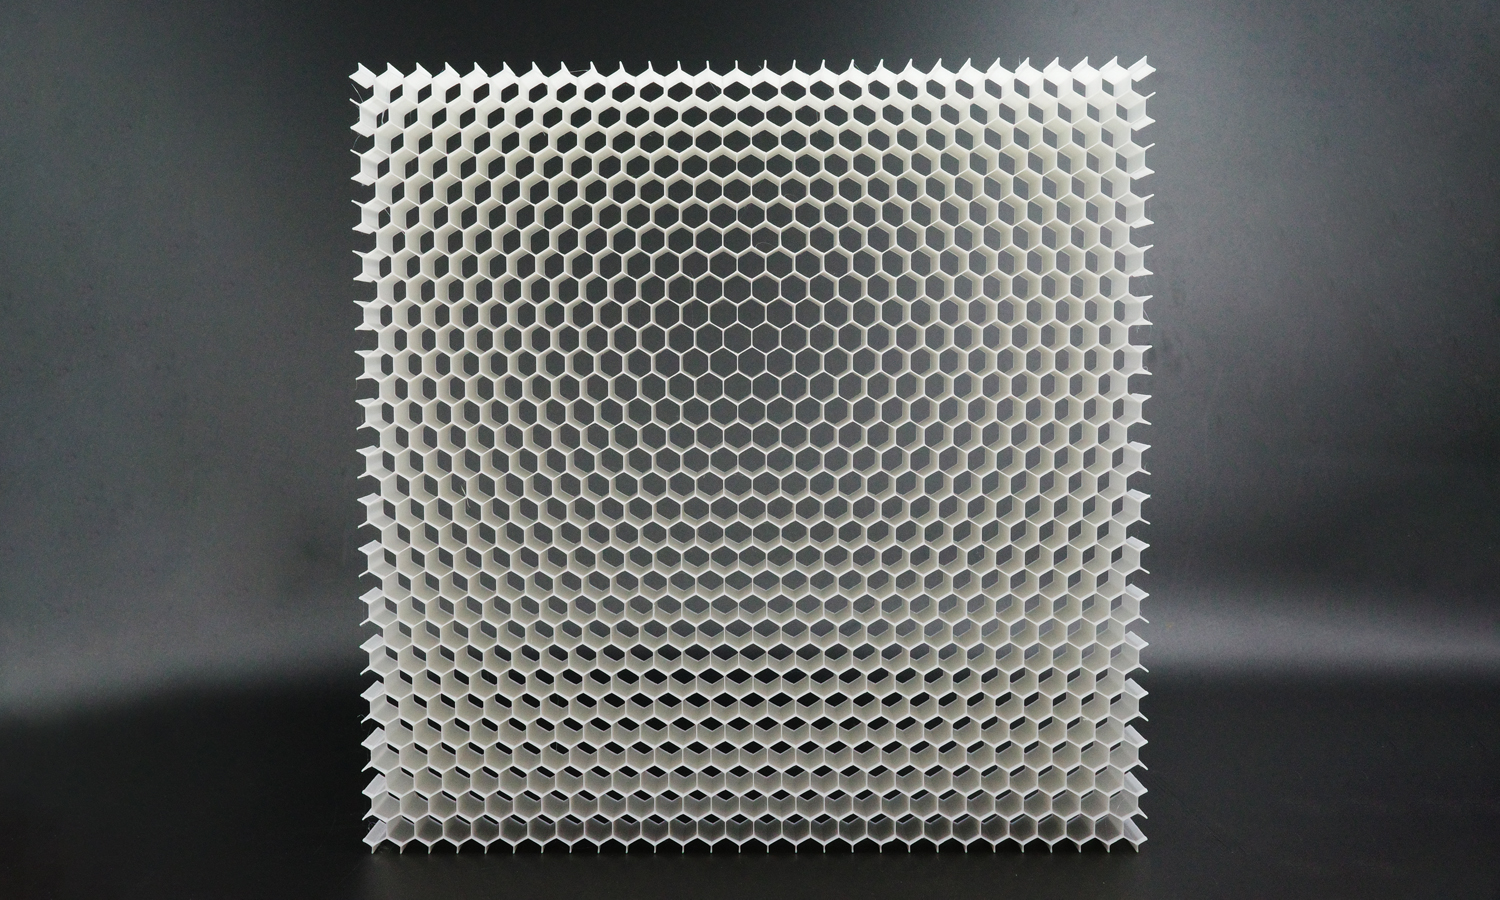
Despite the difficulty, the final result turned out exceptionally clean. The honeycomb lines remain crisp and parallel, with remarkably consistent wall thickness and minimal deformation across the entire sheet. Even under close-up inspection, the surface shows smooth layers and a stable matte texture characteristic of well-dialed PLA extrusion. A structure of this size is usually prone to warping, yet the panel stayed impressively flat thanks to optimized cooling and balanced print speed.
Some faint micro-stringing between cells is visible-an unavoidable trait for such a geometry with thousands of rapid retracts-but the level is surprisingly low for an FDM build of this complexity. The print captured the lightweight, airy aesthetic of the design while preserving structural integrity, making it suitable for functional tests, airflow studies, interior panels, and architectural prototypes.
Applications & How FacFox Can Help
Honeycomb structures like this are used across aerospace, automotive, packaging, filtration, lighting design, and research applications because they provide high stiffness at low weight. Whether you need lightweight cores, airflow-control grids, artistic installations, diffuser panels, or custom lattices, FacFox can help turn your ideas into precise physical parts.
Our FDM, SLA, SLS, MJF, and full-color technologies let us support everything from rapid prototypes to production-grade parts. If you’re exploring lattice structures, lightweight patterns, or experimental geometries, FacFox’s engineering team can advise on materials, print orientation, and feasible design parameters to ensure high-quality results.
From complex CAD concepts to beautifully finished prints, FacFox is ready to manufacture the next piece of your vision.
Solution
- Step 1: Design Preparation. The honeycomb geometry was created in CAD software and was exported as a high-resolution STL file.
- Step 2: Model Inspection & Repair. The STL file was checked for non-manifold edges, intersecting faces, and gaps, and any detected issues were repaired to ensure a watertight model.
- Step 3: Slicing Configuration. The model was imported into slicing software, where layer height, wall count, infill (set to 0% for hollow cells), print speed, and cooling settings were configured. Retraction and travel parameters were optimized to reduce stringing between hexagonal cells.
- Step 4: Build Orientation & Layout. The panel was oriented flat on the build plate to maximize dimensional stability, and the part was centered to ensure even airflow and consistent bed adhesion.
- Step 5: Material Loading. PLA filament was loaded into the FDM printer, and extrusion was purged until a clean, consistent flow was observed.
- Step 6: Bed Leveling & Calibration. The build plate was leveled and the nozzle-bed distance was calibrated to achieve reliable first-layer adhesion across the entire printing area.
- Step 7: Printing. The print job was started, and the panel was built layer by layer. Thin walls forming each hexagonal cell were deposited, and active part cooling was applied so that the tall, slender walls were solidified quickly and maintained their shape.
- Step 8: Process Monitoring. During printing, the build was periodically inspected. Extrusion, adhesion, and dimensional stability were monitored, and the job was allowed to complete without interruption once parameters were confirmed to be stable.
- Step 9: Part Removal. After cooling, the honeycomb panel was carefully detached from the build plate to avoid bending or cracking the thin walls.

