Material Resin
Quantity 2 pcs
Price Range $1-100
Lead Time 2 workdays
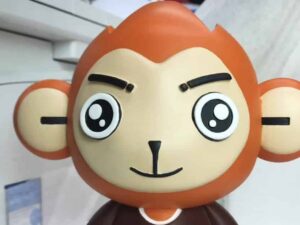
Gallery
About Project
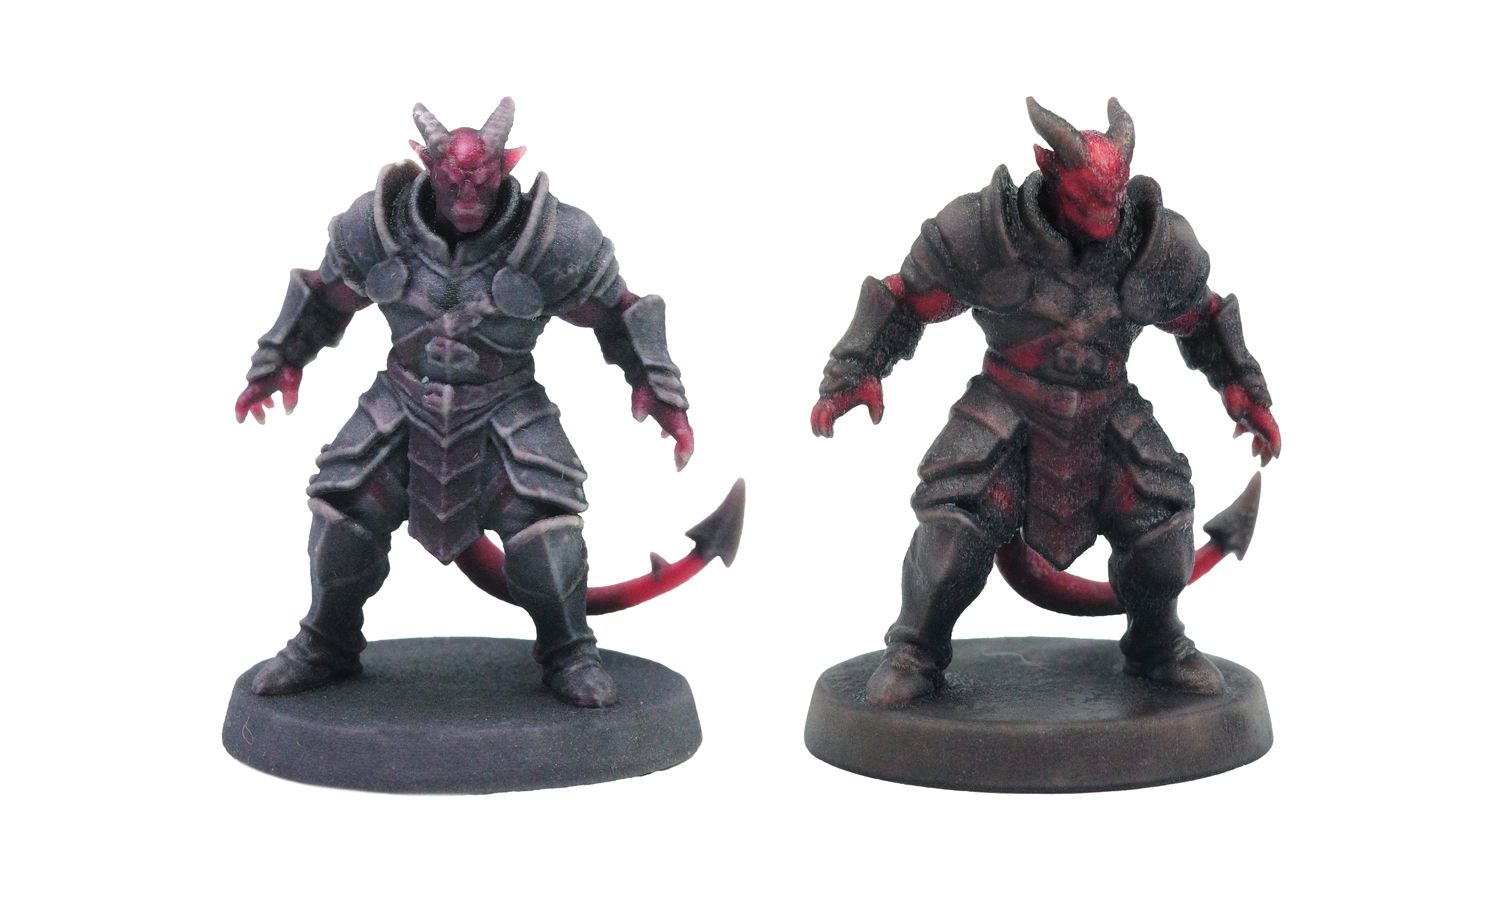
Two full-color technologies, one Tiefling warrior, and a whole lot of differences that matter when you’re prepping for your next campaign.Left is WJP, right is Mimaki – same sculpt, different styles, and some interesting surprises.
Color Accuracy – Mimaki Wins This Round
Both prints show color shifting, but each in its own direction:
- WJP (Left):Leans rosy and cool, giving the Tiefling a pink-ish undertone.
- Mimaki (Right):Lands closer to the original digital palette, especially in the reds.The overall color vibe feels truer to a fiendish character.
¤æē Winner: Mimaki for more accurate and natural tones.
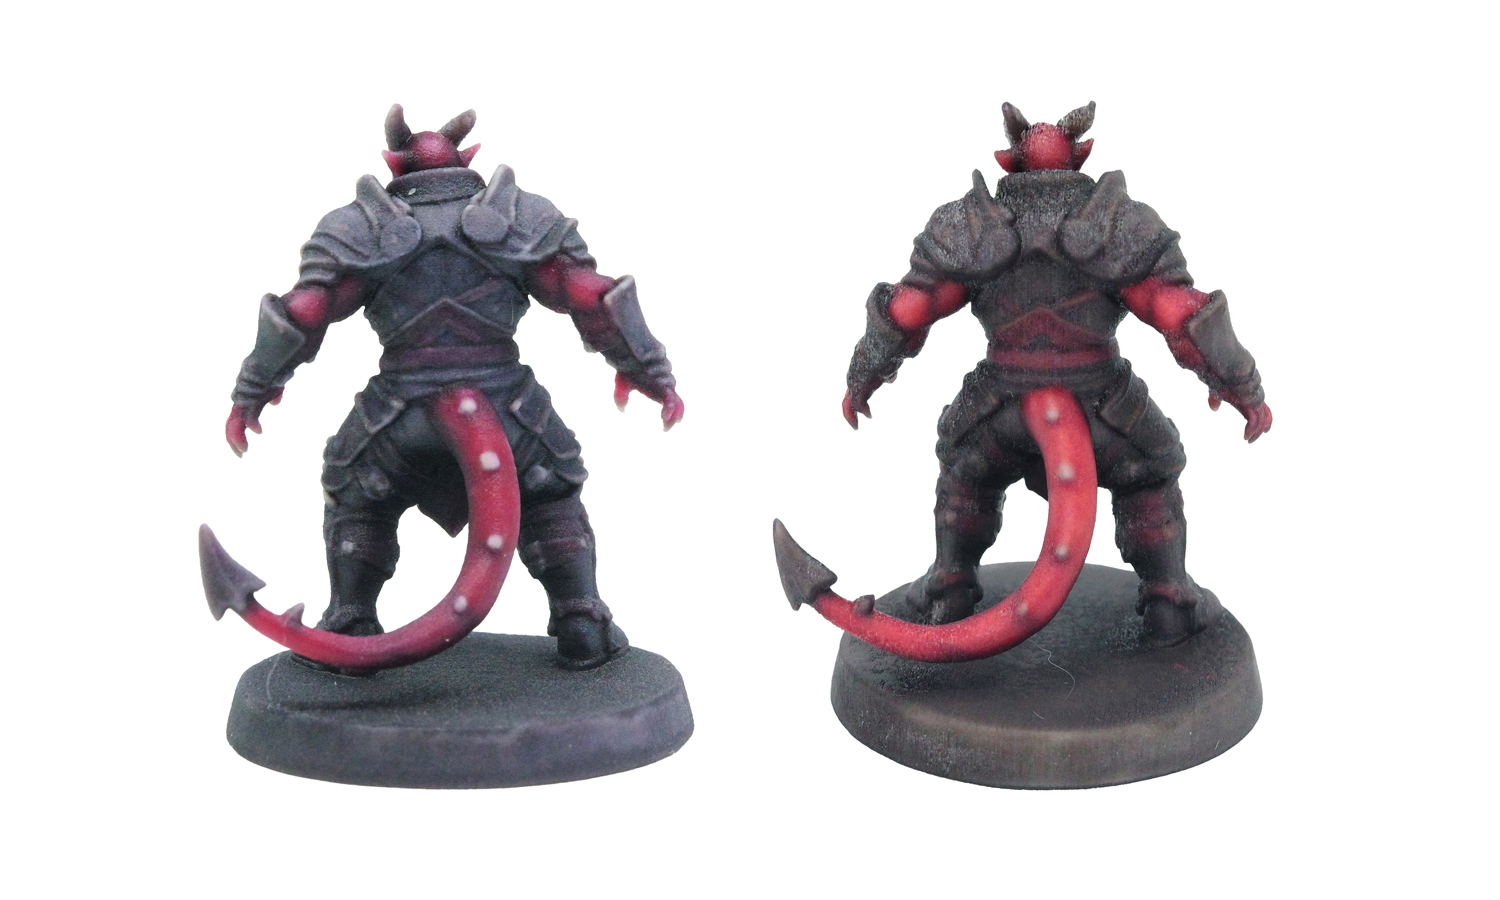
Detail Sharpness – WJP Takes the Crown
This model has lots of armor layering and sculpted patterns, which reveal clear differences:
WJP (Left):
- Armor plates are sharply defined
- Contrast between light and dark areas pops more
- Horn grain texture is clearly visible
- Overall detail readability is stronger
Mimaki (Right):
- Surfaces appear grainier
- Edges soften into a more painterly finish
- Some contrast gets lost in darker zones
¤æē Winner: WJP, easily, for detail clarity.
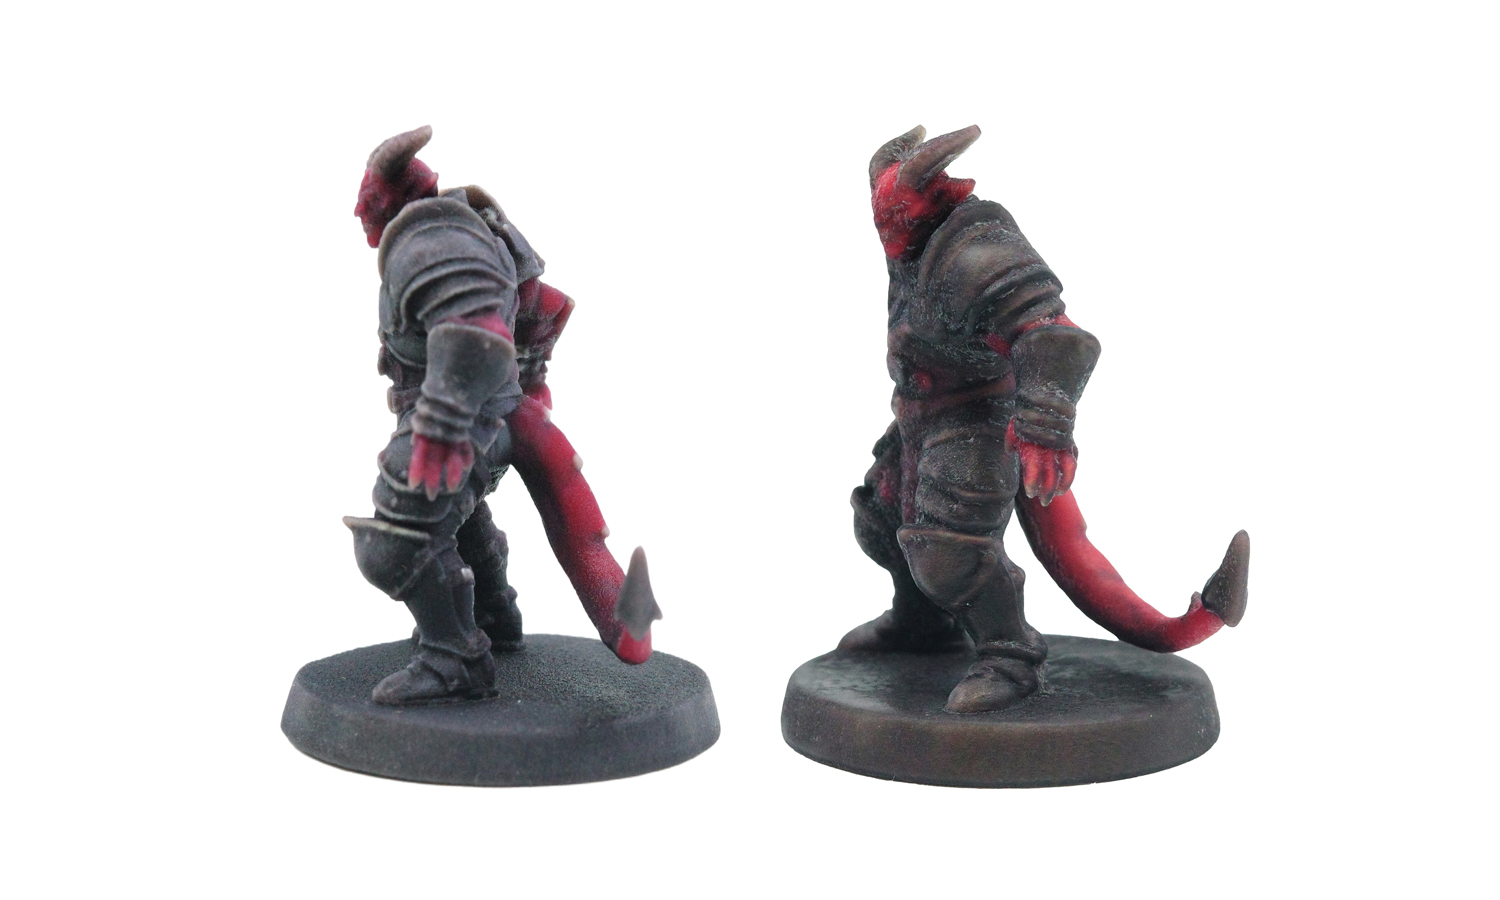
Fragility Check – WJP Resin Is More Brittle
A small but important observation:
- The WJP horns appear slightly shorter, missing the sharp tips.This may indicate breakage during handling or shipping, as WJP resin is noticeably more brittle.
- Mimaki, while not “durable,” tends to survive small bumps or short drops better due to its softer surface texture.
So if your minis travel to game nights often, this is worth considering.
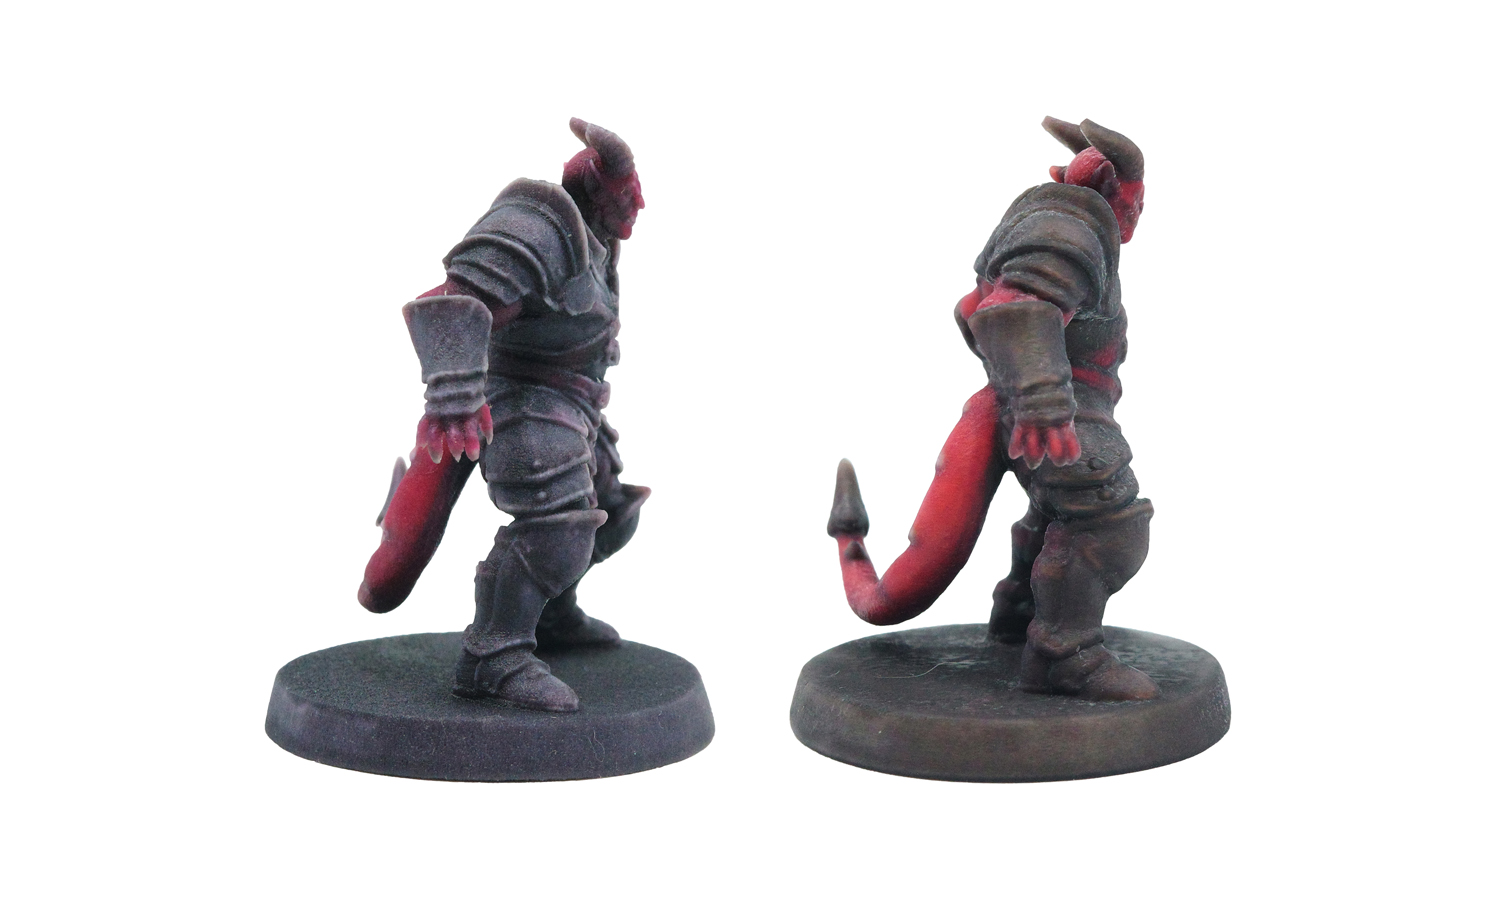
Table Presence – Clean vs. Grimdark
- WJP pops on the board: higher contrast, crisp shapes, easier to identify mid-game.
- Mimaki blends into darker settings with warm shadows and gritty tones – perfect for grim campaigns or dungeon tiles.
Both look great, just with different personalities.
Final Verdict
WJP Full-Color – Best for:
Ō£öSharp armor lines Ō£öReadable silhouettes Ō£öHigh contrast Ō£öClean, crisp tabletop presence
Mimaki Full-Color – Best for:
Ō£öMore accurate color tone Ō£ö Darker fantasy atmosphere Ō£öWarmer, moodier reds Ō£öA more gritty, painterly aesthetic
Same price range – just choose the style that matches your campaign.
Bring Your Characters to Life with FacFox Full-Color Printing
Whether you prefer the sharp clarity of WJP or the rich tones of Mimaki, FacFox offers both full-color technologies under one roof.Our team helps you choose the best process for your model’s geometry, color style, and intended use – and we inspect every miniature carefully before printing.
If you’re ready to turn your digital heroes (or villains!) into tabletop-ready minis, FacFox’s full-color 3D printing service has you covered.
Solution
- Step 1: The Tiefling Warrior 3D model was inspected and was repaired so that the mesh was fully watertight and suitable for full-color printing.
- Step 2: Color textures and shading passes were applied to the model, and the maps were baked and exported in a format compatible with both WJP and Mimaki printers.
- Step 3: The textured file was imported into the WJP full-color printing software, where the scale, orientation, and target resolution were configured.
- Step 4: A second build file was created in the Mimaki slicing software using the same scale and pose so that the two samples could be compared under identical conditions.
- Step 5: The WJP version of the miniature was printed layer by layer in full-color resin, with geometry and color information deposited simultaneously according to the sliced data.
- Step 6: The Mimaki version was then printed in full-color resin on the Mimaki system, using its own color profile and process parameters.
- Step 7: After printing, both builds were removed from their platforms, and excess resin and any supporting structures were carefully cleaned away.
- Step 8: The miniatures were post-cured under controlled UV light so that the resin was fully hardened and the colors were stabilized.
- Step 9: Minor surface artifacts were gently trimmed or brushed off, and the bases were cleaned to ensure that each figure could stand flat on the tabletop.


