Material Plastic, Resin
Quantity 85 pcs
Price Range $100-1,000
Lead Time 3 workdays
Gallery
About Project
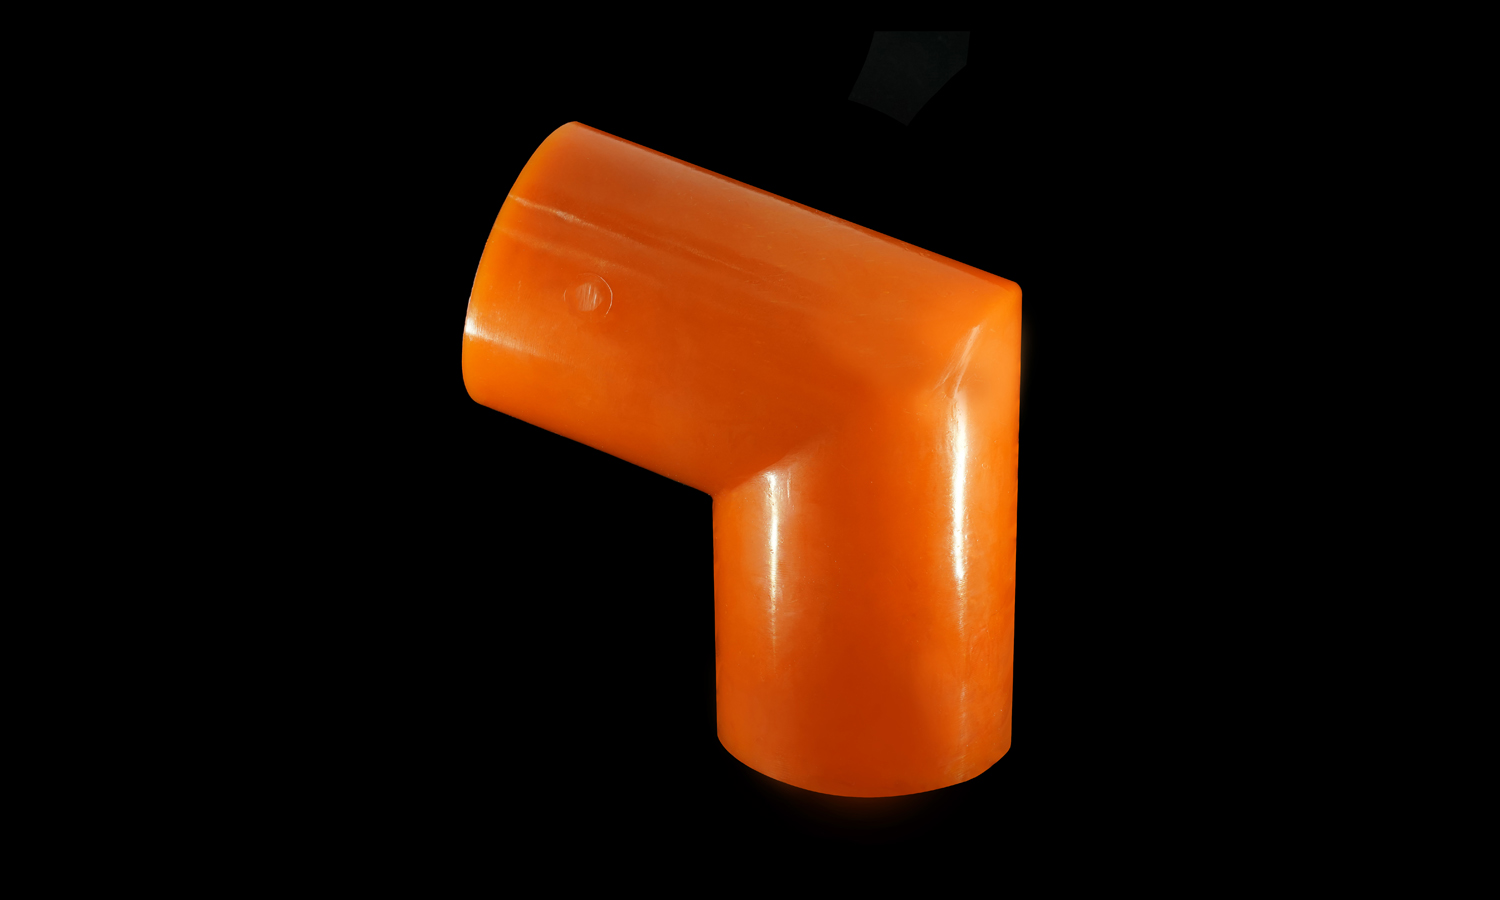
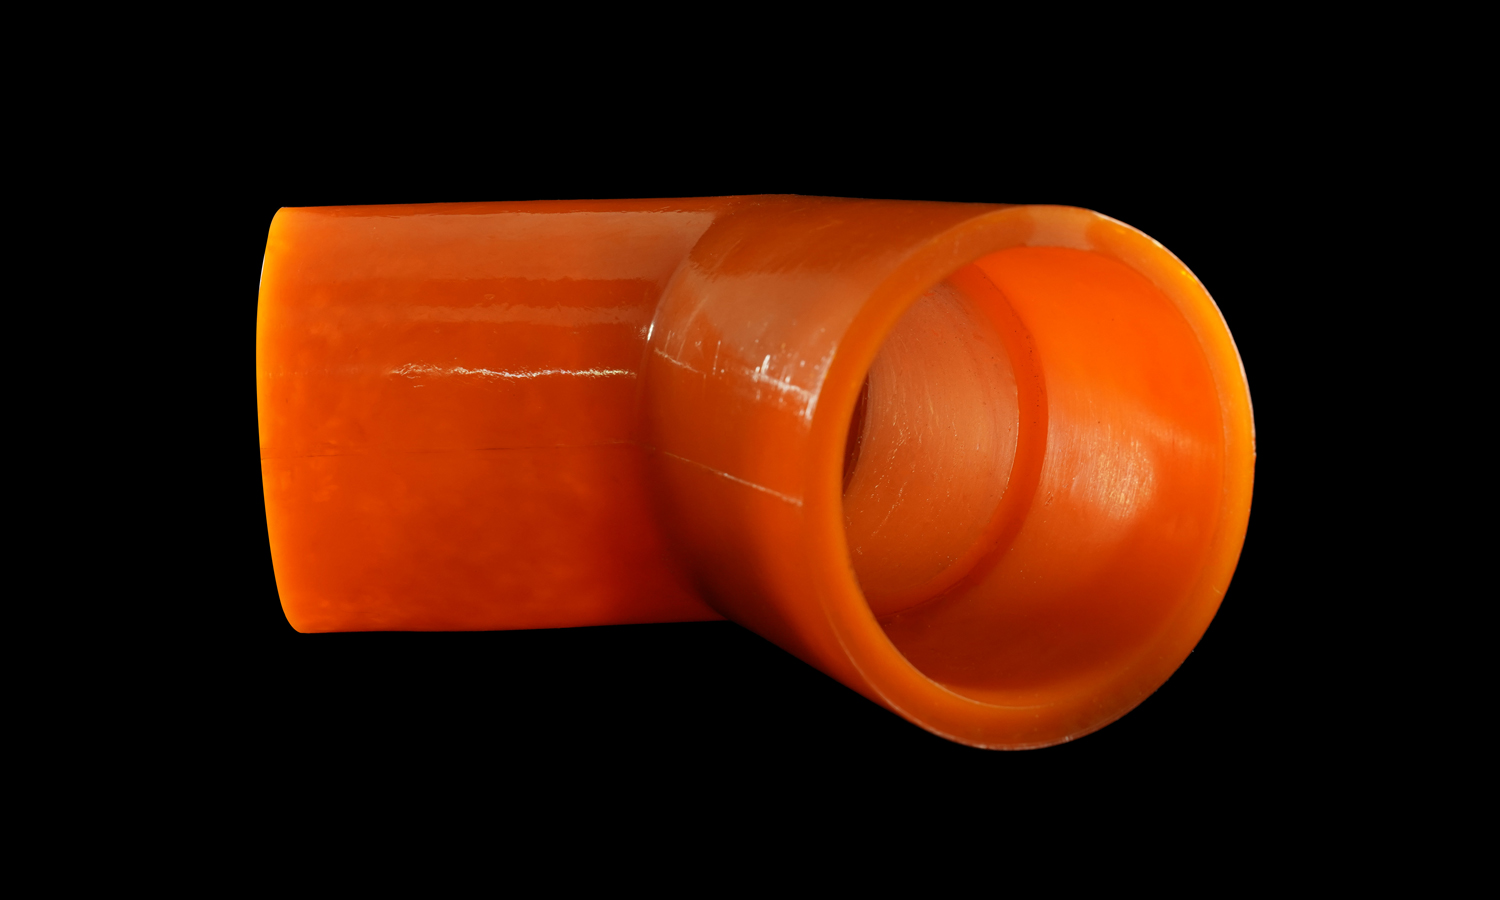
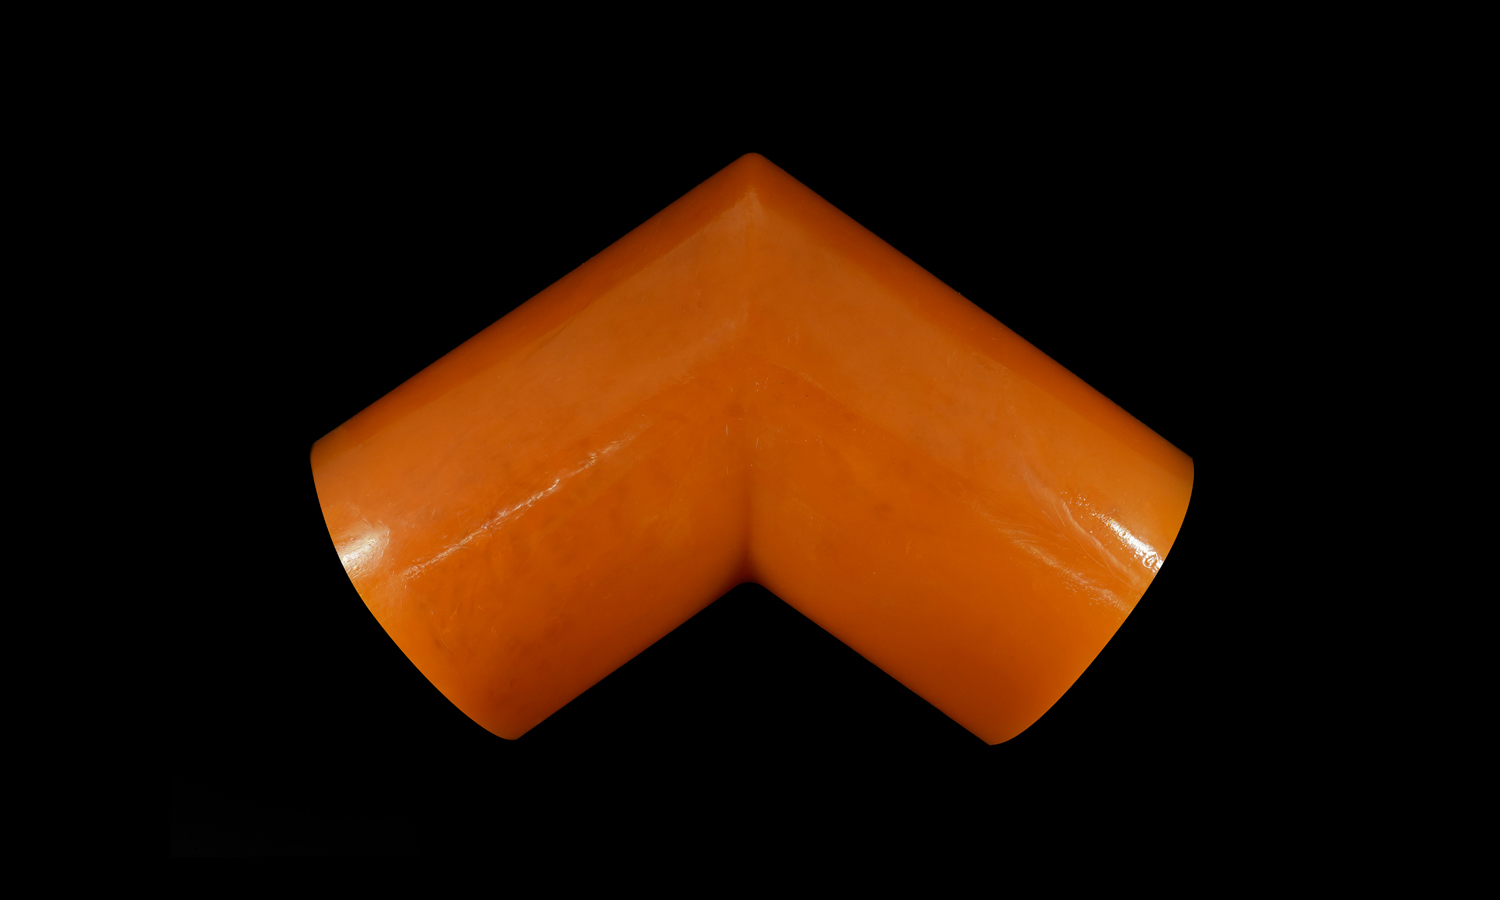
This bright orange connector prototype stands out for its smooth, glossy finish and nonstandard geometry. Unlike a conventional 90В° elbow, the part features an obtuse angle of approximately 105В°, allowing for a more efficient flow path in complex piping systems. Its design combines both aesthetic refinement and functional precision-a clear example of how polyurethane casting can reproduce intricate shapes and consistent wall thickness with near-injection-mold quality.
The connector was created as a functional prototype for a system requiring a specific directional transition where standard fittings could not provide the desired alignment. The custom angle ensures a smoother transition for liquids or air, reducing turbulence and pressure loss. Internally, the surface is highly polished to prevent residue buildup, while the exterior maintains a visually clean and ergonomic contour for easy handling and assembly.
PU casting was chosen because it enables the production of large, durable, and visually refined prototypes at a fraction of the cost of full tooling. The slight translucency and uniform pigmentation of the material highlight its polyurethane origin, offering both mechanical strength and aesthetic quality.
FacFox’s PU casting service made it possible to achieve this level of detail and finish. With precise silicone molding, high-quality resin selection, and optional color tinting, FacFox helps designers and engineers bridge the gap between rapid prototypes and production-grade parts. Whether you need a one-off visual model or small-batch functional parts, FacFox’s vacuum casting solutions deliver consistent results with minimal post-processing-ideal for industrial prototypes, consumer product housings, and custom connectors like this one.
Solution
- Step 1: The 3D model of the custom obtuse-angle connector was designed and finalized according to the client’s specifications.
- Step 2: A high-resolution SLA master pattern was printed, cleaned, and surface-finished to achieve a smooth, glossy appearance.
- Step 3: The master was fixed in a mold box, and liquid silicone was poured and cured to form a two-part mold capturing every contour of the model.
- Step 4: After curing, the master was removed and the mold cavity was checked to ensure accurate geometry at the curved section.
- Step 5: Polyurethane resin and orange pigment were precisely weighed, mixed, and degassed to remove air bubbles.
- Step 6: The silicone mold was assembled, and the resin mixture was poured inside under vacuum pressure to ensure complete filling.
- Step 7: The cast part was left to cure at controlled temperature and then carefully demolded.
- Step 8: Excess material around the gates and vents was trimmed, and the surface was polished to restore a uniform gloss.
- Step 9: Dimensional accuracy and bend angle were inspected to confirm compliance with design intent.
- Step 10: The finished connector was cleaned, labeled, and packed for delivery, ready for functional testing and assembly validation.


