
Gallery
About Project
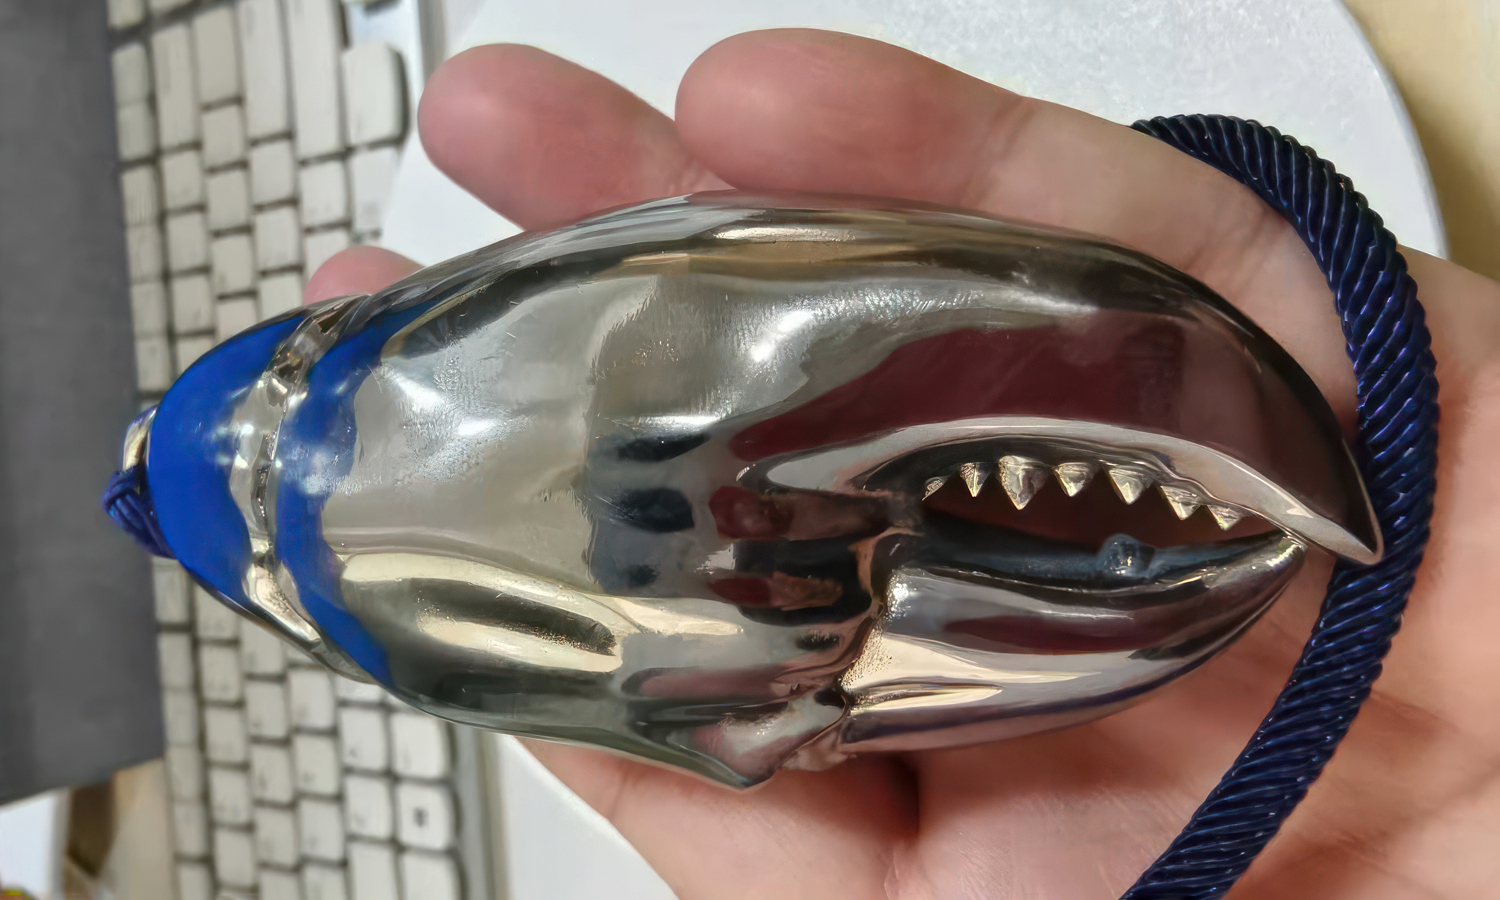
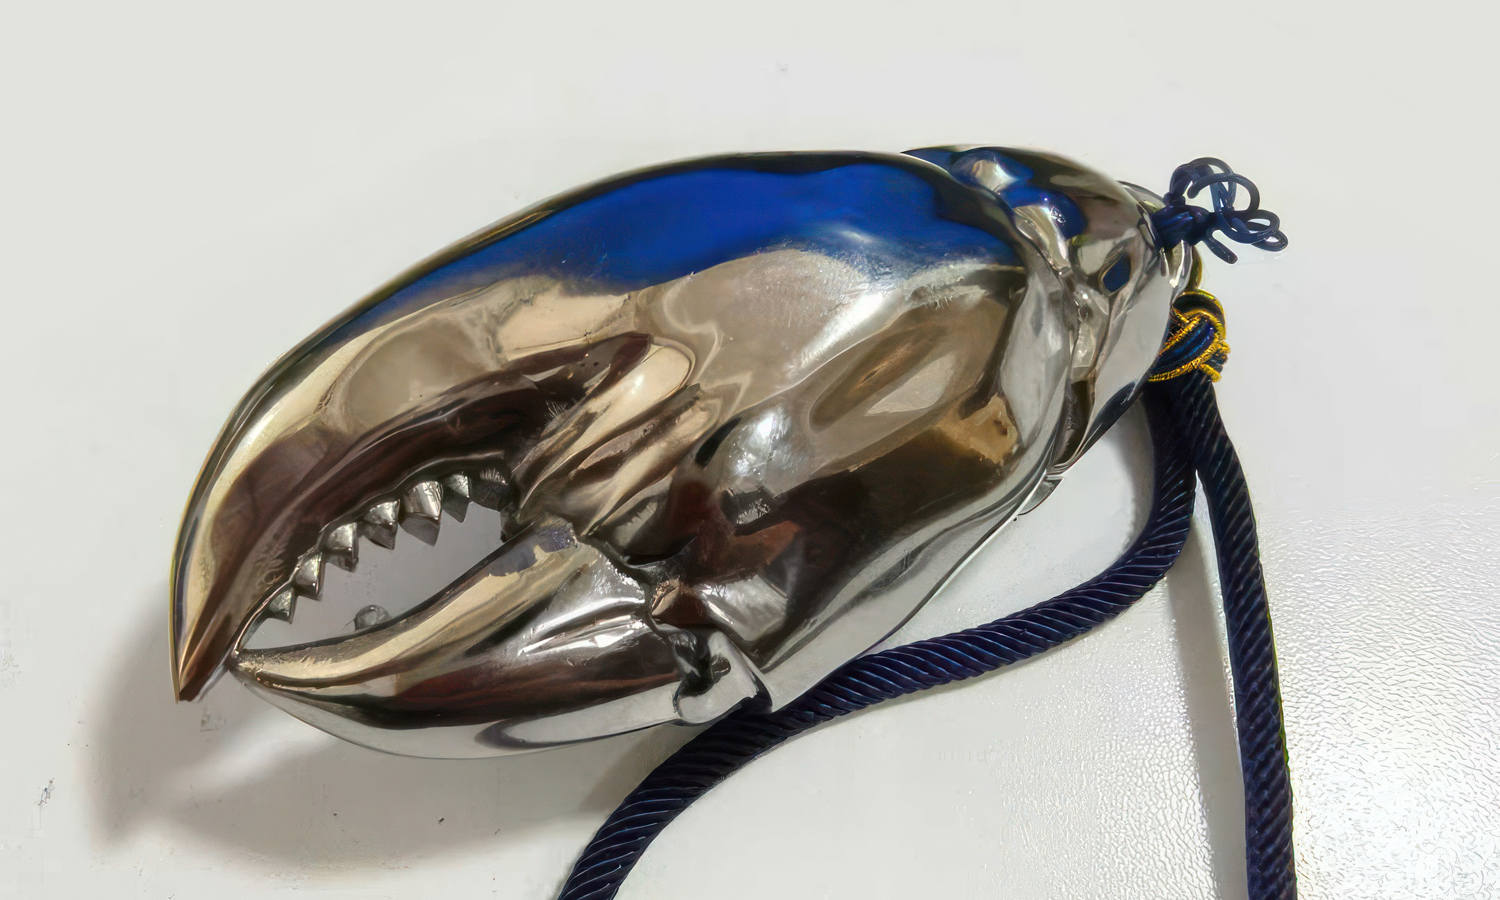
This titanium keychain takes inspiration from a crab’s claw, with a bold, organic curve and lifelike serrations that evoke both natural strength and mechanical precision. The piece weighs 25.18 grams, giving it a dense, premium feel despite its compact size. Its form captures the essence of a crab’s pincer-smooth yet powerful, elegant yet assertive-making it both a striking accessory and a display of craftsmanship.
The surface has been fine-polished to a mirror sheen on most areas, creating a reflective metallic finish that enhances its sculptural look. However, some inner and concave sections remain slightly uneven or matte, a natural result of the complex geometry that makes full polishing difficult. These subtle variations actually enrich the texture and realism of the claw, showing how titanium 3D printing can reproduce intricate organic details with remarkable fidelity.
The printing quality overall is excellent-sharp edges, consistent symmetry, and no visible print lines or support marks. The blend of highly polished and softly matte areas demonstrates both the precision of SLM titanium printing and the skillful hand-finishing involved in the process.
At FacFox, we specialize in metal 3D printing services using titanium, stainless steel, aluminum, and other alloys. With advanced DMLS/SLM technology, we bring intricate, durable, and visually stunning designs like this titanium crab claw to life. Whether for functional prototypes or collectible art pieces, FacFox ensures professional-quality fabrication and post-processing that match your vision.
Solution
- Step 1: The 3D model was prepared, oriented for printability, and supports were generated for overhangs.
- Step 2: The part was printed by SLM/DMLS in Ti-6Al-4V at fine layer thickness, building the serrated claw geometry.
- Step 3: The build was stress-relieved, then the part was removed from the plate and all supports were cut and trimmed.
- Step 4: Edges were deburred and the surface was uniformly blasted/tumbled to remove print texture.
- Step 5: Accessible faces were hand-sanded through progressive grits to refine flatness and curvature.
- Step 6: Mirror finishing was achieved by compound buffing; recessed joints and inner serrations remained satin where polishing tools could not fully reach.
- Step 7: The part was ultrasonically cleaned and, if required, chemically passivated to enhance corrosion resistance.

