Gallery
About Project
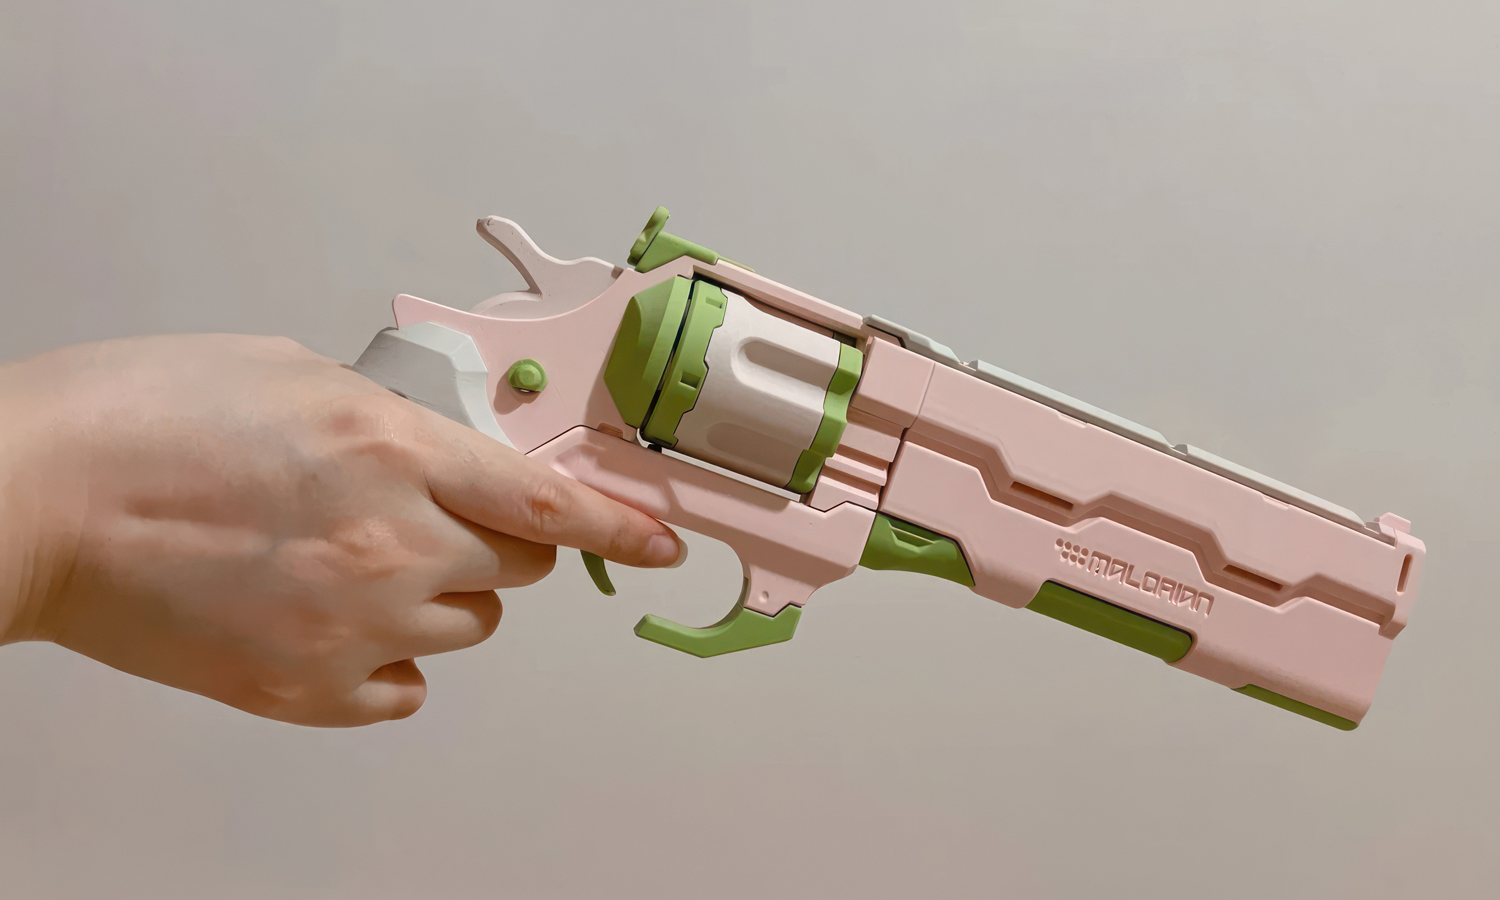
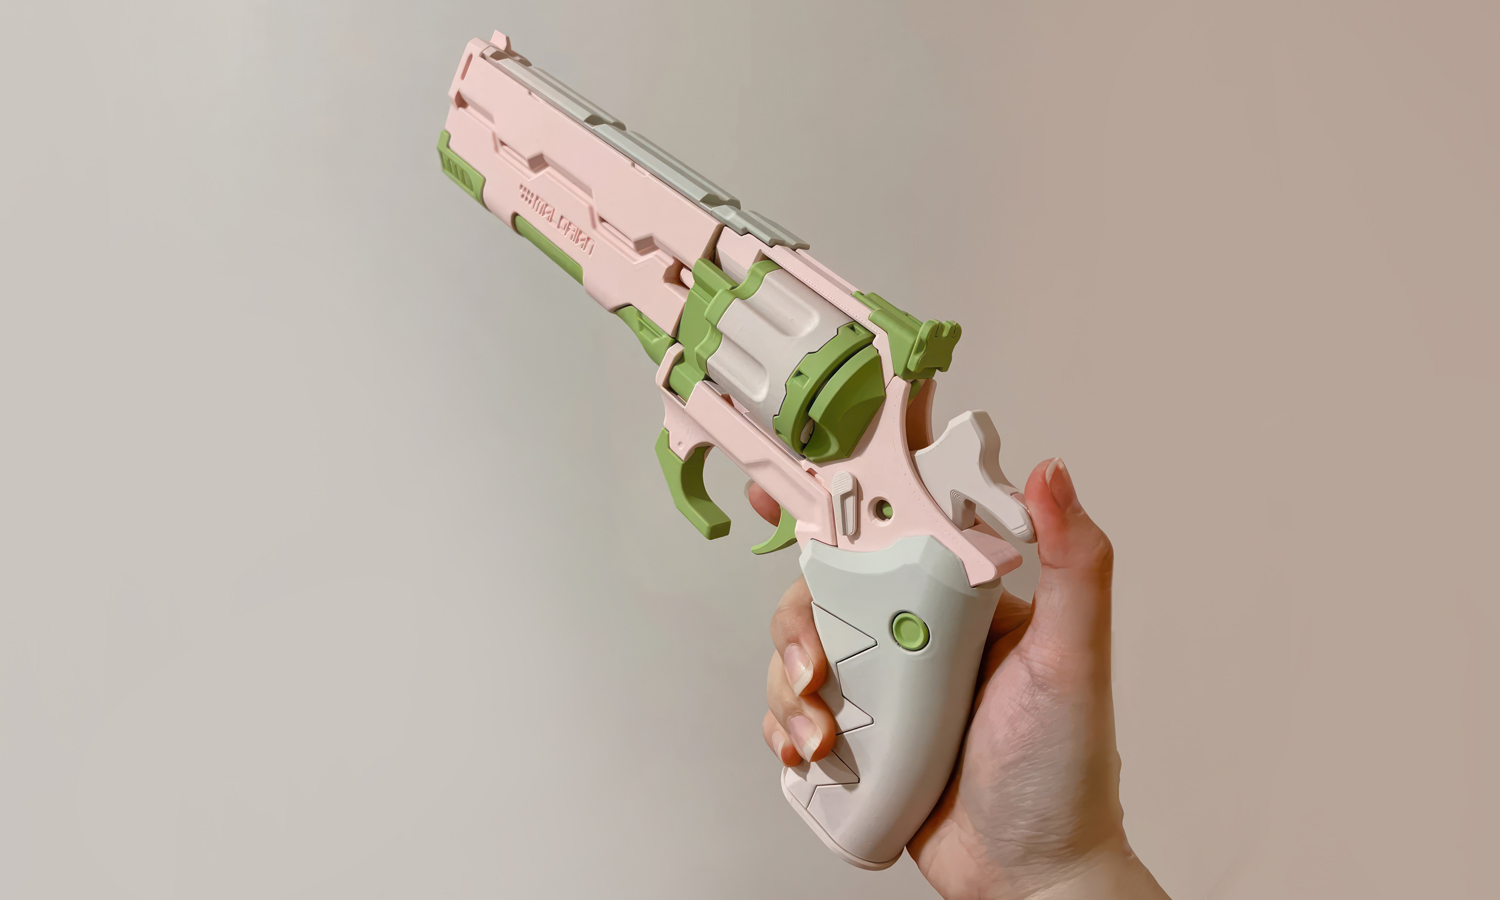
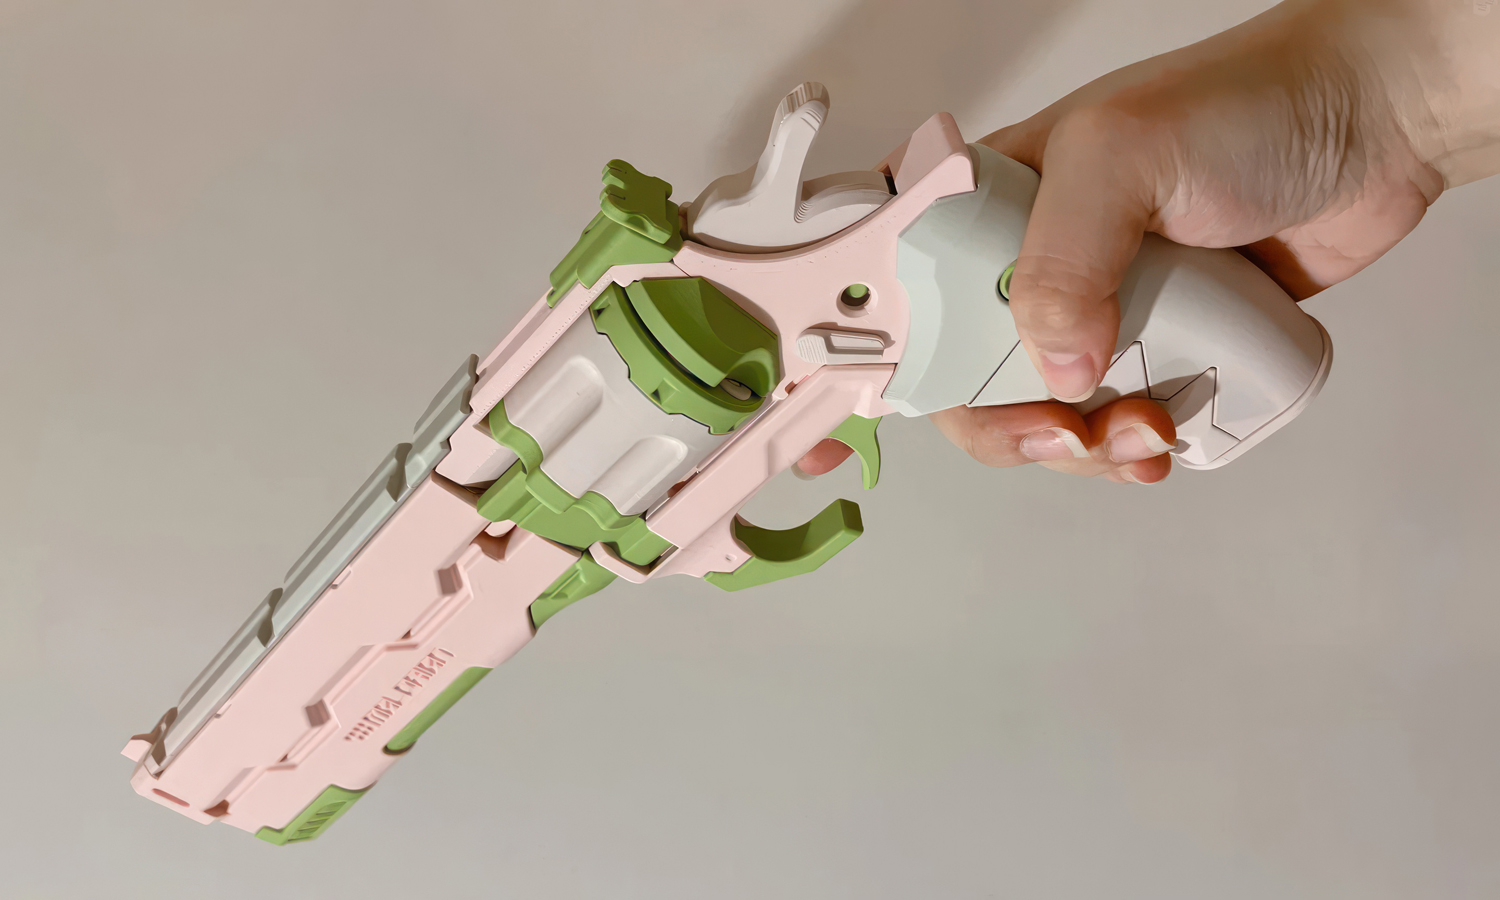
Check out this stunning fan-made replica of the iconic Malorian Arms 3516 from Cyberpunk 2077 – completely 3D printed and reimagined in soft pastel tones of pink, mint green, and white! It’s not just a toy, it’s a piece of art.
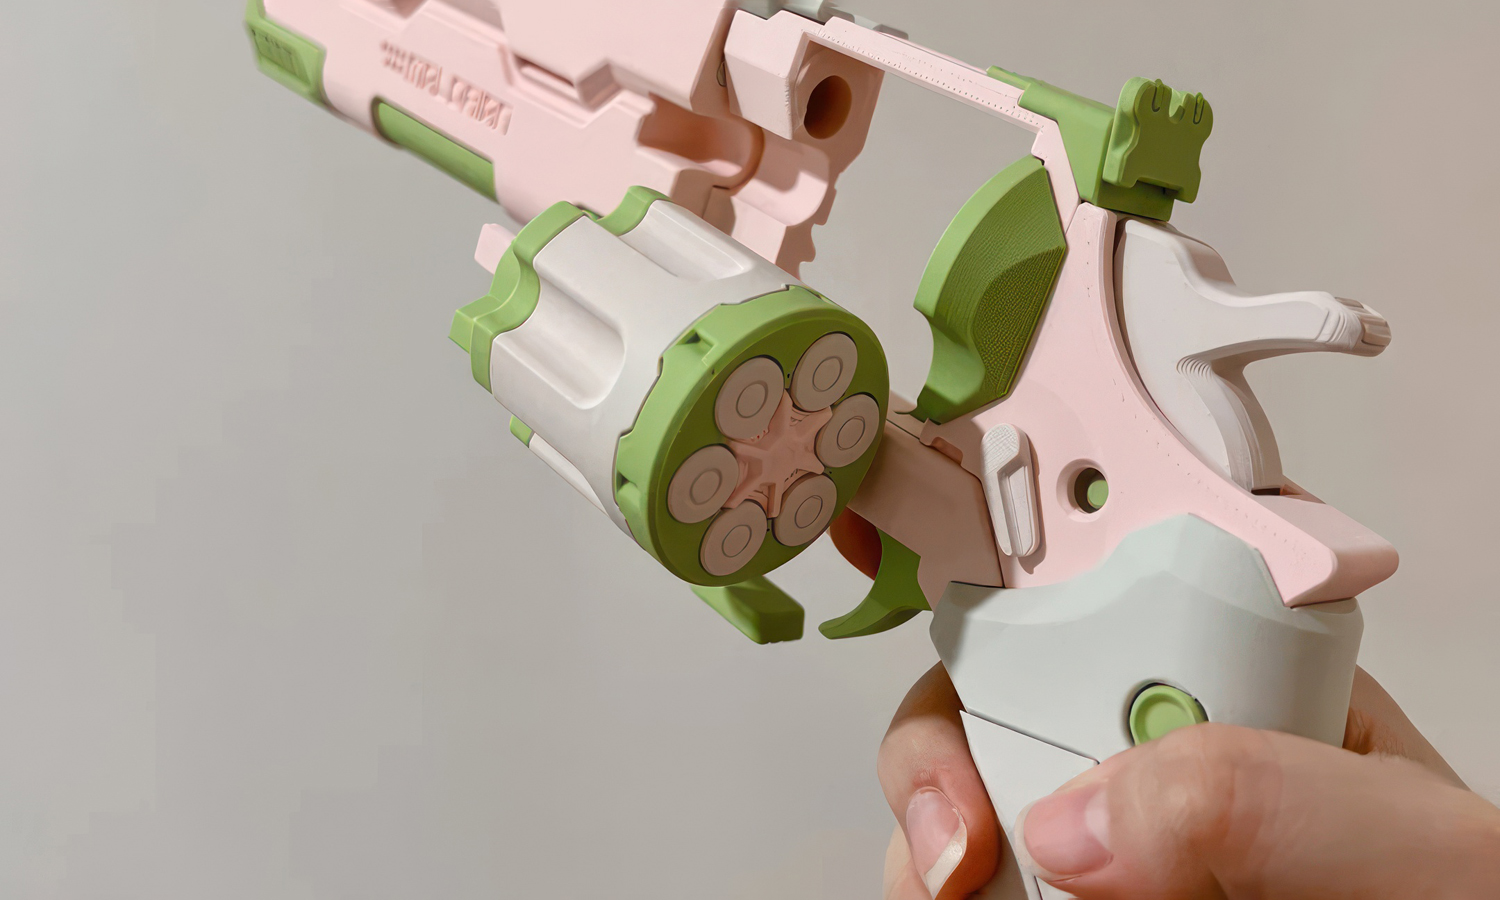
From the precision of the rotating cylinder to the multi-part assembly for easy post-processing, this piece shows just how far FDM 3D printing can go in the hands of a creative maker. The parts were printed separately, carefully sanded, and pieced together like a puzzle – and the result is jaw-droppingly cool!
Whether you’re building cosplay props, collectibles, or display pieces, 3D printing is the ultimate way to bring your fandom fantasies to life.
At FacFox, we specialize in multi-color FDM 3D printing, high-detail SLA resin printing, and full-on prop production for makers, designers, and fans alike. Have a model in mind? We’ll help you make it real – responsibly and beautifully.
Your imagination, our precision.
Solution
- Step 1: Model Preparation. A detailed 3D model of the Malorian Arms 3516 revolver was sourced and modified for multi-part FDM printing. The design was segmented to allow for color separation and easy assembly.
- Step 2: Slicing and Color Planning. Each part was sliced using multi-material FDM slicing software. Color assignments were planned to match the pastel palette: pink, mint green, white, and gray.
- Step 3: 3D Printing. The components were printed using an FDM 3D printer. Multiple filaments were manually swapped or printed with a multi-extrusion setup to achieve the desired color effect. PLA filament was likely used for its ease of use and vibrant finish.
- Step 4: Support Removal and Cleaning. Once printing was completed, all support structures were carefully removed. The surfaces were cleaned and lightly sanded to ensure smooth assembly.
- Step 5: Assembly. The printed parts were fitted and glued together with precision. Moving elements such as the cylinder were checked for alignment and functionality (non-firing).
- Step 6: Final Touches. Minor surface imperfections were corrected with additional sanding. The final prop was inspected for visual consistency and structural integrity.


