Material Resin
Quantity 1 pcs
Price Range $1-100
Lead Time 3 workdays
Gallery
About Project
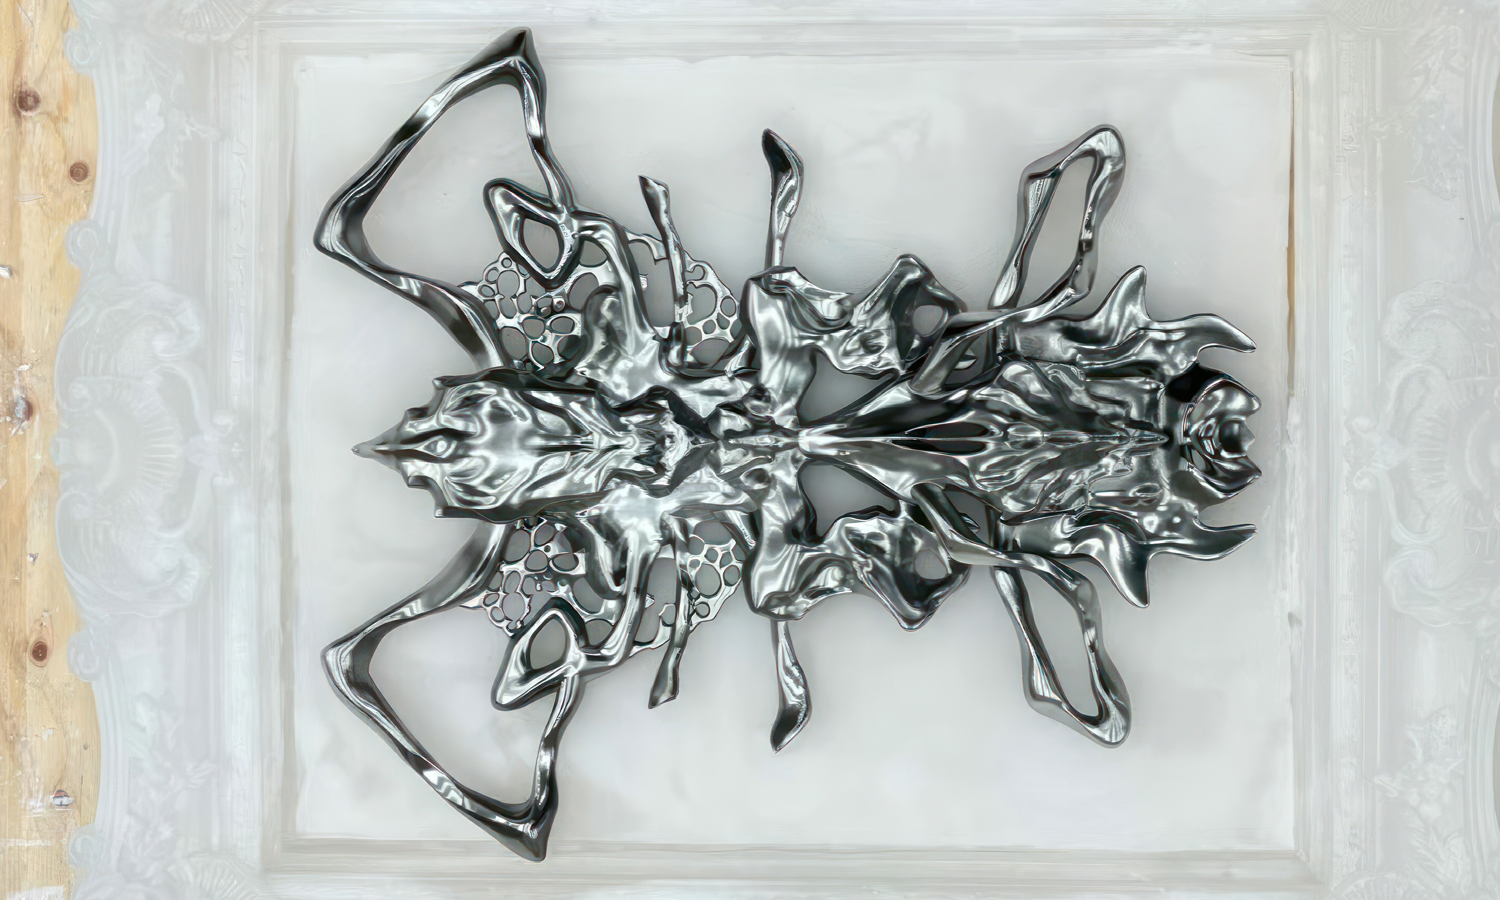
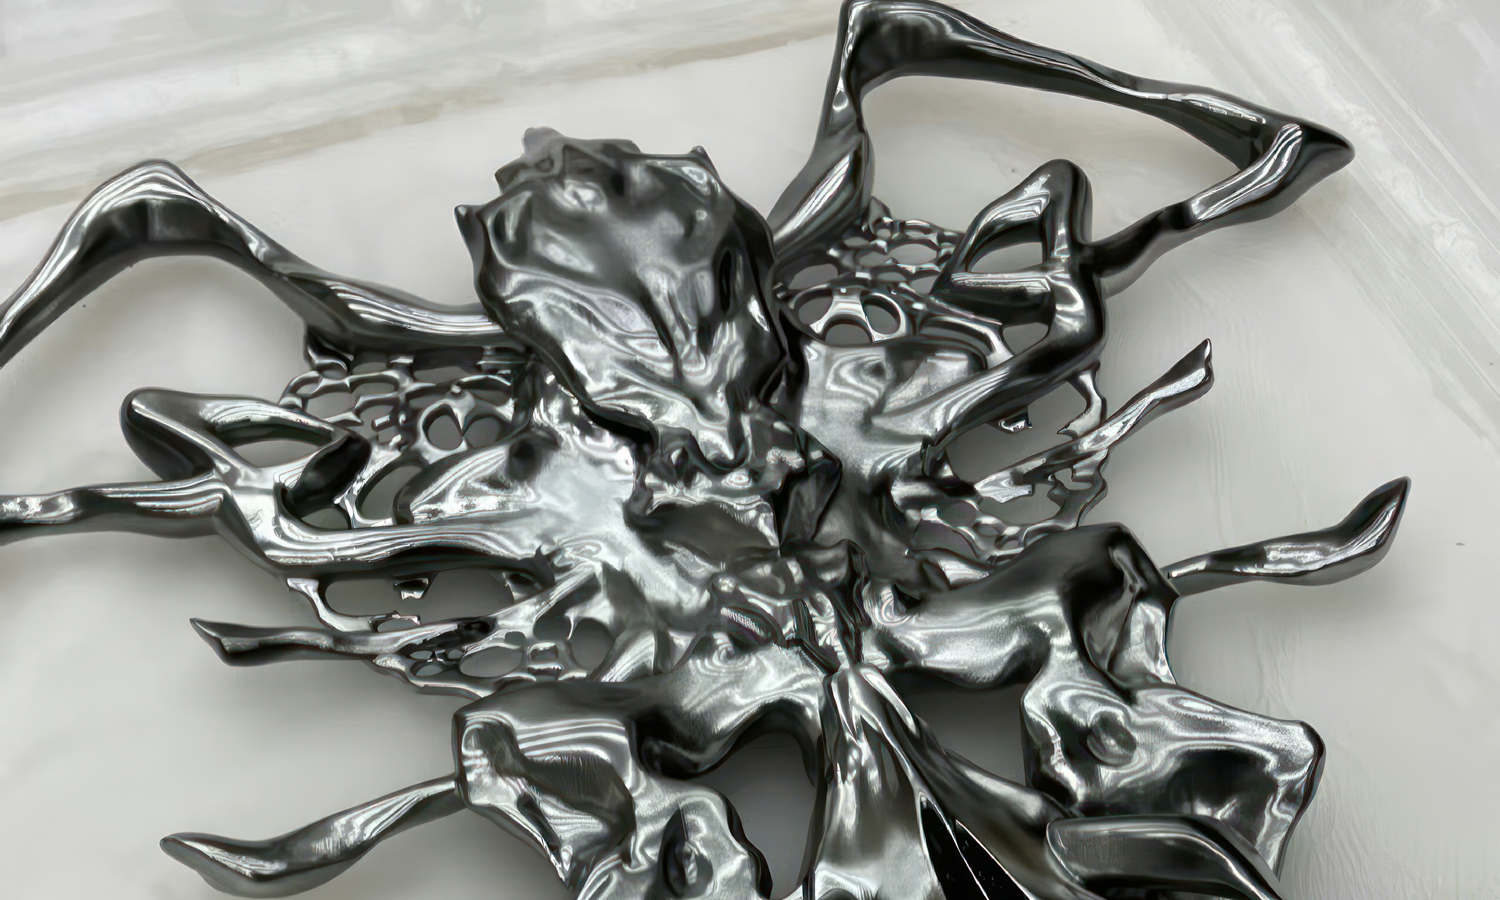
This striking piece presents an abstract interpretation of the human form, rendered in a highly reflective, metallic finish. Set within a baroque-style translucent white frame, the centerpiece evokes the anatomy of a body or insect with symmetrical, alien-like features. The design seems both organic and biomechanical – possibly representing a deconstructed human torso with wings or limbs extending outward, inviting viewers to reflect on identity, transformation, or otherworldly aesthetics.
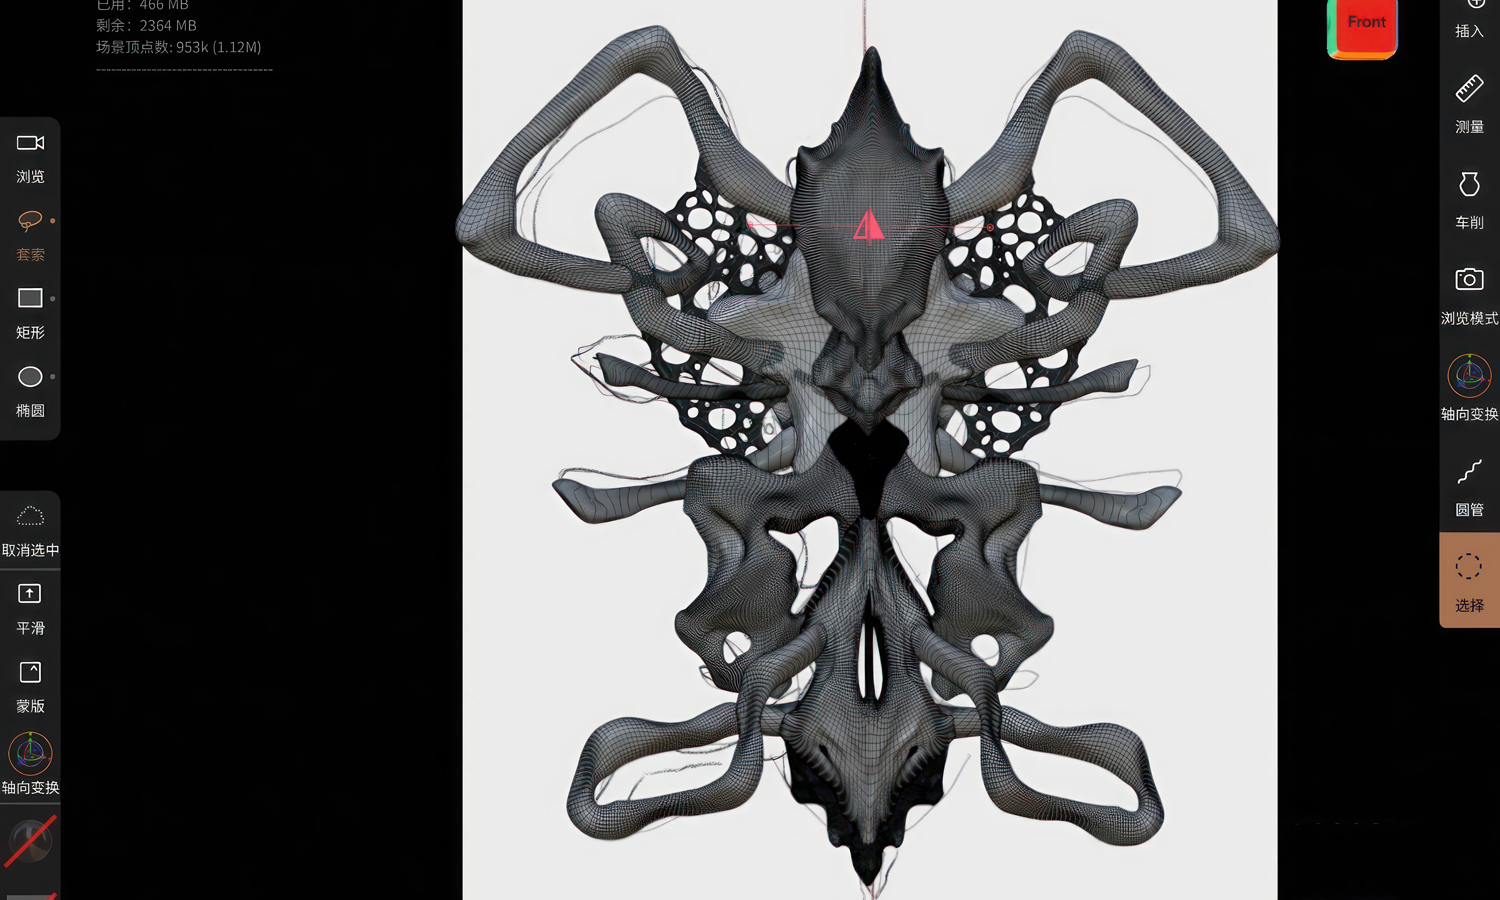
According to the artist, this was their first experience creating art with 3D printing. The modeling was done using Nomad Sculpt on an iPad – showcasing how digital tools and hand-sculpting can blend seamlessly. The sculpt was then 3D printed through a Chinese manufacturer, praised for being faster and more affordable than overseas alternatives. After printing, the piece underwent meticulous post-processing, including fine polishing and a final application of mirror chrome coating to achieve the dramatic, glossy look.
This case highlights how 3D printing empowers artists to bring complex digital creations into the physical world with remarkable precision and visual impact.
At FacFox, we provide custom 3D printing services for digital artists, designers, and studios seeking similar high-fidelity results. Whether you’re working on concept art, body forms, abstract sculptures, or decorative installations, we offer full support from file preparation to post-finishing – including polishing, painting, and electroplating. Let us help you transform your vision into a tangible masterpiece.
Solution
- Step 1: Digital Sculpting. The digital model was sculpted using Nomad Sculpt on an iPad, with detailed shaping completed by hand using a stylus.
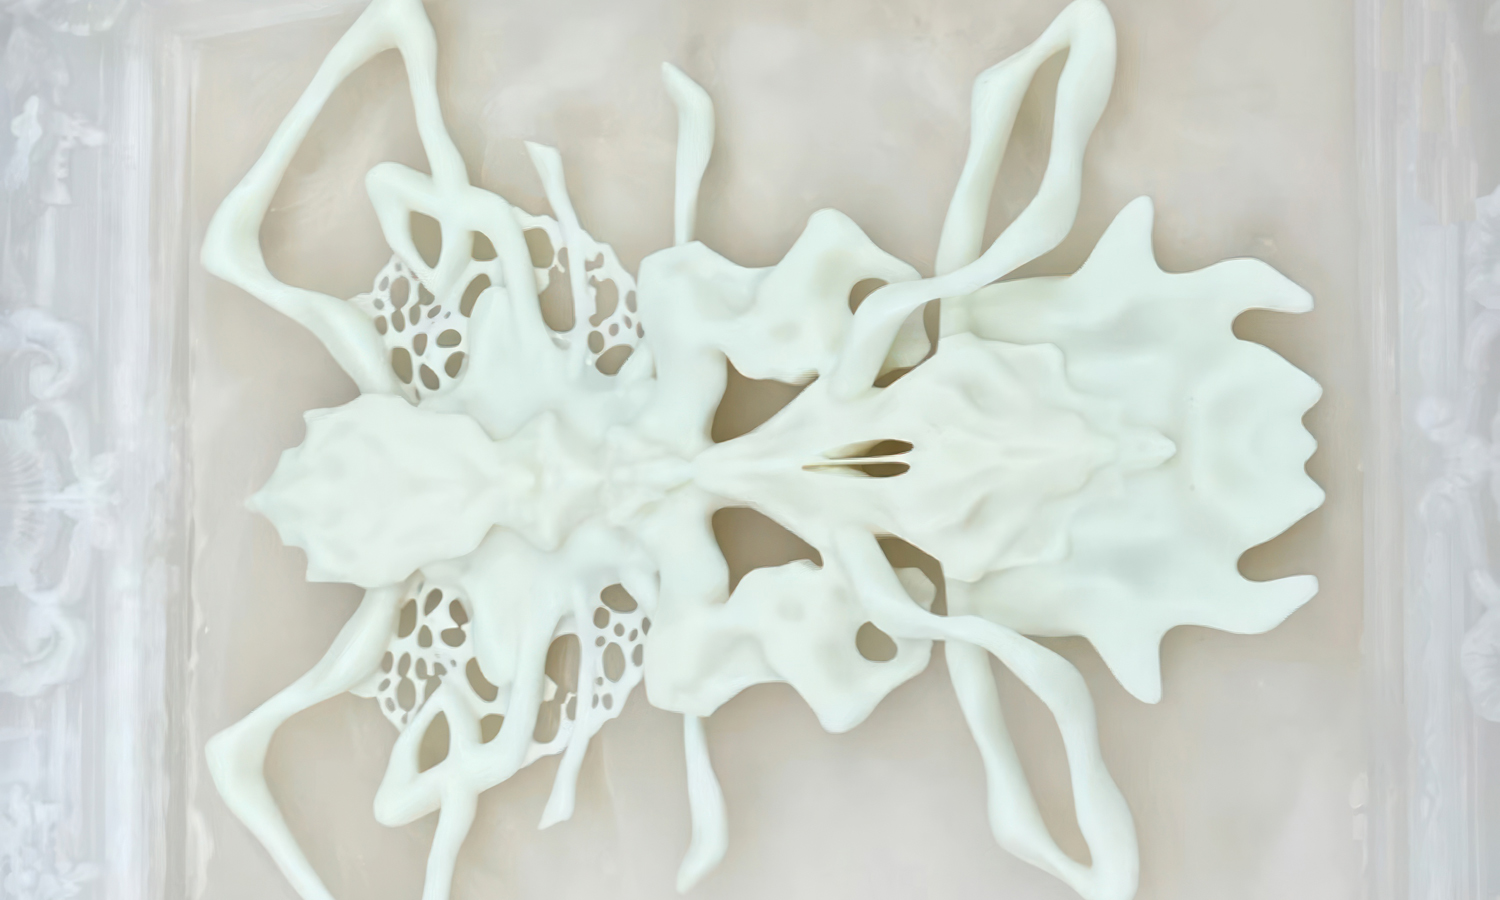
- Step 2: 3D Printing. The file was exported and sent to a professional 3D printing service, where it was printed in Tough Resin using SLA (stereolithography) technology to ensure high strength and fine detail.
- Step 3: Support Removal. After printing, the model was carefully removed from the build platform, and all support structures were detached without damaging the surface.
- Step 4: Initial Sanding. The surface was sanded dry using 1000-grit sandpaper to smooth out layer lines and surface irregularities.
- Step 5: Wet Sanding. The model was then wet-sanded with 2000-grit sandpaper to further refine the surface and prepare it for finishing.
- Step 6: Polishing. After sanding, the piece was polished to a high gloss to eliminate any remaining dullness and to create a smooth, reflective base.
- Step 7: Mirror Coating. Finally, a mirror-like metallic coating was applied evenly across the surface to achieve the distinctive chrome finish seen in the final piece.


