
Material Plastic
Quantity 1 pcs
Price Range $1-100
Lead Time 2 workdays
Gallery
About Project
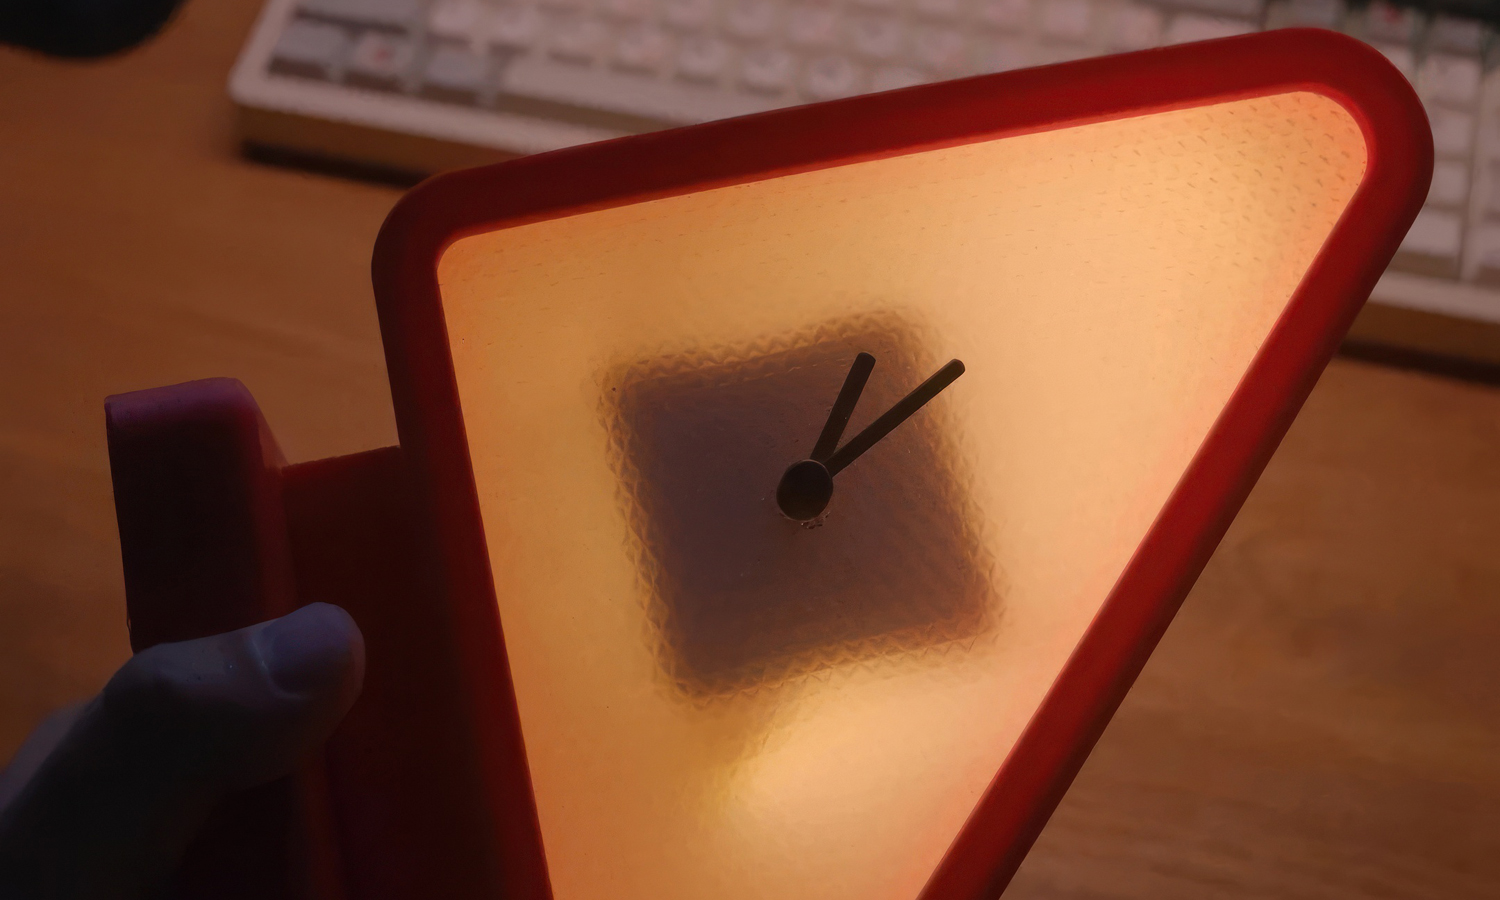
In the world of design and technology, 3D printing has become a revolutionary tool for creativity and problem-solving. Uncle Jiang, a passionate DIY enthusiast, has leveraged this technology to replicate a popular clock design that is otherwise difficult to find – the Dulton-style triangular clock. Using a 3D printer, Uncle Jiang crafted a stunning piece that combines modern aesthetics with the versatility of 3D printing.
Dulton clocks are known for their distinctive triangular shape and minimalist design. However, Uncle Jiang found it challenging to source an authentic Dulton clock due to either limited availability or high costs. The decision was made to create a custom, 3D-printed version that captured the essence of the Dulton clock while offering flexibility in design and accessibility.
Design Process
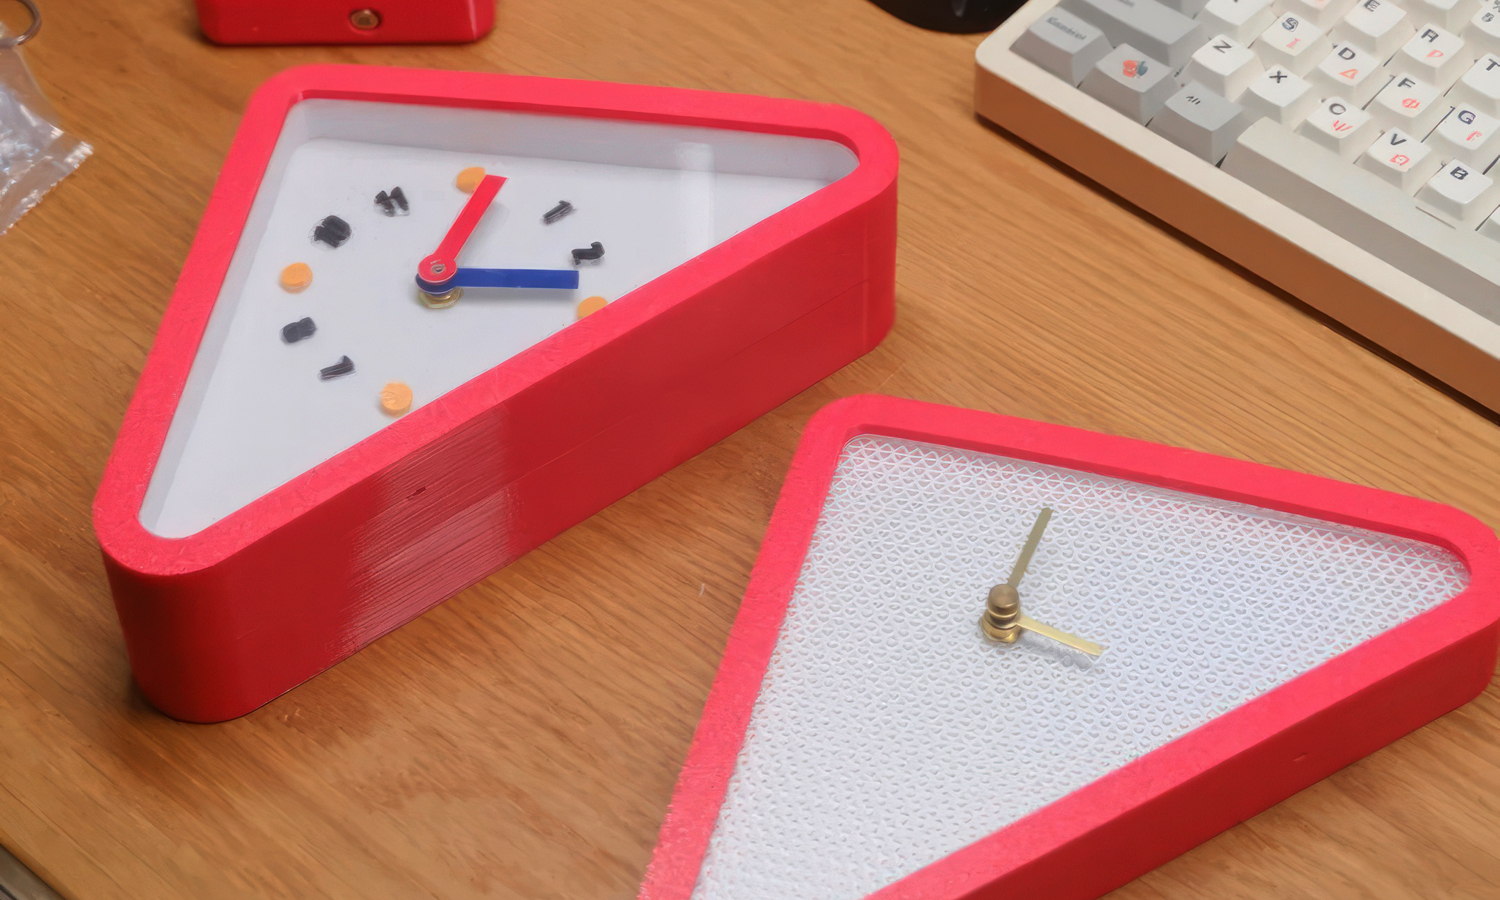
Uncle Jiang began by studying the Dulton clock’s design elements: the clean triangular casing, the minimalist dial, and the simple black hour and minute hands.
A crucial aspect of the design was to ensure that the clock maintained functionality while also serving as an aesthetically pleasing object. With a focus on both form and function, Uncle Jiang made slight modifications to the original design to personalize the clock.
Using a 3D printer, Uncle Jiang crafted the clock’s casing from red filament, providing it with a bold, vibrant look. The clock face features classic dotted hour markers and subtle backlighting, which not only adds to the visual appeal but also enhances the clock’s readability in low-light conditions.
Materials and Technology
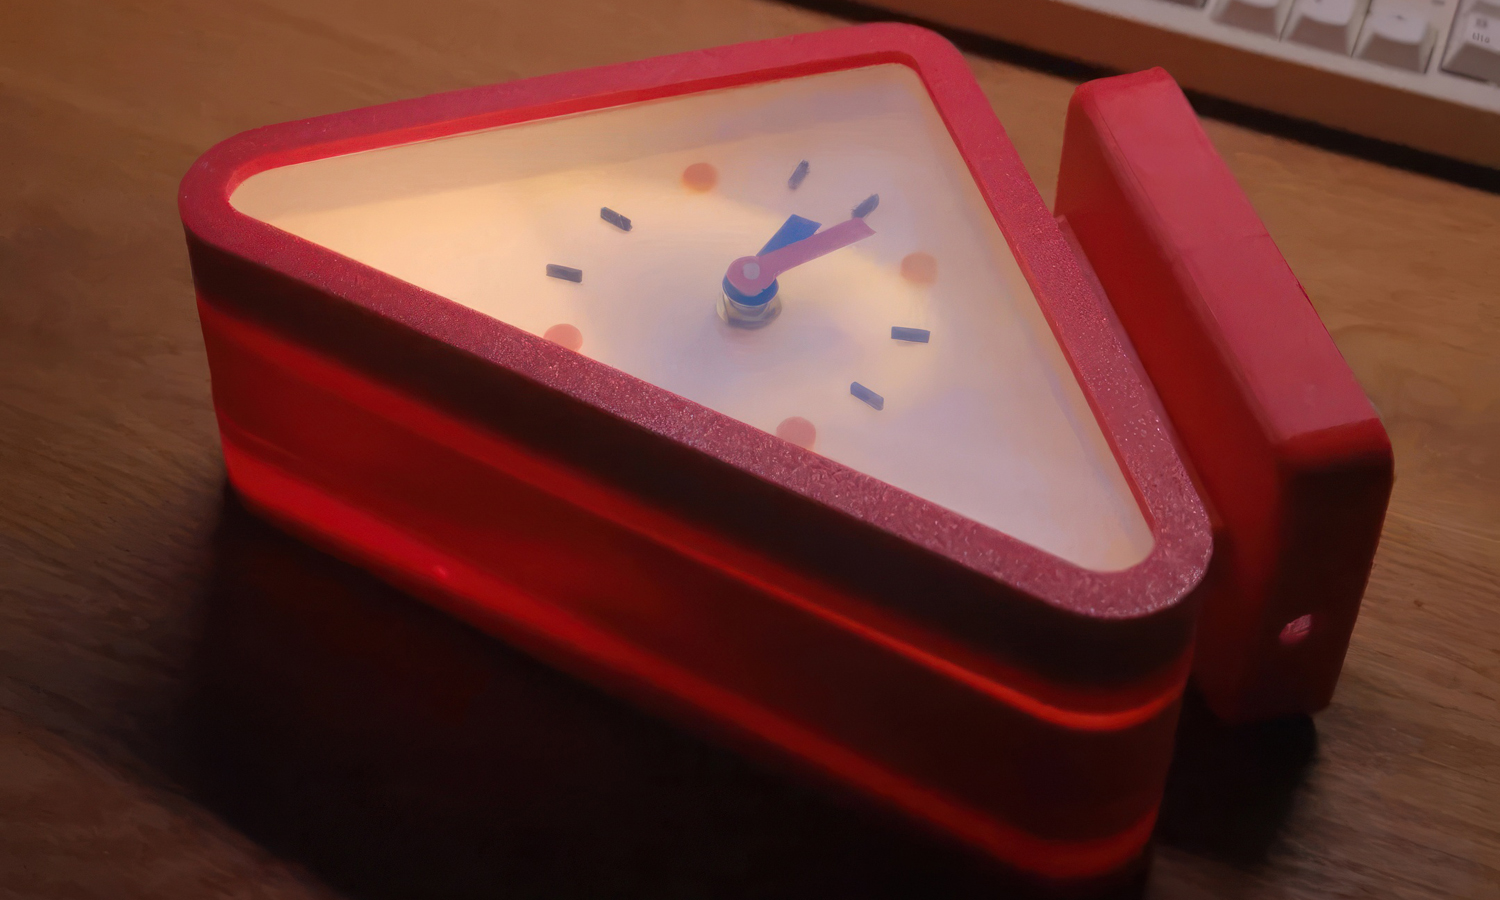
The clock was created using high-quality 3D printing materials that ensured durability and a smooth finish. The precision of the 3D printer allowed Uncle Jiang to achieve clean lines and details, making the clock an eye-catching focal point in any room. The backlighting feature was achieved by incorporating a light source inside the casing, giving the clock an inviting glow.
Challenges and Solutions
While the design was conceptually sound, there were a few challenges during the creation process. The key difficulty was ensuring that the clock’s minute and hour hands were correctly proportioned and functional despite the compact design. Uncle Jiang fine-tuned the mechanical aspects to ensure the clock remained accurate and functional while maintaining the overall aesthetic.
Outcome and Reception
The 3D-printed Dulton-style clock was met with positive feedback from design communities and DIY enthusiasts alike. The clock’s clean, bold appearance and practical functionality make it an ideal piece for modern homes and workspaces. Moreover, Uncle Jiang’s ability to create such a personalized and functional item using 3D printing showcases the potential of this technology in transforming design possibilities.
Solution
- Step 1: Design Preparation. The 3D model of the Dulton-style clock was designed using CAD software. The clock’s triangular casing, dial, and other design elements were carefully mapped out, with adjustments made to suit the 3D printing process.
- Step 2: 3D Printing the Casing. The 3D printer was set up with red filament, and the casing of the clock was printed layer by layer. The print was completed with precise attention to detail to ensure the triangular shape and smooth edges of the casing were accurately formed.
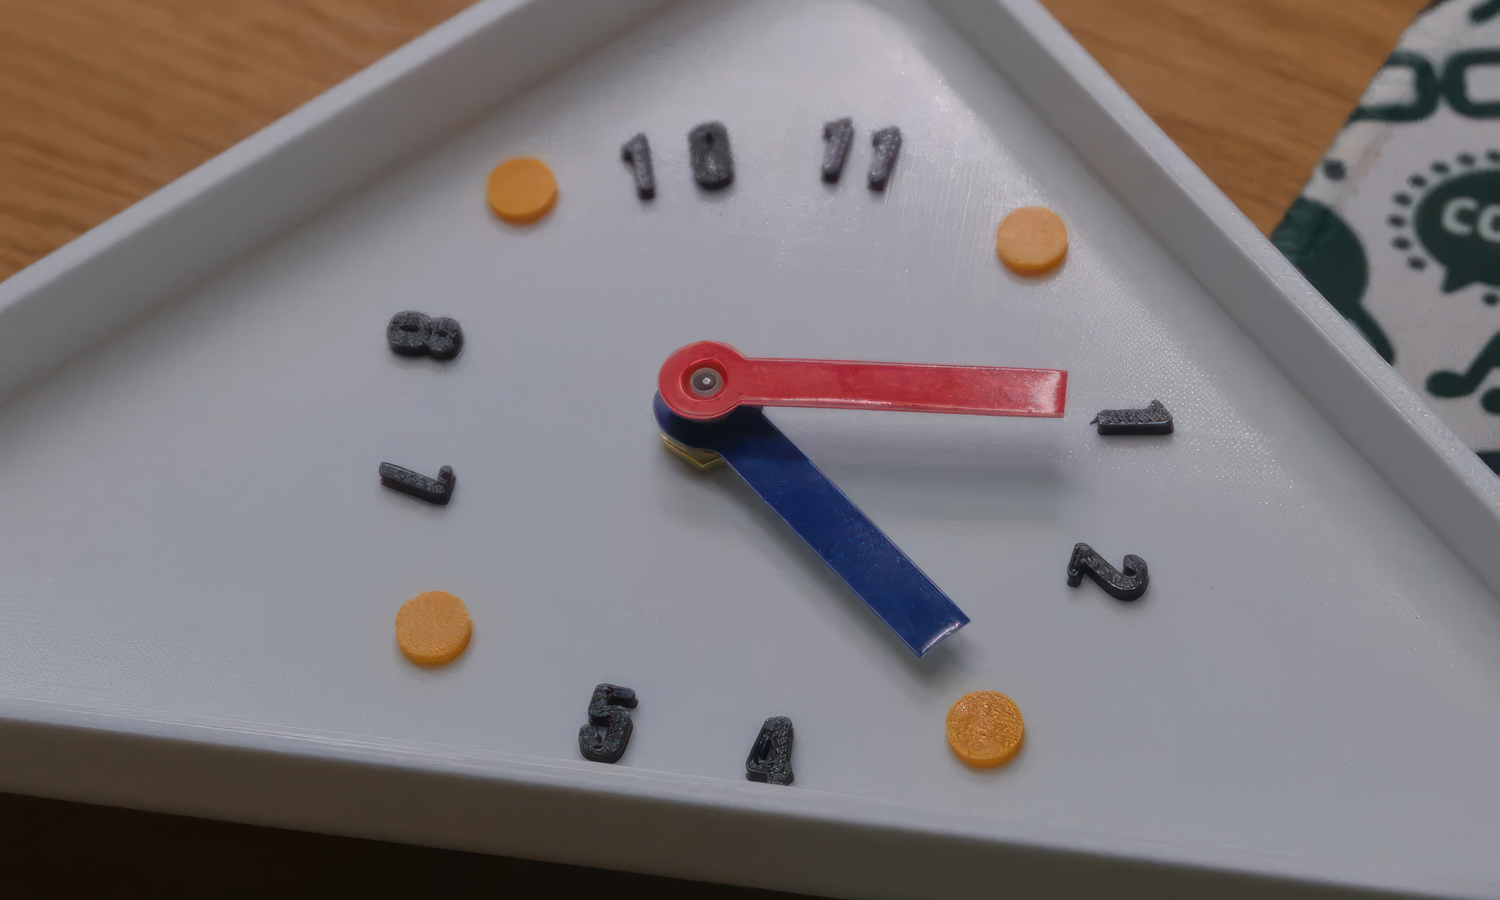
- Step 3: 3D Printing the Clock Face and Markers. The clock face, including the hour markers, was printed separately using a different filament for contrast. A smooth surface finish was ensured to allow for proper application of the hour markers and to maintain the visual clarity of the clock’s face.
- Step 4: Printing the Clock Hands. The hour and minute hands were printed using small, precise layers to ensure a functional yet delicate finish. The components were designed to be lightweight but strong enough to rotate freely without obstruction.
- Step 5: Post-Processing the Printed Parts. After the parts were printed, they were carefully removed from the build platform. The printed surfaces were then smoothed using light sanding to remove any visible print lines and to ensure the final product had a polished appearance. This step also included removing any support structures left from the printing process.
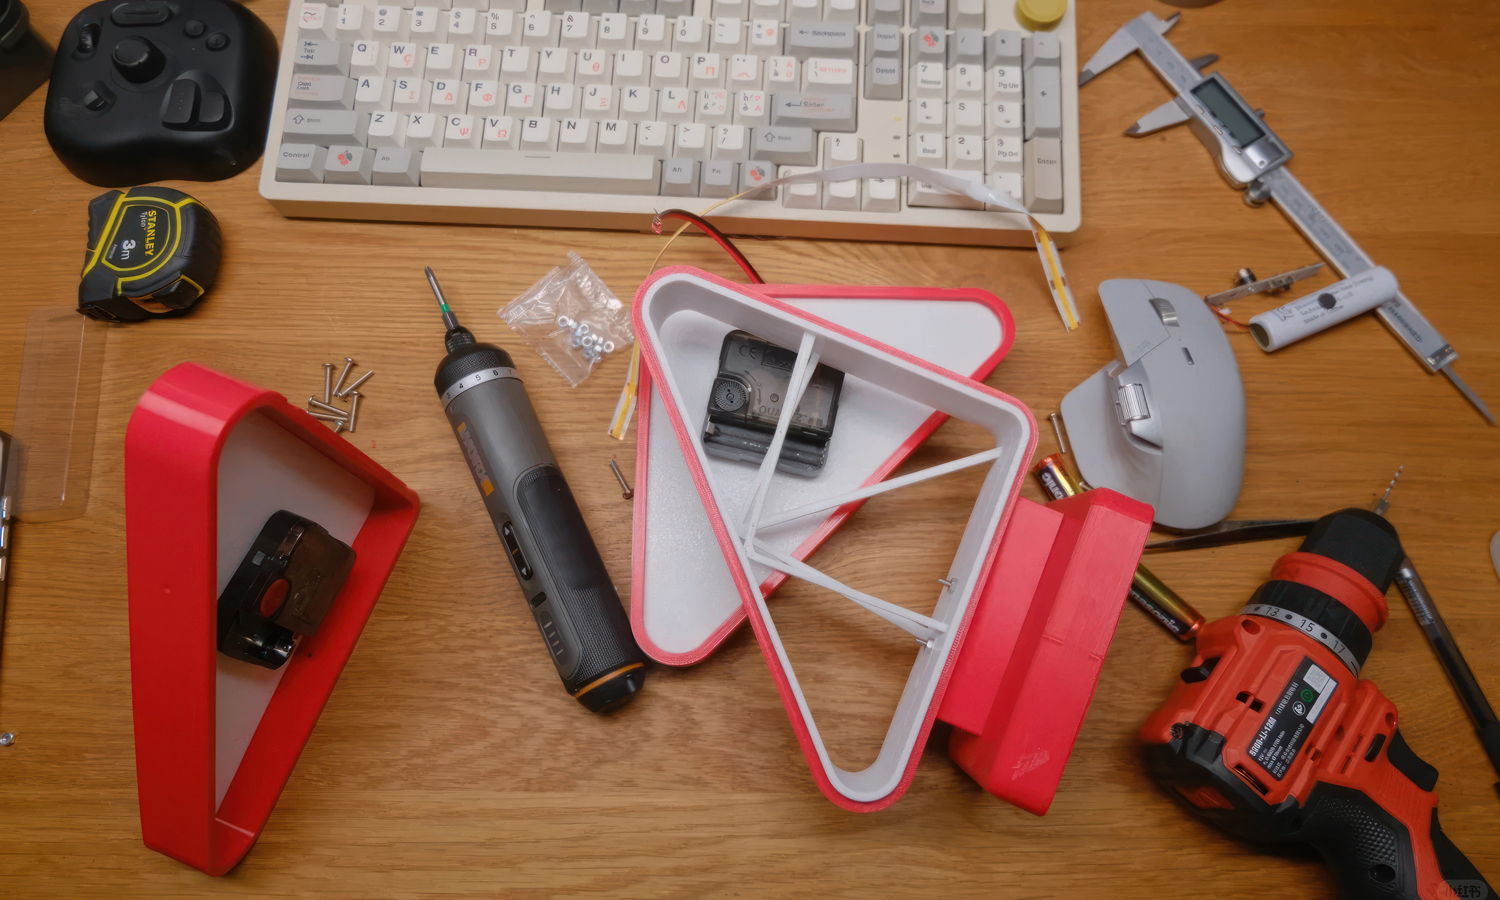
- Step 6: Assembling the Clock Mechanism. The clock mechanism, including the movement and motor, was placed into the printed casing. The clock hands were carefully attached to the mechanism, ensuring they were properly aligned and able to rotate smoothly.
- Step 7: Installing the Backlight. A small LED light source was positioned inside the casing, behind the clock face, to provide subtle backlighting. The light was tested for even illumination, ensuring the clock face was well-lit without overwhelming the design.
- Step 8: Final Assembly. The clock face, backlight, and mechanism were all assembled into the 3D-printed casing. The parts were secured in place, and the clock was tested for accuracy, with adjustments made to ensure the time was displayed correctly.
- Step 9: Testing and Calibration. The final clock was powered on and the timekeeping functionality was tested. Adjustments were made to ensure that the hour and minute hands moved correctly and that the clock kept accurate time.
- Step 10: Final Inspection. A final inspection was conducted to check the overall appearance, functionality, and build quality of the clock. Any remaining imperfections were addressed, and the clock was cleaned for presentation.


