Material Resin
Quantity 1 pcs
Price Range $1-100
Lead Time 5 workdays
Gallery
About Project
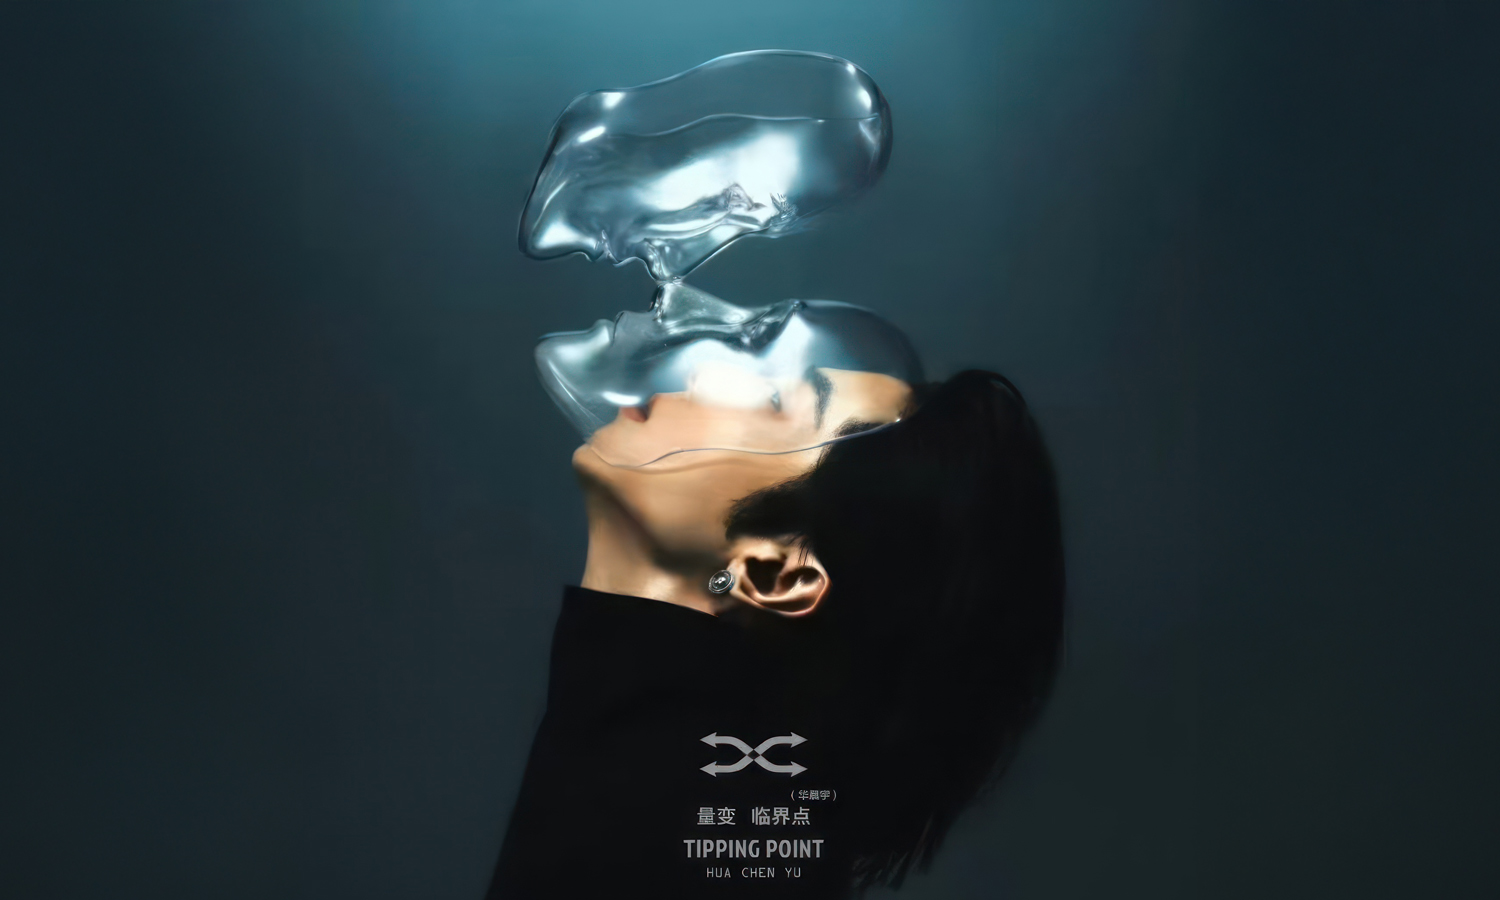
The striking visual for Hua Chen Yu’s album “Tipping Point” features the artist partially obscured by two stunning, face-shaped masks, locked in a nose-to-nose position. These ethereal masks, crafted from a crystal-clear resin, play a crucial role in conveying the album’s themes of duality, introspection, and transformation. The smooth, reflective surfaces of the masks catch the light, creating a sense of otherworldly beauty and adding a layer of intrigue to the overall composition. Their delicate features and precise positioning contribute to the surreal and captivating atmosphere of the cover.
The choice of clear resin for these masks was essential in achieving the desired aesthetic. The transparency allows Hua Chen Yu’s features to be subtly visible beneath, creating a fascinating interplay between the artist and the symbolic objects. The smooth, glass-like finish of the resin enhances the dreamlike quality of the image, while the inherent fragility of the material hints at the delicate balance between opposing forces or ideas. The masks act as both a barrier and a lens, inviting the viewer to look closer and decipher the deeper meaning behind the image. They represent a powerful visual metaphor for the album’s exploration of critical moments and personal breakthroughs.
Achieving this level of detail and clarity requires expertise in advanced 3D printing techniques. FacFox specializes in high-quality clear resin 3D printing, capable of producing intricate designs with exceptional precision and clarity. If you’re looking to bring your own creative visions to life with the same level of artistry and detail, FacFox’s services are the perfect solution. From concept to creation, we can help you realize your projects with stunning results.
Solution
- Step 1: Digital Model Created.┬ĀA detailed 3D model of the two face-shaped masks, connected as a single piece, was designed using specialized CAD software.
- Step 2: Model Prepared for Printing.┬ĀThe digital model was sliced into numerous thin layers by dedicated software, generating instructions for the 3D printer. Support structures were added to the model in the software to ensure stability during the printing process.
- Step 3: Resin Vat Filled.┬ĀA vat of liquid, UV-curable resin was filled to the appropriate level.
- Step 4: Build Platform Positioned.┬ĀA build platform was positioned within the resin vat, just below the surface of the liquid resin.
- Step 5: Laser Directed.┬ĀA UV laser beam was precisely directed by mirrors, tracing the cross-section of each layer of the connected mask design onto the resin.
- Step 6: Resin Cured.┬ĀThe resin exposed to the laser was solidified, forming a thin layer of the masks.
- Step 7: Build Platform Moved.┬ĀThe build platform was then moved downwards, a distance equal to the thickness of one layer.
- Step 8: Layers Repeated.┬ĀThe process of laser curing and platform movement was repeated layer by layer, building the connected masks from the bottom up.
- Step 9: Support Structures Formed.┬ĀSimultaneously, the support structures designed in the software were also built, providing necessary support to the overhanging parts of the masks during the printing process.
- Step 10: Support Structures Removed.┬ĀThe support structures were carefully detached from the connected masks when printing completed.
- Step 11: Post-Curing Performed.┬ĀThe masks were then subjected to a post-curing process under UV light to further strengthen and solidify the resin.
- Step 12: Sanding Performed.┬ĀThe surfaces of the masks were thoroughly sanded using progressively finer grits of sandpaper to remove layer lines and imperfections.
- Step 13: Polishing Performed.┬ĀFollowing sanding, the masks were polished to achieve a smooth, high-gloss finish.
- Step 14: Acrylic Coating Applied.┬ĀA clear acrylic oil or coating was applied to the masks to enhance their clarity, protect the surface, and provide a final glossy finish.


