Material Resin
Quantity 2 pcs
Price Range $1-100
Lead Time 1 workdays
Gallery
About Project
At Facfox, we’re proud to introduce our SLA High-temp Resin-140Ōäā and showcase its potential through our latest 3D printed testing plates. Designed to withstand extreme temperatures, this innovative material is ideal for your high-temperature applications, ensuring reliability and performance.
Testing Insights
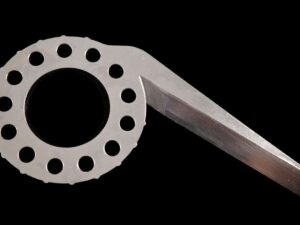
We’ve printed two plates to rigorously test this heat-resistant resin, revealing both strengths and areas for improvement:
- Surface Quality: The plates have an overall smooth matte finish, but with visible lines and tiny air bubbles in the horizontal stages.
- Precision: While thicker sections performed well, the thinner sections (0.2 mm to 0.6 mm) exhibited holes and the label between 0.2 mm and 0.4 mm broke off, highlighting potential challenges with intricate details.
- Edge Quality: The right edge of the plate has bubbles, and the dented vertical bars show wrapped edges, indicating room for refinement in achieving perfect edges.
- Roundness: Holes on the right top were not perfectly round, emphasizing limits in fine precision.
SLA High-temp Resin-140Ōäā is not the best choice for printing intricate parts or display models requiring a smooth surface. We recommend a minimum wall thickness of more than 2 mm to achieve optimal results.
Why Choose Facfox’s 3D Printing Services?
Facfox’s 3D printing services offer advanced heat-resistant materials like the SLA High-temp Resin-140Ōäā, ensuring your projects are durable and high-performing. With our team of experts guiding you from design to the final product, you can trust Facfox to deliver quality and innovation in every print.
Elevate your projects with the power of high-temp SLA 3D printing. Trust Facfox to deliver quality, performance, and innovation!
Solution
- Step 1: Design. The 3D model of the testing plates was designed using CAD software.
- Step 2: Preparation. The 3D model was prepared for 3D printing by optimizing it for the SLA process and ensuring proper orientation for support structures.
- Step 3: Slicing. The 3D model was sliced into thin layers using specialized software.
- Step 4: Resin Tank Preparation. The resin tank was filled with the SLA High-temp Resin 140Ōäā.
- Step 5: Build Platform Positioning. The build platform was positioned in the SLA 3D printer.
- Step 6: Printing. The 3D printing process was initiated. The laser beam was projected onto the resin, solidifying each layer according to the sliced data. Once the printing was complete, the build platform was lowered, and the printed parts were removed from the resin tank.
- Step 7: Washing. The parts were washed with a solvent to remove any residual resin.
- Step 8: Post-curing. The parts were post-cured using UV light or a curing chamber to enhance their mechanical properties and dimensional stability.
- Step 9: Support Structure Removal. The support structures were carefully removed from the printed parts using specialized tools.
- Step 10: Inspection. The printed parts were visually inspected for any defects, such as holes, cracks, or surface imperfections.


