Material Resin
Quantity 2 pcs
Price Range $100-1,000
Lead Time 4 workdays
Gallery
About Project
Imagine holding a miniature version of your next ventilation innovation! 3D printing is revolutionizing the way prototypes are made for facilities, and specifically for ventilation equipment. Scaled-down prototypes created with Stereolithography Apparatus (SLA) can be a cost-effective way to test the form and function of these systems before full-scale production.
Mysterious Mini-Vents: Unveiling the Benefits of SLA 3D Printing
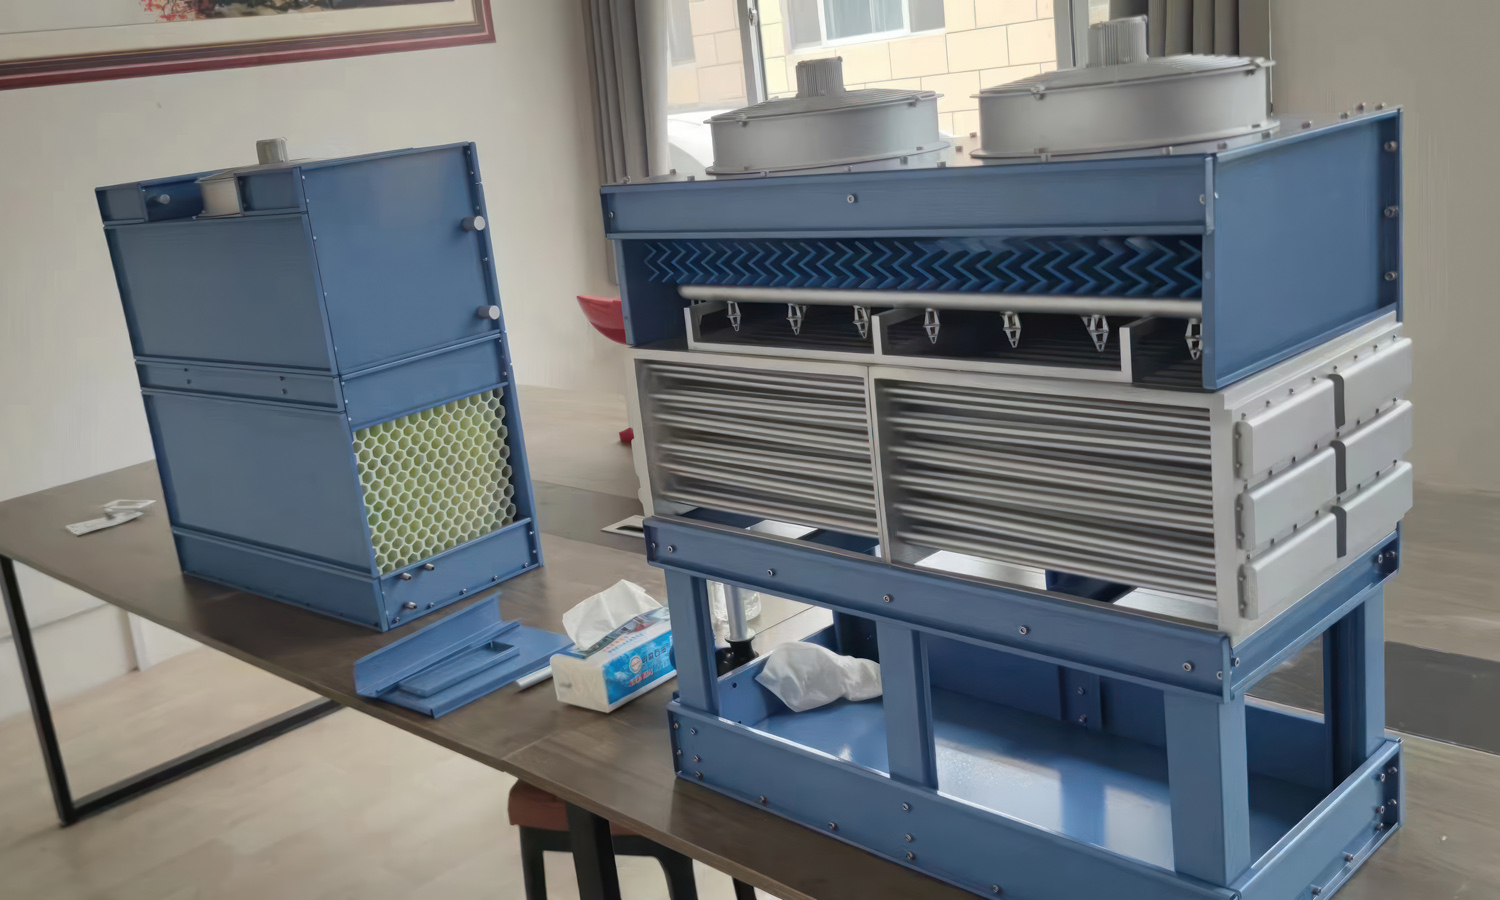
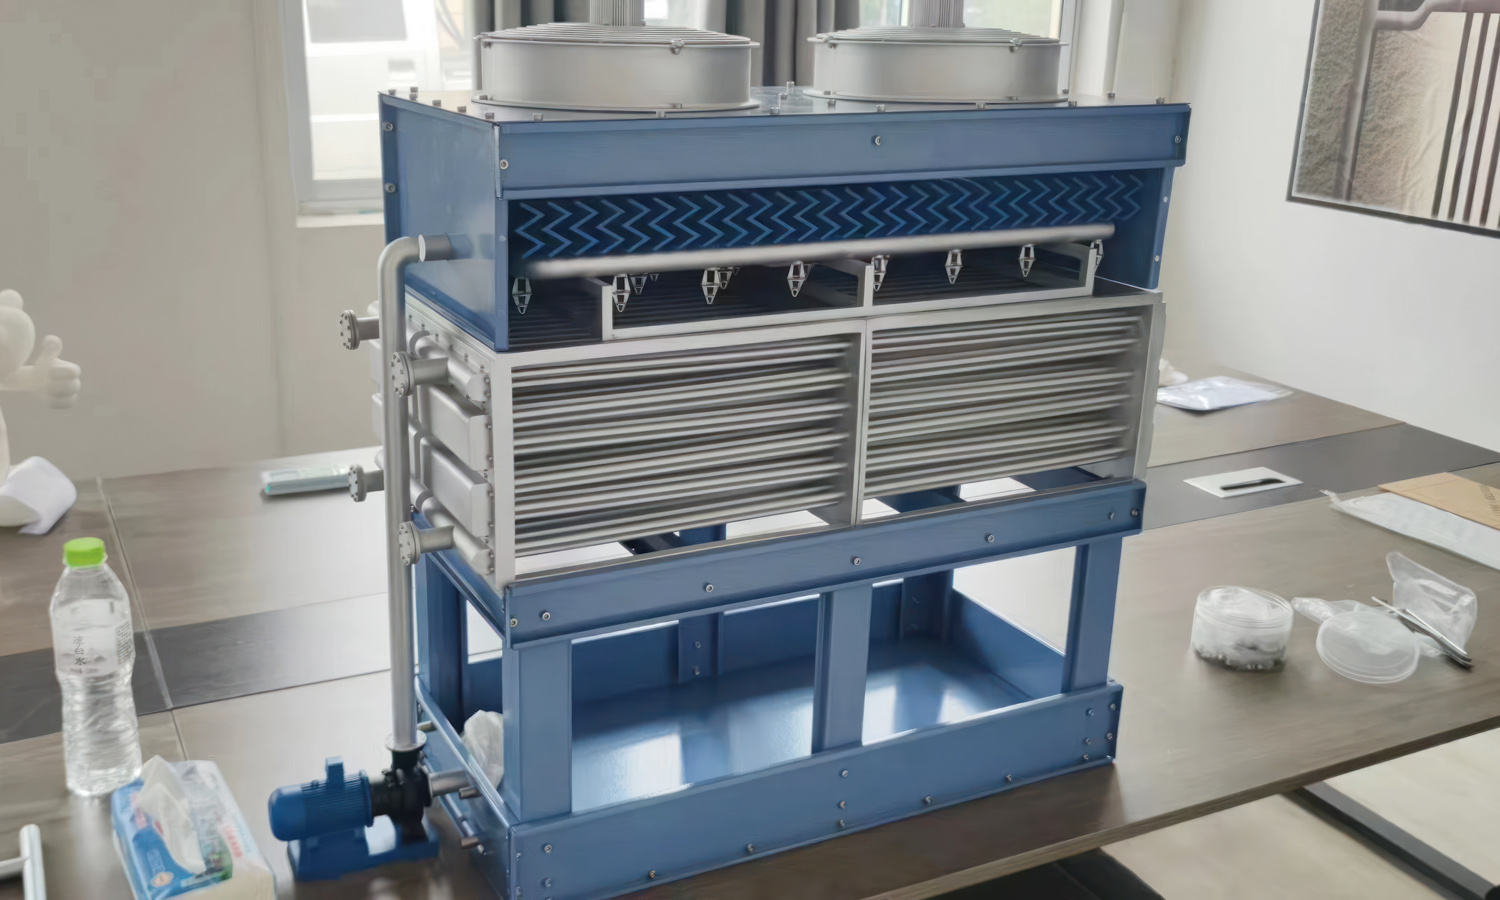
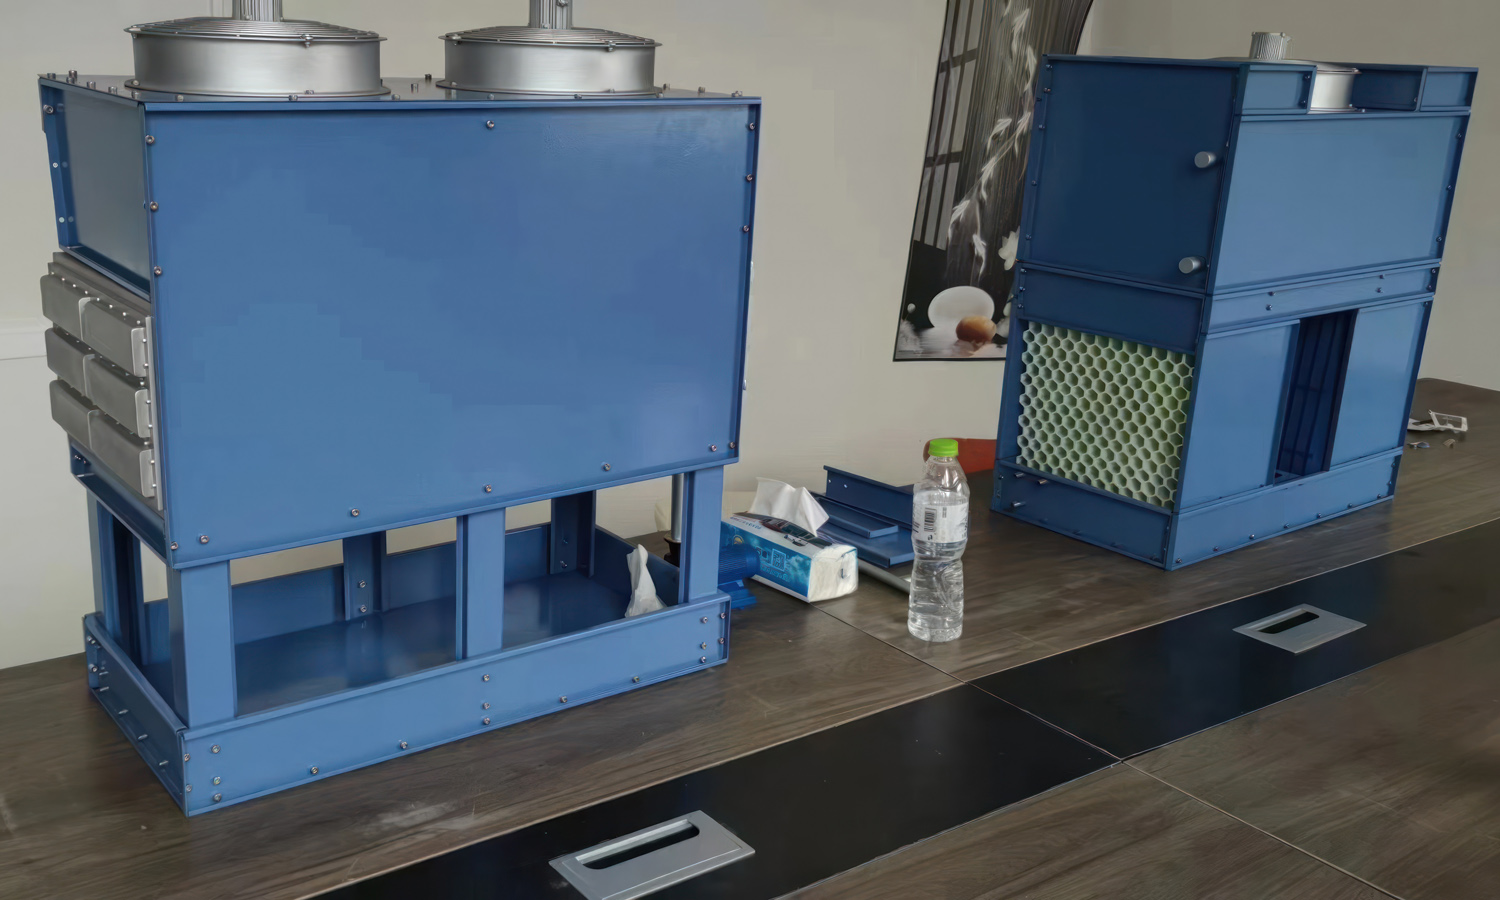
These SLA 3D printed ventilation prototypes come in a sleek, grayish-blue hue, perfect for mimicking real-world facility equipment. One prototype boasts a unique design with two cylindrical canisters or filters perched atop its horizontal layers. These layered structures could be heat sinks or part of an intricate cooling system. The bottom appears hollowed out, hinting at its potential airflow functionality.
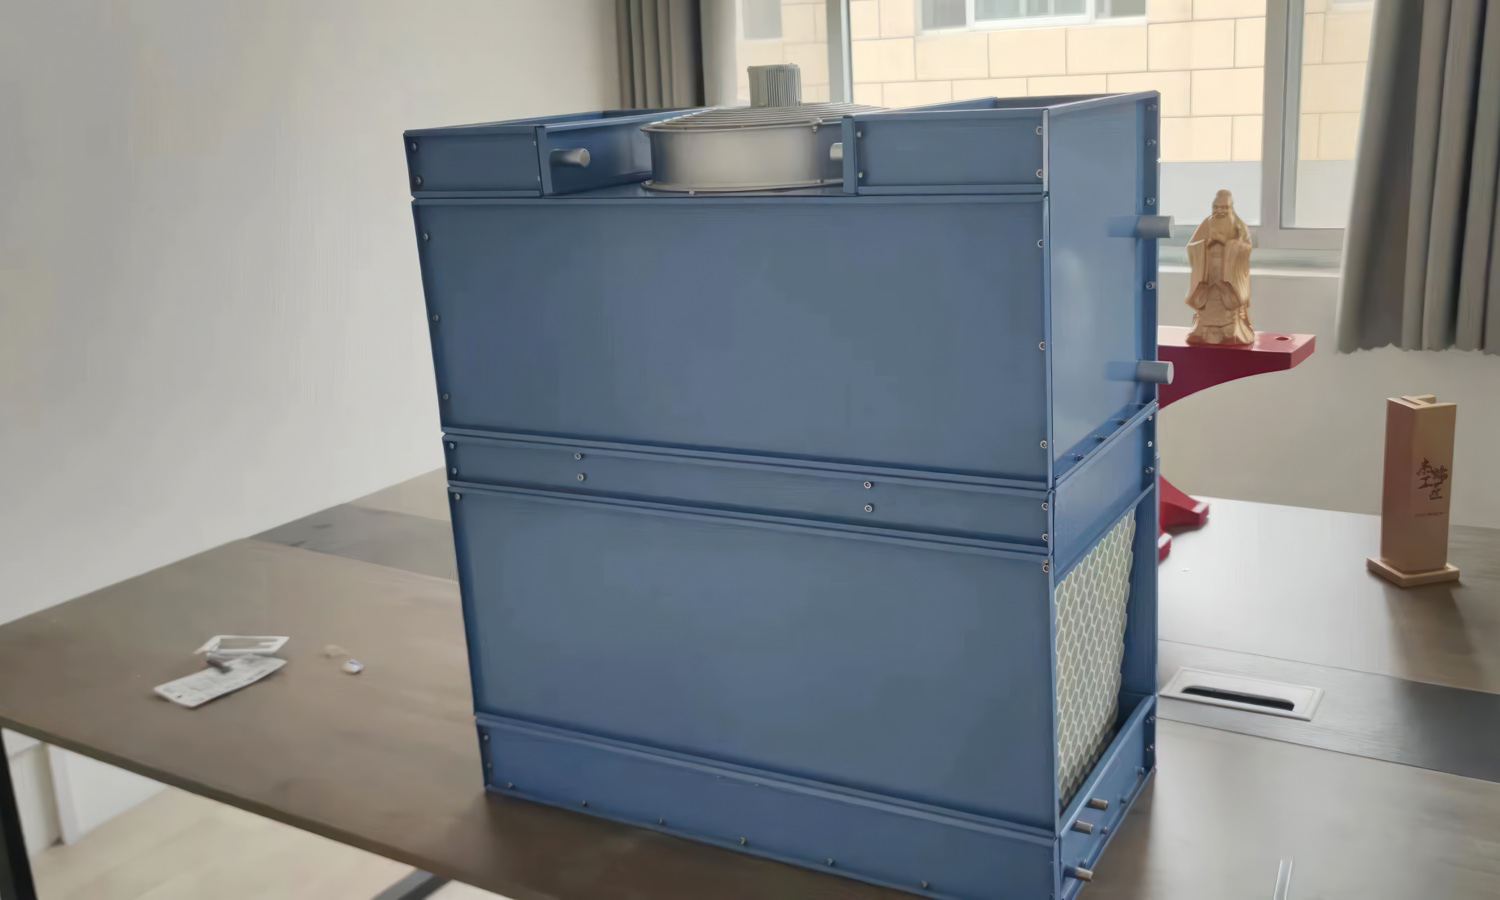
The other prototype features a single, similar cylindrical object on top. But its most striking feature is the honeycomb-like latticework covering both sides. This structure could represent an air filtration system or a specialized heat exchanger, optimized for efficiency.
Beyond Appearances: The Advantages of SLA Printing
While the look of these prototypes piques our curiosity, the true power lies in the benefits of SLA 3D printing for ventilation equipment:
- Unmatched Precision: SLA printing delivers exceptional accuracy, capturing even the most intricate details of ventilation components, crucial for replicating real-world functionality.
- Speedy Prototyping: This technology enables rapid creation, allowing you to swiftly iterate on designs and get your ventilation equipment into production faster.
- Design Freedom: Unleash your creativity! 3D printing lets you explore complex shapes that traditional methods might struggle with, fostering innovative ventilation solutions.
- Cost-Effective Prototyping: Compared to traditional prototypes, 3D printed versions are often more affordable, saving you money during development.
FacFox: Partnering in Facility Innovation
FacFox offers a comprehensive suite of 3D printing services for facility prototyping, including SLA. Our team of experts collaborates with you to design and create prototypes that perfectly match your vision. We even provide post-processing services like painting and finishing, ensuring your prototypes look and feel professional.
If you’re looking to revolutionize your facility’s ventilation system, SLA 3D printed prototypes are a game-changer. With FacFox as your partner, you can bring your ideas to life quickly and efficiently. Contact FacFox today to explore how 3D printing can elevate your facility’s ventilation solutions!
Solution
- Step 1: Design Creation.б═The 3D models of the ventilation equipment were designed using CAD software. The designs included one model with two cylindrical objects on the top and multiple layers of horizontal tubes, and another model with one cylindrical object on the top and honeycomb-like structures on both sides.
- Step 2: File Preparation.б═The CAD files were converted into STL format and then sliced into layers using slicing software. The slicing software generated the necessary instructions for the 3D printer.
- Step 3: Printer Setup. The SLA 3D printer was prepared by filling the resin tank with SLA Tough Resin. The build platform was cleaned and leveled to ensure proper adhesion of the printed layers.
- Step 4: Printing Process.б═The sliced files were uploaded to the 3D printer. The printing process was initiated, and the laser selectively cured the resin layer by layer, building up the models from the bottom up. The process continued until the entire models were completed.
- Step 5: Post-Processing.б═Once the printing was finished, the models were carefully removed from the build platform. Excess resin was drained, and the models were rinsed in isopropyl alcohol to remove any uncured resin.
- Step 6: Curing.б═The rinsed models were placed in a UV curing chamber to fully cure the resin. This step ensured that the models achieved their final mechanical properties and stability.
- Step 7: Support Removal.б═Any support structures used during the printing process were carefully removed using cutting tools and sandpaper. The surfaces were smoothed to achieve the desired finish.
- Step 8: Painting.б═The models were painted in grayish-blue to match the intended appearance. Multiple coats of paint were applied to ensure even coverage and a professional finish.
- Step 9: Final Inspection.б═The painted models were inspected for any defects or imperfections. Any necessary touch-ups were performed to ensure the models met the quality standards.
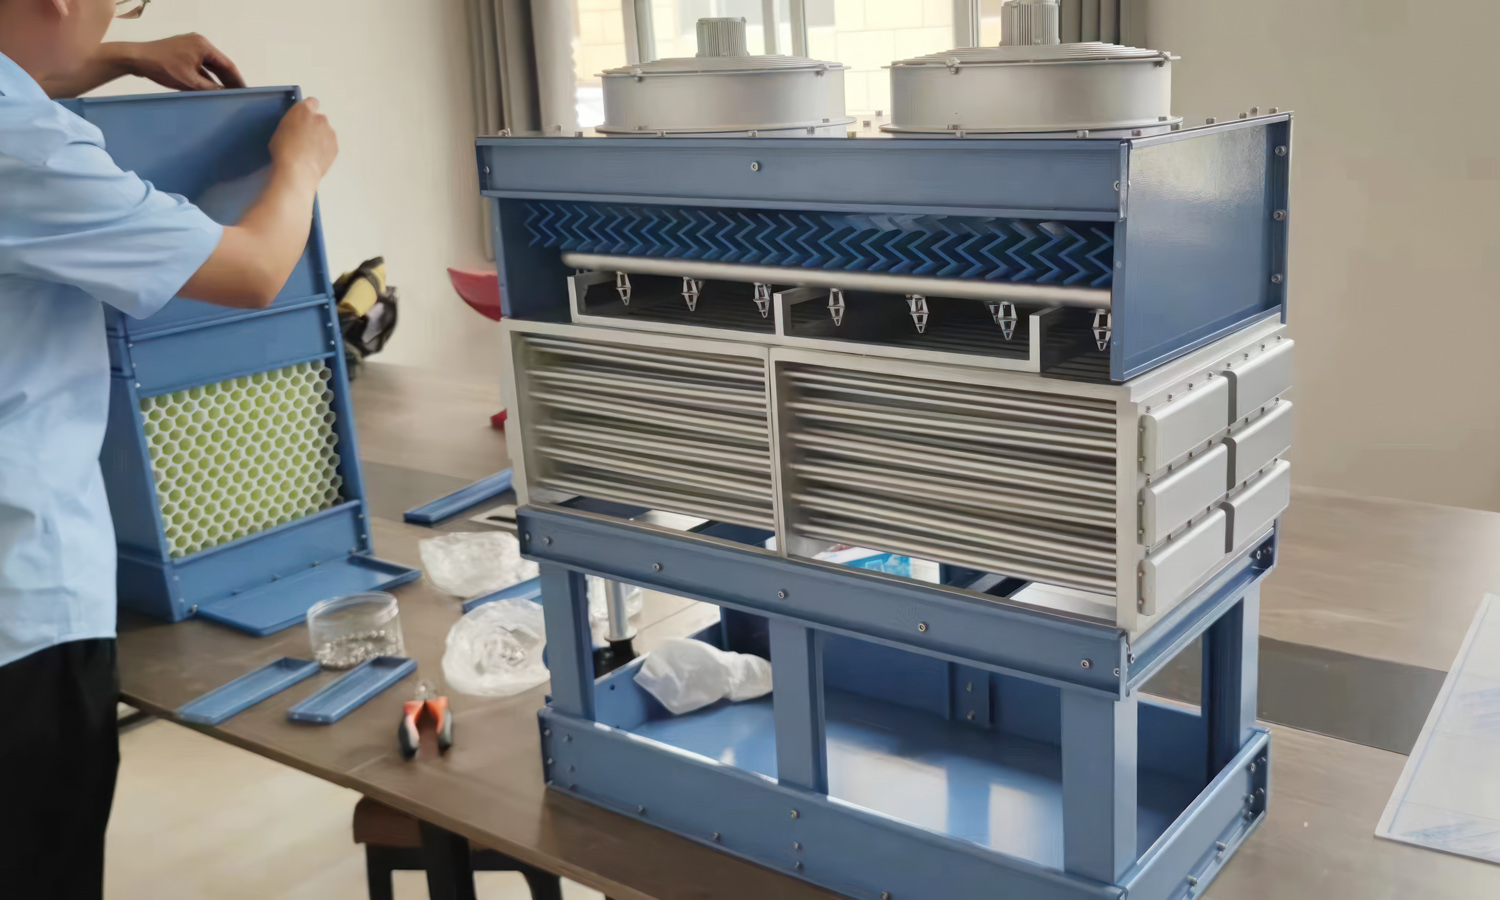
- Step 10: Assembly.б═The models were assembled if required, ensuring that all parts fit together correctly. The cylindrical objects, horizontal tubes, and honeycomb structures were checked for proper alignment and functionality.


