
Creating small finely detailed castings, such as a model car, can be tricky. Castings with thin walls have a tendency to be fragile, and any flaws in the mold can result in hours of tedious cleanup on the final product.
Fortunately, for all of you model car enthusiasts, making your own custom molds may not be as difficult as you think. With time, patience, and the right materials, you can build a mold that will make the model car building a breeze.
From larger than life sculptures to small finely detailed models, FacFox makes a variety of molding and casting products to get the job done. In the tutorial below we have outlined the best practices for making a clean mold.
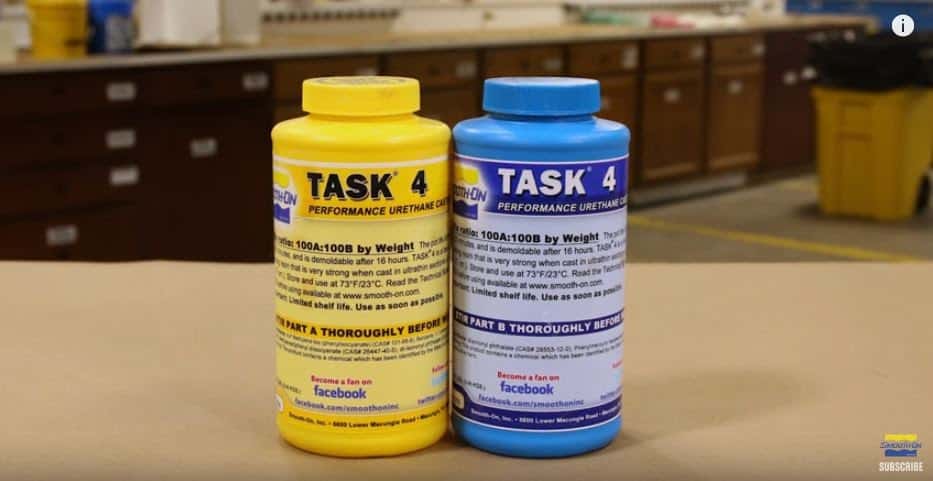
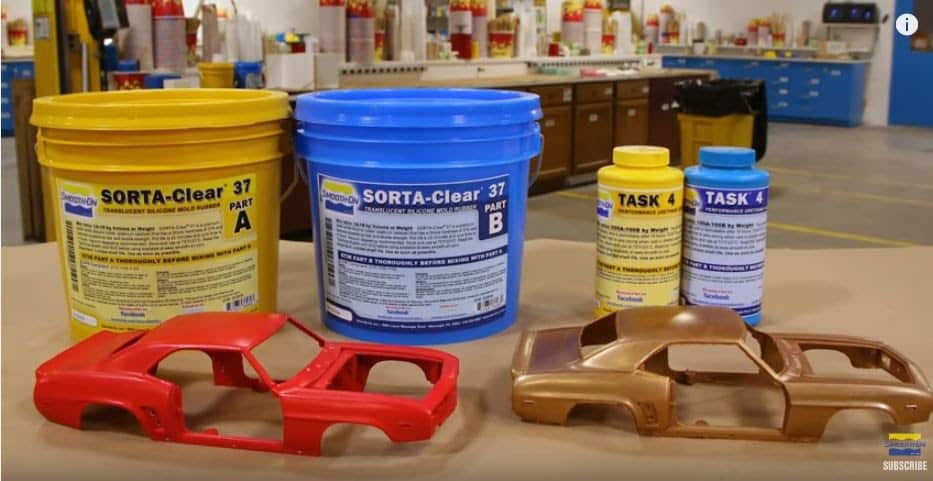
For this tutorial, we will be using SORTA-Clear 37 Translucent Silicone and TASK 4 High-Performance Plastic.
Other optional products for adding a little color to your model include Cast Magic Metallic Powder and UVO UV-Resistant Color Tint.
STEP 1: CREATE A BASE FOR YOUR MODEL
Begin by building up a bed of oil-based clay about 1 inch thick. Make sure to bevel the edges of the clay bed inwards towards the model. This will create a natural key to align the mold, and prevent the two halves of the mold from locking together.
It is extremely important that your clay does not contain any sulfur, which is commonly found in Plastiscines. SORTA Clear Silicone is a platinum silicone, which will not cure if it comes into contact with sulfur. If you are unsure if your brand of clay contains sulfur, do a small scale test is recommended. Mix a small amount of silicone and test it on a non-crucial area of the model.
For instance where the model may contain sulfur using tin cure silicone may be another alternative.
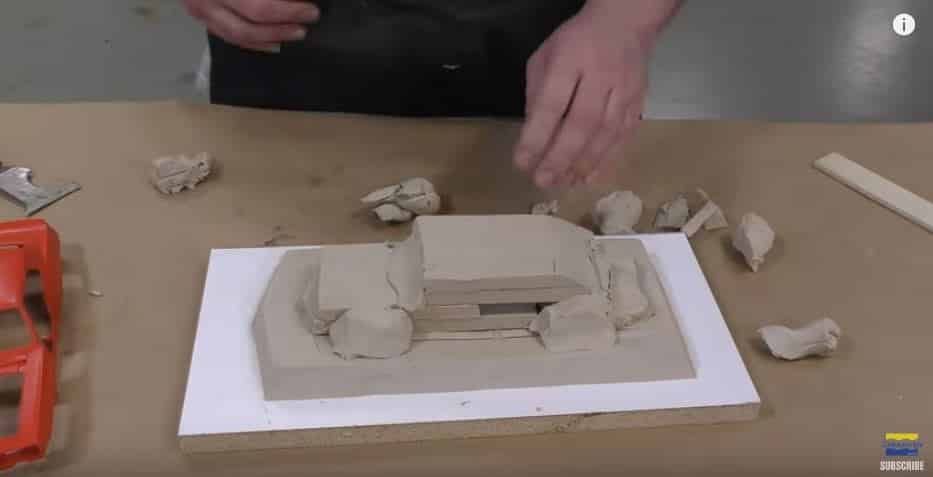
STEP 2: CLAYING UP THE MODEL
This step is by far the most time-consuming. The clay build-up around our model will later be the second half of the silicone mold.
Use additional clay to completely fill the interior of the model. Take your time here and use a straight-edged sculpting tool to make sure the lines where the clay meets the edges of the model are straight and even. These areas will become the seam lines of the casting, so your attention to detail in this stage will reduce the amount of clean-up time later.
Once the model is clayed up, use a geometric shape to create additional keys in your model. These will help keep your mold aligned once the urethane plastic is poured into the mold. For this example, we have used a nut which has been screwed onto the end of a bolt. Press the shape straight down into the clay. Do not press in at an angle or from the side, even on slanted surfaces such as the windshield. This will cause the mold to lock during use. The keys also do not need to be very deep. A quarter-inch deep or so is enough to mold this size.
STEP 3: CREATE A MOLD BOX
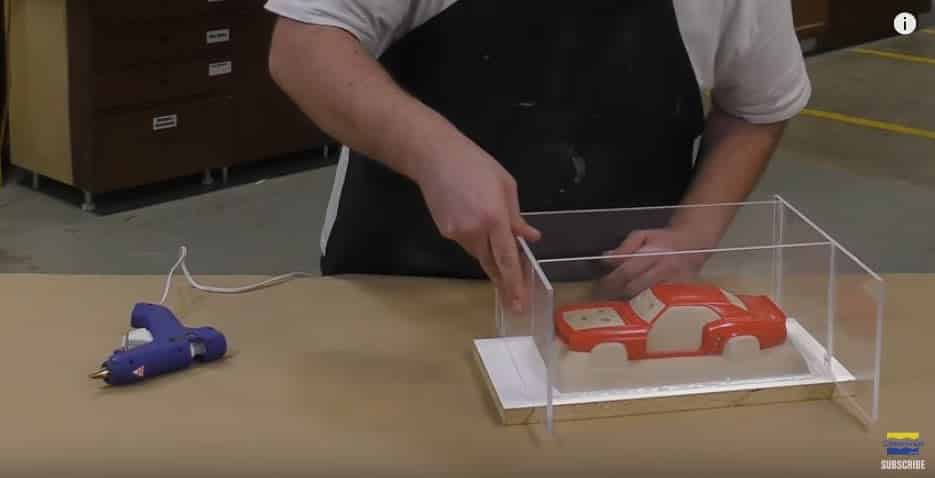
Now it is time to build a box for pouring the clay. In this tutorial, we have used sheets of clear plexiglass, but most non-porous materials will work for this step. Avoid using porous materials such as wood, as the silicone may bond with these surfaces.
Make sure all corners and edges are sealed with glue or clay. We do not want our mold box to spring a leak while pouring our silicone!
STEP 4: MIXING THE SORTA-CLEAR 37
In this tutorial, we are using the SORTA-Clear platinum cure silicone. Once fully cured it will be translucent, which is ideal for small detailed castings. It will also be flexible, and have a high tear strength, which means that the final mold will have a long shelf life.
Some important things to note about this silicone is that it should be stored and mixed at room temperature (73°F/23°C). Warmer temperatures will reduce the shelf life of the material, and in some cases may drastically shorten the pot life of the silicone. For anyone living in warmer climates, it is highly recommended to store and mix this silicone in an air-conditioned workspace.
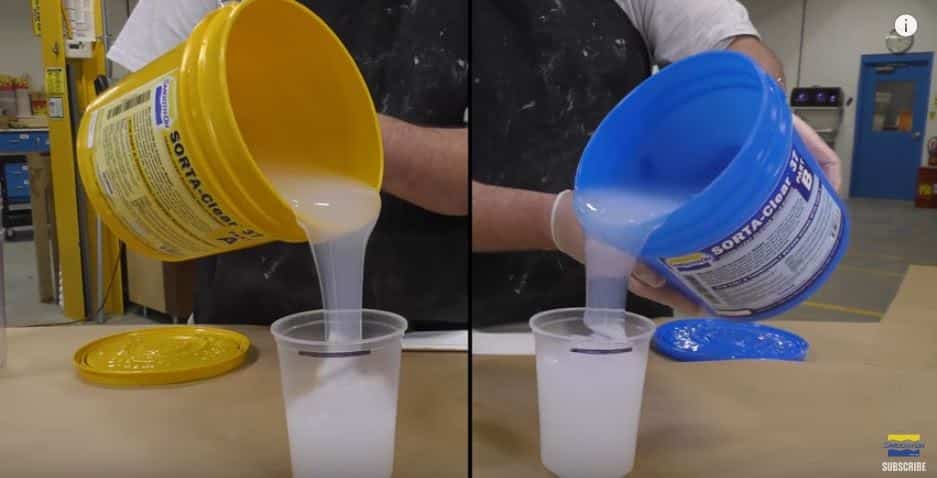
The material may settle during transportation and storage, so make sure to mix part A and part B separately inside their containers before measuring or mixing. This will ensure the ingredients are even, and that the silicone will behave as expected.
SORTA-Clear silicone is mixed 1A:1B by volume. Use a measuring cup, or two identical containers to measure out equal parts A and B.
When mixing, make sure to thoroughly scrape the walls of the mixing containers. This will help ensure that there is no unmixed silicone clinging to the sides of the container. Since parts A and B are the same color, another technique to help thoroughly mix the silicone is to transfer both parts into another clean mixing container, and then continue to mix.
Once parts A and B are mixed, the pot life, or the time that the silicone will remain pourable, is about 25 minutes. It will then fully cure, or harden, in about 4 hours.
STEP 5: VACUUM DE-GAS THE SILICONE
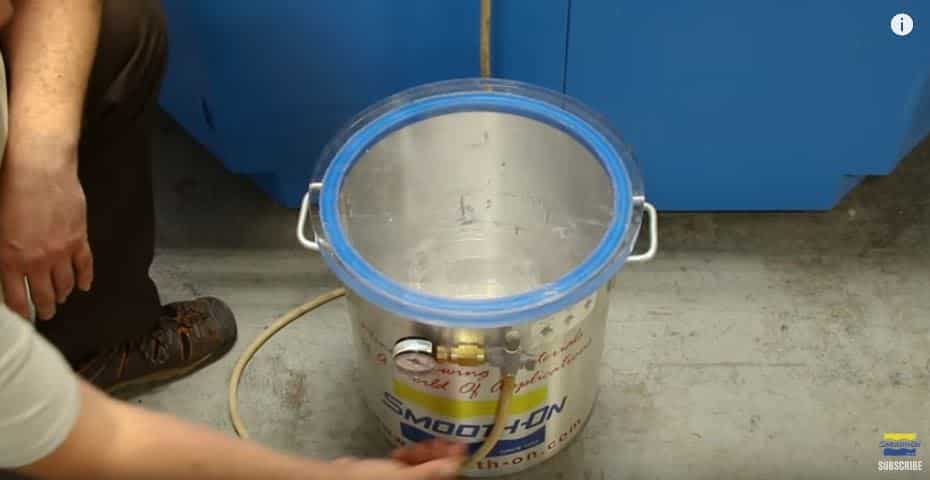
Mixing the silicone can introduce air to the silicone mixture. To prevent these bubbles from becoming trapped, and potentially ruining the working surface of the mold, degassing is recommended.
Once you have thoroughly mixed parts A and B of the silicone, place the container inside a vacuum chamber for degassing. Place the mixture under 25” of mercury.
The bubbles in the mixed silicone will begin to rise, and make the top of the silicone foam. After the bubbles have risen and fallen, continue to vacuum the silicone for about another minute before removing the container from the vacuum chamber.
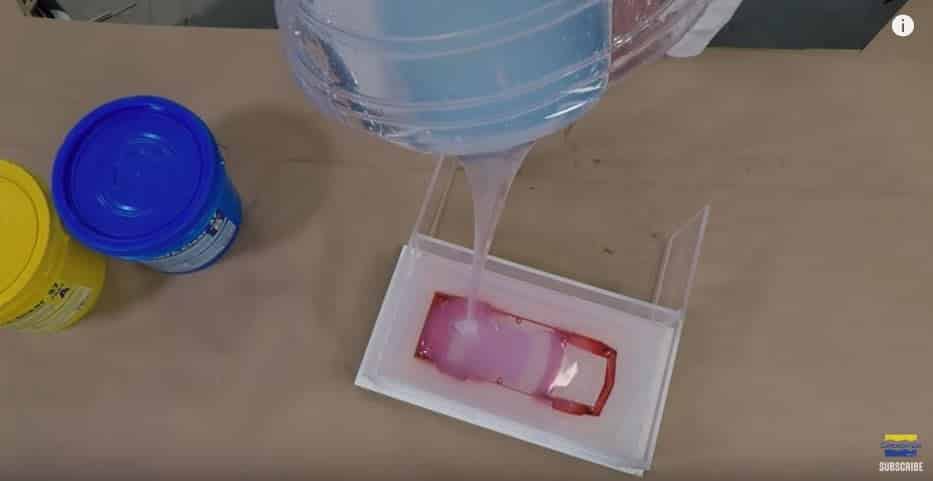
STEP 6: POURING THE SILICONE
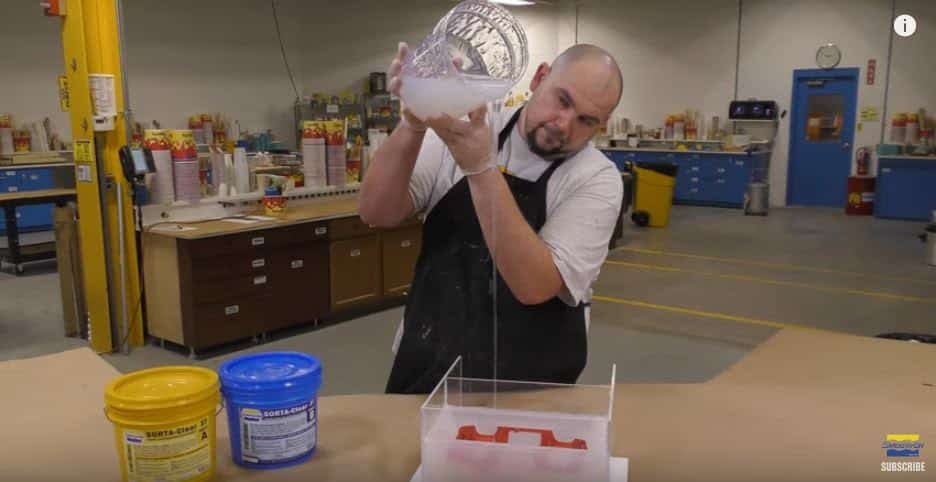
Now you are ready to pour your silicone mixture onto the model!
Hold the container of silicone high above the model and pour a thin stream into the mold box. Make sure to pour into the lowest point inside the mold box. This will prevent air bubbles from becoming trapped in recesses or tight corners. Let the silicone slowly fill the mold box and level itself out.
SORTA-Clear will begin to set at about 25 minutes, and will be fully cured and ready to demold in 4 hours, so take a break and come back to your project in a few hours…
STEP 7: DEMOLDING

Once the silicone has fully cured, it is time to demold the clay. Pull the mold box apart and begin to remove the clay buildup inside.
Be careful not to disturb the silicone or the model. You will need the model to remain firmly in place while the second half of the mold is being poured. If needed, use a wooden tool to carefully remove the excess clay. That way you will avoid scratching or otherwise damaging the model and the silicone.
STEP 8: THE SECOND HALF OF THE MOLD
To begin the process of building the second half of your two-part mold, first start by applying a layer of mold release to your mold and model. Don’t forget this step or you won’t be able to open your mold!
Ease Release 205 is a release agent manufactured by Smooth-On and will prevent the silicone from bonding. Ease release 205 comes as a liquid, which is ideal for a mold that may have shallow undercuts where a spray release may not reach.
Pour a small amount into a cup and use a chip brush to apply a layer of release agent to the working surface of the mold and model. It is also a good idea to apply release to the edges and an inch or two along the sides of the mold, just in case silicone runs down the edges. The coat should be even, and there should be absolutely no pooling of release anywhere in the mold. Too much release agent may prevent the silicone from curing properly.
Once the release agent is applied, simply repeat steps three through seven. Make sure when you are building the mold box that it fits as snugly as possible around your mold in order to prevent leaks. Mix the silicone for the second half of the mold as instructed, and wait 4 hours for the silicone to fully cure before demolding.
At the end of this process, it will be safe to remove the original model from the inside of the mold. Rinse out the mold to remove any residue from the working surface, and allow it to dry thoroughly before use.
(Optional) Cold Casting
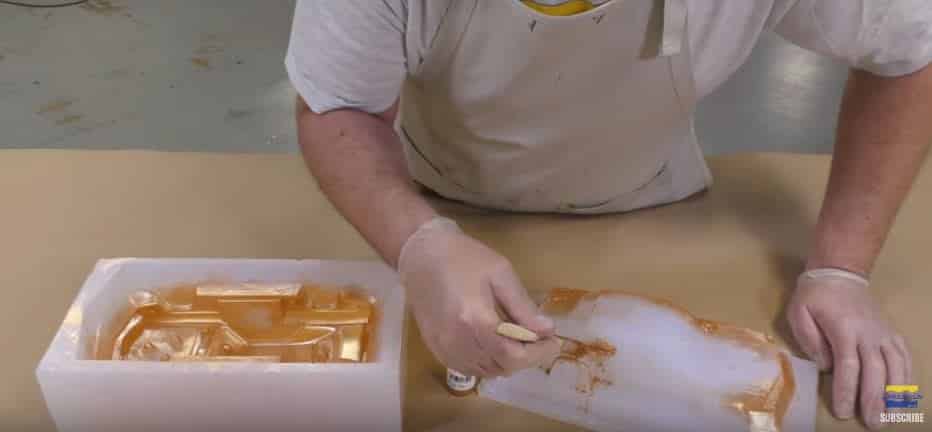
It is possible to add a metallic finish to casting while it is in the mold. Before pouring in the resin, use a metallic powder such as Smooth-On’s Cast Magic Metallic powder. With a chip brush, spread an even layer across the inside of both halves of the mold.
Using metallic powder both halves of the mold will help the cleanup of the casting later. This will make both sides of the seam lines the same color and easier to hide. It also provides a base tone for any additional paint.
STEP 9: MIXING THE RESIN
Congratulations! You now have a working mold that is ready to begin casting. Now you can begin making urethane resin castings of your model.
For models with thin or delicate pieces, TASK 4 urethane resin is lightweight, durable, and flexible. This resin is strong in thin sections, and will resist cracking or snapping when under pressure.
Just like with the silicone, make sure to mix both part A and part B of the plastic separately before mixing them together. Ingredients in the plastic may settle over time, so for best results always shake or stir before use.
TASK 4 is mixed equal parts A and B by weight, so this time around a gram scale will be required. Take care to expose to part A to as little moisture as possible. Even moisture in the air may affect part A of the urethane resin, and prevent it from curing properly. This part should be measured last, and any excess material should be sealed up tight and stored in a cool dry area.
During the measuring process, some tint (such as UVO UV Resistant Color Tint) can be mixed into part B. Like the metallic powder, this will provide a base color to the casting, which may make it easier to paint later.
Mix the resin thoroughly, making sure to scrape the sides of the container. Once all the material has been mixed, it is ready to pour into the mold.
Next, squeeze the top half of the mold down into the freshly poured resin until resin fills the entire space. Place a weight on top of the mold to keep both halves tightly together, and to keep the casting as precise as possible.
TASK 4 has a pot life of about 20 minutes and takes 16 hours to fully cure.
STEP 10: REMOVING THE CASTING
16 hours later, your casting will be ready to demold. Bend and flex the silicone mold gently to release the resin casting from the mold. The casting should release easily.
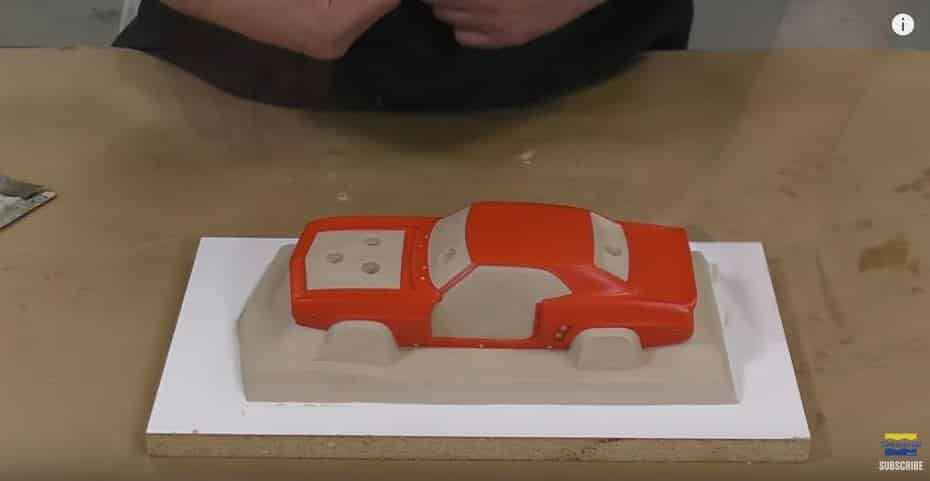
This is where all the time spent creating a clean clay buildup pays off. If the mold was precise, any of the flashings where the clay was built should be hairline thin, and break away from the body of the casting easily.
As you can see by the picture above, the mold has created an exact replica of the original car body which is about 2mm thick. By using Cast Magic Metallic powder and UVO UV Resistant Color Tint this car body can now be reproduced in a variety of colors and finishes.
This mold making technique can be used to make all manner of models, sculptures, and other fun projects. FacFox also manufactures a wide line of molding and casting materials for a variety of applications, so go ahead and experiment!