
A butterfly wing you can read through. A mushroom bookmark that looks almost embroidered. A tiny window that lets light pass through its patterned panes. These pieces have the delicate look of organza, but most of them are made entirely from 3D printed plastic.
The trick is to let the thin parts transmit light while using thicker printed lines to draw the details. There is also a second method that uses real organza. Let’s look at both.
First, Make the Design Thin in the Right Places
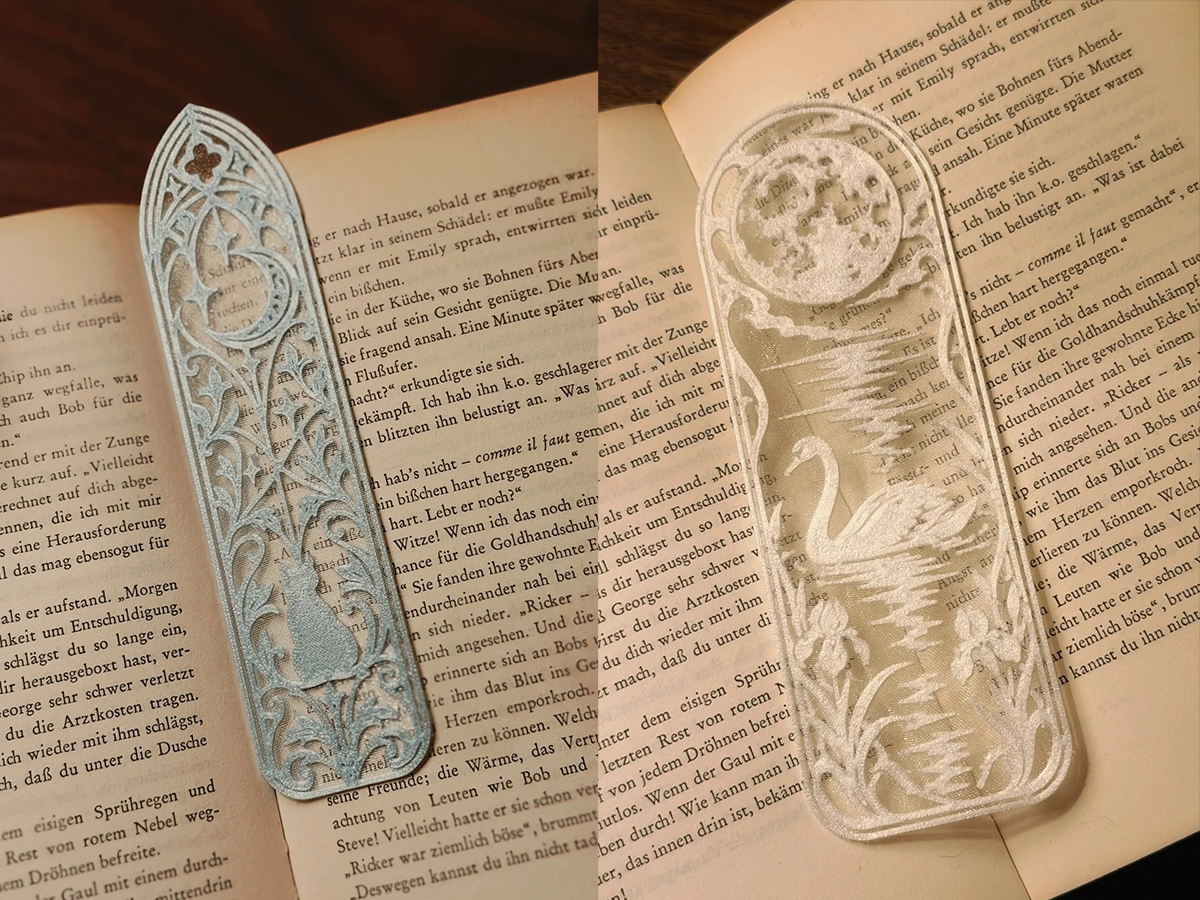
A faux-organza print usually starts as a flat illustration: a silhouette, an outline, and the details inside it. Those parts become a shallow 3D model with two different jobs. A thin base creates the translucent area; slightly raised lines make the veins, petals, or decorative pattern stand out.
Jooli’s butterfly bookmarks show why that contrast matters. Their wings are made of fine printed lines, while the wing edges and veins remain easy to see. When the bookmarks are held up to the sky, light brings out every layer.
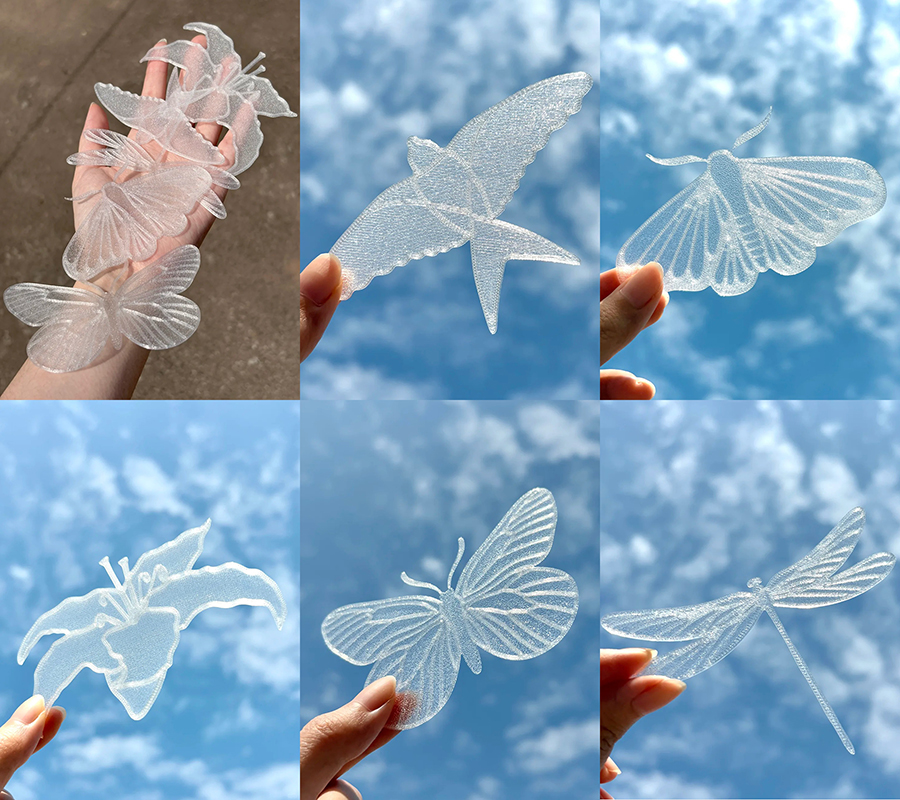
You can begin with a simple black-and-white drawing, turn its shapes into a model, and assign different heights to the base and the linework. Before printing, check the slicer preview closely. If a narrow antenna, stem, or decorative line disappears there, it will not magically return on the print bed.
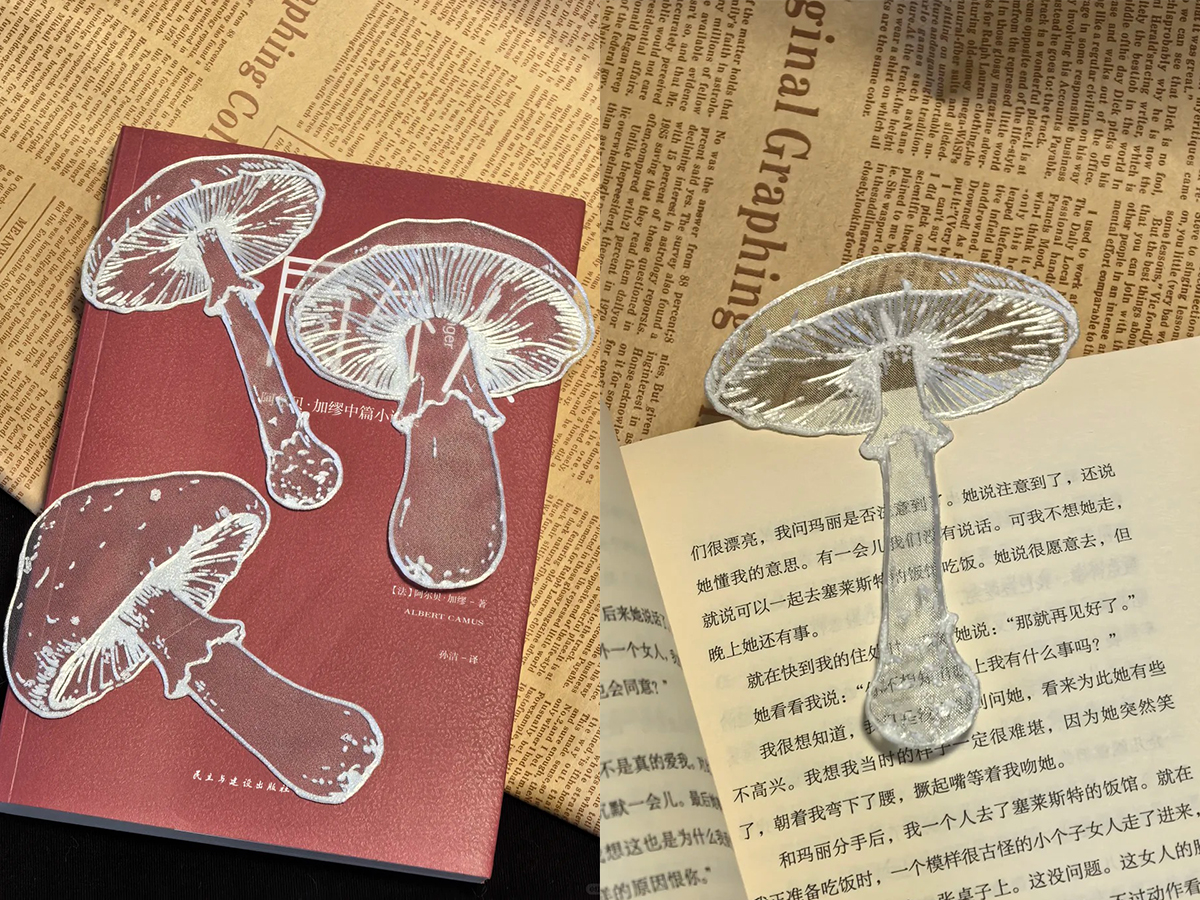
Shuye’s mushroom bookmarks are a lovely example of using linework well. The fine gills give the caps detail, while the transparent spaces keep the bookmarks light enough to sit naturally over a page.
Then, Let the Filament and Layers Do Their Work
For the fabric-free version, makers often choose a translucent filament and print the flat design with FDM. A thinner area generally lets more light through; additional printed lines make that area look more opaque and textured. Changing the number of solid layers and the visible line pattern changes the result, so this is as much a slicing experiment as a modeling one. Prusa’s slicer documentation explains how top and bottom solid layers affect printed thickness.
One useful approach is to print a small test sheet first: a few squares or parts of your design with different base thicknesses and outline heights. Hold them over a book page, then up to a light source. You are looking for a balance: enough translucency to get that gauzy look, but enough material to keep the piece intact when you remove and handle it.
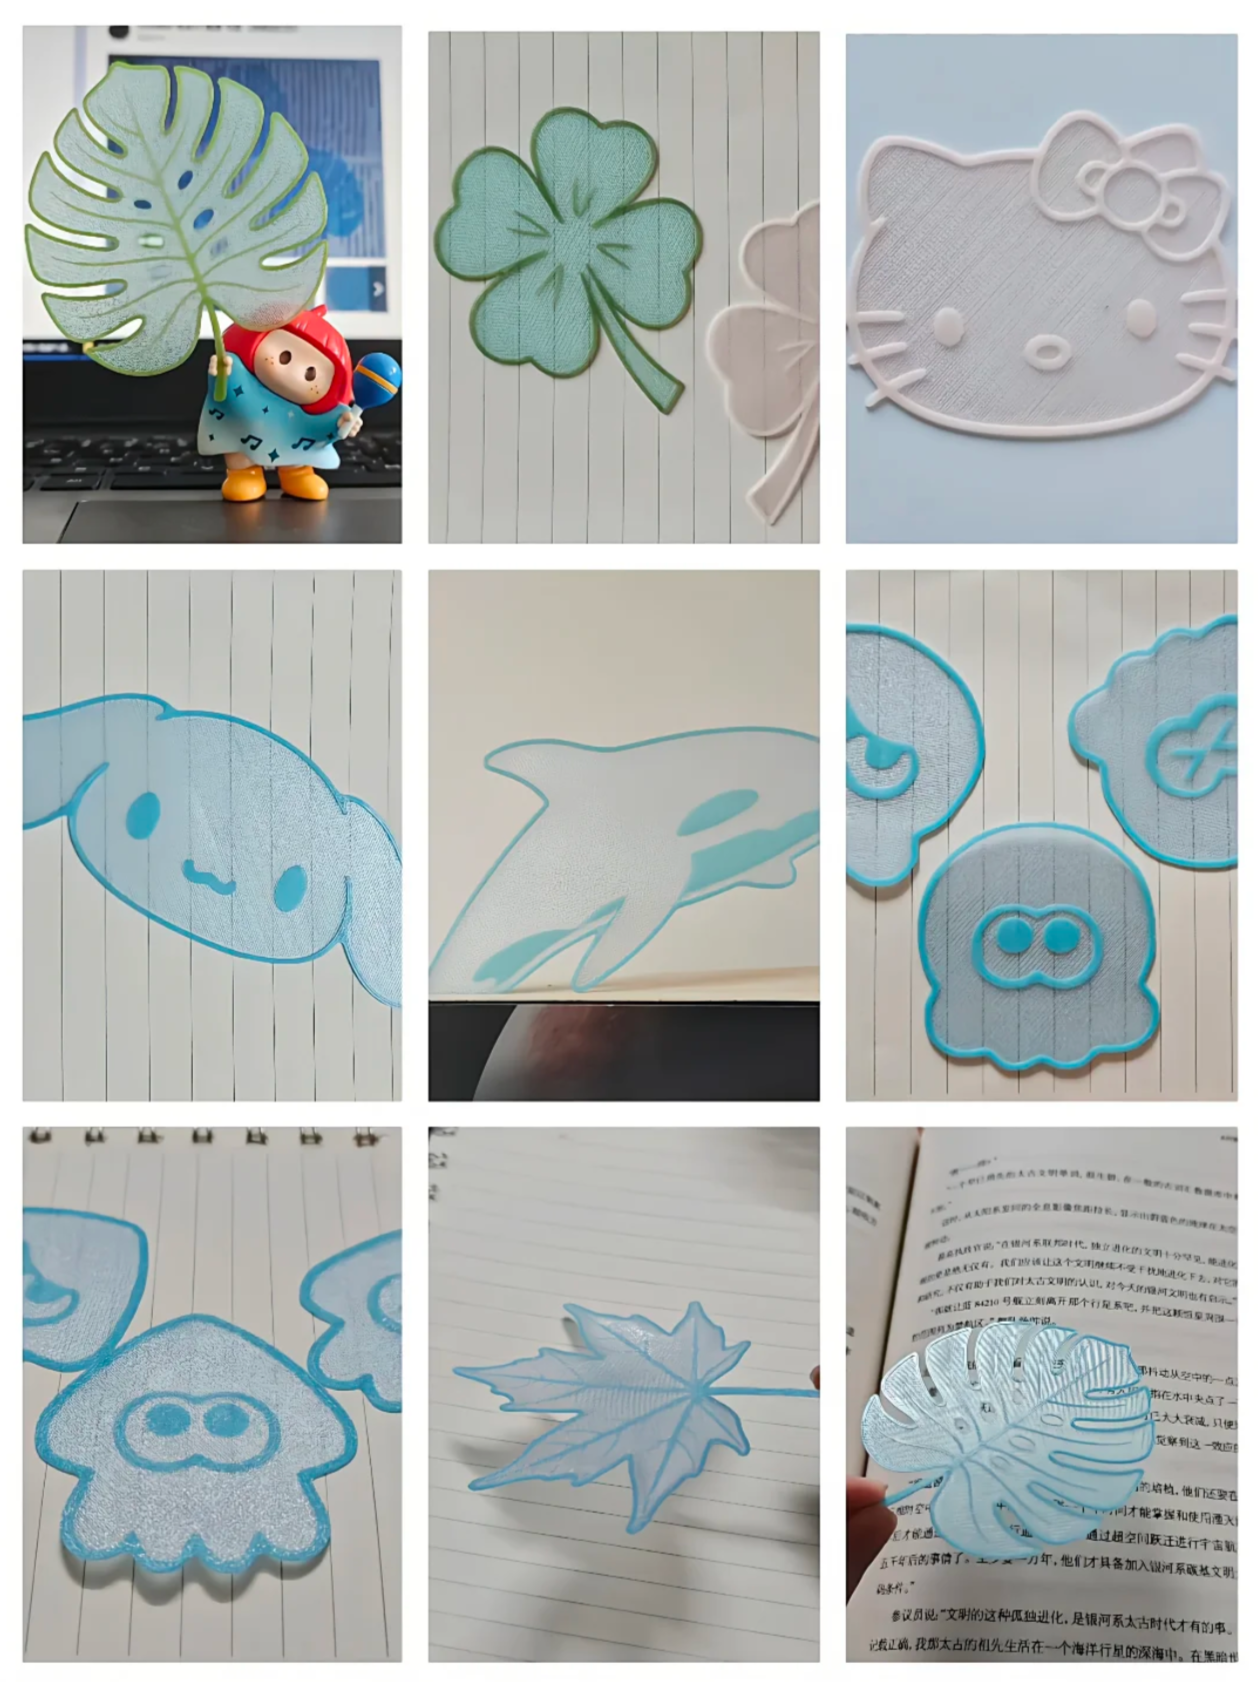
Creator Dongguadong shared one tested combination for a faux-organza bookmark: a 0.3 mm translucent base and 0.2 mm of raised outline, for 0.5 mm total thickness. That is a reference from one maker’s setup, not a universal setting. Their earlier, thinner versions could split along the print lines; the successful version could bend without falling apart.
Try the Effect on Something Other Than a Bookmark
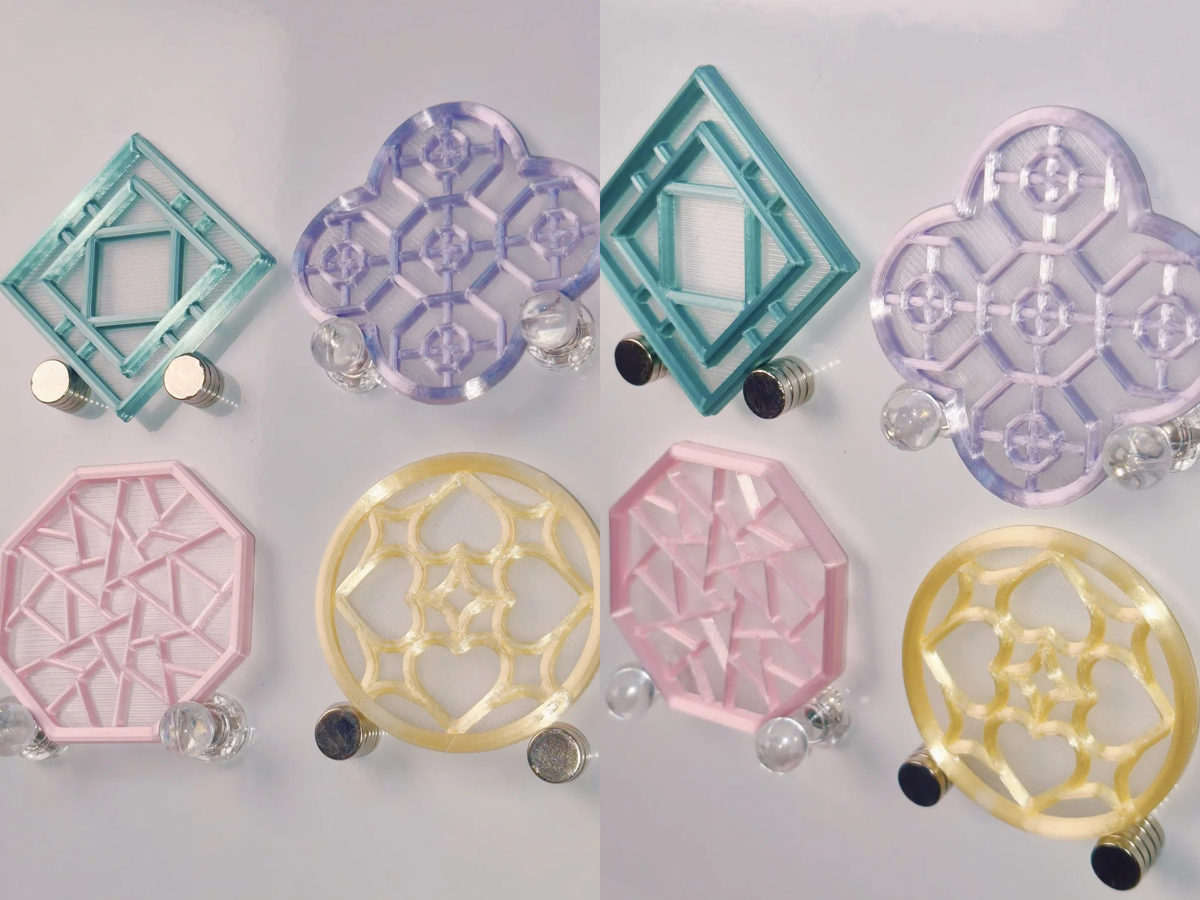
Doudoujiang used thin, light-transmitting areas inside small Chinese-style window magnets. The printed frames define each window pattern, while the pale “panes” let the light through. Magnets complete the pieces for display on a fridge.
Test the Part You Will Actually Use
A sample can look beautiful in a photograph and still be difficult to remove from the bed, trim, or slip between pages. Xixi’s shell-bookmark experiments make this clear. The maker compared different material combinations and transparent sections: some versions were too delicate, while others looked too solid or lost definition.
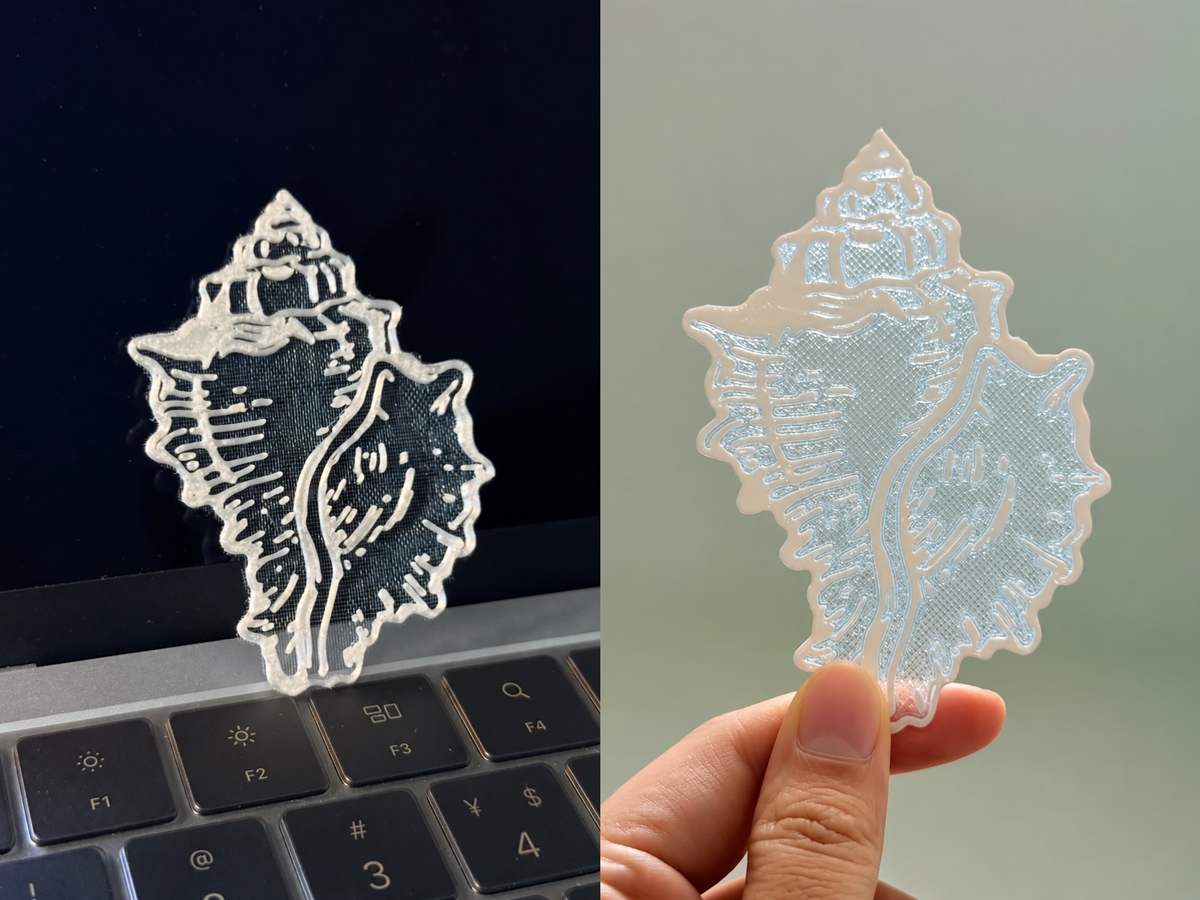
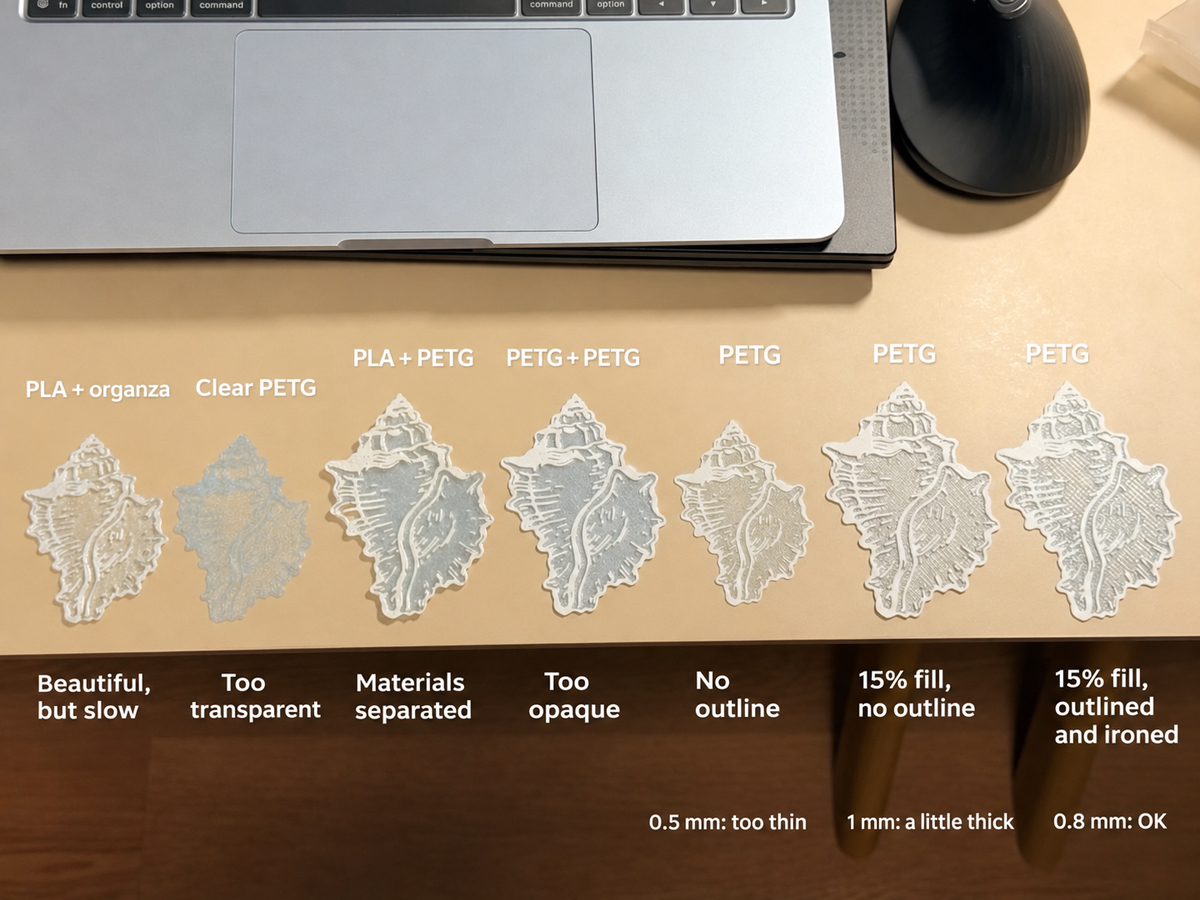
For a practical test, check three things after printing: Can you remove it cleanly? Does it bend without tearing along the lines? Can you still see the intended pattern against both light and dark backgrounds? The answers may lead you to adjust the base thickness, strengthen a narrow connection, or change the material. That small round of testing is what turns a pretty experiment into a usable bookmark.
What If You Want Real Organza?
Qidian Fasheng tried making miniature decorative gates two ways. For the first version, the maker printed one or two layers of the frame, paused the printer, laid real organza over the unfinished piece, and held the fabric flat with magnets before resuming. The remaining printed lines secured the fabric inside the gate. Up close, you can see the actual woven threads between the raised patterns.
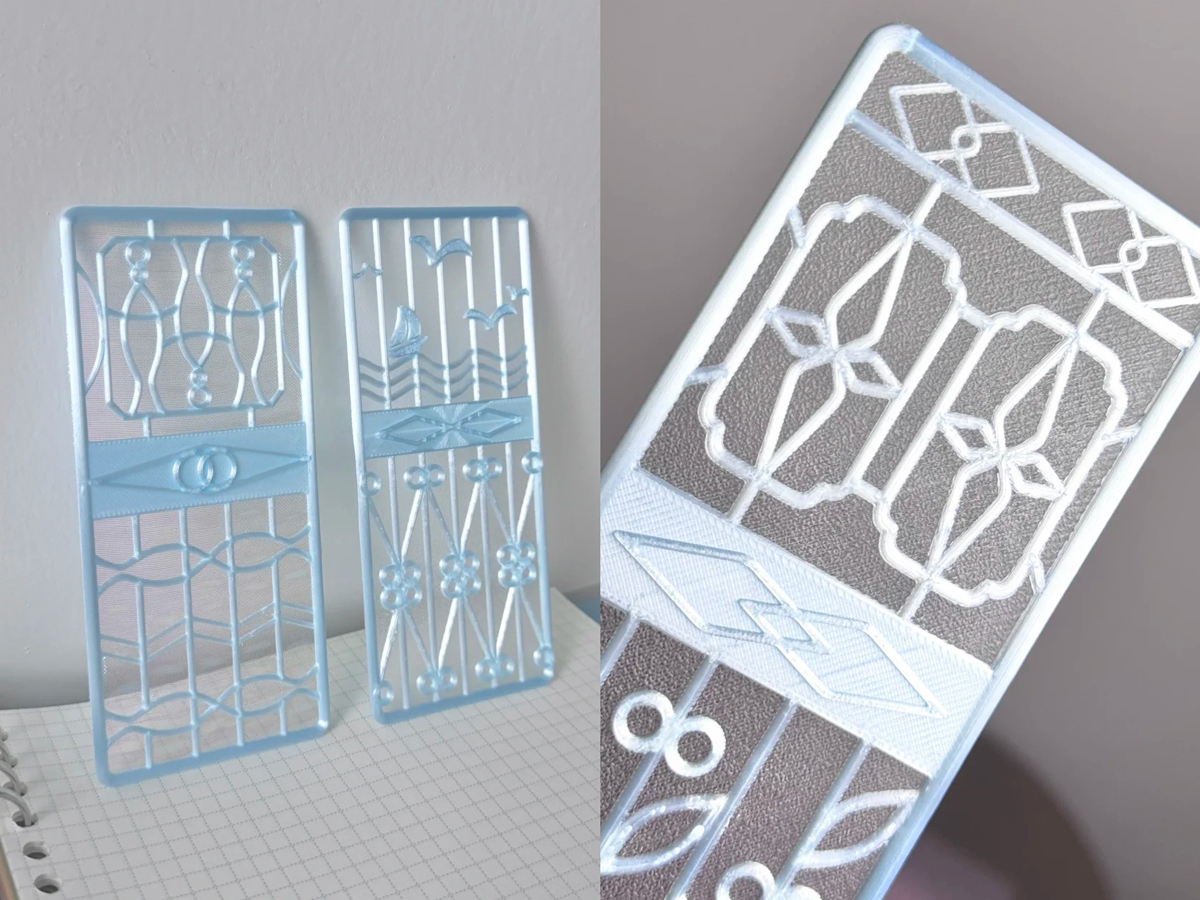
The maker also printed a version using transparent filament instead of fabric. Its fine printed lines create a sheer-looking surface, while the textured build plate gives it a colorful, glass-like shimmer. It catches the light beautifully, but it is still plastic rather than woven cloth.
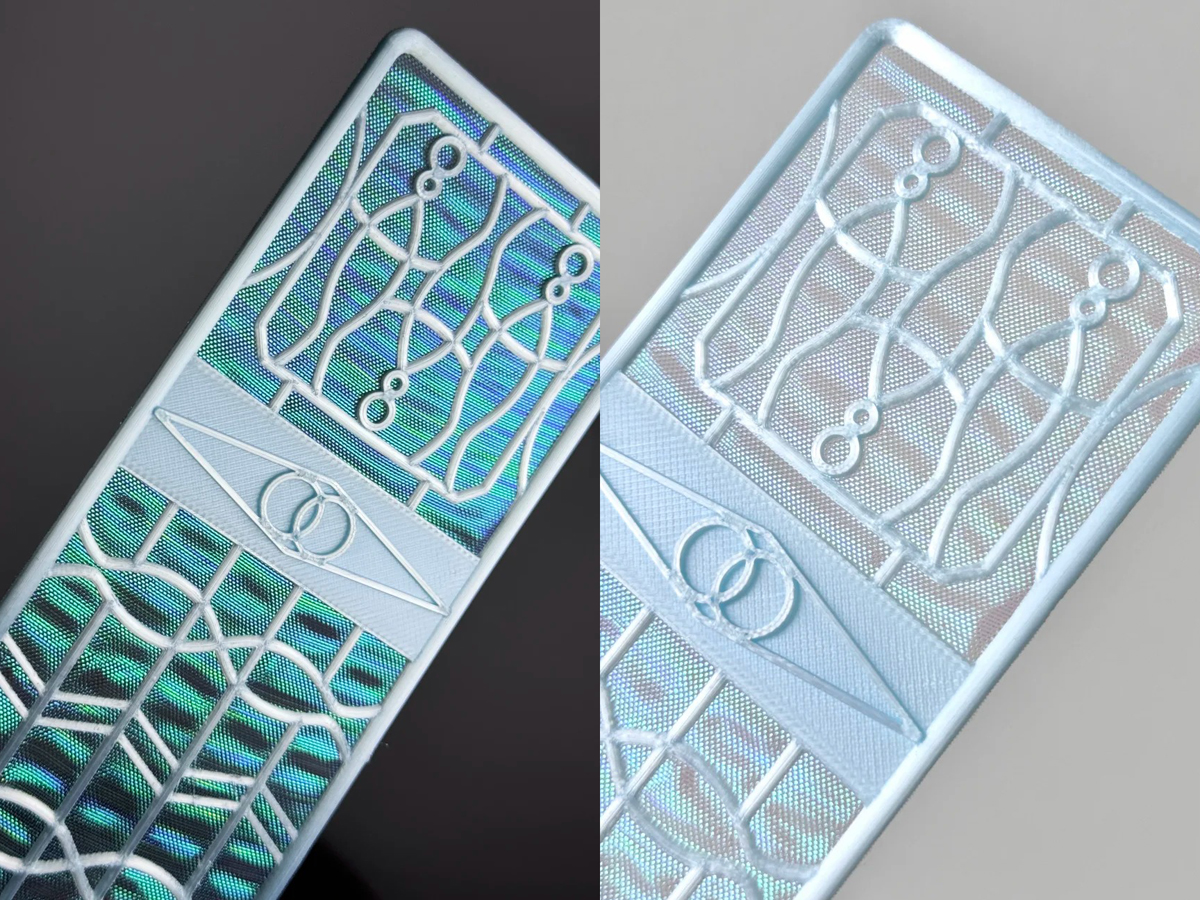
Both start with a printable frame, but the choice changes the result: real organza brings a textile texture; transparent filament keeps the whole piece 3D printed. For the fabric version, the important step is planning the pause at the right layer and keeping the cloth flat and clear of the moving nozzle before printing resumes.
The difference is easy to remember: faux organza uses printed plastic to imitate a sheer textile; embedded organza puts actual fabric into the print. Both are worth exploring, but they call for different designs and tests.
Make Something Light, Personal, and Printable
Butterflies, mushrooms, windows, and ornate bookmarks all begin with the same question: where should light pass through, and where should the printed detail catch your eye? If you have an illustration you would love to turn into a translucent object, FacFox can help you test materials, refine the thin areas, and choose a production approach that suits the design.
Leave A Comment
You must be logged in to post a comment