In a world where video games have evolved so much that graphics can oftentimes be indistinguishable from actual film, it’s fun to look back at just how far the technology has progressed. Kids today have the option of playing entire libraries of free games via their smartphones, but just a couple decades ago the notion of a complex portable gaming experience seemed more like science fiction than a reality.
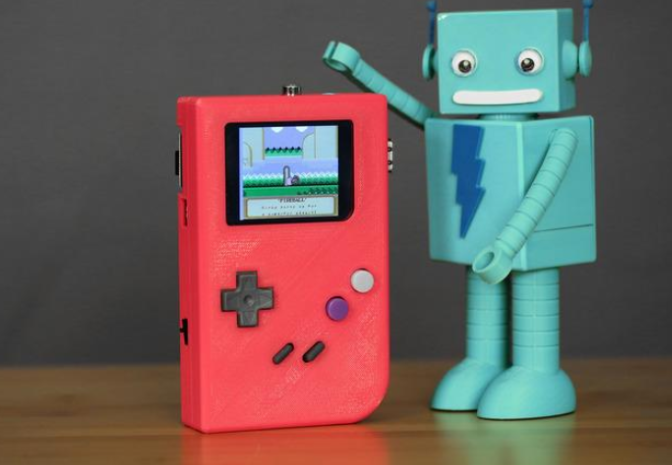
Popular DIY instructional website, Adafruit, recently published the schematics and instructions to allow anyone anyone with access to certain materials and equipment to 3D print their own Raspberry Pi enabled Gameboy, in commemoration of the 25th anniversary of the groundbreaking handheld gaming device of the 80’s.
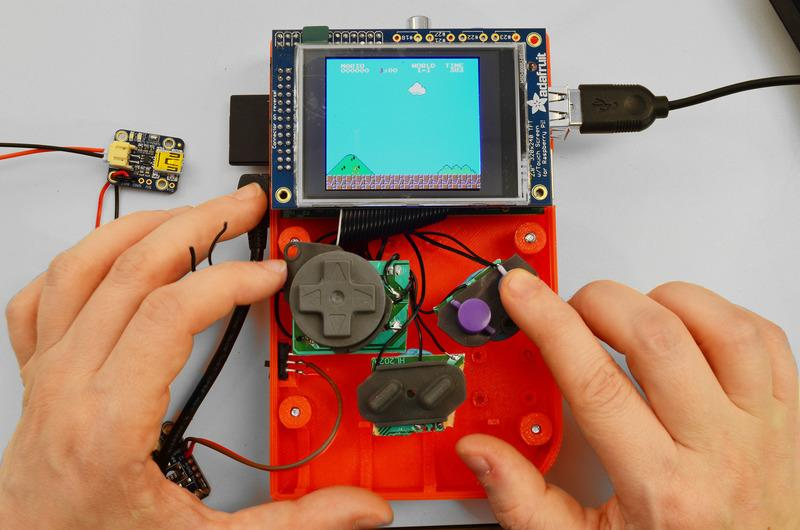
The device can be programmed to play any emulator game, including all your favorites from of the original GameBoy unit, such as Tetris, Paperboy, Super Mario Land, Double Dragon, and more. Thanks to the wonderful capabilities of 3D printing, a nearly exact design to that of the original, can be printed to house all the components which help run the emulator software for the device. As for the buttons used on hand held machine, they too could technically be 3D printed, however, Adafruit decided to take an easier way out, and use an old Super Nintendo controller.
In order to assemble the Adafruit version of Nintendo’s Gameboy, you will need quite a bit of experience working with Raspberry Pi, as well as a good deal of free time, and the following parts:
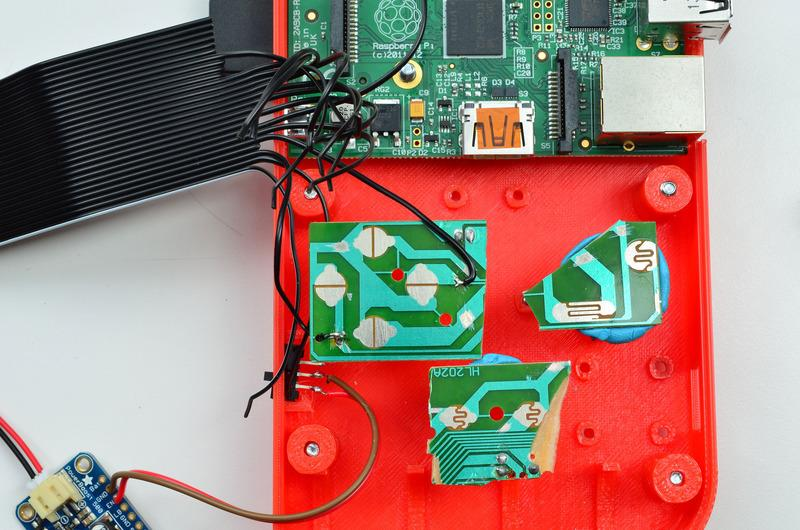
- Raspberry Pi Model B
- SNES Controller
- 2200mAh lithium cylindrical battery
- PiTFT Mini Kit
- GPIO Pi Cable
- PowerBoost 500
- Micro Lipo Charger
In additional to these parts, you will need to have access to the following equipment:
- 3D Printer
- Wire Strippers
- Panavise Jr.
- Heat Shrink Pack
- Fun-Tac, Putty
- Soldering Iron + Solder
- Third-helping hand
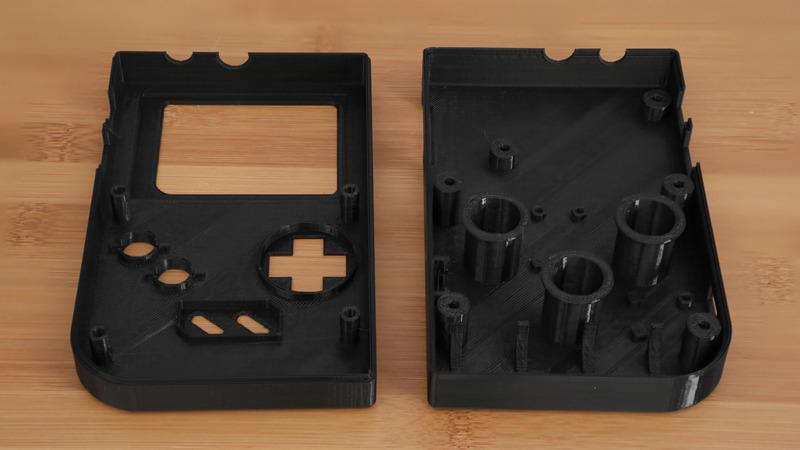
The 3D printed shell can be produced on any FDM based 3D printer which has a build envelope of 150mm x 150mm x 100mm or greater. It has been designed so that no support material is needed within the print. The .STL files can be downloaded free of charge off of Thingiverse. Once printed the two pieces snap together and then can be secured using comming Phillips’ screws. Wah lah! You have a real, working Gameboy!
This would certainly make a very entertaining, as well as educational project to work on with a youngster. If you have decided to dive into this project, please let us know how it goes in the 3D printed Gameboy forum thread on 3DPB.com.
Leave A Comment
You must be logged in to post a comment