Material Resin
Quantity 2 pcs
Price Range $1-100
Lead Time 2 workdays
Gallery
About Project
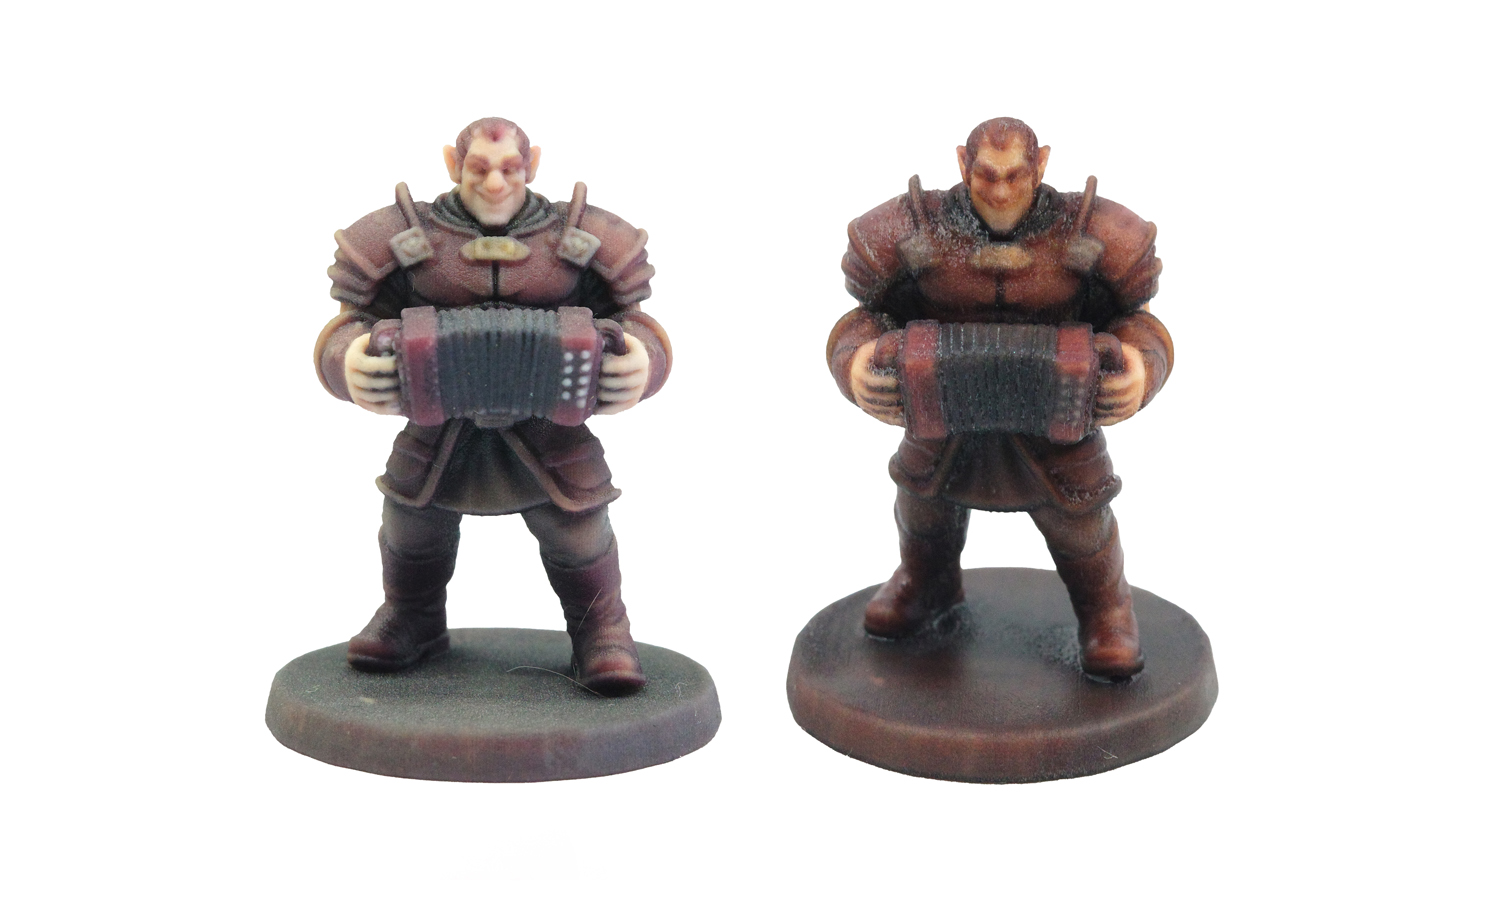
If you love board games and tabletop minis as much as we do, you know the thrill of unboxing a new character and seeing how the printing tech brings your digital sculpt to life. In this round, our Accordion Player steps onto the stage to show how WJP and Mimaki handle the same model very differently.
WJP (Left) – Crisp, Clean, and Table-Ready
WJP really shines if you’re the type of player who loves miniatures that read well from across the table.
Color & Tone
The overall hue is lighter than the original 3D model, giving the miniature a clean and readable look. Even though it’s lighter, nothing feels washed out.
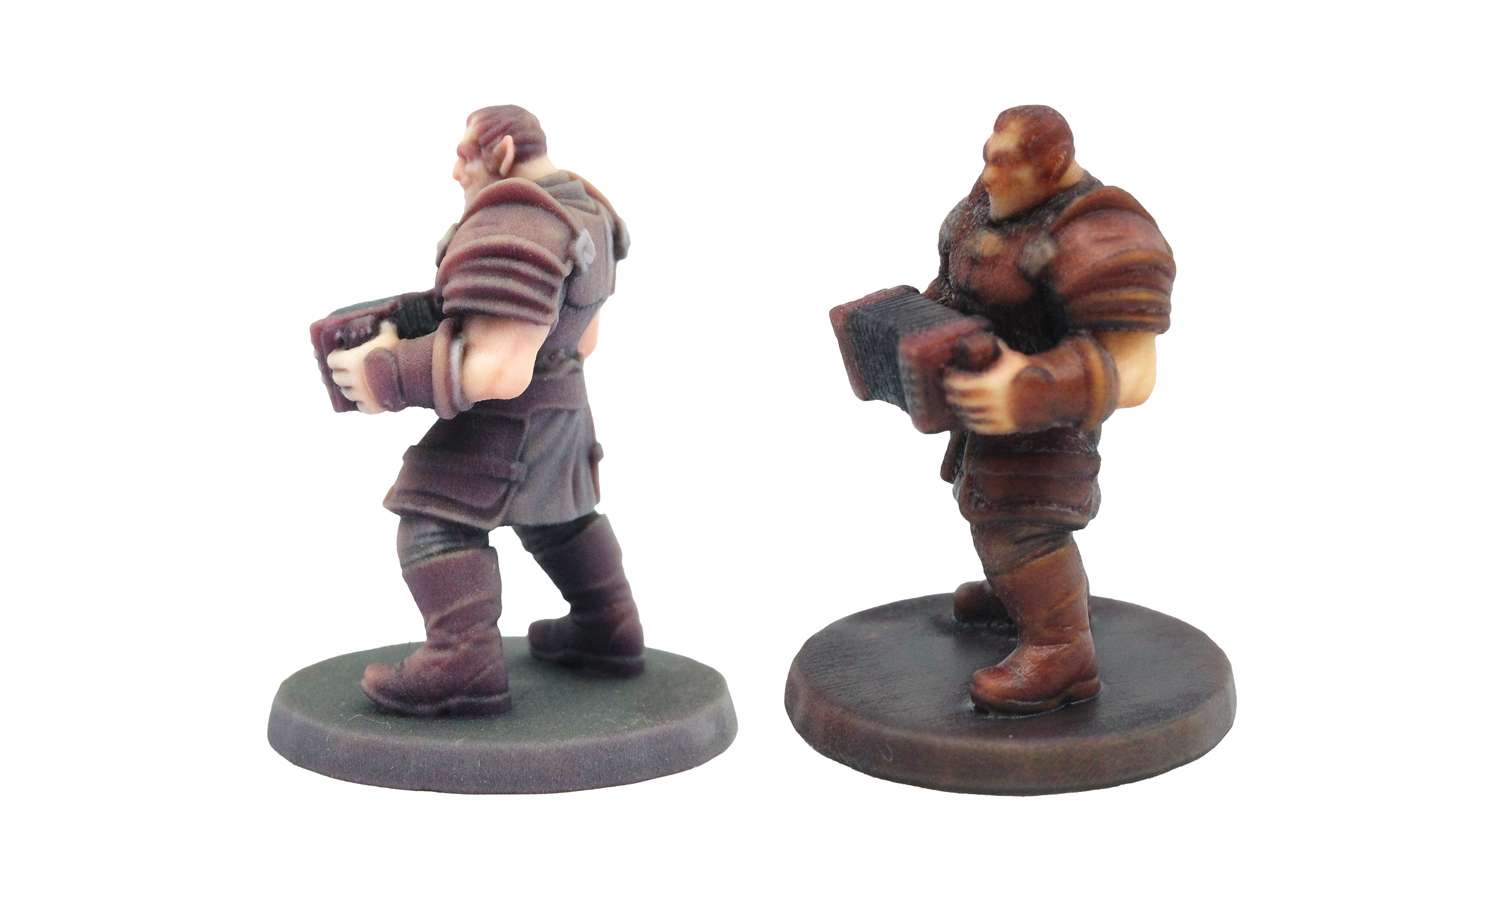
Detail & Contrast
This is where WJP wins big:
- High contrast between light and shadow
- Armor plates and clothing folds appear more defined
- Patterns on the accordion pop clearly
- The face and hands are easy to distinguish
It gives that “painted but still natural” feeling we want for tabletop characters.
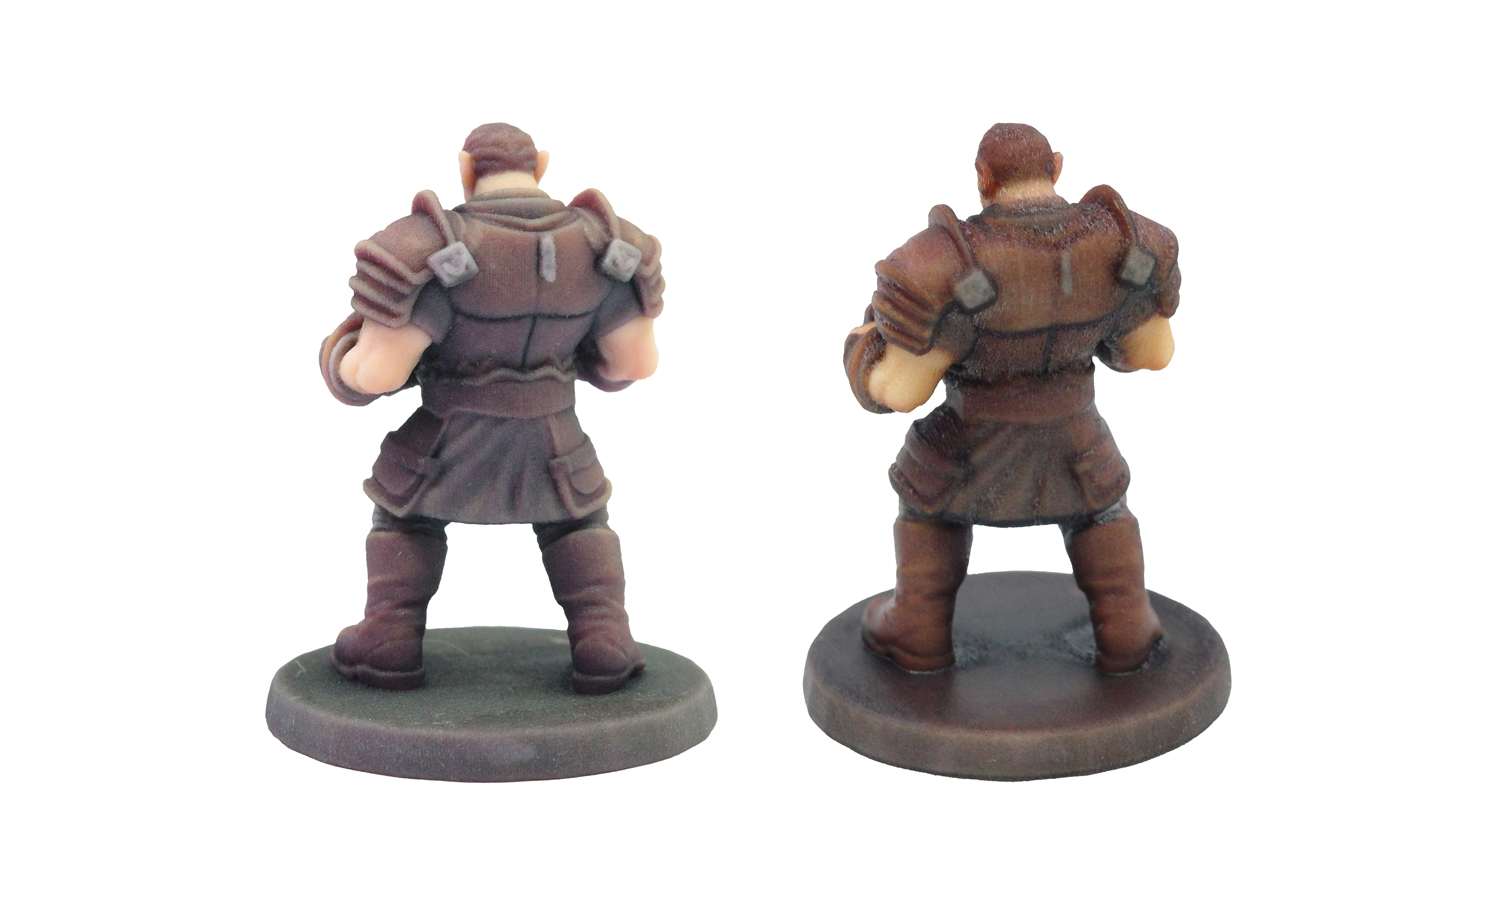
Surface Quality
Smooth, matte, and no defects.No gloss, no streaks-just a consistent, game-ready surface.
In short: WJP = clarity + readability + clean craftsmanship.
Mimaki (Right) – Darker, Richer, but Softer
Mimaki has a unique look that some players enjoy for a more moody, saturated aesthetic, though it comes with trade-offs.
Color & Tone
The colors come out much darker, giving the miniature a dramatic, gritty feel-almost like stepping straight out of a dungeon scene.
Detail Sharpness
This is where Mimaki struggles:
- Facial features are softer
- Armor edges blur together
- The accordion patterns are less clear
If you’re a fan of micro-details, you may notice the loss of crispness.
Surface Characteristics
The telltale reflective stripes are present-Mimaki’s signature artifact.Under good lighting, these shiny bands appear across the surface.
Overall: Mimaki = deeper color, darker mood, but softer detail.
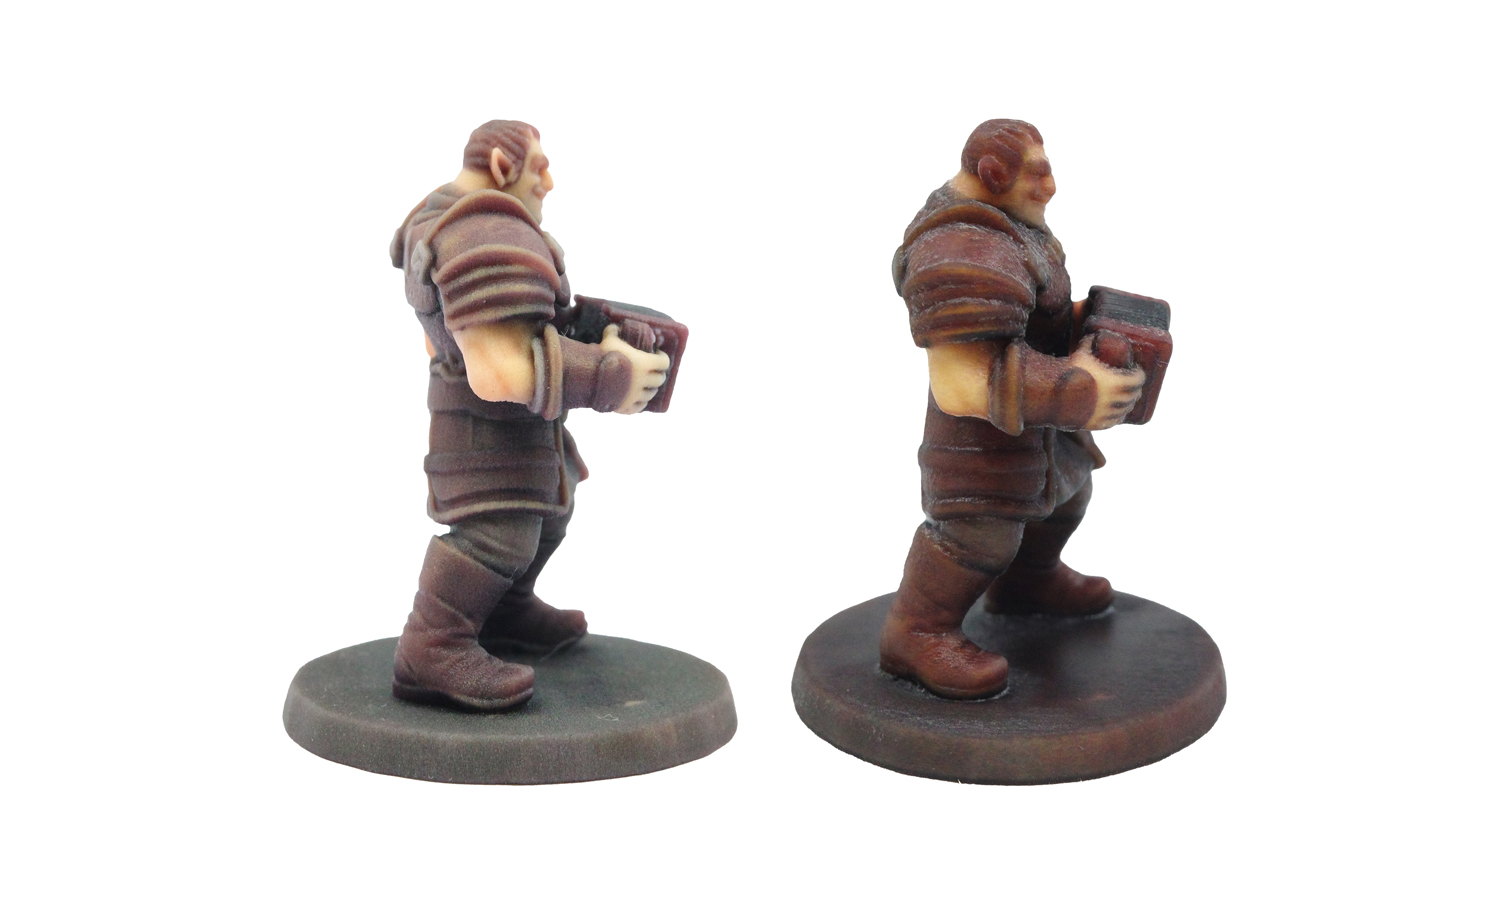
Final Verdict (From One TTRPG Fan to Another)
If you want the miniature to show every armor plate and crease clearly,вһЎ WJP is your go-to.
If you want a dark, saturated vibe and don’t mind losing some sharpness,вһЎ Mimaki can still deliver a very atmospheric piece.
Both have their charm-just depends on your table style.
Want your own minis printed? FacFox has your back!
Whether you prefer the high-contrast clarity of WJP or the rich tones of Mimaki, FacFox offers both full-color technologies with professional inspection, reliable turnaround, and global shipping. If you’re building a board game prototype, producing small-batch minis, or testing characters for your campaign, we can help bring them to life exactly the way you want.
Your miniatures, your style – FacFox prints them beautifully.
Solution
- Step 1: The Accordion Player 3D model was inspected and was repaired so that the mesh was fully watertight and suitable for full-color printing.
- Step 2: Color textures, including skin, leather armor, and accordion details, were applied in the 3D software and were baked into texture maps compatible with both printers.
- Step 3: The textured file was exported and was imported into the WJP full-color printing software, where the scale, orientation, and print resolution were configured.
- Step 4: A second build file was created in the Mimaki slicing software using the same scale and pose so that both versions could be compared under identical conditions.
- Step 5: The WJP version of the miniature was printed layer by layer in full-color resin, with geometry and color information being deposited simultaneously according to the sliced data.
- Step 6: The Mimaki version was then printed in full-color resin on the Mimaki system, using its own color profile and process parameters.
- Step 7: After printing, both builds were removed from their platforms, and excess resin and supporting structures were carefully cleaned away.
- Step 8: The miniatures were post-cured under controlled UV light so that the resin was fully hardened and the colors were stabilized.
- Step 9: Minor surface artifacts were gently brushed off, and the bases were cleaned to ensure that each figure stood flat on the tabletop.


