
Material Rubber
Quantity 1 pcs
Price Range $1-100
Lead Time 2 workdays
Gallery

About Project
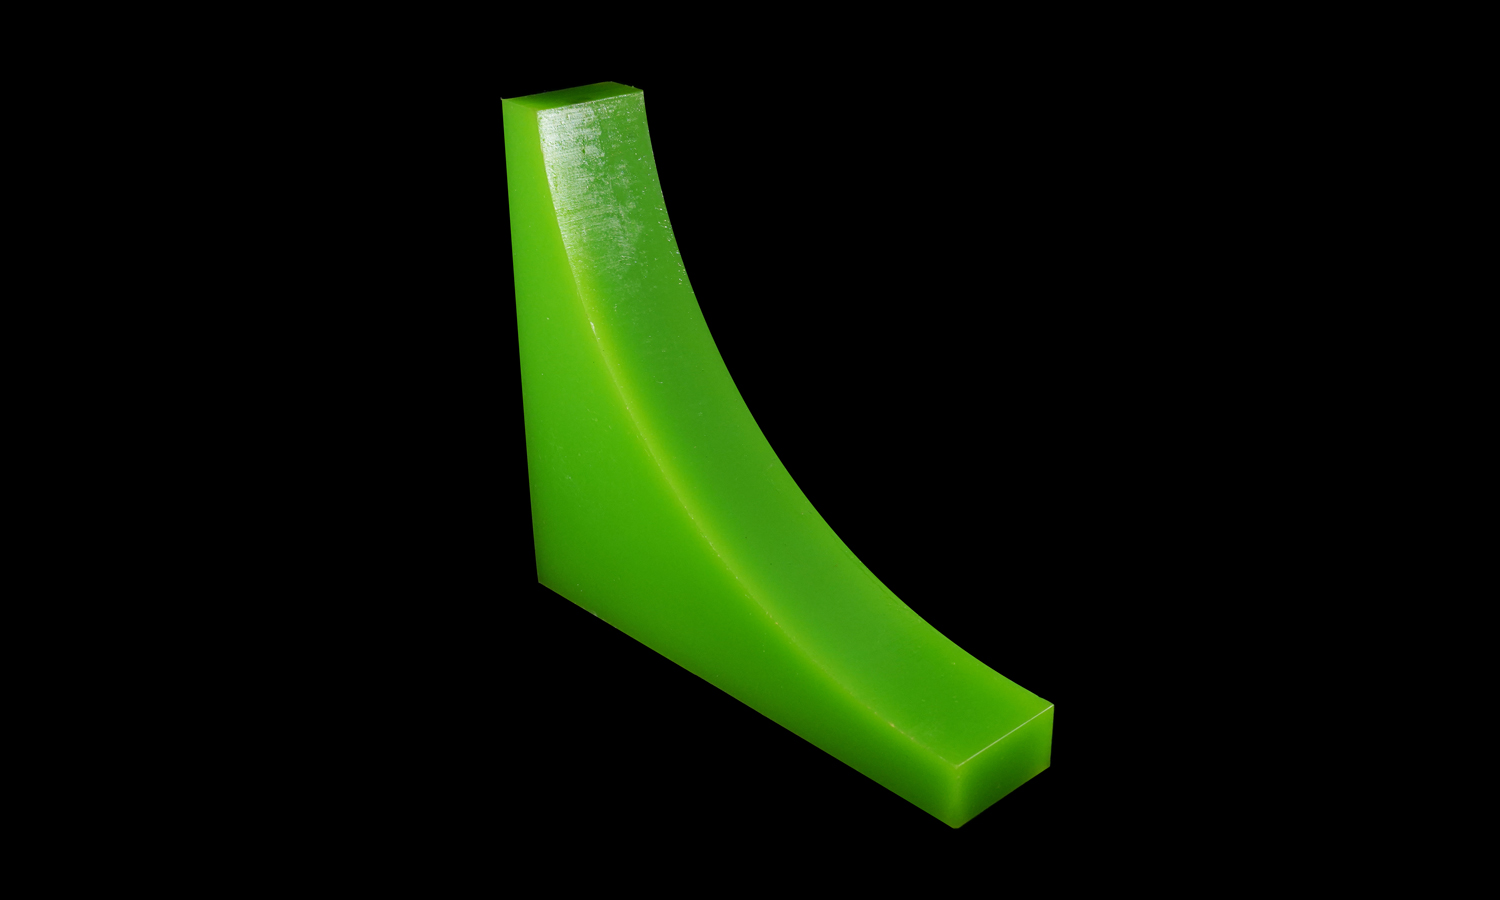
Tired of material carry-back slowing down your operations? This sleek, curved component is a high-performance Polyurethane (PU) conveyor belt scraper blade, designed to effectively clean your belts and reduce waste.
PU is the material of choice for demanding industrial applications due to its exceptional abrasion resistance, elasticity, and chemical stability. Unlike metal scrapers that can damage belts, PU blades are gentle yet highly effective, extending the lifespan of your conveyor system and minimizing maintenance. The vibrant green color you see isn’t just for aesthetics; it often indicates a specific hardness (durometer) or formulation, allowing for quick identification of the correct part in a busy industrial setting.
How does PU get its color? Polyurethane starts as a combination of liquid components. Dyes and pigments are added to these liquid resins before they are cast or molded. This allows manufacturers to create PU parts in virtually any color imaginable. Different colors can also be used to signify specific grades, hardness levels, or even to match corporate branding.
Looking for custom PU parts that precisely meet your industrial needs? FacFox offers expert PU manufacturing services. From custom scraper blades like this to complex seals and rollers, our advanced capabilities ensure high-quality, durable, and precisely engineered polyurethane components. Contact us today to bring your custom PU projects to life!
Solution
- Step 1: The specific CAD model was designed to match the required curvature and dimensions for the conveyor system.
- Step 2: A high-precision mold was fabricated, typically using CNC machining or 3D printing, to serve as the negative for the liquid polyurethane.
- Step 3: The raw polyurethane prepolymer and curative were preheated to specific temperatures to ensure optimal viscosity and chemical reactivity.
- Step 4: Targeted pigments or dyes were added to the liquid resin to achieve the distinct green color used for grade identification.
- Step 5: The components were degassed in a vacuum chamber to remove all air bubbles, preventing structural weaknesses in the final part.
- Step 6: The mixture was metered and poured into the heated mold, ensuring the cavity was completely filled without voids.
- Step 7: The part was oven-cured for several hours, allowing the polymer chains to fully cross-link and develop its trademark abrasion resistance.
- Step 8: The blade was demolded and trimmed to remove any excess material (flash) from the parting lines.
- Step 9: A final inspection for durometer (hardness) and dimensional accuracy was performed before the part was cleared for industrial use.


