
Material Resin
Quantity 1 pcs
Price Range $1-100
Lead Time 8 workdays
Gallery

About Project
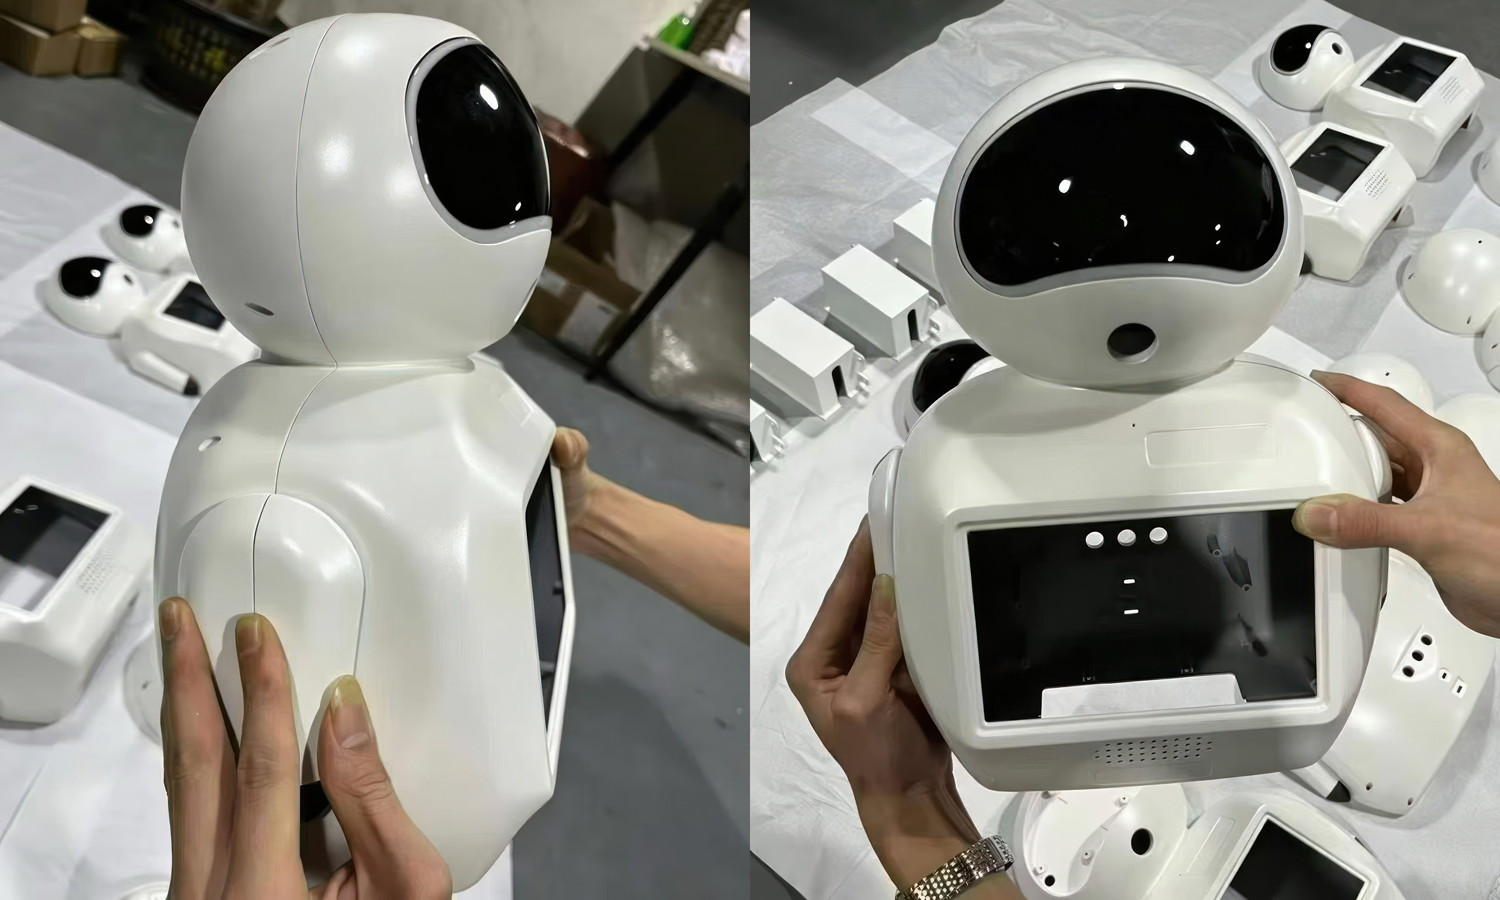
The future called, and itŌĆÖs surprisingly smooth. If you still think 3D printing is restricted to rough prototypes and grainy plastic trinkets, these sleek, adorable robot enclosures are here to politely prove you wrong.
Laid out like a high-tech assembly line, this batch of glossy, porcelain-white chassis and pristine black visors showcases what happens when precision engineering meets high-end additive manufacturing. Every curve is dialed in. Notice the flawless surface finish, the razor-sharp tolerances where the head seamlessly meets the body, and the perfectly crisp cutouts for the display panels and speaker vents. This isn’t just a proof-of-concept; itŌĆÖs a small-batch production run that looks less like a layer-by-layer print and more like it was birthed from a premium injection mold.
Historically, bringing a complex hardware vision to life meant bleeding capital over expensive industrial tooling before you could even test the user experience. This setup flips the script. It proves you can achieve retail-grade quality, deploy a pilot fleet into the wild, and iterate on the fly without compromising on structural integrity or aesthetic appeal.
Ready to turn your own digital blueprints into factory-quality reality? Whether you’re building a fleet of service robots or a specialized consumer tech product, FacFox is the manufacturing partner you’ve been looking for. Offering an elite suite of advanced 3D printing technologiesŌĆöincluding high-resolution SLA, SLS, DMLS, PolyjetŌĆöpaired with professional-grade post-processing that completely eliminates layer lines, FacFox erases the boundary between 3D printing and mass production. Bring your CAD files to FacFox and scale your ideas seamlessly.
Solution
- Step 1: Digital 3D CAD models were sliced and prepared for high-resolution Stereolithography (SLA) 3D printing. Liquid photosensitive resin was cured layer by layer using a UV laser to form the precise geometry of the robot enclosures.
- Step 2: The printed parts were removed from the build platform, and excess uncured resin was washed away in an isopropyl alcohol bath. Temporary support structures were carefully detached from the components.
- Step 3: The cleaned enclosures were placed into a specialized UV curing chamber, where post-curing was executed to ensure the material achieved its maximum mechanical strength and stability.
- Step 4: Progressive grit sandpaper was utilized to sand the surfaces, ensuring all witness marks from the supports were completely eliminated. A high-build primer coat was then applied to seal the resin and fill any remaining micro-imperfections.
- Step 5: Premium porcelain-white paint was sprayed onto the main chassis sections, while a high-gloss black coating was meticulously applied to the visor pieces. A protective clear topcoat was added to achieve the highly reflective, retail-grade sheen.
- Step 6: All finished components were inspected for surface uniformity, and a manual fit-check was conducted to verify that the tight assembly tolerances and alignments were successfully achieved.


