Material Resin
Quantity 1 pcs
Price Range $1-100
Lead Time 4 workdays
Gallery
About Project
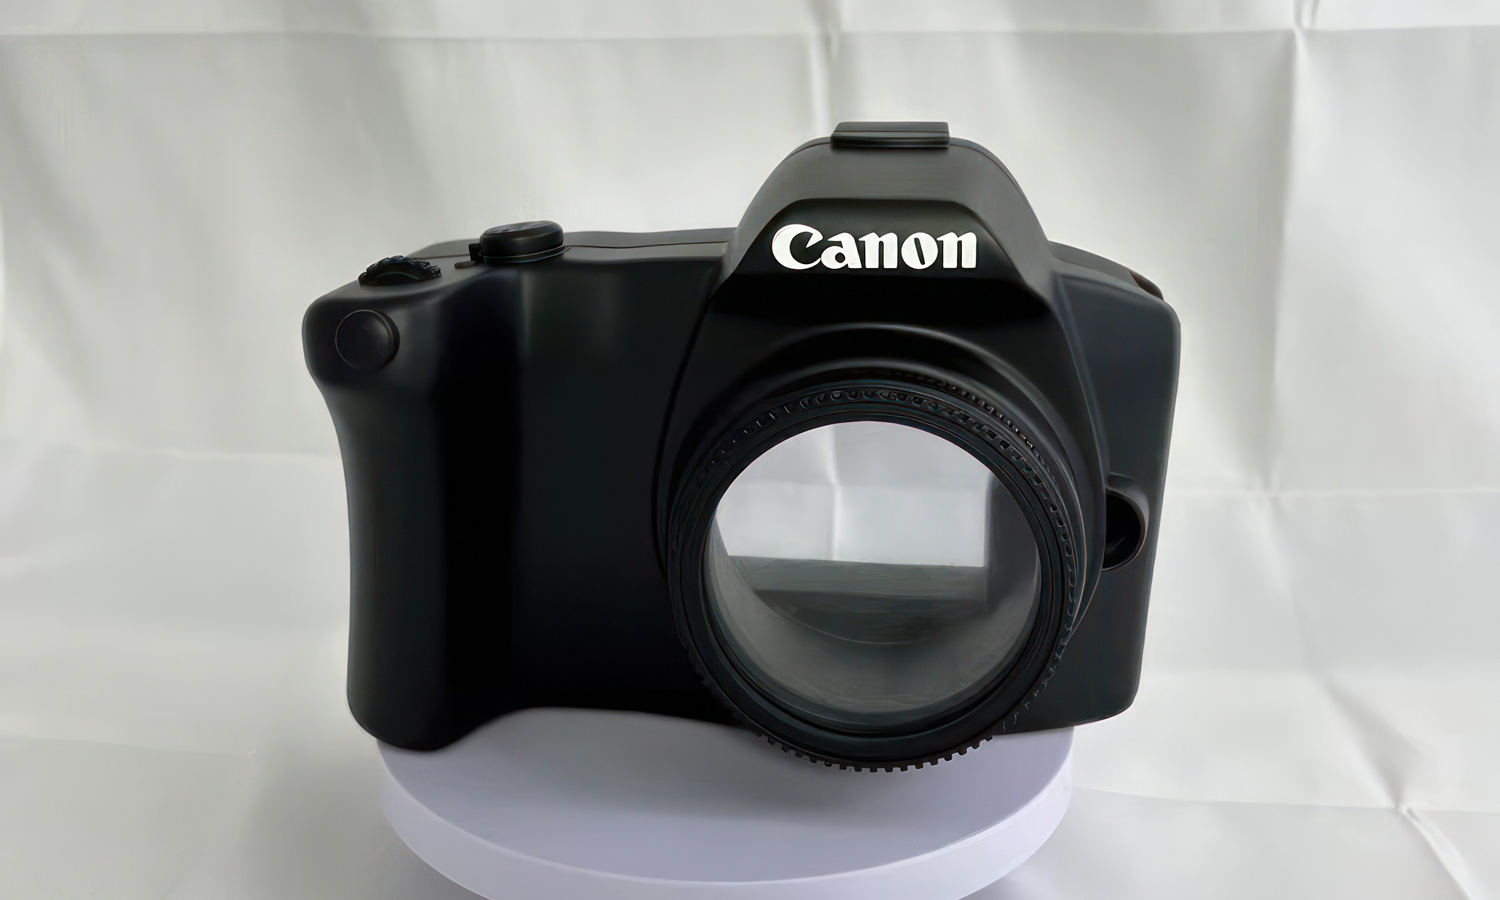
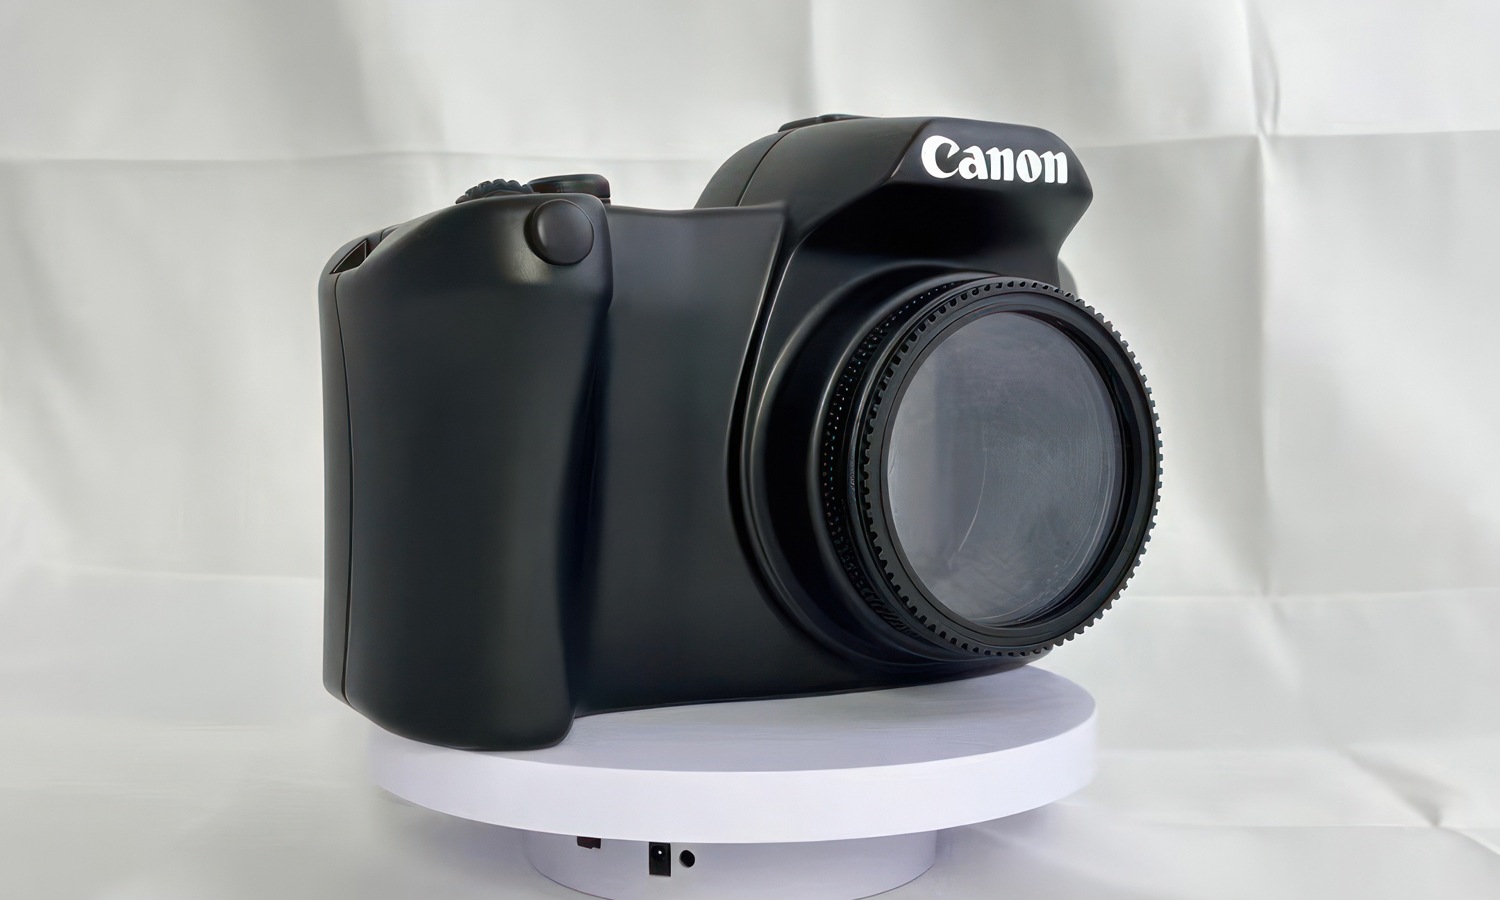
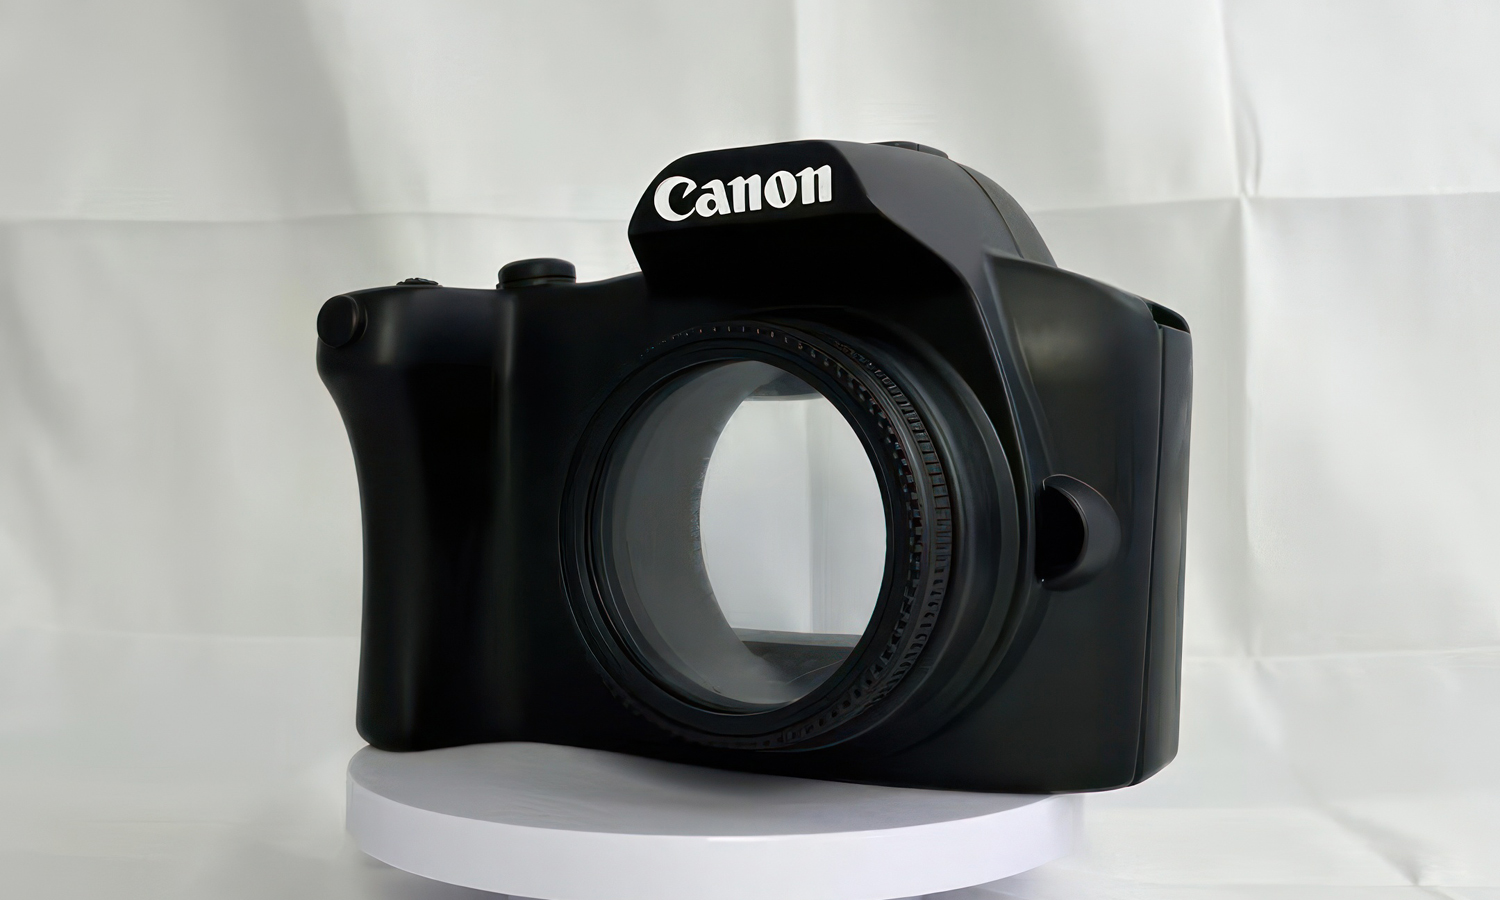
Take a close look at this stunning replica of a Canon DSLR camera. At first glance, you would easily mistake it for a factory-molded device straight off a retail shelf. But peer through that completely hollow lens barrel, and the magic is revealed: it is actually an incredibly detailed, 3D-printed display prop!
The craftsmanship on this piece is an absolute masterclass in rapid prototyping and fine finishing. Here is what makes it so impressive:
- Seamless Matte Finish: The ergonomic curves around the grip are flawlessly smooth. There isn’t a single visible layer line in sight, beautifully mimicking the precise look and feel of injection-molded plastic.
- Razor-Sharp Details: From the tactile ridges on the lens barrel to the crisp, clean white branding on the housing, every single detail is beautifully executed.
- Complex Geometry: The open, see-through body perfectly demonstrates how additive manufacturing allows for intricate, hollow designs that traditional manufacturing struggles to replicate.
Projects like this remind us how seamlessly 3D printing can bridge the gap between a digital concept and stunning, tangible reality.
If you’re looking to bring your own creative concepts or industrial prototypes to life with this exact level of premium quality, precision, and stunning finish, elevate your next project with FacFox’s comprehensive 3D printing services.
Solution
- Step 1: A highly detailed digital 3D model of the camera was designed, incorporating a completely hollow interior housing and an open, see-through lens barrel.
- Step 2: The 3D file was imported into specialized slicing software, where necessary support structures were generated and optimal printing parameters were configured.
- Step 3: The camera body was printed layer by layer using Stereolithography (SLA) technology and a premium black photopolymer resin to ensure ultra-fine geometric details.
- Step 4: The completed print was submerged and washed in an isopropyl alcohol (IPA) bath to remove residual uncured resin, and was subsequently placed in a UV chamber to be fully cured.
- Step 5: The support structures were carefully detached from the body, and a meticulous, multi-stage sanding process was performed to completely eliminate any remaining layer lines or surface blemishes.
- Step 6: A high-quality filler primer was applied to the smooth surface, and a professional coat of matte black paint was sprayed to accurately replicate a realistic camera chassis texture.
- Step 7: The crisp white branding logo was precisely applied to the front housing, after which a final quality inspection was conducted to complete the display model.


