Material Plastic
Quantity 1 pcs
Price Range $1-100
Lead Time 1 workdays
Gallery

About Project
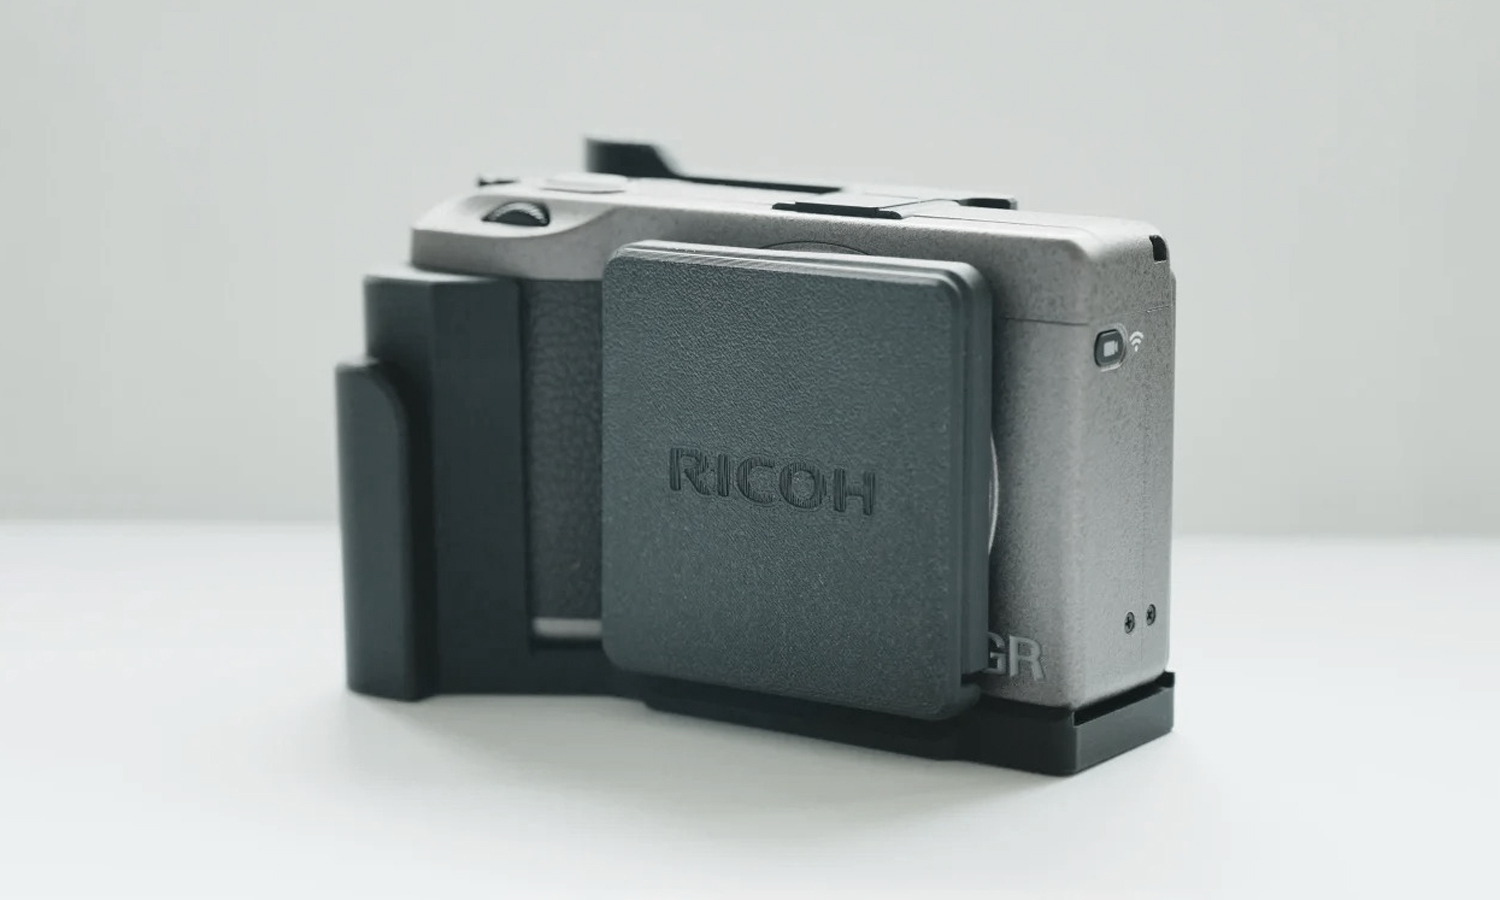
As a street photography enthusiast, I love traveling light. The Ricoh GR3 is one of my favorite everyday cameras for its compact size and stellar image quality – but after using it for a while, I realized I needed better ergonomics for extended shooting. That’s when I turned to 3D printing.
Custom Design Goals
The main objective was to improve handling without compromising portability. Using CAD software and multiple prototypes, I designed a set of functional upgrades:
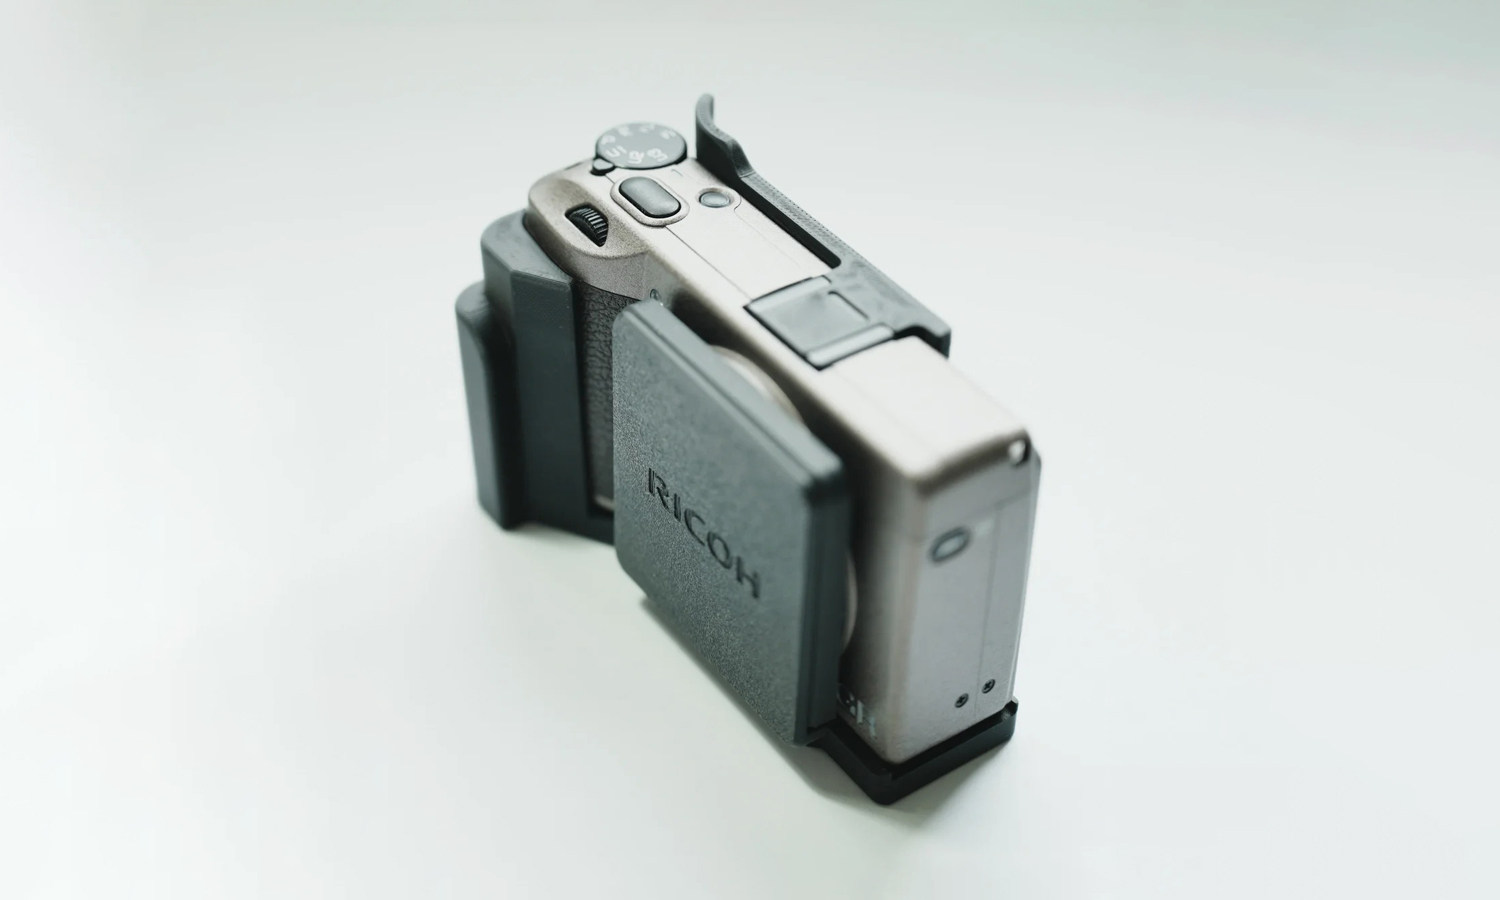
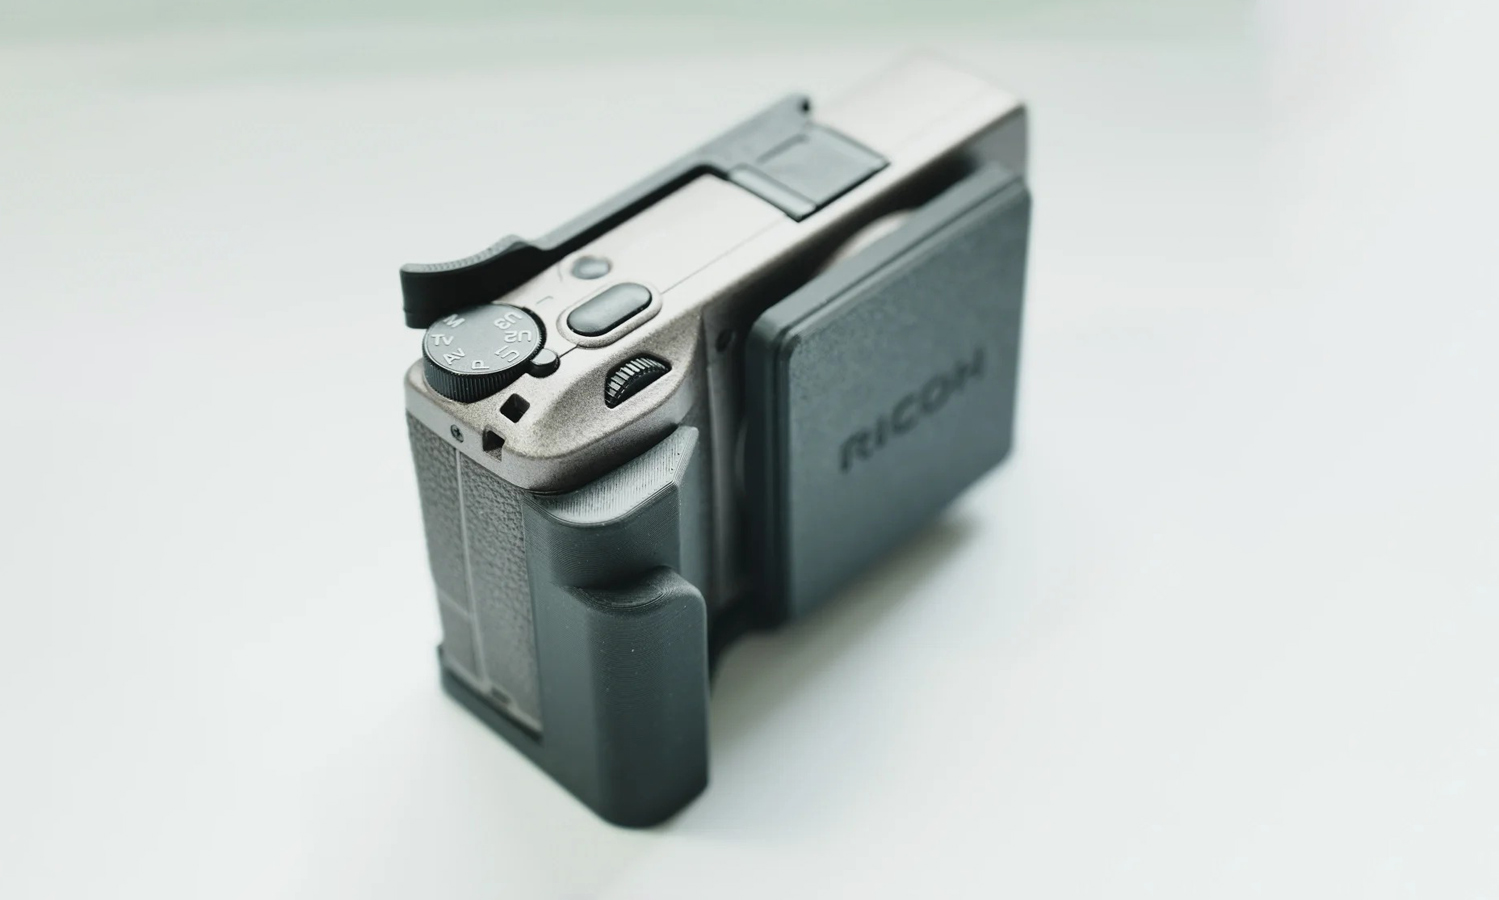
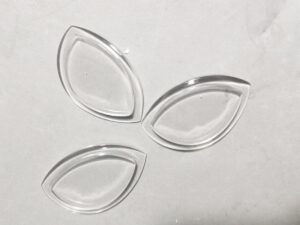
- Grip Extension: Designed to follow the contour of the camera body, this front grip helps prevent accidental drops and offers better control while shooting.
- Thumb Rest: A rear-mounted thumb rest was added for stability and comfort, especially during one-handed operation.
- Textured Surface: The grip features a subtle surface texture to further enhance the tactile feel and shooting confidence.
Printing Process & Material
All components were 3D printed using Polymaker HT-PLA, a heat-resistant PLA variant that combines rigidity, strength, and good dimensional stability. The finish blends well with the camera body, and the parts hold up well in daily field use – even under sunlight or extended handling.
Final Thoughts
This project proves that small, thoughtful mods can make a big difference in usability. The GR3 is now more comfortable to use, safer to carry, and even more fun to shoot with.
If you’re looking to upgrade or customize your own gear, FacFox offers professional-grade 3D printing services with a wide range of materials – from HT-PLA to industrial-grade nylon, TPU, resin, and more. Whether you’re working on ergonomic accessories, functional parts, or creative projects, we’re here to bring your ideas to life.
Let’s make your next project real: www.facfox.com
Solution
- Step 1: 3D Modeling. The accessories were first designed in CAD software. Ergonomic dimensions and contours of the Ricoh GR3 were measured, and grip and thumb rest components were modeled to fit snugly around the camera body.
- Step 2: Slicing. The final STL files were imported into slicing software. Print parameters such as layer height, infill density, and wall thickness were optimized for strength and surface finish suitable for handheld use.
- Step 3: Printing. The parts were 3D printed using Polymaker HT-PLA filament. A high-temperature nozzle and heated bed were used to ensure optimal adhesion and heat resistance.
- Step 4: Cooling and Removal. Once the printing process was completed, the parts were allowed to cool completely on the build plate to prevent warping. They were then carefully removed using a scraper.
- Step 5: Post-Processing. Support structures were removed, and any rough edges were sanded smooth. A matte finish was applied to enhance aesthetics and better match the texture of the GR3 camera body.
- Step 6: Assembly and Fit Testing. Each component was test-fitted on the GR3 to ensure secure attachment and proper alignment. Minor adjustments were made to improve comfort and grip.


