Material Resin, Metal
Quantity 1 pcs
Price Range $1-100
Lead Time 18 workdays
Gallery

About Project
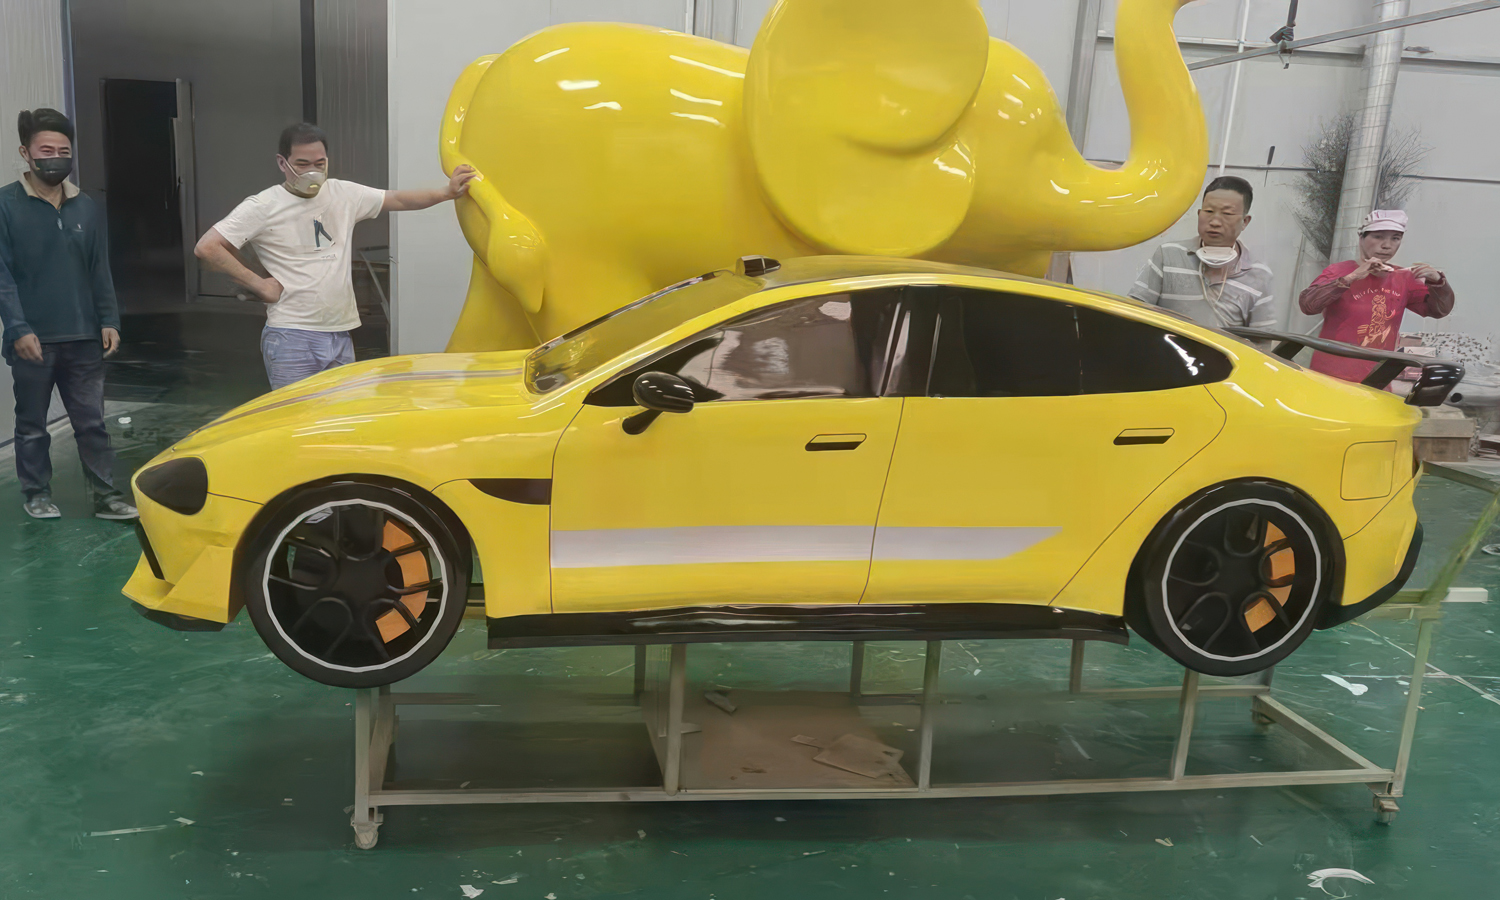
When it comes to grabbing attention at exhibitions, events, or showrooms, nothing speaks louder than a life-size car display model. FacFox recently brought the SU7 Ultra to life through advanced large-format 3D printing and meticulous finishing techniques.
Unlike a functioning vehicle, this model is designed purely for display – yet it captures every curve, surface, and highlight of the real car. The body was produced in sections with industrial 3D printing, then carefully assembled, sanded, and painted to achieve a sleek, glossy finish. Many structural details, such as door handles, air intakes, and window frames, were not physically modeled but artistically painted to keep the model lightweight while maintaining realism.
The result is a striking, full-scale automotive replica that allows designers, marketers, and audiences to appreciate the SU7 Ultra’s form in real-world dimensions.
¤ī¤ Whether for auto shows, promotional events, retail displays, or concept unveilings, FacFox’s expertise in 3D printing and finishing makes it possible to transform digital car designs into tangible, eye-catching exhibits.
¤æē If you’re looking to create a custom car display model – from scaled miniatures to full-size mockups – FacFox is your trusted manufacturing partner.
Solution
- Step 1: The digital 3D model of the SU7 Ultra was prepared and optimized for large-format printing.
- Step 2: The car body was divided into multiple sections to fit the build volume of the industrial 3D printers.
- Step 3: Each section was 3D printed with durable material to ensure structural stability.
- Step 4: The printed parts were removed from the machines and carefully cleaned of supports and surface residues.
- Step 5: The sections were assembled on a reinforced frame to form the complete full-size car body.
- Step 6: Joints and seams were filled, sanded, and smoothed to create a seamless exterior.
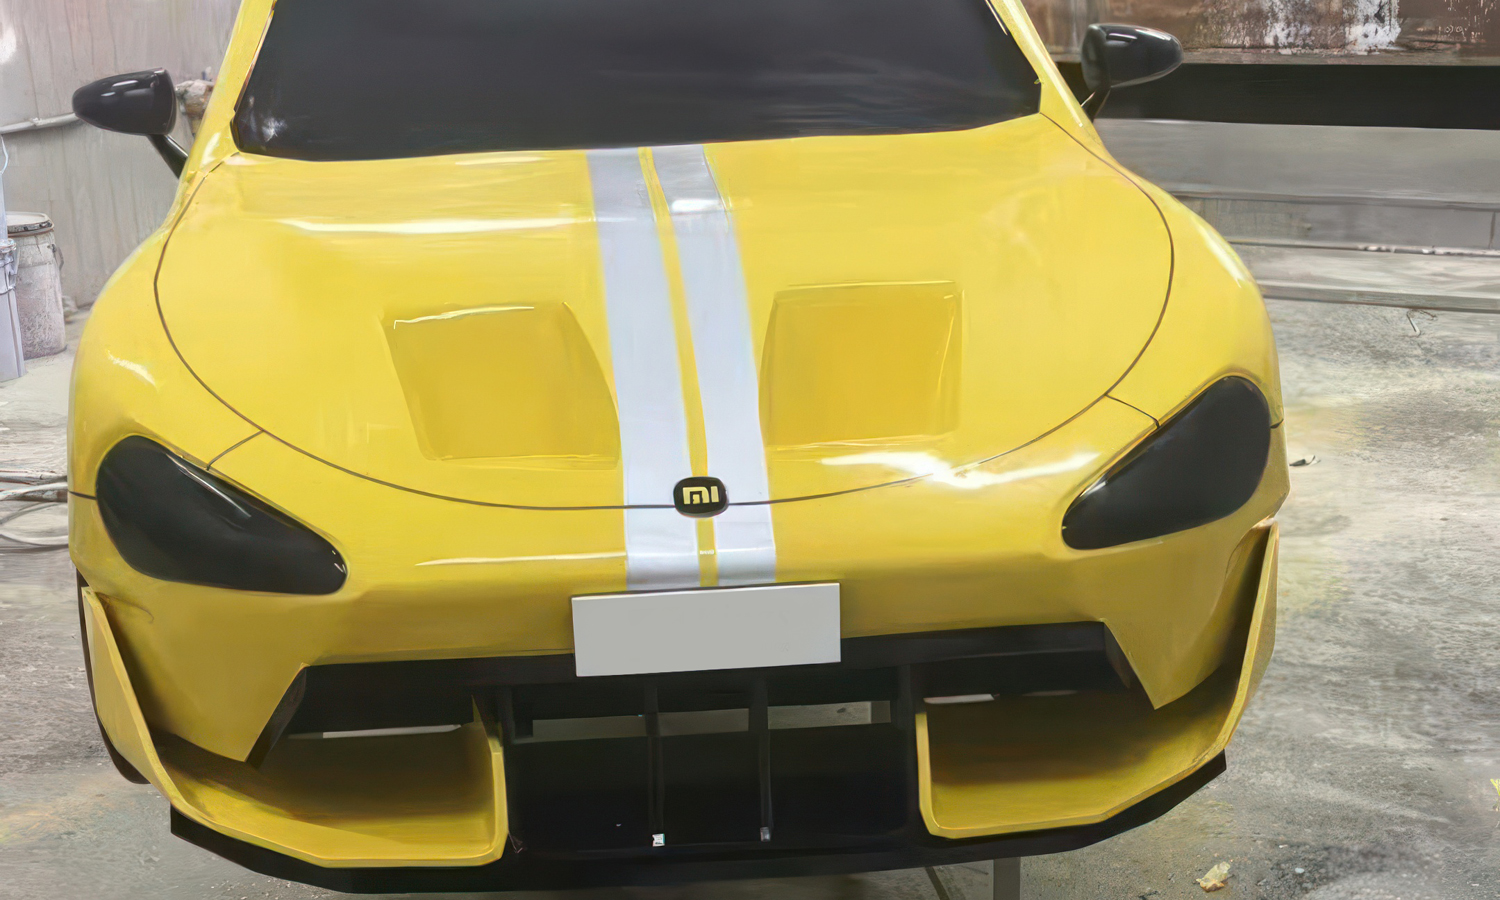
- Step 7: The entire surface was primed and coated with automotive-grade paint in bright yellow and black accents.
- Step 8: Additional details, such as handles, intakes, and windows, were painted onto the surface to enhance realism without extra weight.
- Step 9: The final model was polished and inspected to ensure a glossy, professional showroom finish.

