Material Resin
Quantity 1 pcs
Price Range $1-100
Lead Time 8 workdays
Gallery
About Project
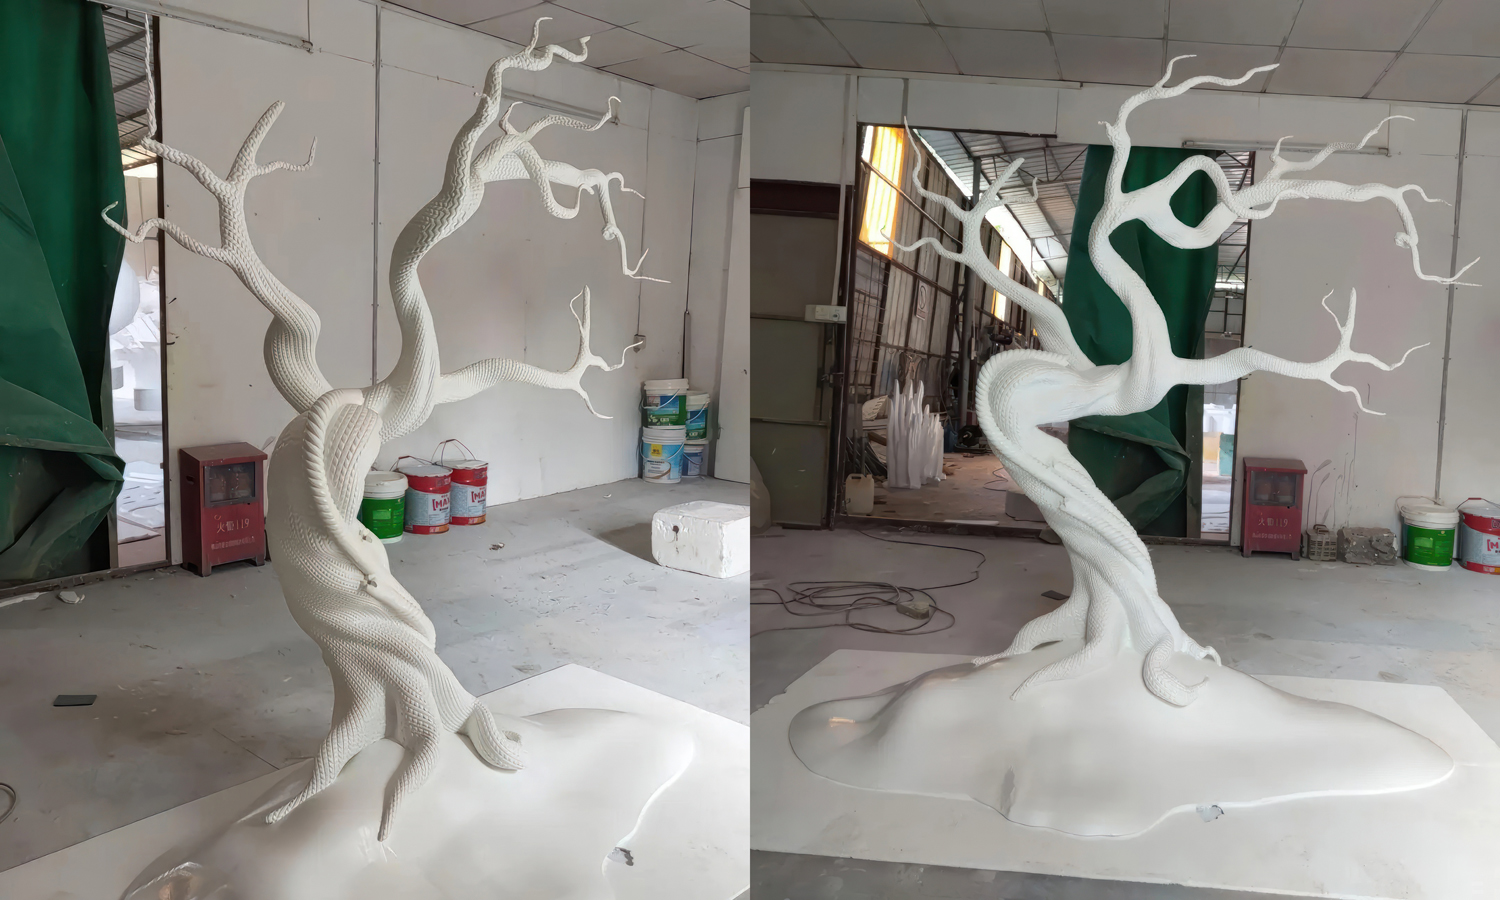
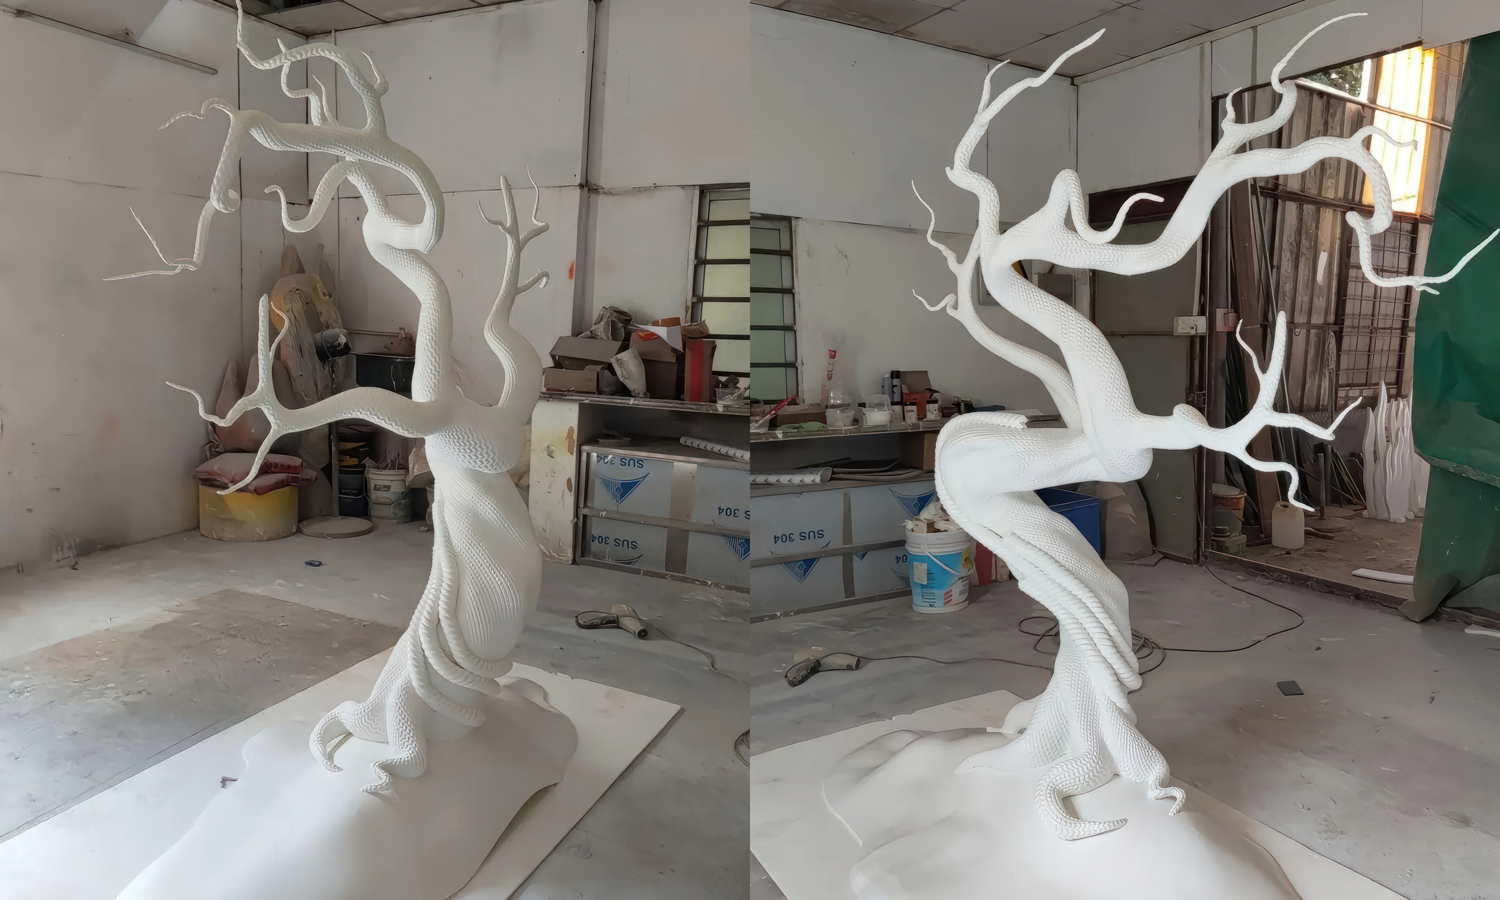
This striking tree sculpture showcases how 3D printing can bring complex digital art to life at a large scale. The twisting branches and flowing base merge organic beauty with a surreal, futuristic touch-like a tree grown from melted resin.
The entire piece features a repeating, woven surface texture that gives it a tactile, fabric-like quality. Despite the intricate geometry, the structure remains balanced and smooth, illustrating how precision resin 3D printing can capture both detail and motion in one form.
Standing over a meter tall, the sculpture was modeled with generative design tools to achieve its rhythmic, spiraling shape. The roots flow seamlessly into a glossy base that mimics the look of melting resin or liquid glass. The smooth transitions between the branches and the uniform surface texture make the piece appear both organic and digital-like nature reborn through computation.
- Printing quality: Exceptional – intricate texture reproduced with no deformation.
- Post-processing: Seamless assembly and even surface finish.
- Aesthetic effect: The contrast between the structured texture and fluid form evokes a dialogue between craftsmanship and technology.
Bring Your Vision to Life with FacFox
Whether it’s a digital sculpture, an exhibition piece, or a public art installation, FacFox can turn your creative concepts into tangible reality. Our SLA resin 3D printing service delivers ultra-smooth surfaces, fine textures, and scalable builds-perfect for art, architecture, and design installations.П÷▒┴ Transform your imagination into form with FacFox’s professional 3D printing solutions.
Solution
- Step 1: The digital model was created using parametric software to generate the repeating texture and organic curvature.
- Step 2: The sculpture was sliced and printed in multiple segments using SLA resin 3D printing, ensuring both precision and high surface fidelity.
- Step 3: The printed parts were joined with epoxy, carefully aligned, and reinforced internally.
- Step 4: The surface was sanded and primed to remove minor print lines and achieve a clean matte texture.
- Step 5: A glossy clear coat was applied to the base to simulate a fluid or melting effect, enhancing the visual depth of the design.


