Professional detailers hate the idea of imperfect surface texture – as they should. They see orange peel, which is quite literally when your paint is textured like the skin of an orange, and they want to correct it. This requires smoothing the surface by wet sanding through the clear coat and pigment layer.
Like we have referred to in this post, when spraying clear UV protective acrylic onto SLA prints, it’s easy to results in an ‘orange peel’ effect on the surface. This article will cover how your prints become riddled with orange peel and how to fix it.
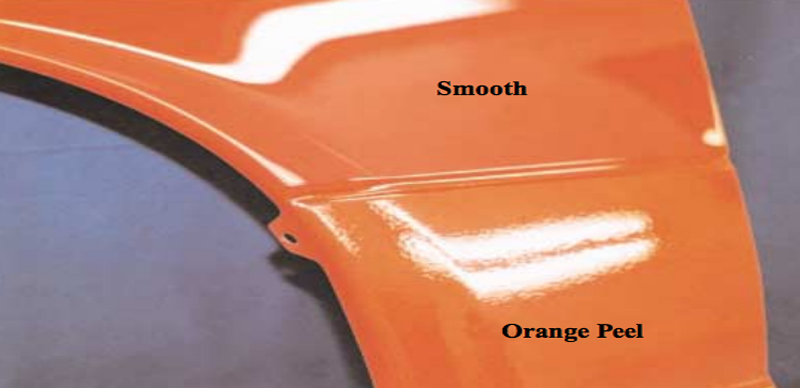
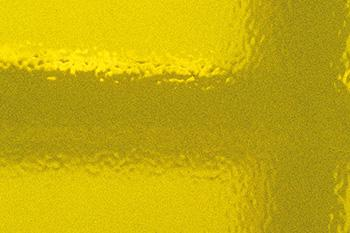
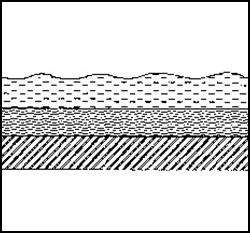
What exactly is orange peel?
Put simply, orange peel is a textured imperfection in a paint job. You can see it with your eye because the paint is wavy in a sense, and reflects light in different angles around the imperfection(s). The surface will appear bumpy and won’t reflect perfectly. Often times you will find orange peel on products that have been repainted. It can also come straight from the manufacturer in some cases.
What causes orange peel?
Not just what… it’s who, too. Orange peel is (in part) caused by improper painting techniques. Indeed the orange peel effect has a few different causes. It can be caused by premature evaporation of thinner, incorrect spray gun setup (ie. low air pressure or incorrect nozzle), spraying at an angle other than perpendicularly, or applying excessive paint. 90% of the time, it’s human error.
- Spray gun held too far from the object
- Spray pressure too low (poor atomization)
- Paint film too thin
- Viscosity too high (paint too thick)
- Hardener and/or thinner too fast for the conditions or size of the object
- Spray nozzle too small
- Flash-off time too long between coats
How to avoid it?
- Keep spray gun within the recommended distance from the object
- Ensure spray pressure is as recommended
- Always apply wet coats
- Adjust paint viscosity as recommended
- Choose correct hardener and thinner (temperature table)
- See tech data for correct choice of spray nozzle
- Allow a long enough flash-off between coats
How do you fix orange peel?
In short, for minor problems, sand down with P1200, polish with Glasurit 562-1602 Fine Polishing Compound and finish with any standard high-gloss polish. For major problems, sand down completely and apply a new finish.
You need to wet sand if the orange peel is bad enough. We recommends starting with a medium polish to see if you can address the problem without being too abrasive at first. If that doesn’t work, you should progressively get more aggressive as needed. Wet sanding, of course, is the dive-right-in approach that is most commonly used, but this makes my teeth cringe. Basically, you wet the surface and the sandpaper, and diminish the clear coat until the surface is smooth. Then you follow a polishing procedure to further smooth out the scratches you have created with the sandpaper. Because correction is an abrasive process in which you are removing microns of clear coat, in no way does this restore the finish to factory quality or thickness.If you want orange peel gone for good and your finish restored to factory-like condition (with a full clear coat), the area will have to be repainted. Hopefully, it’ll be by someone with enough knowledge to ensure orange peel isn’t created a second time.
Leave A Comment
You must be logged in to post a comment