
If you’ve ever considered collecting action figures, then you’ve probably realized one thing – they can get very expensive. It’s not uncommon to see highly detailed action figures that cost $200 or more. A collection of these action figures can be considered a small fortune.
However, if you have a 3D printer, you can even create custom 3D models for printing by yourself. Check out our tips and tricks for getting the best results:)
Firstly, you should have a 3D model.
Start from downloading 3D models on the Internet
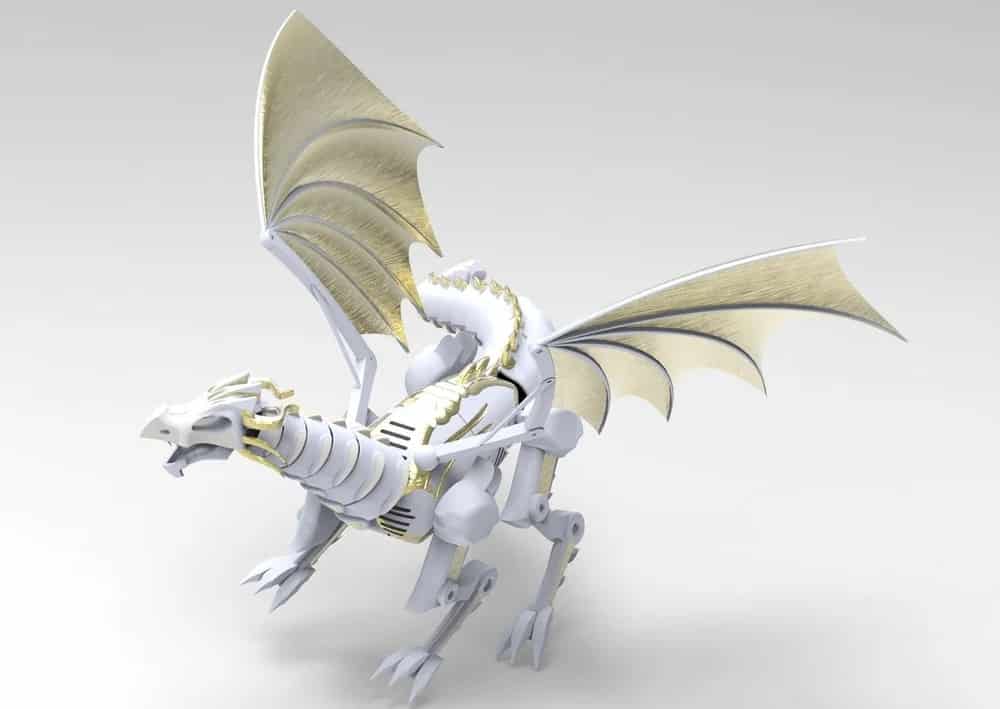
Every 3D printing project starts with a 3D model. The only question is – where is the model going to come from? If you just want to get to the 3D printing step as quickly as possible, then you can simply download models from any of these sites.
The main model repositories are listed below:
Also, you can use MakeHuman, a great tool to create your first 3D file. It’s free and open-source software that creates realistic and customized 3D humans which can still be further edited in programs like ZBrush and Meshmixer.
There’s also a service called MyFaceonaFigure.com, which will create a custom action figure for you starting at around $90. You simply send them pictures of your subject, taken from multiple angles, choose from a wide array of action figure body styles, and they’ll do all the work.
Start from scanning
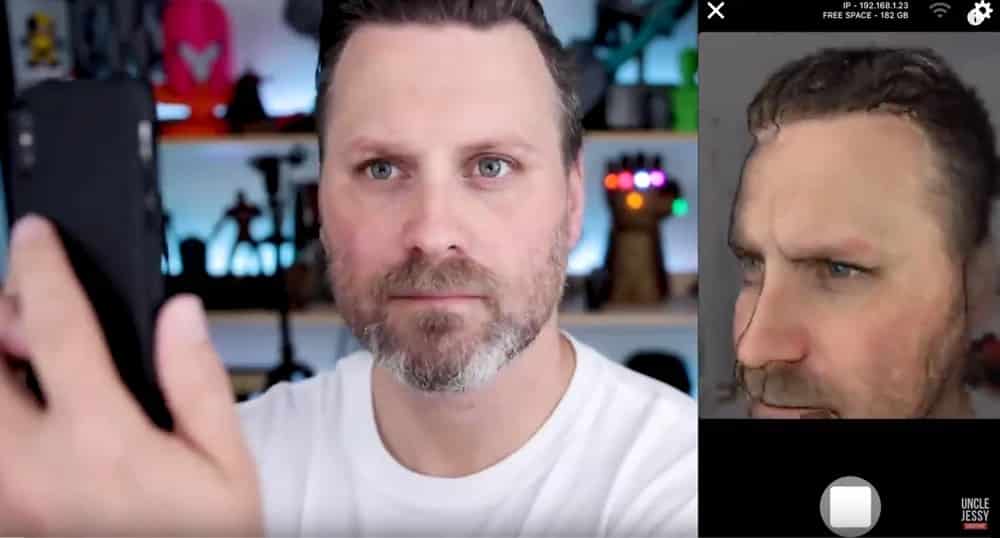
Of course, many people want themselves to be the main hero. In order to create a figurine that looks just like you, there are 3D scanners for the job. High-end scanning software can easily cost thousands of dollars – but there are cheaper alternatives. On the one hand, you could get yourself scanned (yep, there are services for that), or you could try to get a scan with a free app on your smartphone. Creating a decent 3D scan with a smartphone (or camera) is a bit trickier and may take a few attempts, but we’ve had quite a few positive experiences already.
The largest downside of any 3D scanning is that you’ll have to edit your 3D model for defects. Also, for full-body scans, your model will be static, without articulation. This means you’ll need to spend a significant amount of time designing suitable joints for 3D printing if you want a fully-functional action figure.
Start from digital sculpting
If you’ve never done digital sculpting before, then it’s going to take a lot of practice before you can come up with something that looks really good. The good news is that there a few software platforms that are decidedly user-friendly and make the learning process easier.
Step 2: 3D print your design
It doesn’t matter if you start from scratch, a scan, or a file. Two more things are essential for a successful 3D print – a well-prepared file and a basic understanding of the intended 3D printing material.

3D printing material
When it comes to action figures in professional 3D printing quality, you have several great options. For a 3D print that is printed in multiple colors, multicolor material is probably the way to go. If you want stronger plastic material and are thinking about painting the model yourself you should take a look at Polyamide or Gray Resin. Metal prints are also possible: steel, brass, bronze… you name it!
Below are the two most popular 3D printing filaments that are equally suitable. Each option has benefits and drawbacks, but they are both easily available. You might even already have spools of these filaments on hand.
- ABS: ABS is known for its strength and heat stability. It doesn’t crack easily, does not warp when exposed to heat, and is fairly stable when exposed to chemicals. If you want your action figure to last a long time, then ABS would be a better bet.
And it can be finished by an acetone vapor bath. By exposing an ABS print to dissolved acetone, the outer surface of the print dissolves in a very controlled manner. This results in the disappearance of its layer lines and an overall smoother finish.
However, it’s prone to warping, therefore requires very good bed adhesions aids, and emits a particularly noxious gas while printing. - PLA: It remains one of the most popular filament materials because of how beginner-friendly it is. Not only is it one of the more forgiving 3D printing filaments, but it’s also the only plastic filament that is sustainable and completely biodegradable.
Finishing a PLA print will require a more old-fashioned technique – sanding. By using sandpaper of different grit sizes, irregularities on the surface of a PLA print can be removed bit by bit.
File preparation
No matter what material you choose in the end, you always need to read the detailed design guides for some essential tips and tricks to prepare your file for 3D printing. You will learn why wall thickness is important and how the fragile parts of your model can be supported. We already mentioned it above, but it’s worth another reminder: a 3D scan always needs to be ‘cleaned up’ before it is printable, please check here to learn how to clean up a scanned model to make it printable.
Getting your professional 3D print
In order to receive a high-quality 3D print, you can simply upload your file here and choose from various materials and finishes. We will then print your model and ship it right to your doorstep:)
Don’t overlook post-process
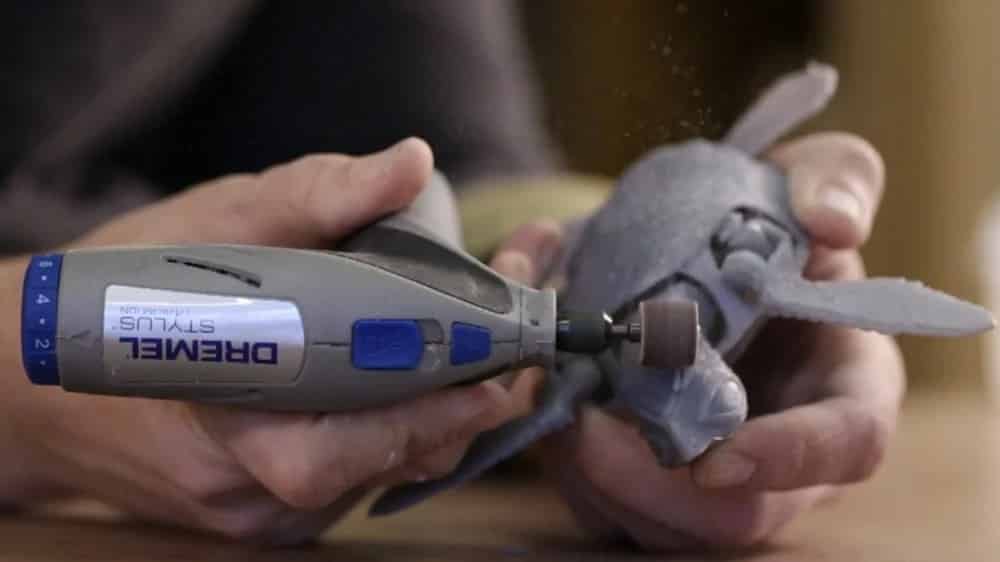
Once printed, your action figure likely needs some work to get to the displayable quality of a shelf-bought toy.
- First off, remove any supports for your print. You may want to invest in a craft knife (if you haven’t already) to remove small artifacts and particularly stuck supports.
- The next step is fitting the parts. Using sandpaper or a knife, carefully smooth out joints and connections until they fit together nicely. Glue together any parts that printed in sections using something like cyanoacrylate (super glue) or modeling glue.
- Now, it’s time to paint! With 3D prints, best practice is to first sand the parts, and then apply a base coat of primer (usually found as spray paint). If you don’t have access to a good primer, a single coat of matte, neutral-colored spray paint will do the trick nicely.
- Using detail brushes, you can apply as much or as little detail you want. Many people prefer to use modeling paints, but for most purposes, acrylic paint will work nicely.
- Once detail painting is done, a coat of clear spray varnish is a good idea to prevent the paint from scratching off easily, and to smooth out the model.
Accessorize!
If you really want to make your custom action figure pop, then you might need more than just 3D printed objects. How about giving your action figure some clothes or props? Clothes made with a real fabric look best, especially if you’re handy with a needle and some thread. If you’d rather buy miniature clothes from someone who knows what they are doing, then you can check out handmade crafts sites like Etsy and AliExpress.

Conclusion
Creating custom action figures is a huge undertaking. From coming up with a 3D model to fully painting and accessorizing a finished print, a custom action figure isn’t exactly the type of project that you can finish over one afternoon.
Despite the difficulty, creating custom action figures is still one of the most fun things that you can do with a 3D printer. This is especially true if you’re a huge fan of some video game franchise or comic book. By adding a touch of your own creativity, you can create action figures that are truly unique and would make a great addition to any collection.