If you have an award to give, nothing will look better than having a custom-made trophy with names printed in place. Not only will it be one of a kind, and therefore special, it’ll also be purpose-fit to the occasion!
In this article, we’ll go over how to make a 3D printable trophy, from modeling the basic shapes to coating it with a shimmering shine. Before that, however, we’ll first take a look at some impressive examples of 3D printed trophies.


If you’ve already got a design ready to go but don’t have the means to make it yourself, we suggest trying a 3D printing service. Through FacFox’s online 3D printing service, you’ll find a wide variety of materials and finishes at your disposal. When it comes down to it, a trophy’s job is to look special and last forever, and you can be guaranteed of both when you use a professional service.
Let’s get started!
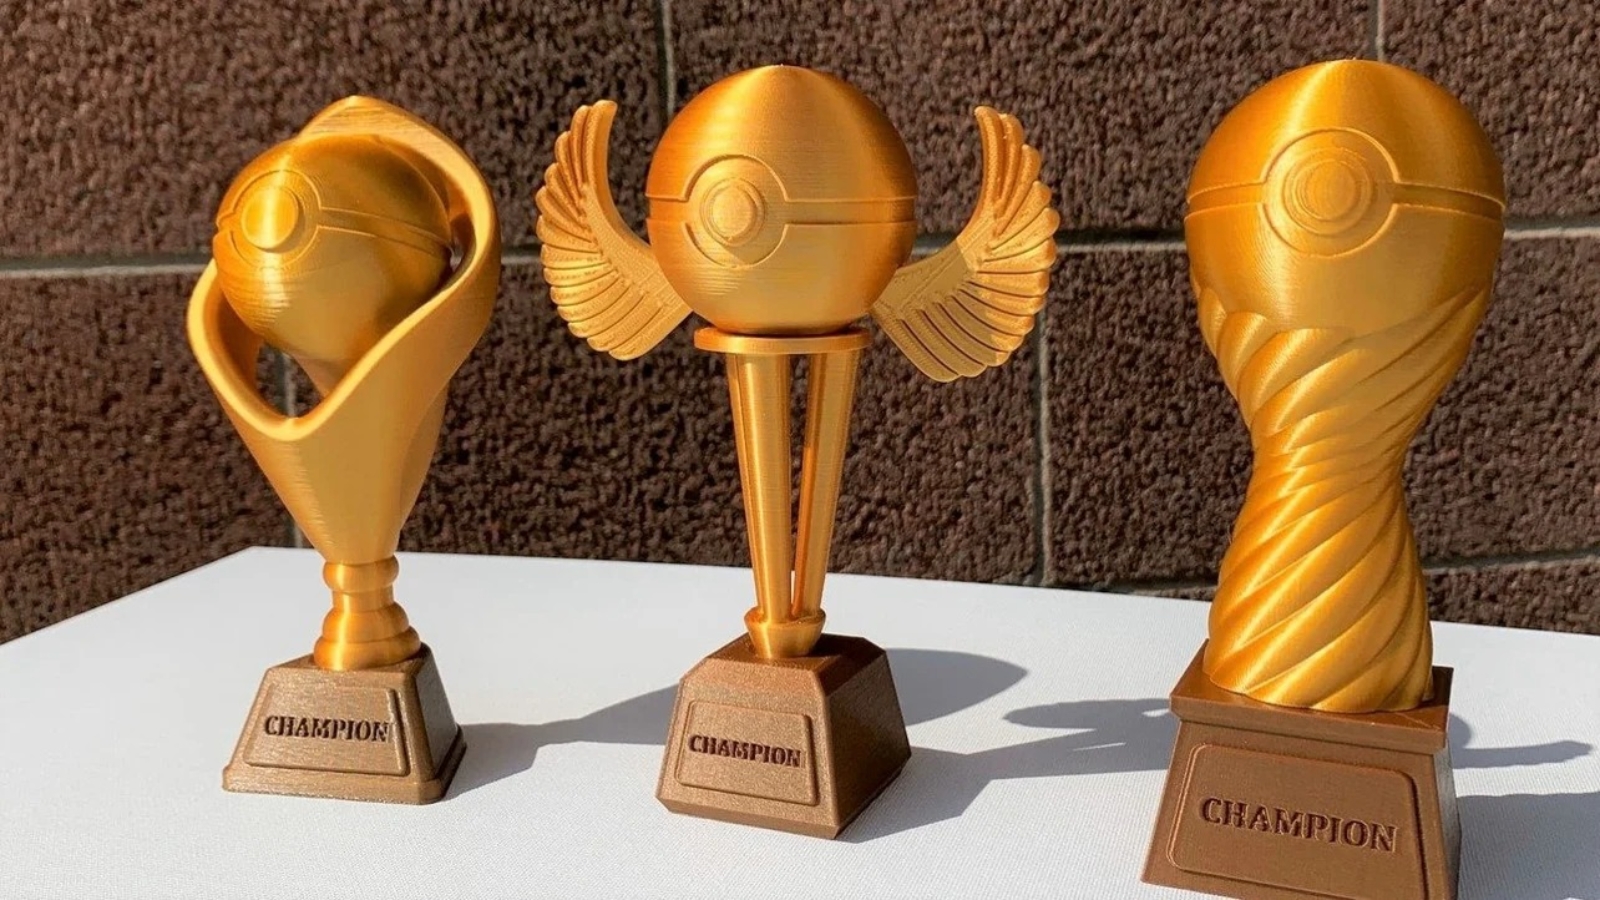
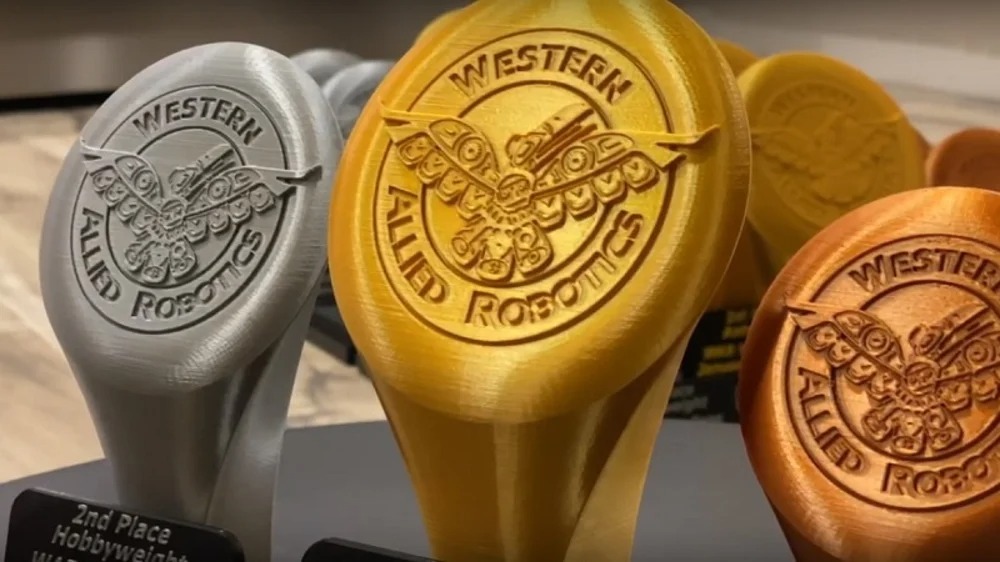
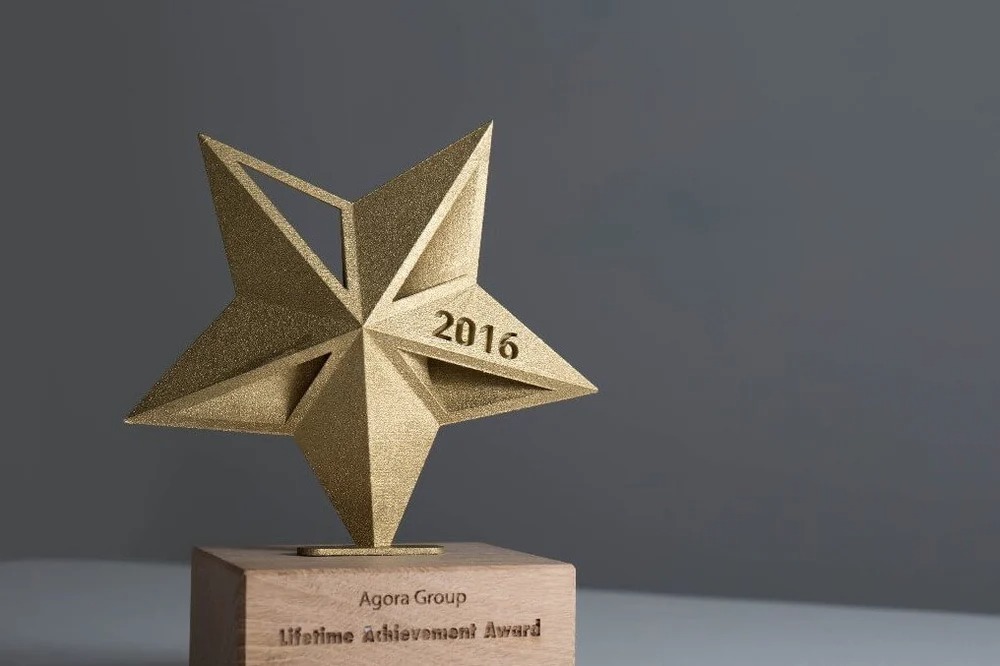
The above examples show that it doesn’t matter whether the design is simple or intricate. It can be of any form, whether an everyday object or something abstract. The only requirement is that it should be pleasing to the eye. To achieve this, we can break trophy creation down into three things: an interesting shape, a supporting pedestal, and a nice surface finish.
For the sake of simplicity, we’ll create a trophy featuring the common cup. That said, the same steps are more-or-less applicable to a trophy of any type.
Also for simplicity, we’ll be using Tinkercad to demonstrate the modeling steps. If you’re not familiar with the program, it’s a free, easy-to-use CAD tool that executes via your internet browser.
Here are the main steps we’ll follow to create the trophy:
- Modeling the body (including forming and hollowing the cup and base)
- Adding decoration
- Attaching the pedestal
- Adding text
- Printing
- Post-processing (including sanding and painting)
Modeling: Body
Cup
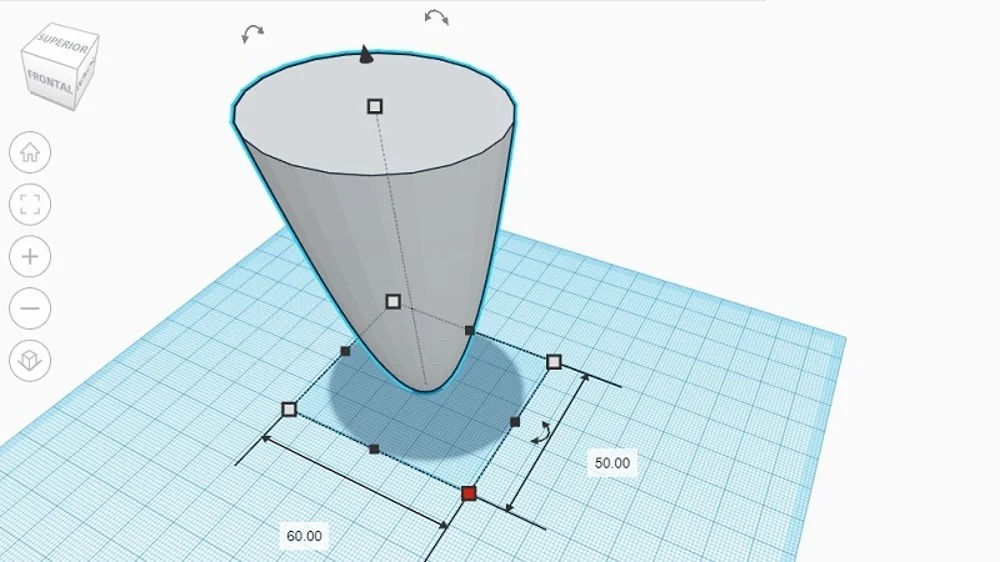
First, form the cup portion of the body using an upside-down paraboloid. You’ll find this under “Basic Shapes”.
Use the provided object operations to rotate and resize the trophy as desired. (Rotation can be restricted to 45-degree increments by holding Shift.)
Base
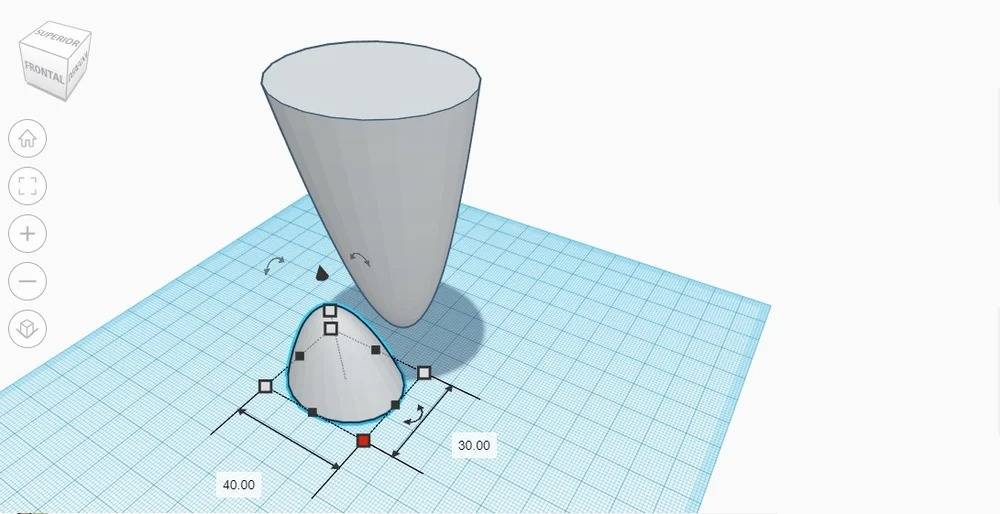
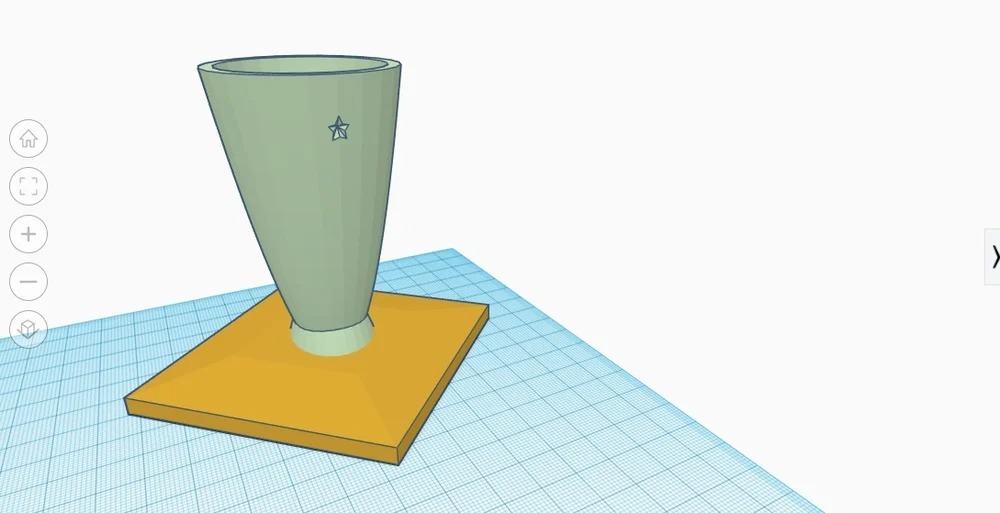
The base, in this case an upright paraboloid, is meant to give the cup more stability. In particular, it provides a larger surface area with which to attach to the pedestal.
Once you’ve sized your base, join it to your cup like this:
- Select both objects.
- Press the “Align” button.
- Center the objects in the X and Y directions.
- Press the “Group” button.
Hollowing
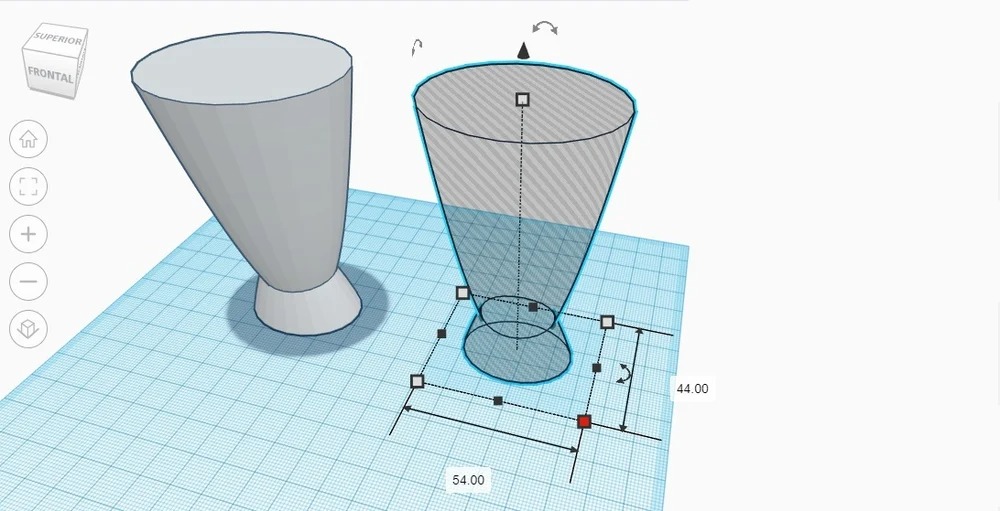
A cup isn’t really a cup unless it’s hollow. Let’s get to it.
More advanced programs can handle this step with an operation often referred to as “shell”. In that case, one must typically provide the wall thickness, and the software will work it out.
In Tinkercad, we’ll have to do this “manually” using the following steps:
- Duplicate the cup-base object.
- Set the duplicate to “Hole” (instead of “Solid”).
- Slightly reduce the length and width of the duplicate. (The subtracted value in each direction should be two times your desired wall thickness.)
- Use the align operation to center the objects in both the X and Y directions.
- Group the two objects together.
After completing these steps, the result will resemble a funny-looking funnel.
Modeling: Decoration
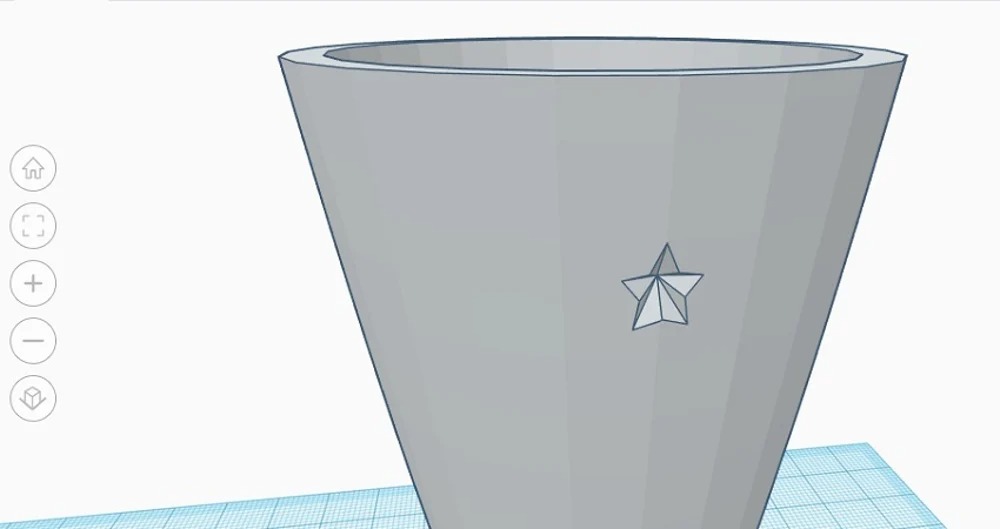
Most trophies, even cup-based trophies, feature some kind of decoration. As a simple demonstration, we’ll “carve” a small star into the surface of our cup. Naturally, you’re free to add whatever detail you like!
To create something like what’s picture above, you’ll need to do the following:
- Create a 3D star (found in “Basic Shapes”), making sure to set your desired dimensions.
- Set the star to “Hole”.
- Position your star so that it partially overlaps with the outer surface of the cup.
- Group the two objects.
Note that this decoration was made in a recessed and sloped way so as not to require supports during printing.
Modeling: Pedestal
Most trophies will require a pedestal of support. Apart from providing stability, it can also be used to display text.
A simple rectangular prism will do the trick, but we choose to angle the top outward to make added text easier to read from the front. We also rotated it with respect to the body. In this way, the pedestal sits like a diamond instead of a square.
To add your pedestal to your body, center the two objects in the X and Y directions and group them together.
Modeling: Text
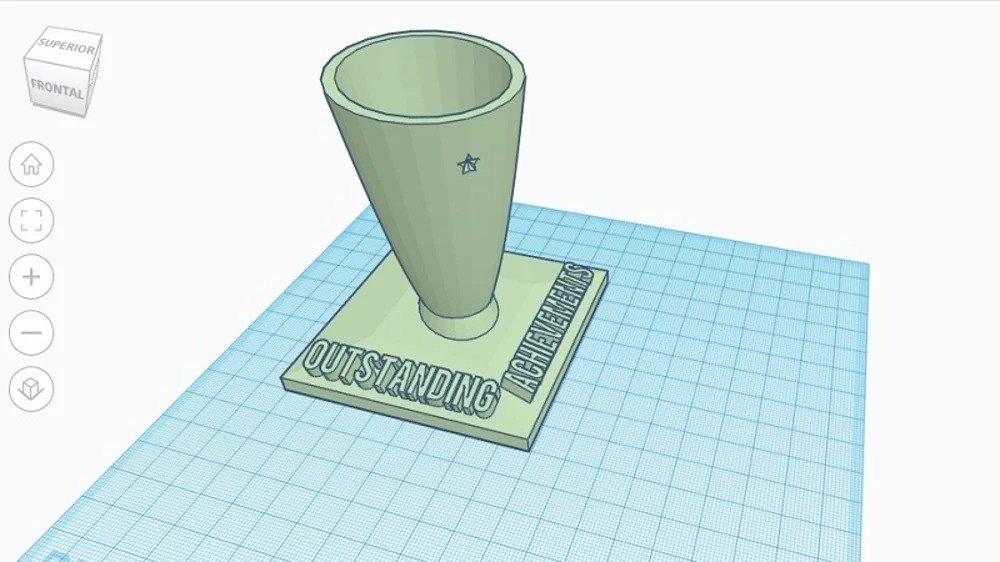
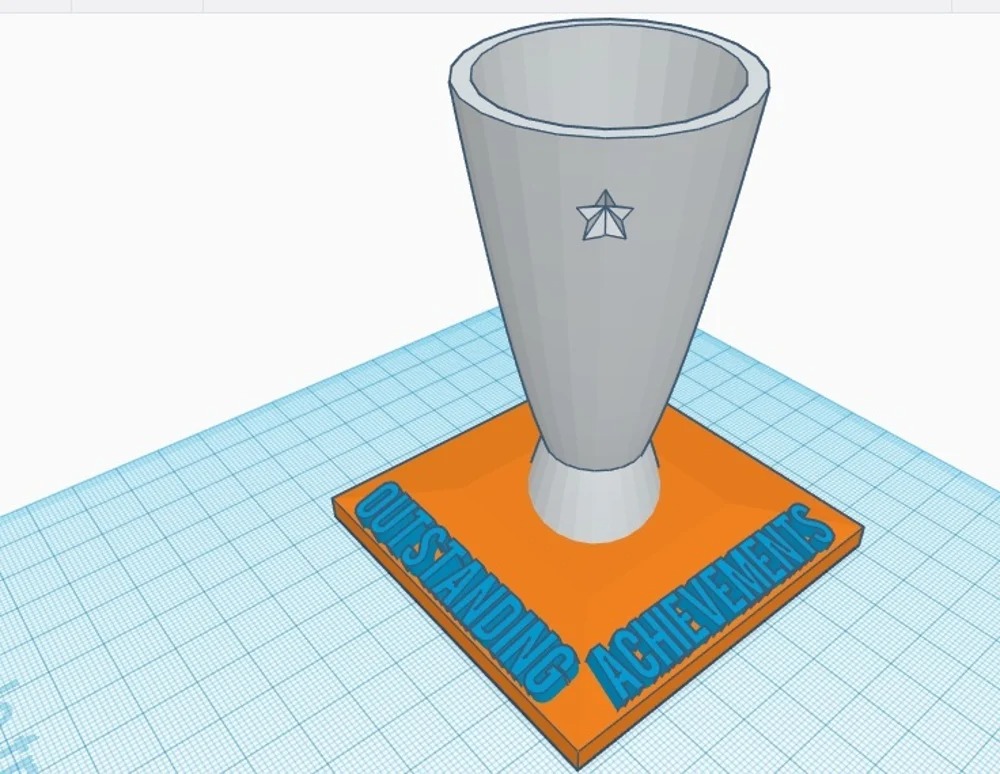
If you’ve more-or-less followed the steps (and images) until now, your pedestal should have enough space to display many letters. If you have a specific event, winner, or year in mind, these would make prime candidates. In our case, we’ll keep it generic with the words “Outstanding Achievements”.
Though it seems simple, this is one of the key advantages of 3D printing a trophy. With everything in one piece, your design will avoid the glued-on-plate look.
Tinkercad’s text feature allows one to quickly and easily make 3D text. Just make sure that your text is high enough so that the letters will be clear even after post-processing.
If you were able to slope the top of your pedestal earlier, a nice trick is to set a new temporary “Workplane” on the slope. This will allow you to better place your letters.
Otherwise, create your text, adjust the size, and group it along with the rest of your trophy.
3D Printing
Assuming your model is similar in structure and appearance to what we’ve presented here, printing your design should be fairly straightforward, requiring no supports or special settings.
To obtain your 3D printed trophy, do the following:
- Export your Tinkercad model as an STL file.
- Load the STL into your favorite slicer, and prepare it for printing using the best settings for your material of choice.
- Slice the model and transfer the G-code file to your printer.
- Start printing!
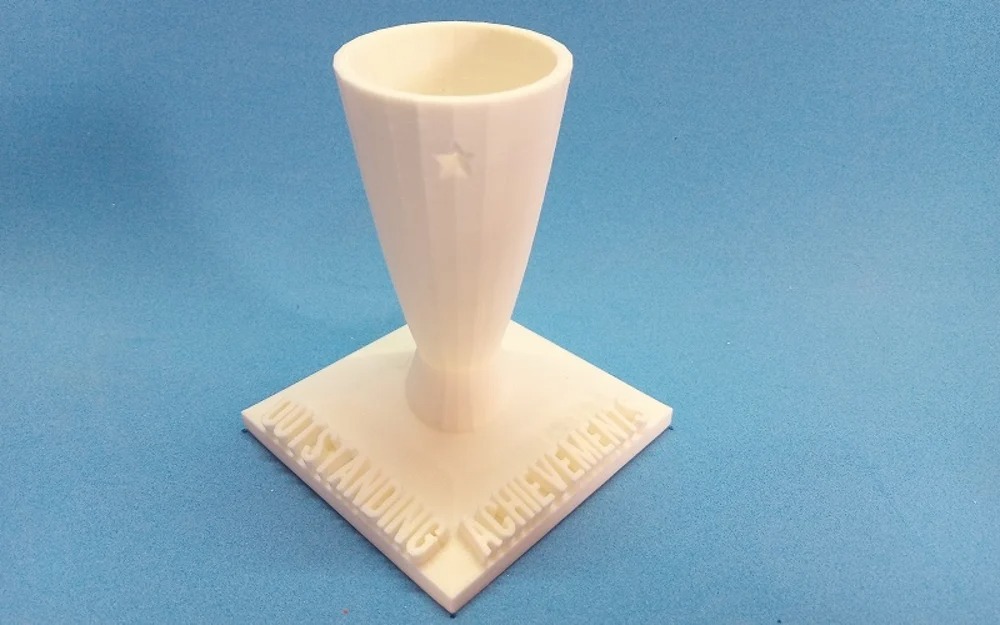
The above image shows our trophy in all its raw, unprocessed glory. (We used PLA with standard settings.)
Post-Processing
Sanding
Even with the finest settings (which aren’t necessary), an FDM print will look 3D printed. And that’s not something you want to see on the surface of a trophy.
For most prints, the first step is sanding. In general, sanding should be performed uniformly across a service in multiple stages. Earlier stages should use a coarser grit (e.g. 200) while later stages, a finer grit (e.g. 4000).
That said, it’s up to you to decide how obsessive to get with this step. And remember that microscopic edges and flaws will be covered up by the paint.
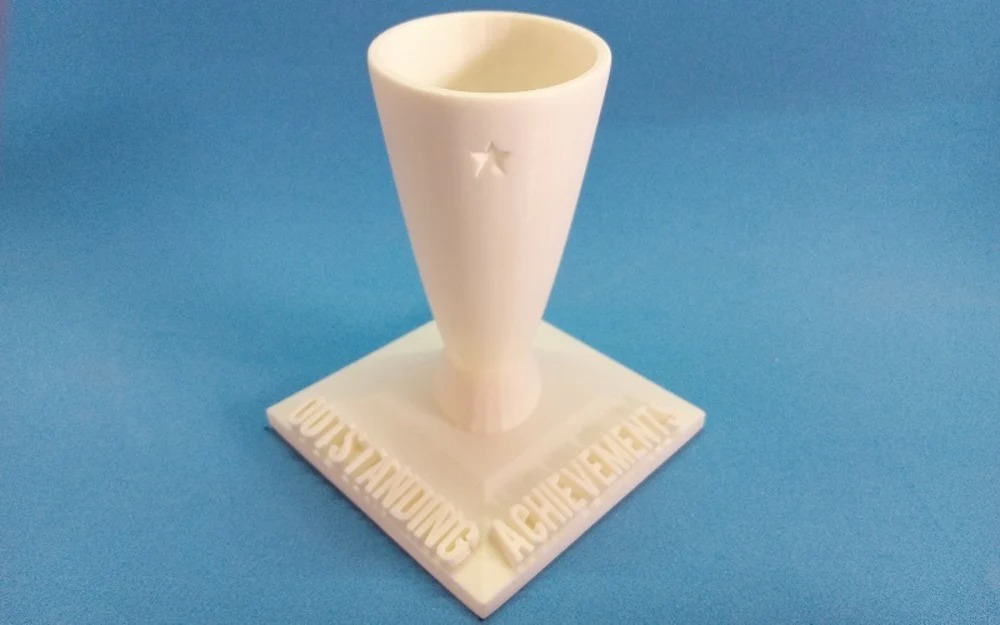
If you look closely at the above image, you’ll notice how the surface is much smoother after some heavy sanding. (It was sanded progressively, and the last grit used was 600.) The letters were left untouched so as to not wear them down.
Painting
Since it should be pleasing to the eye, the painting process is of fundamental importance.
It is recommended to do this little by little, adding one light coat of paint at a time. If too much paint is applied in a single coat, you run the risk of visible drops. Also, make sure to allow ample time to dry between coats.
As a model like this is bound to have many nooks and crannies, apply paint from several directions. It’s quite easy to overlook the little corners around the letters. When painting, always follow all safety recommendations, including setting up proper ventilation.
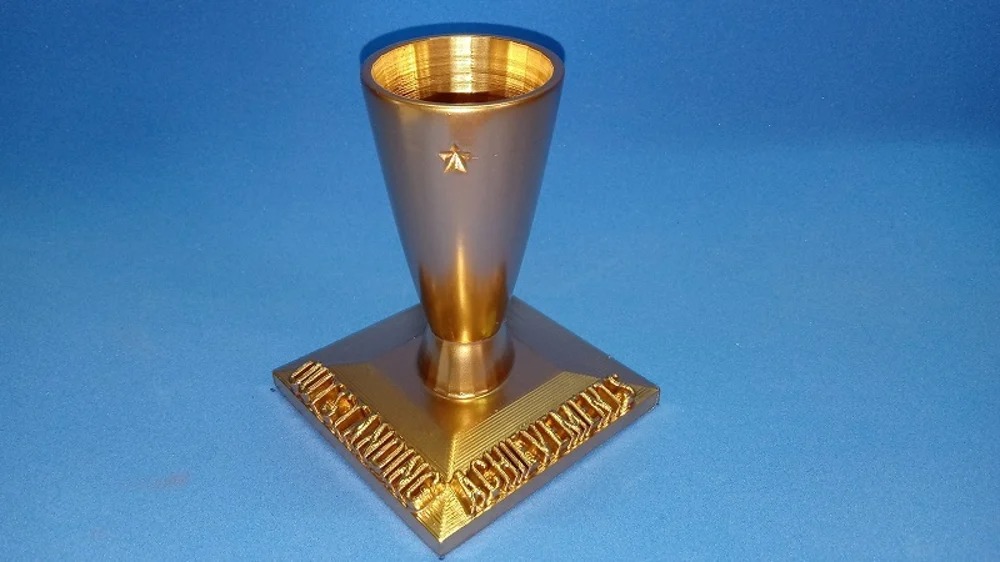
To achieve the result in the photo, a standard, off-the-shelf gold spray paint was used. Even with several coats, little of it was needed. For simplicity, we painted the entire model in a single color, but don’t be afraid to get creative with multiple colors!
And there you have it! A beautiful, custom-made, 3D printed trophy!
Other Post-Processing Methods
Though not relevant for our tutorial, there are a few other post-processing methods you may be interested in.
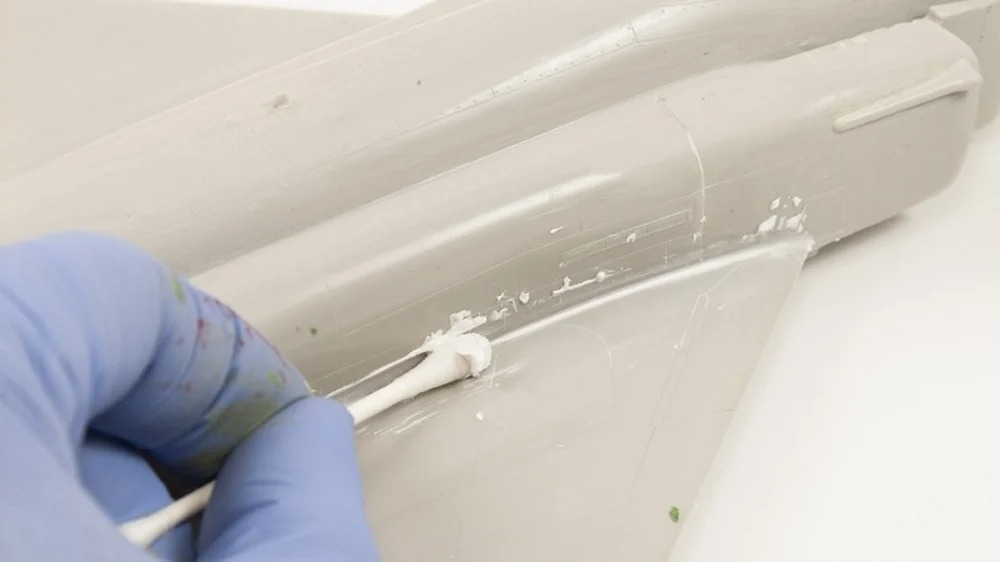
Modeling Putty
A smooth surface and well-aligned components are essential for overall aesthetic quality.
In cases where sanding isn’t enough, it might be worthwhile to use some modeling putty. To achieve that non-3D printed look, fill in those rogue nooks, let it dry, and sand down anything that bulges.
Vapor Smoothing
If you’re using ABS, you might want to consider vapor smoothing. Of the most common 3D printing materials, ABS is the only one that will work with this technique, as it dissolves in acetone.
Essentially, vapor smoothing lightly exposes the surfaces of a print to acetone vapor. In this way, small details – like layer lines – are “melted” away, leaving behind a smooth and shiny surface. In some cases, you may not even need to apply any paint.
Compared to sanding, this technique requires less work to produce a nicer finish. That said, it does require one to take proper safety precautions. Acetone is both flammable and toxic to humans, so it must be handled with care.
Also, think about whether or not it makes sense to use vapor smoothing for your model. Generally speaking, the technique is applied to an entire print, and that may not be practical if you have fine-detail letters.
Leave A Comment
You must be logged in to post a comment