It takes a lot of effort to create electronic products, but did you know that with 3D printing, you can simplify one step? It can simply produce an enclosure for your product! In this article, we provide you with all the information you need to create an enclosure using 3D printing.
Advantages of the 3D printed enclosure
When creating electronic devices, the design of the enclosure is as important as ergonomics and function. To meet this important requirement, you can rely on the ability of 3D printing to create complex shapes in a very short time.
3D printing is the fastest prototyping technology because it allows the creation of unique prototypes without any molds, which means that the price of the parts is very low.
For 3D printing, the price is not determined by the quantity, but by the number of materials used. Compared to multiple iterations of the same chassis, 3D printing is a more reliable and sustainable manufacturing method than traditional methods.
With the help of 3D printed prototypes, you can check the ergonomics, appearance, and installation of internal components or accessories. With a variety of 3D printed materials, you can also view the final material aspects and check the assembly.
How to design a 3D printed enclosure
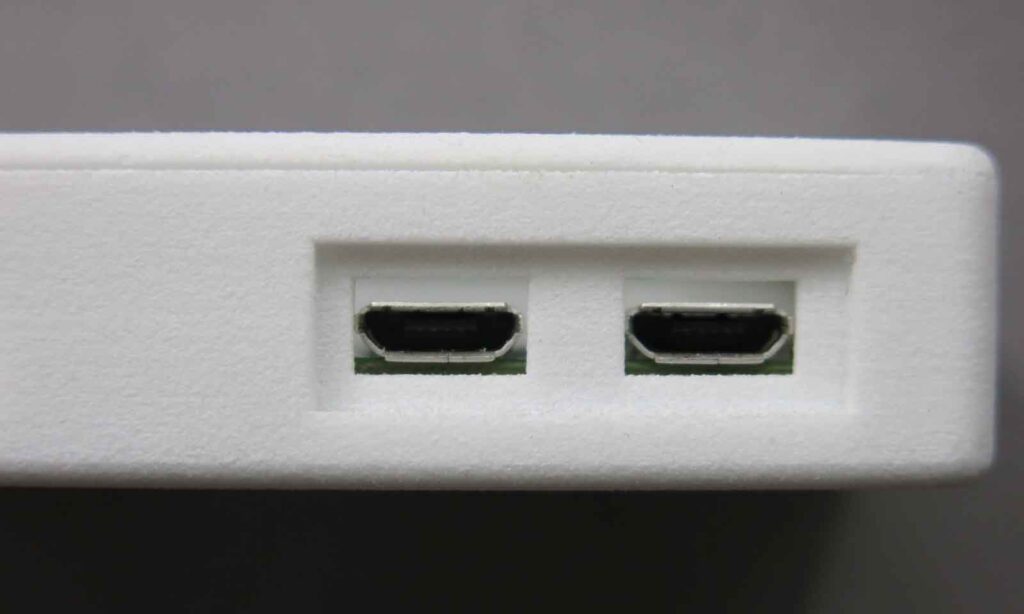
Before modeling the chassis, it is really helpful to design the components to be packaged. This way, you can place components, check whether all components are suitable, and then determine the gap of the connector or cable will be easier. To ensure proper assembly, we recommend maintaining a 0.5 mm gap between the assembly and the 3D printed features.
Access to the component
When designing a case, the first thing to consider is the case you want to put in and how to use it. If no components are required, a specific fastening component can be designed or the housing can be permanently sealed using adhesive.
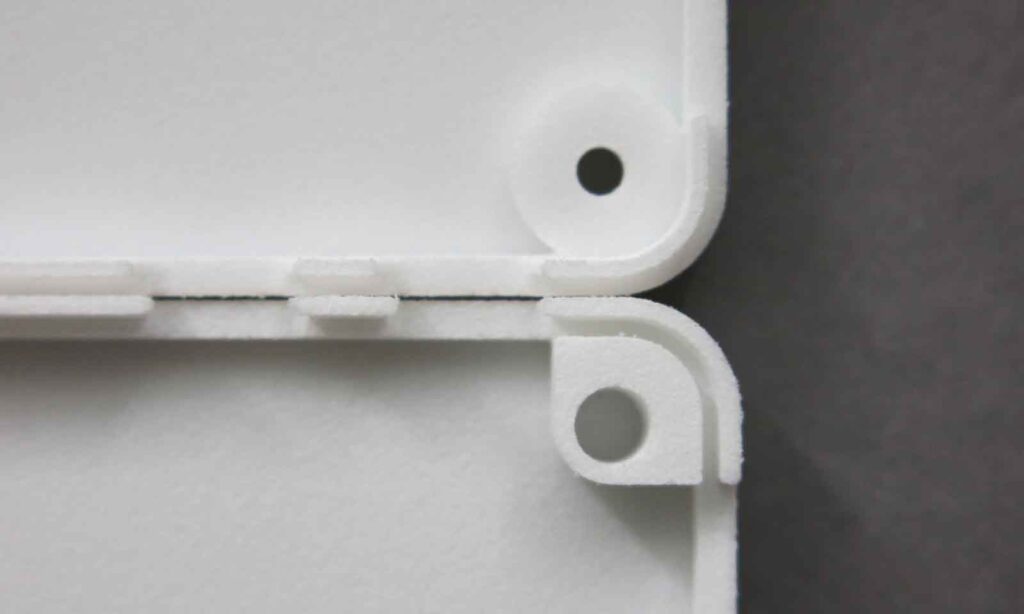
In the case where you want to have access to your components, there are many closing systems you can use:
- Semi-rigid lugs
- Sliding faces
- Screws
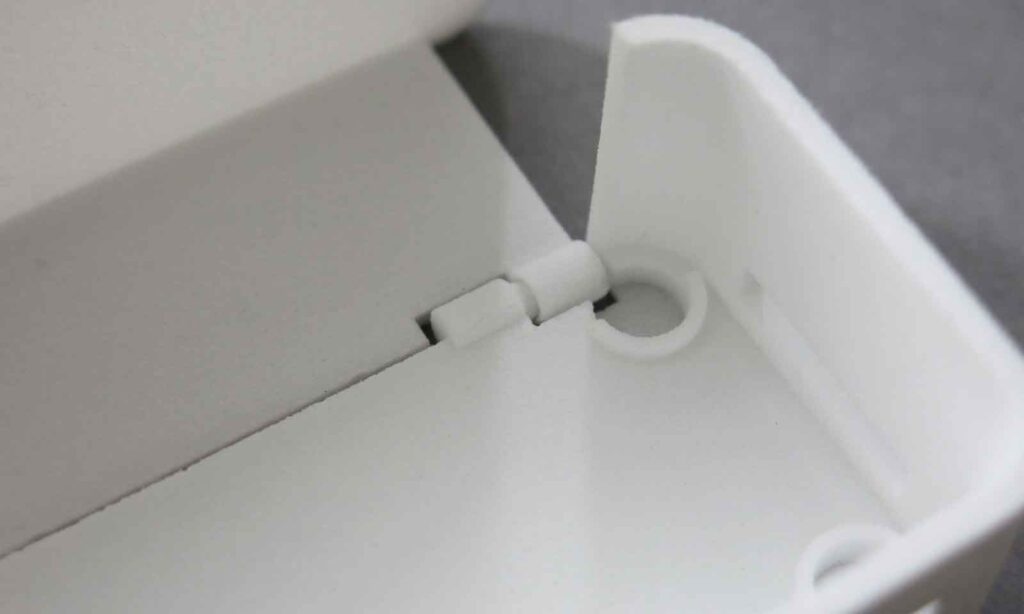
- Classic and Living hinges
- Assembly
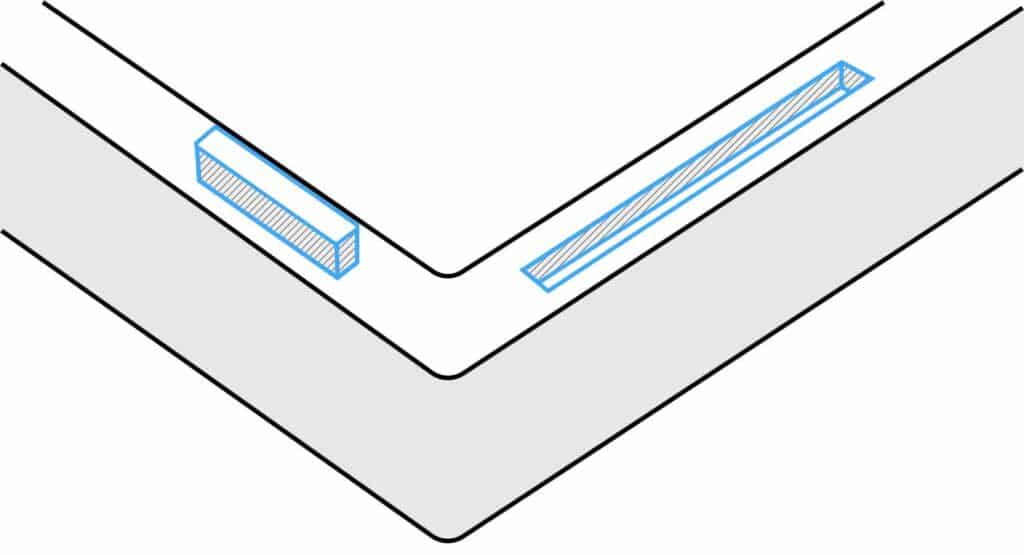
Lugs, cut-outs, and lips help with the assembly and parts alignment. In addition, if you adhere to the minimum size of these functions, then these functions are very useful for enhancing the shell.
The robustness of the 3D printed housing
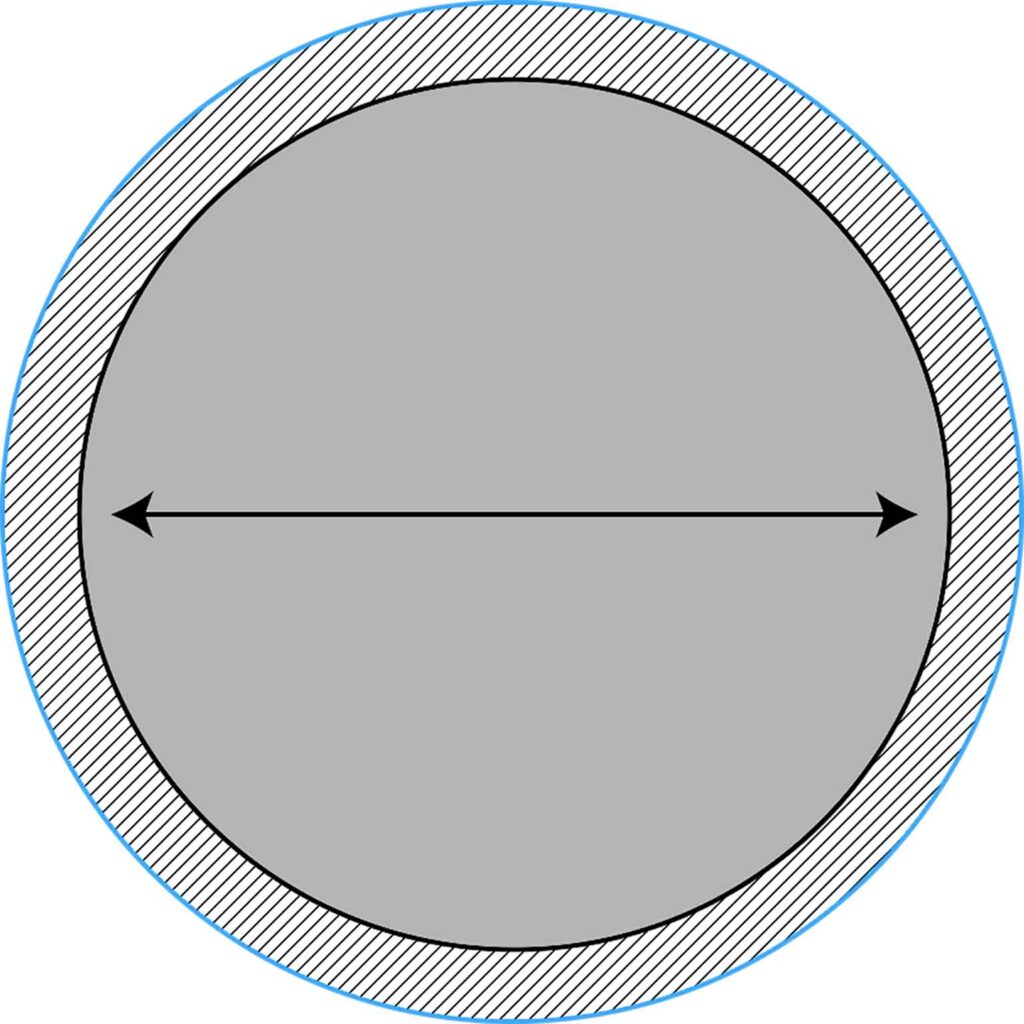
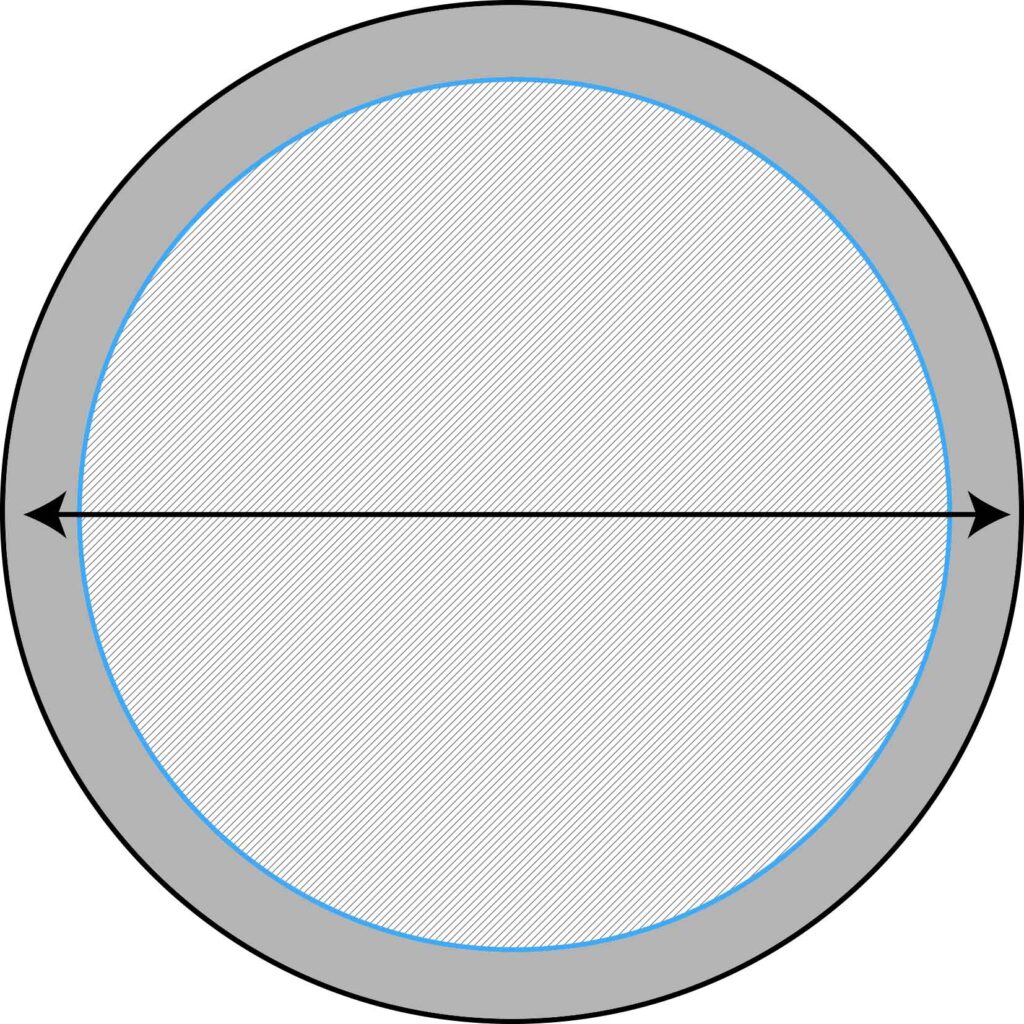
The wall thickness of the housing is the main issue to be considered. It determines the weight, rigidity, robustness, and use of the chassis. Even though our machine can print smaller details and walls, we recommend that you observe a minimum wall thickness of 2 mm. This value ensures very light structural robustness.
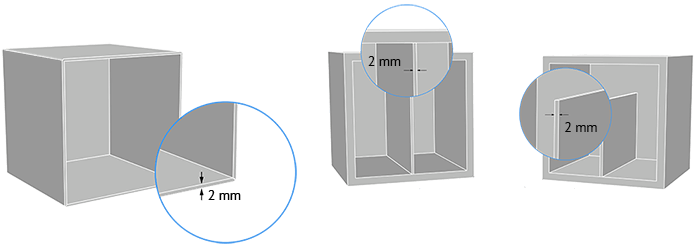
However, please note that depending on the length of the housing, a wall thickness of 2 mm may give the wall some flexibility and cause some shrinkage.
A fillet is a key feature in 3D printing because hard angles may not be properly 3D printed. Fillets in enclosures are really important both in the inside and the outside.
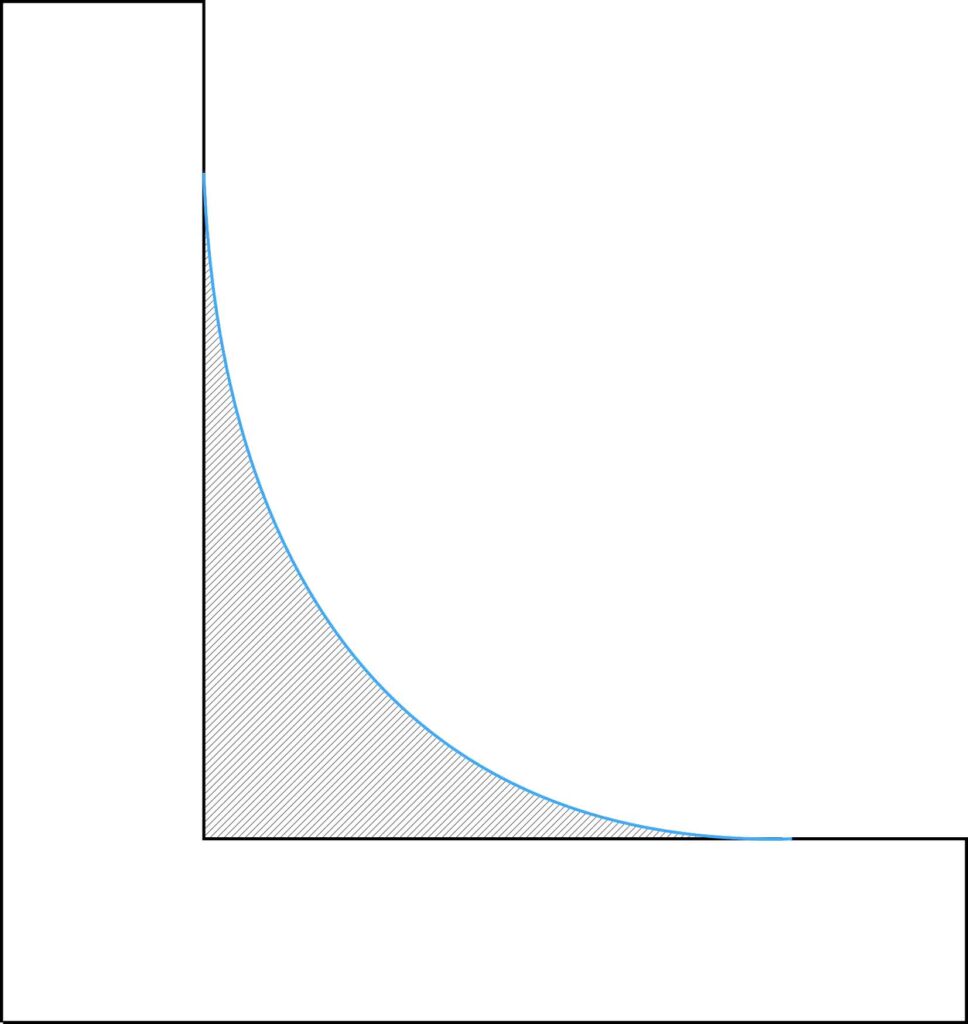
Outside the enclosure, soften the corners with small rounded corners (1 or 2 mm).
Inside the enclosure, you can use bosses and rounded corners to strengthen the corners. The small radius facilitates 3D printing and reduces stress concentration in corners.
3D printed enclosures: quality and accuracy
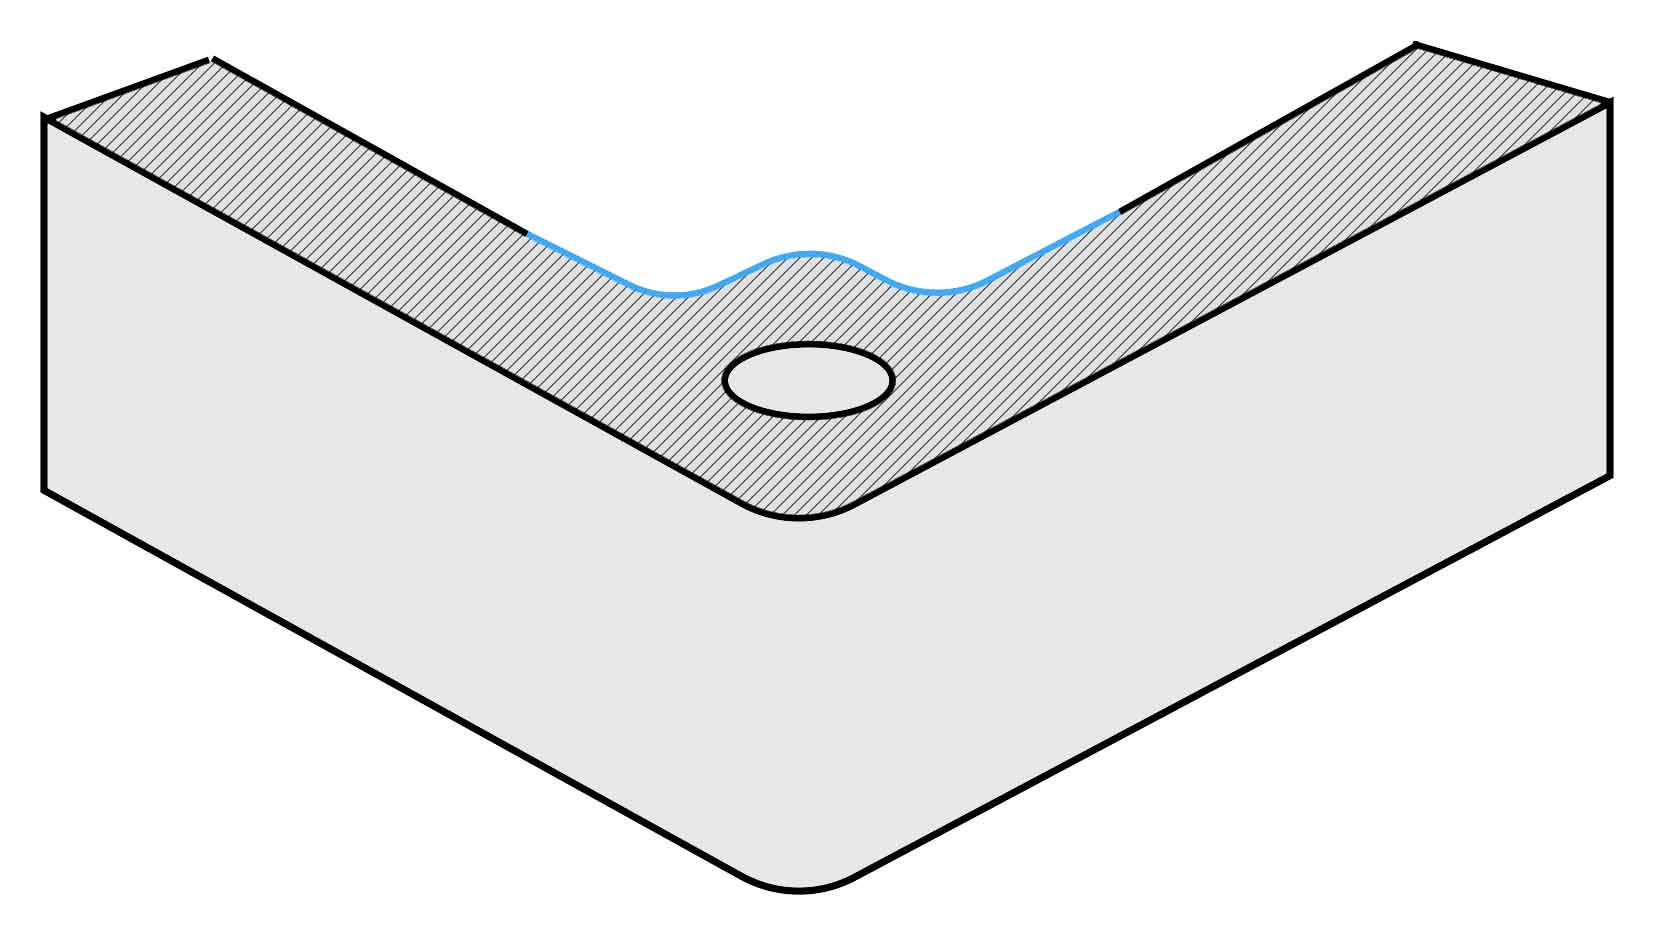
If your design includes screw holes or fastener clearance holes, make sure your materials are accurate enough. Using our 3D printed plastic, the accuracy is very high, but to obtain a more accurate hole, it is recommended to use a machining tool to drill or tap.
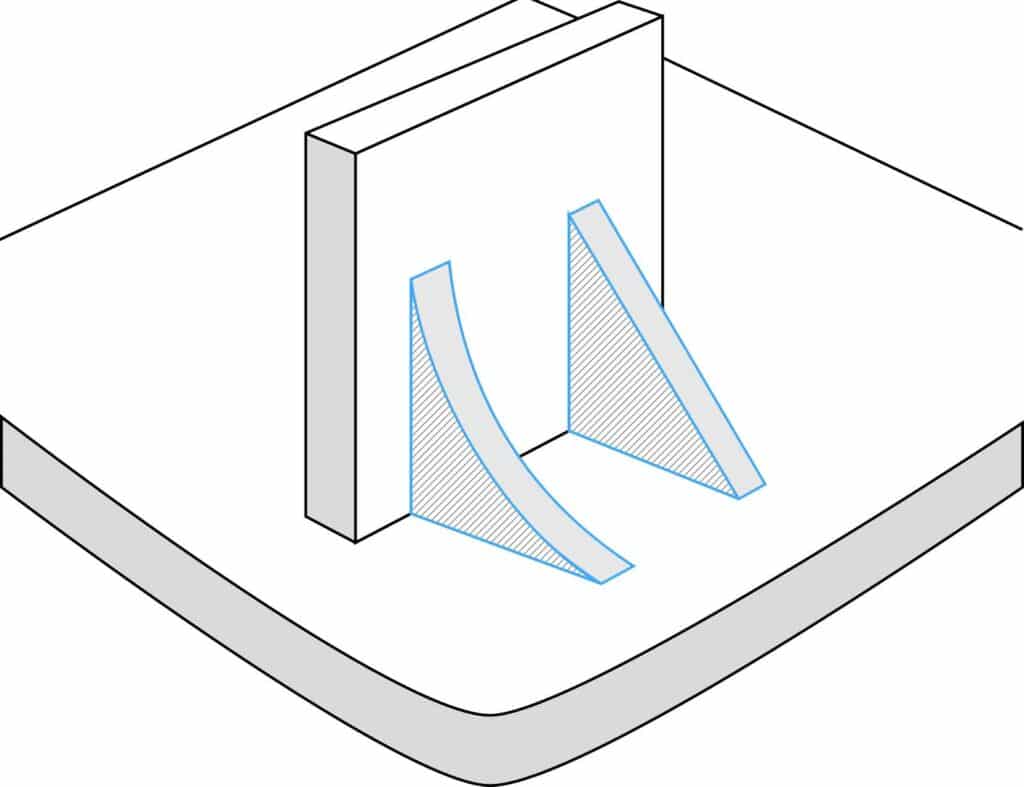
In the enclosure, small walls and thin-walled parts are usually added to fix the components in place. These functions must take into account the minimum thickness of the material, but in addition, we recommend adding structural features such as gussets or ribs, which will enhance the strength of the element and help it to 3D print correctly.
- If you choose 3D plastic materials printed with SLS, you can control the orientation of the model to avoid the appearance of the printed layer, and enhance the entire model by choosing the appropriate orientation.
- If you use CLIP technology to 3D print the shell, please remember that the drape and bridging need support.