In our step-by-step guide about the amazing art of lost-PLA casting, learn how 3D printing meets traditional casting to create metal objects.
21st Century Blacksmith

While the 3D printing scene continues to progress rapidly, one of the remaining limitations is also one of the most frustrating: It’s difficult and expensive to 3D print in metal.
Metal 3D printers like the Markforged X can cost hundreds of thousands of dollars and are roughly the size of a compact car, putting them outside the budget and floor space of most hobbyists. Luckily, you don’t have to print in metal to get metal prints.
A metalworking technique called “lost-wax casting” has been used to make jewelry for hundreds of years, and has been combined with 3D printing to make metal printer parts and even Academy Awards. With lost-PLA casting, you’ll need some DIY skills, and a bunch of materials including a spool of PLA filament, but you can do your own metal “printing”!
Lost-Wax Casting
To give you a brief overview of the process, casting starts with a model (usually sculpted from special wax). The model is placed in a plaster mold and the mold is heated until the wax liquefies and flows out of a hole in the bottom (hence the “lost-wax” part of lost-wax casting).
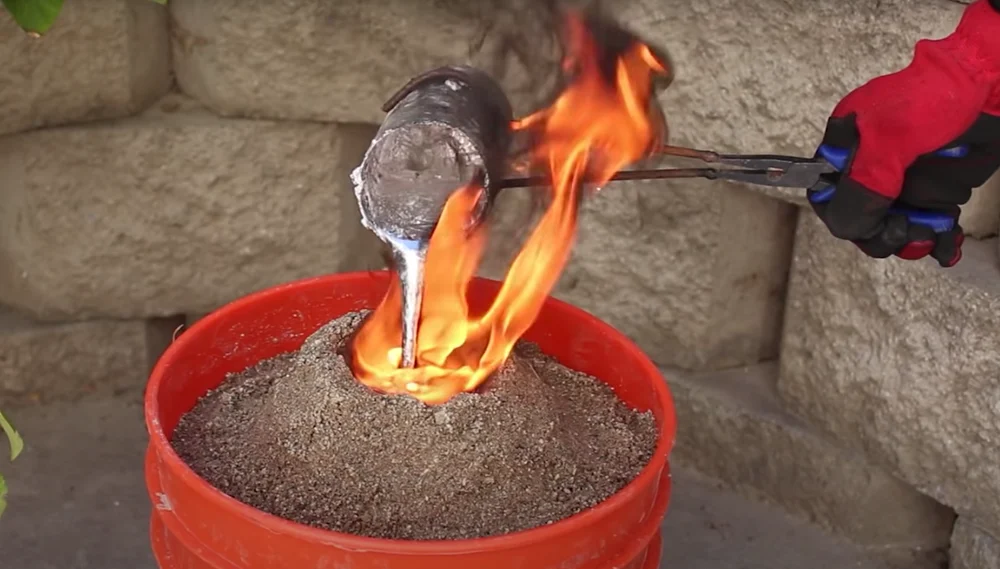
Liquid metal is then poured into the mold, which flows into the imprint of the design left in the baked plaster. As the metal cools, it solidifies and is ready to be removed, cleaned, polished, and used.
Lost-PLA Casting
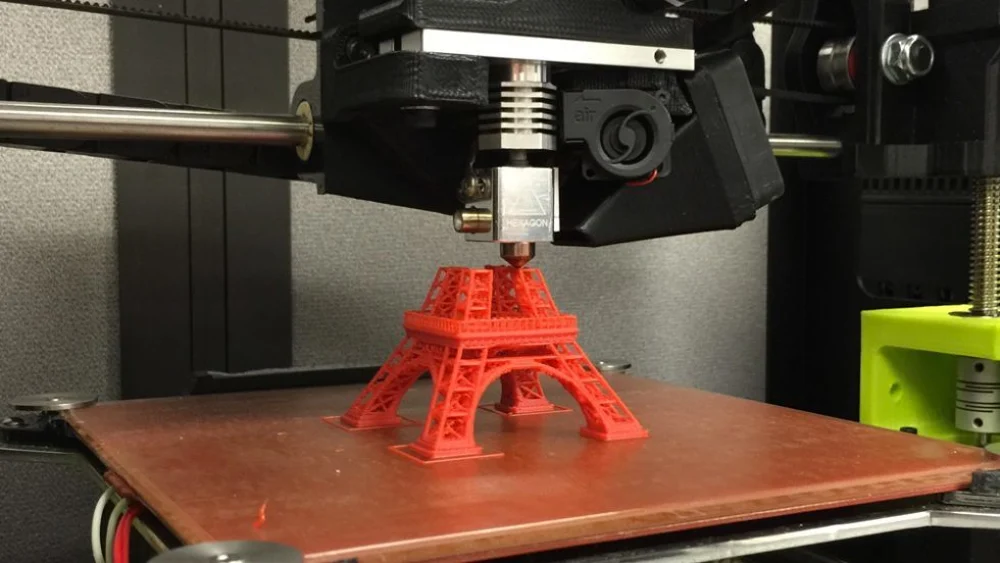
Lost-PLA casting takes the same steps, but with one important difference: Rather than sculpting the model from wax, it’s printed using PLA filament, which has a low melting point and will liquefy much easier than other filaments like TPU. This makes it quicker, easier, and more reliable than wax sculptures.
This article will give you step-by-step directions on how to get started with lost-PLA casting, including safety tips, how to make your own equipment, where to source supplies, casting your first mold, and the finishing touches. When possible, in addition to items that you can purchase, we’ll give you DIY alternatives to keep costs down. At the same time, sometimes there’s no substitute for professional-grade equipment or supplies.
As a final note on supplies, this article recommends casting with aluminum, which is cheap, easily accessible in most countries, and has one of the lowest melting points of any metal you’ll likely be using to start out. If you choose to use other metals such as pewter or silver, you’ll have to upgrade your equipment, as certain DIY options aren’t equipped to handle the higher melting points.
Now, before we get started with making the actual mold, we’ll need to make sure we’re properly and safely set up.
Health & Safety
Since we’re going to be working with aluminum, the first thing to know that it has a melting point of 660 °C (1,220 °F)! This temperature is more than hot enough to cause permanent damage to unprotected skin in less than a second and can off-gas depending on the source of the aluminum.
Establishing safe practices and purchasing appropriate safety equipment should be your first priority.
Work Area
A special work area for doing lost-PLA casting is essential. A workshop with a cement or stone floor with vacuum ventilation (where the air is sucked up and out through an exchanger) and protected from the weather is ideal. If that’s tough to come by, a sandy or gravel lot is fine, though molten metal doesn’t like moisture, so casting in the rain, sleet, or snow can cause it to explode.
General Guidelines
Perhaps it’s implied, but it’s very important to keep your work area cleared of debris and the foundry (furnace) away from flammable objects such as wood, paper, fabrics, dry grass, and so on. Put your heavy equipment like your furnace on cement patio slabs, raising them from the floor and minimizing your need to bend or stoop to pour. It’s best if they’re at your lower chest height.
It’s also good to have an evacuation plan, know where your safety exits are, and the appropriate emergency number(s) to call if anything gets out of hand. Additionally, checking online communities like Reddit’s metal foundry thread can be a useful source for tips, tricks, and advice on avoiding costly (and painful) mistakes.
Local Laws & Ordinances
Many cities or municipalities restrict or outright prohibit having open fires on personal property or specifically doing metalworking. If your city or county has a website, make sure to check it for such by-laws before you begin to purchase equipment, or even call your city’s government and ask. You may have to rent workspace in a community workshop or even purchase land in an area zoned for industrial use, such as a warehouse or factory district.
After securing a workspace, the next step is to outfit it and yourself.
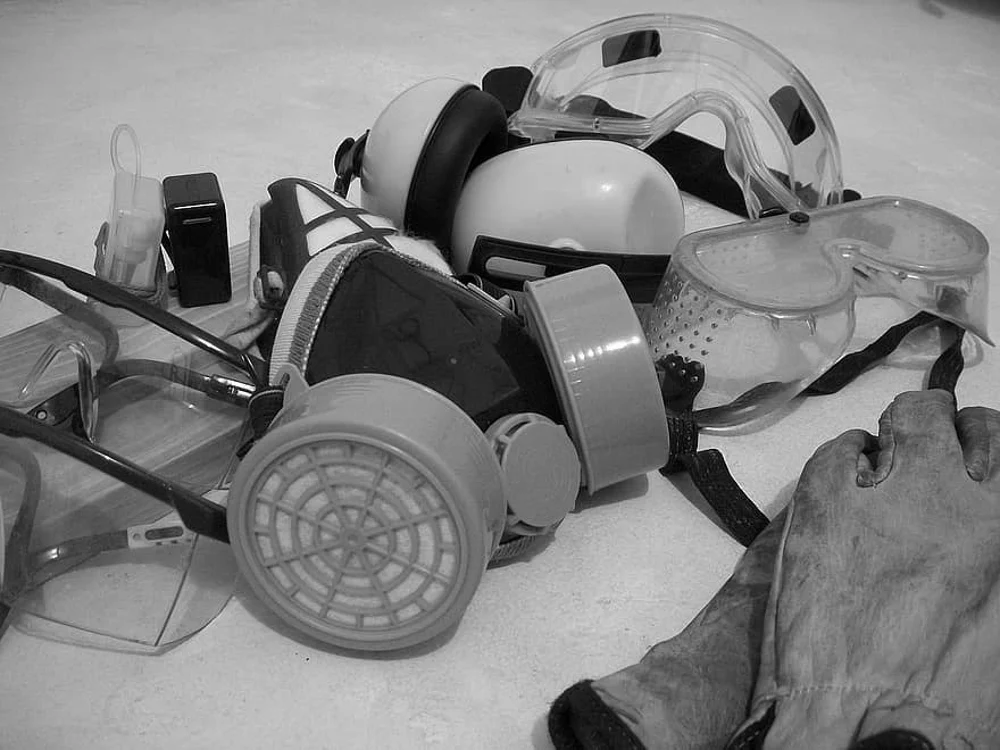
Personal Protective Equipment (PPE)
One of the best ways to outfit yourself is to get welder’s clothes, as they are probably the easiest to source that’ll do the job. Along with a mask, gloves, boots, and an apron, you should wear only thick cotton or other natural-fiber clothes underneath your PPE as composite materials like polyester can melt to your skin under high heat.
- Welder’s mask
- Welder’s gloves
- Welder’s apron
- Welder’s boots or leather boot metatarsal guards
- N95 face masks
Fire extinguishers
Fires are classed based on their fuel source — Class A fires result from wood, paper, cloth, and so on, while Class D fires result from combustible metals such as magnesium or aluminum. You should have both on hand.
Now, let’s get to the fun part: choosing the designs you want to cast.
Designs
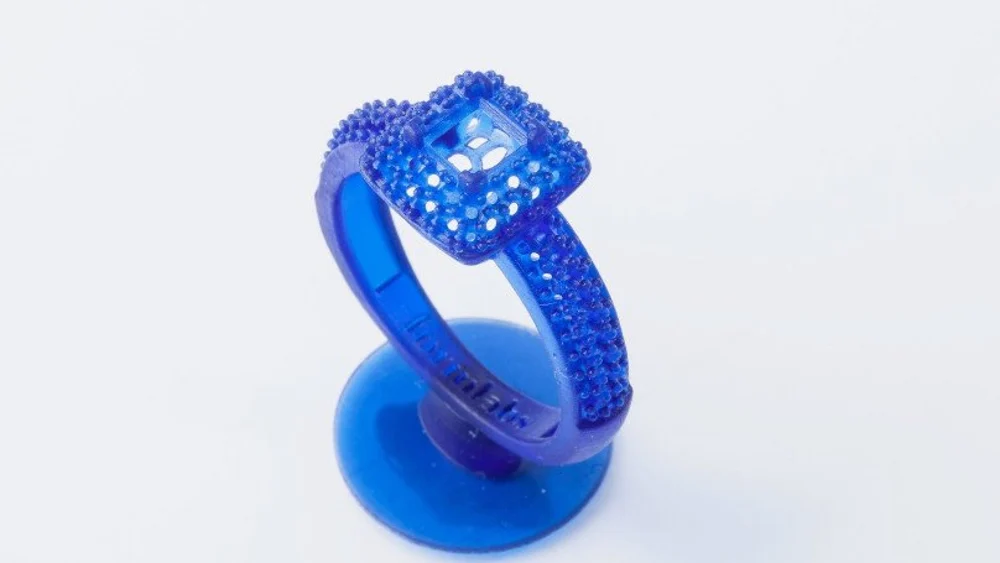
In manufacturing, as in fashion, great design is essential. Once you learn to make your own models, you probably want to get casting as soon as possible. Fortunately, sites like Shapeways, Pinshape, and Cults have jewelry sections full of models perfect for casting.
But what makes a model suitable for casting? There are a few things to look out for.
- Details: Investment casting is used primarily when small details are key, such as in jewelry or fine art. When starting out, simple is best. Choose a design that has strong lines and solidity to it, such as this Witcher pendant.
- Shape: While investment casting is great for fine detail, it has its limits. Weak supports may collapse during the baking process and ruin the mold, necessitating starting over from scratch. Make sure any gaps in the model are well supported, such as this dragonfly wing bracelet.
- Size: When molten aluminum cools, it shrinks at a rate of 5/32″ per foot (13.02 mm per meter). For small items like jewelry, this rate is too low to be concerned about, but for larger projects, it’s best to oversize the model slightly. For best results, there should be at least 1/4″ (7 mm) space between the model and the flask wall, which will be filled in with molding plaster. A larger mold allows you to cast larger models, such as this unique spine necklace.
If you’re casting multiple small items like rings or pendants, you can create a casting tree, where the model is stuck onto the runner with a small bead of wax, like a branch on a tree. This enables you to cast several items or copies of an item at the same time. You can find the STL model of a casting tree on Thingiverse from YouTuber VegOilGuy.
Once you’ve picked out your design (or designs), it’s time to get stocked up on supplies!
Supplies

Supplies for this project are the consumables that are used up to make the final product, like wax, plaster, PLA, and so on. While some of these are specially sourced for this kind of work, there’s actually a lot you can do with household items or local vendors, depending on location. Always check to see what’s around to save on shipping costs, if nothing else.
ALUMINUM
Aluminum is now found in hundreds of everyday items, from baking foil to soda cans. Theoretically, this means an inexpensive and near-limitless supply of metal for casting.
However, melting sods cans is a time-consuming process, requiring extra equipment to get the cans to a usable state. As well, you would need hundreds of cans for only a few pounds of aluminum, resulting in lots of slag (waste material) from the paint and other impurities.
Alternatively, you can get ingots (blocks of metal) online, specifically made for backyard casting. Prices and sizes vary, meaning you can find something to fit your project and your budget.
FUEL SOURCES
The availability and cost of suitable fuel sources varies by region, but we’ll cover your main four options.
Starting from the “dirtiest”, burning coal requires adequate and constant airflow, and in general, isn’t the best option for casting. However, if you can find a reliable (and cheap) source, it may be a start. Keep in mind that coal burns slowly, so you may have to douse it with water after you’re done to keep down the embers.
A step up from pure coal, charcoal is derived from wood and burns quickly at a low temperature. It may struggle to reach the temperatures needed to melt the aluminum, or not reach them at all. However it’s cheap, and more widely available than coal. If you’re willing to experiment to get the right setup, charcoal may become your go-to fuel. Note that because it burns fast, you’ll have to keep adding fuel to the fire.
The best option we know of is propane gas, which is a petroleum by-product widely available for residential use. Stored in tanks ranging in size from 4.7 gallons (18 liters) for a barbecue to 1,000 gallons (3,800 liters) to heat a house, it’s probably the most reliable fuel source available for a backyard foundry. Best to start with a small tank to determine your needs.
Finally, if your area has reliable and inexpensive residential electricity, then you may be able to use it for either melting the aluminum, casting the mold, or both, if you can get the right equipment.
MISCELLANEOUS
You’ll need to have extra containers and cleanup equipment on hand, especially if you decide to “make” your own aluminum. For containers, you’ll need a few buckets, which can hold the mold when you are pouring the metal. Don’t be surprised if the bucket melts after a few uses, as it’s not designed for this work.
As for cleanup, keep chemicals away from the heat source in your workshop. Try vinegar and water, or strong dish soap, to start with.
PLA FILAMENT
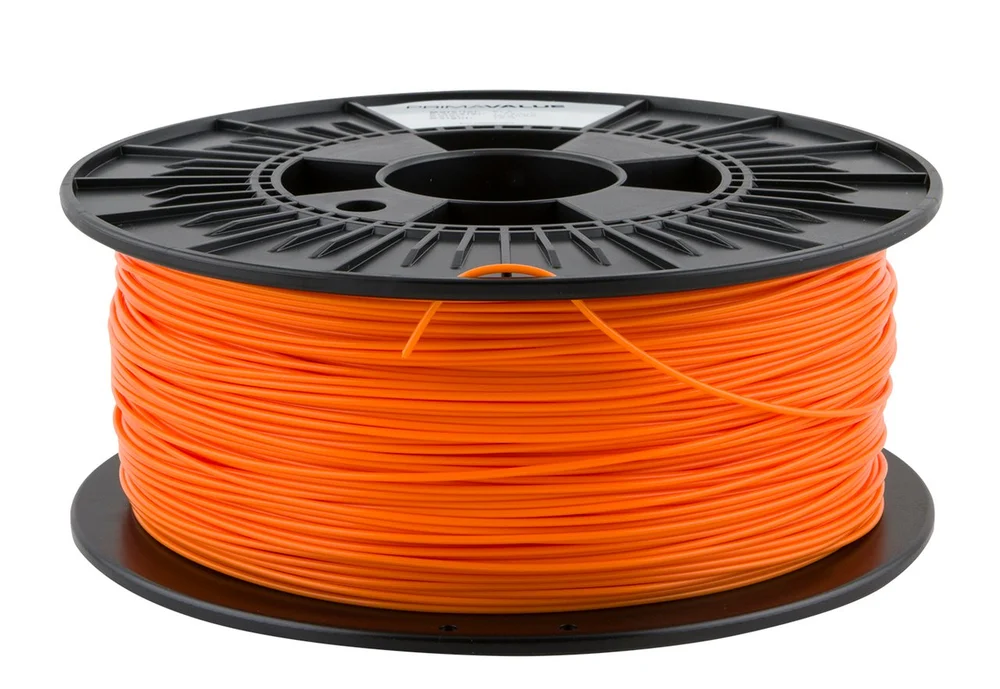
Polylactic acid (PLA) is probably the most widely available and used filament type in 3D printing. Its low cost (generally around $25/kg) and melting point (392 °F/200 °C) makes it ideal for this project.
That being said, generic PLA can leave ash behind after it liquefies and runs out of the mold (called “burnout”), so you may want to splurge on Polycast, which is specially formulated for investment casting and leaves almost no ash behind.
There’s even a castable wax filament for a more traditional wax casting, although the website warns your 3D printer must be modified to work with it.
Lastly, there are some PLA brands that are known as good for casting like Hatchbox.
PLASTER
As the mold is the centerpiece of investment casting, a bad mold means a poor result. Since PLA expands under intense heat while wax does not, it may be worth seeking out a specialty compound that takes that into account for casting aluminum, such as Plasticast or Ultravest plaster.
POLISHING COMPOUNDS
Cast metal comes out looking almost burnt. Polishing waxes and compounds help uncover the shine underneath the soot. We recommend trying a polishing compound assortment or walnut shells.
SAND
Sand is one of the most crucial elements of the entire casting process. First, it’s mixed with the plaster to create the mold. After the mold is fired (baked), it’s placed in a bucket of sand and the liquid metal is poured into it. High-purity silicate sand is best, but if it’s too expensive, you can try using “play” sand.
SPRUE WAX
Sprues are the supports found in model kits, connecting pieces to the plastic sheet. Here, sprue wax is used to connect the 3D printed model to the runner, keeping everything together in one piece. This is particularly useful if you want to cast multiple items, such as rings, at the same time: Simply attach them to the runner with more sprue wax! Note that candle wax is not recommended for this task.
Now that the supplies are sorted, let’s take a look at the equipment you’ll need.
Equipment
While supplies are the consumables you’ll use for this project, equipment is the opposite: Special tools that require an initial investment of time and money but will remain to serve well after the embers have smoldered out.
A list of equipment will likely include (either bought or DIY):
- 3D printer: A critical part of lost-PLA casting is, well, the PLA, so you’re going to need an FDM 3D printer.
- Crucibles: A crucible is where the metal is melted down, and made of graphite or clay-infused metal. You can either make your own by sawing in half an empty steel canister such as a fire extinguisher or similarly thick container, or purchase a crucible (available in a variety of sizes).
- Flasks: The flask is where the plaster is poured over the model and inserted into the furnace to bake. Make sure the flask is big enough to completely cover your model in plaster, but still fits in your furnace with the recommended tolerances. If you’re looking to cut costs, a cardboard mold box will also work (see the “Mold Making” section later in this article for instructions), though flasks are recommended for more high-quality casts. If you want to buy one, go for perforated flasks, which have multiple size options available.
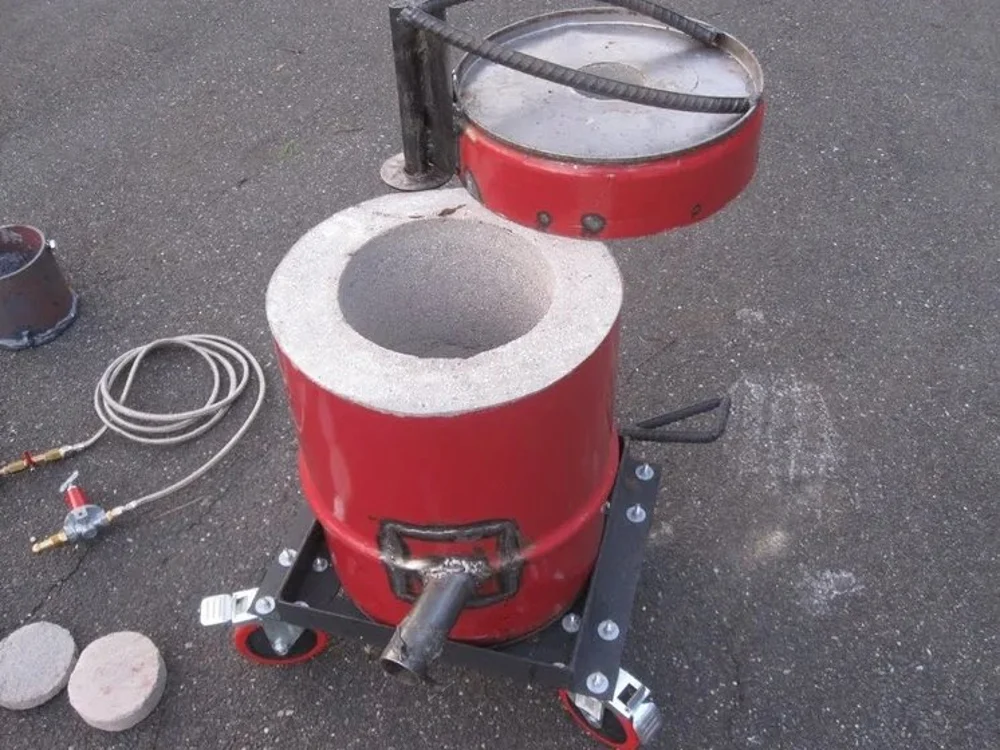
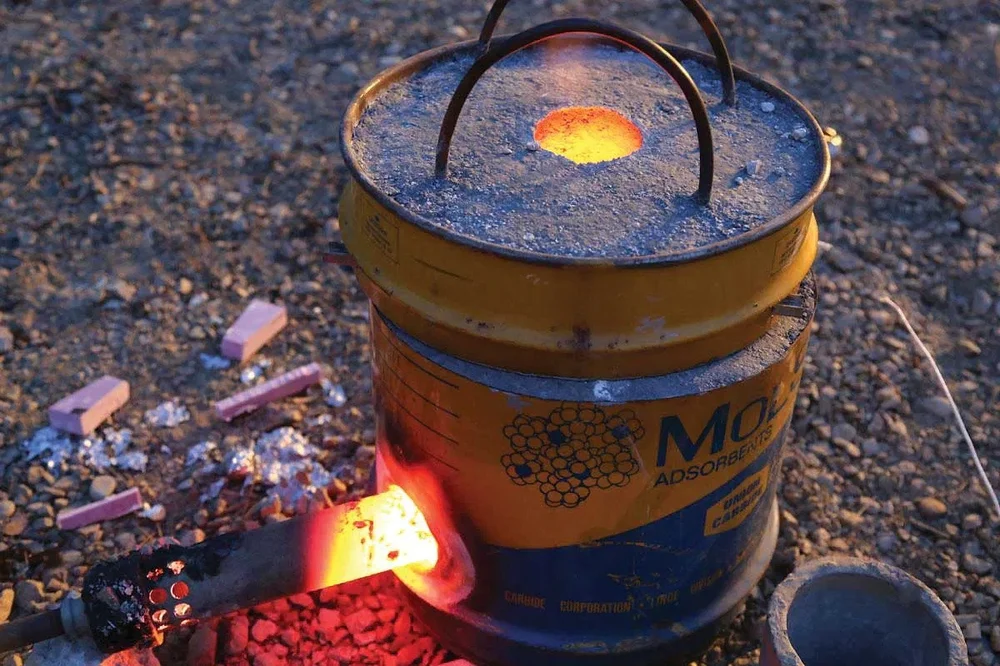
- Furnace: A furnace (also called a foundry) is needed to bake the plaster, melt the plastic, and melt down the metal, whether it comes in the form of soda cans or ingots. You can make a charcoal or coal furnace yourself using a steel bucket among other things, or you can purchase propane foundrys or electric foundry kits to have something that works out of the box.
- Tongs: To handle your casting, you’ll want both crucible tongs and flask tongs. Note that while crucible tongs can pick up flasks, flask tongs should not be used for crucibles.
- Tumbler (optional): After your item has been cast and removed from the mold, it can be placed in a tumbler for polishing. Filled with a medium such as walnut shells, the chamber rotates, polishing the ring or other object through abrasion. There are other methods, but nothing quite gets a shine like a tumbler.
- Vacuum chamber: A vacuum chamber removes any bubbles from the plaster mixture while it’s in liquid form, which can interfere with the casting or even split the mold once it’s exposed to heat. For a cheaper option, you can make your own, but you’ll still need to purchase the pump.
Once you’ve gathered your supplies, got your equipment, set up your workspace, and chosen your design, it’s finally time to really start casting.
3D Printing
If you’re already a 3D printing pro, feel free to skip this section. If you’re new to the scene or have gotten your first 3D printer just for this project, there are a few things that are good to know.
- Read up on the basics on 3D printing, from start to finish.
- Learn how to calibrate your 3D printer for getting the best results. The temperature settings are especially important, as being even a little off can cause a print failure.
- Optimize your slicer program to work with your specific model of printer, such as the Cura slicer with Creality’s Ender 3 printer.
- Try out your printer and filament of choice with a few test prints.
Once you’re satisfied with the result, try printing your casting model. Don’t be discouraged if it takes a few tries. When you’ve got the model you want, it’s time to make a mold!
Mold Making
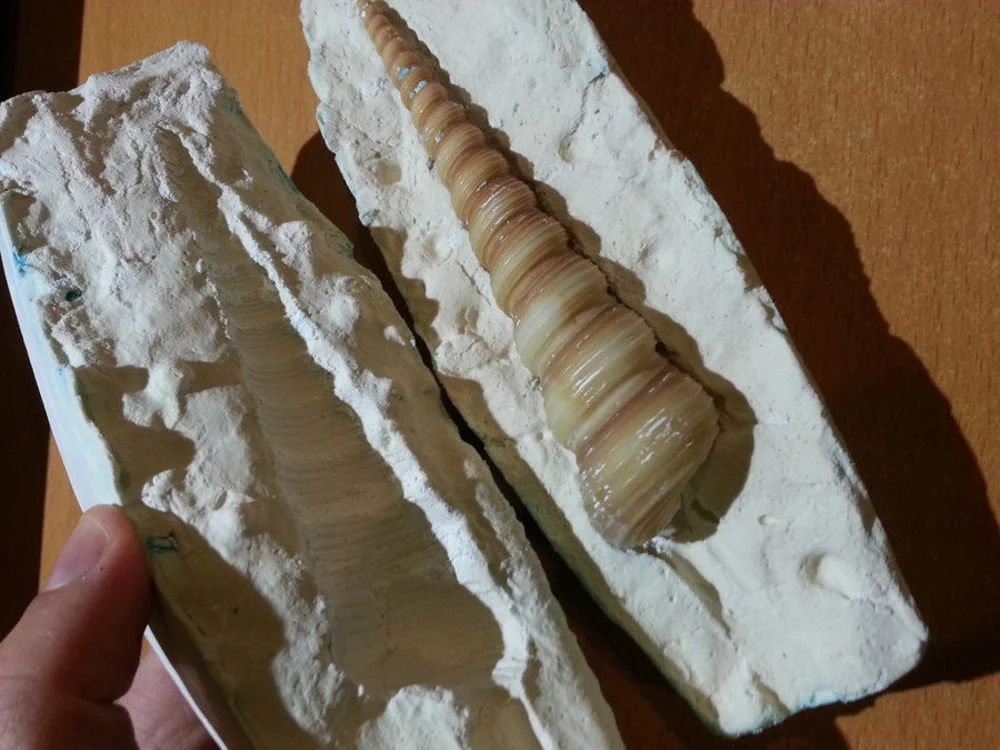
With your 3D printed model, we can now move onto creating the mold.
- Take your model and apply the sprue wax. If you’re casting a statue or other large object, ensure that you attach the sprues to large overhangs, such as outstretched arms or wings. As a rule of thumb, if it needed supports while printing, it needs some sprues.
- Next, get your mold box ready. Ensure that it’ll fit in your furnace before placing the spruced-up model into it. The model should be placed on a separate piece of Styrofoam or cardboard and either taped or glued down, with the cardboard forming a hollow tower around it. Be sure not to cover the top, as this is where you’ll be pouring the mixture.
- In a bucket, mix the plaster, silicate sand, and water, according to the directions on the plaster packaging. Mix thoroughly, ensuring there are no dry patches in the mix, which could ruin your cast.
- Pour the mixture into the vacuum chamber as soon as it’s mixed, as it’ll begin to harden quickly. If you haven’t procured a vacuum chamber, proceed to the next step.
- Once the mixture is ready, pour it in the top of your mold box and let it set according to the directions on the plaster packaging. If there weren’t any with your plaster, we’d recommend waiting 24 hours.
- When completely dry, remove the cardboard (including the bottom where the model has been glued to) from the mold and turn it upside down. Note that you’ll need to be able to see the base of the plastic model or casting tree, roughly in the center, in order to move onto the next step.
Now comes perhaps the most fun part: burnout.
Burnout
Burnout is the process of melting the PLA and letting it drain out into the furnace from a hole in the bottom of the mold. The hole is from the base of the plastic model after it liquifies, so it’s vital that you can see the base of the model before you continue.
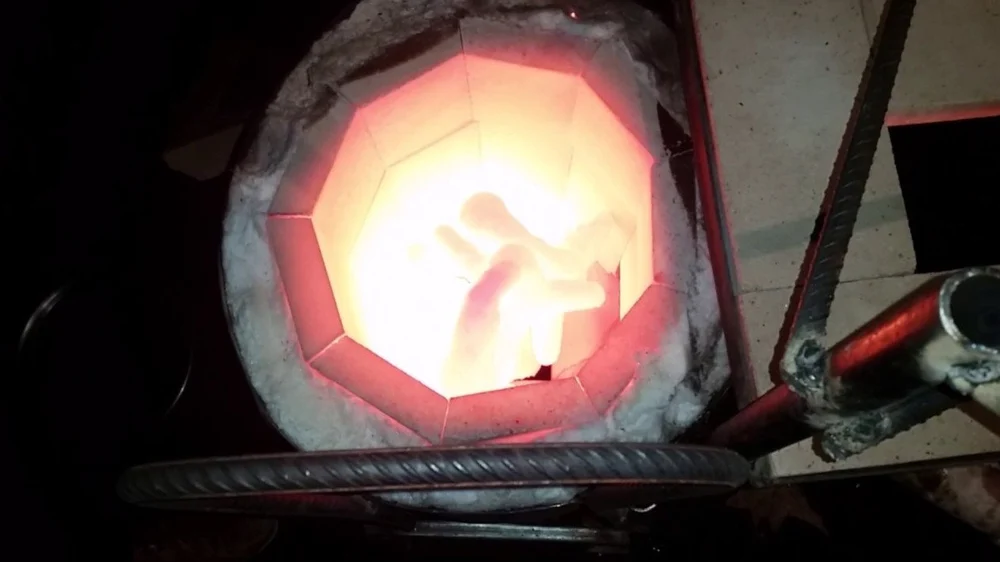
- Start your furnace following the manufacturer’s directions. If you’ve built it yourself, safely start the fuel source that you’ve chosen, and wait until the furnace gets to a yellow-red glow.
- Take the mold with your tongs and place it in the furnace so that the base of the model is on the bottom.
- Depending on the temperature, it’ll take at least three hours for the PLA to completely liquify and drain from the hole in the bottom.
While this is happening, periodically check to make sure there’s no “heat creep” (components that should be insulated from the heat are getting warm or hot). This includes the fuel pipe (if using propane or similar gas) or the outside of the fuel container (such as the coal hutch or charcoal kiln).
If heat creep does occur, safely shut off or cover the fuel source, remove the mold, and wait for everything to cool down. Check the furnace for cracks and other places where the heat could have escaped, and repair or improve them. Unfortunately, depending on when you detected the problem, the mold might be ruined, and you’ll have to start over. Still, it’s preferable to starting an accidental fire.
Assuming everything works out, it’s on to casting!
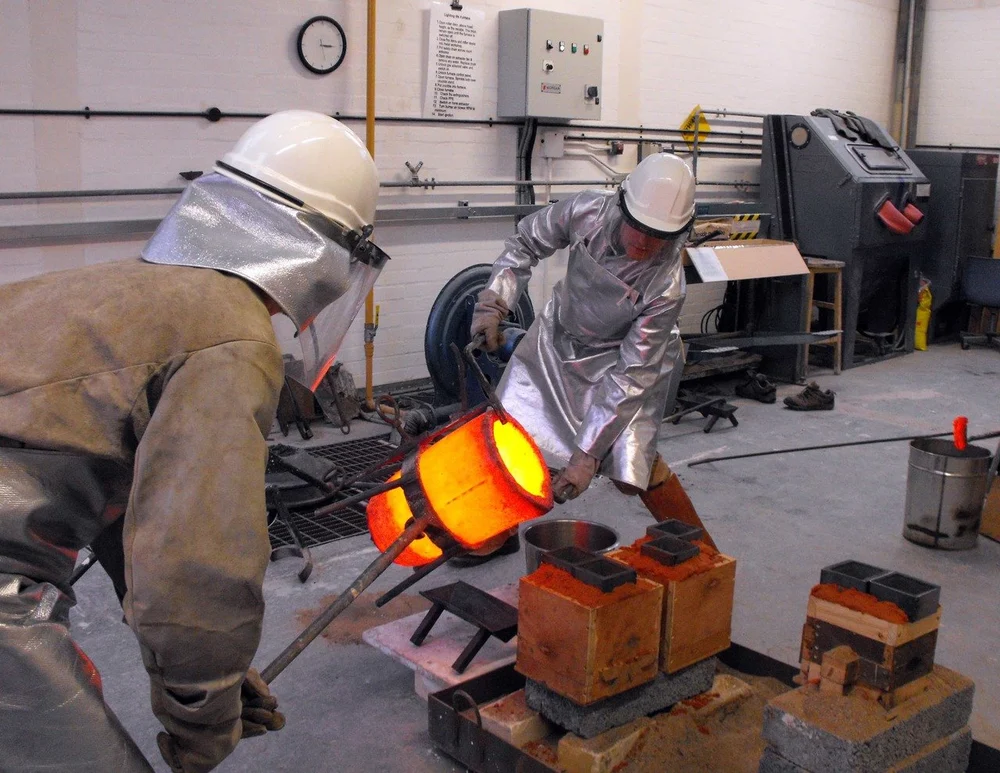
Casting
This step is the most crucial and the most dangerous. Keep alert and aware of both your surroundings and what you’re doing, and don’t hesitate to use your fire extinguisher or to call emergency services if you think it’s warranted. You can always try again.
- Once the mold is empty, place it upside down (hole facing up) in a bucket of silicate sand. Ensure the mold is centered in the bucket, with at least as much sand on each side as half of the width of the mold and half the height of the mold from the bottom of the bucket. (For example, if the mold is 4 inches wide and 6 inches tall, ensure there is at least 2 inches of sand on each side of the mold and 3 inches of sand at the bottom of the bucket.)
- With your crucible tongs, take your crucible and place it in your furnace. Wait for it to heat up, watching for a cherry-red glow from the furnace, and begin placing your aluminum into it. Wait until each piece has melted, as you don’t want to overflow the crucible or put out the fire with molten aluminum.
- Here’s where the differences between soda cans and professional ingots begin to show: Household aluminum will have impurities (“dross”) that’ll come to the surface of the aluminum and will have to be skimmed off with a metal bar. Don’t use plastic or wood for this; aside from the safety hazards, it’ll just add more impurities to the aluminum.
- Once you’ve melted the aluminum fully, remove the crucible with the crucible tongs and transport it over to the mold.
- Carefully pour the liquid metal into the mold a little bit at a time. Be prepared to step back quickly if the metal pops and spits at you.
- Once the mold is full, let it cool for between 15 and 30 minutes.
Extracting
After the mold has cooled down a bit, it’s time to remove its contents.
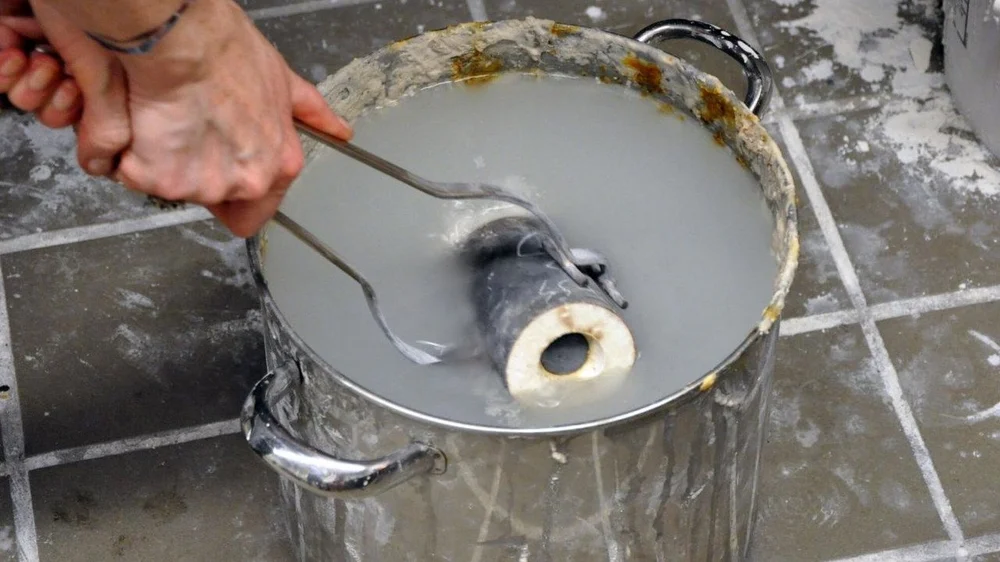
- Fill a large bucket with enough water to submerge the mold entirely.
- Take the still-hot mold in the flask tongs and place it under the water (it will hiss and spit). This process will cool the metal without allowing air pockets to form and dissolve the plaster around the object. Depending on the plaster mixture used, there may be some residual plaster left on the object, which you can clean off.
Finishing
Of course, simply making something isn’t the final step. Even if done correctly, an object cast in metal can look malformed, burnt, and ugly. That’s where finishing comes in.
There are three main components in finishing: cleaning, buffing, and tumbling (polishing).
- Cleaning is the removal of pieces that were necessary for the production of the piece, but undesirable in the final product, such as sprues and leftover plaster that are still clinging to the piece. Wire clippers, such as what comes with many 3D printers, are ideal for removing sprues, while a wet cloth and bucket of water should do for the plaster.
- Buffing is the process of scraping off the soot and sprue marks left from the heat of the furnace. This is done with fine-grit sandpaper and patience.
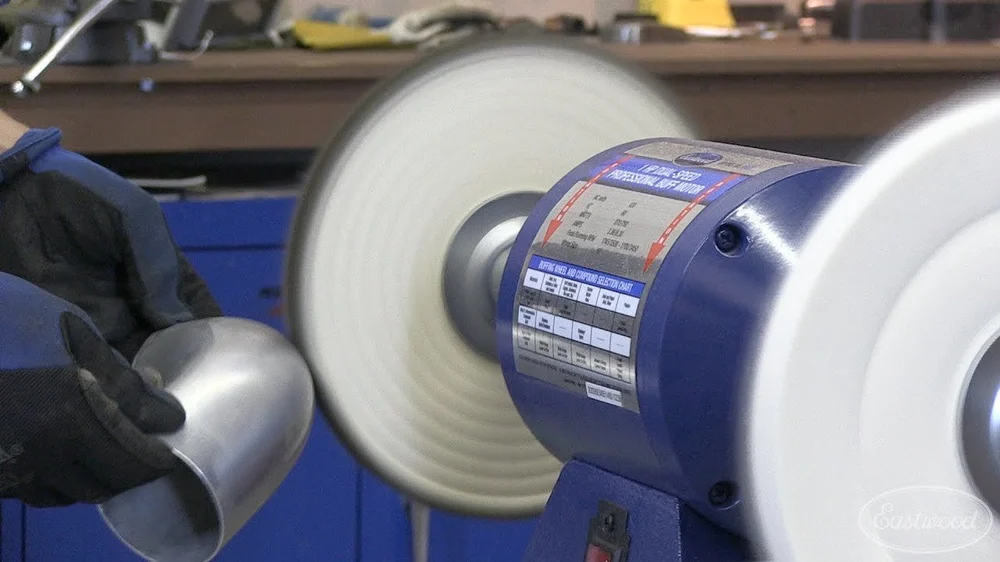
- Finally, polishing can be done either by hand using polishing wax and special cloths or by placing the object in a tumbler.
And there you have it – the process to make your own metal objects using nothing but your ingenuity, a 3D printer, and the ability to work around obstacles.
Community Resources
Thankfully, there are several places online that are there to provide you support as you go through this in-depth process.
YOUTUBE CHANNELS
- MyFordboy: Excellent step-by-step series on building a home foundry
- Tobho Mott: Looks at pattern making and upgrades to equipment
- Veg Oil Guy: Works with lost-PLA and resin casting, as well as build-it-yourself equipment
WEBSITES
- Backyard Metal Casting: Lots of backyard-level projects for your foundry, including building a “coffee-can furnace”
- Instructables: Hundreds of projects with step-by-step directions for you to recreate
- Makezine: Covers projects from casting to cosplay, 3D printing to robotics
FORUMS
- Alloy Avenue: The main forum for the Backyard Metal Casting YouTube channel
- Metal foundry subreddit: Many discussions on metal casting of all sorts
- Metal cast subreddit: Focused more on the process of casting than r/Metalfoundry
Eventually, metal 3D printing will be affordable and easy, and like the inkjet printer before it, will become unremarkable. Until then, it’s exciting to be in the workshop with tongs, a furnace, and goggles, as if you were a medieval blacksmith, or a steampunk inventor – using your ingenuity and home-made equipment to forge something new.