Let us help you with Ender 3 Cura settings! Enjoy perfect prints with the best Ender 3 (V2/Pro) Cura profile for your needs.
Arguably the most popular 3D printer family of all time, Creality’s Ender 3, Ender 3 Pro, and Ender 3 V2 all provide an affordable entry point into the world of 3D printing. Rivaling some of the higher-priced printers in terms of speed, quality, and print volume, we’ve been blown away by these affordable workhorses.
Naturally, a printer at this price requires some bed leveling, manual calibration, and perhaps a few modifications. But if everything were automatic, Creality would likely put most other 3D printers (or themselves) out of business.
In this article, we’ll help you set up the perfect Cura profile for your Ender 3 printer, regardless of which version you have. We’ll go over key Cura settings, explaining each and recommending the best values for the most popular 3D printing materials. Let’s dive in!
Getting Started
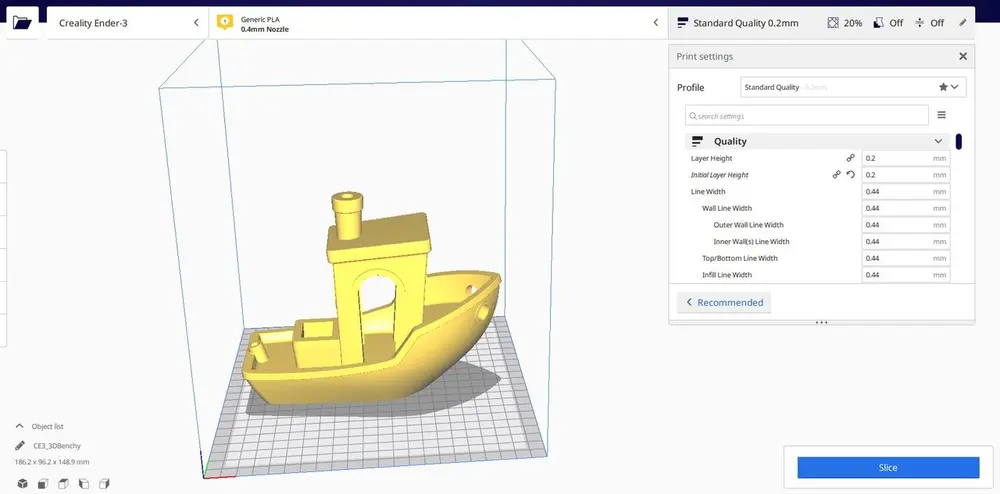
To get started, the stock profile on Cura for the Ender 3 is remarkably good. The Ender 3 Pro also has its own profile, so depending on which machine you’re using, it’s a good place to start. As of now, there’s no profile for the V2, but it’s likely that most of the settings for the Pro will work for the V2. Here’s how to access the stock profile:
- Click “Settings > Printer > Manage Printers”.
- In the preferences box, head for “Add > Add a non-networked printer”.
- Scroll to “Creality3D”, expand the section, and select Ender 3 or Ender 3 Pro.
From here, you’ll have default settings from which to build your perfect profile. Naturally, you’ll have to adapt to individual filaments and resolutions. By default, we’ll build this profile for PLA, but also mention settings for ABS and PETG.
Below is a quick summary of the profile we recommend, before we jump into a more detailed breakdown of each setting.
Perfect Ender 3 PLA Profile
- Printing temperature: 200 °C
- Bed temperature: 60 °C
- Speed: 50 mm/s
- Layer height: 0.12 mm
- Retraction: 6 mm at 25 mm/s
- Infill: 20%
- Initial layer speed: 20 mm/s
- Initial fan speed: 0%
Hot End Temperature
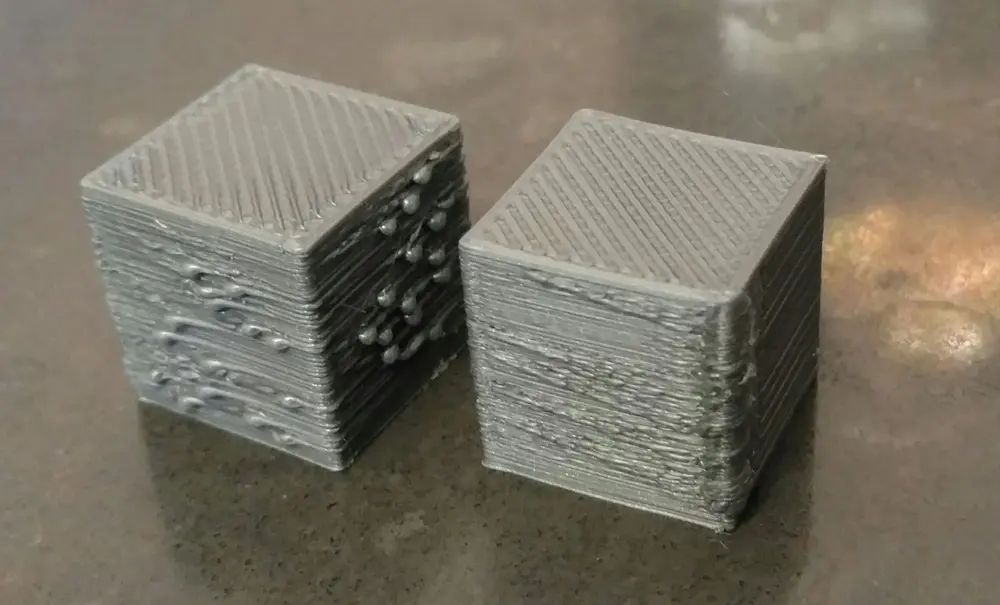
One of the most important settings is temperature. An incorrect temperature setting can cause over- or under-extrusion, curling, and blobs or zits. Most PLA filaments require at least 180 °C for smooth extrusion, but can stretch up to 220 °C before over-extrusion becomes a problem.
Ideal temperatures vary between materials (ABS: 220-250 °C, PETG: 220-245 °C), but the brand of filament can also make a difference. When trying a new filament, it’s a great idea to print a temperature tower. In general, we find 200 °C a great average temperature for PLA.
Remember to only change one setting at a time when calibrating your Ender 3!
SUMMARY
- PLA: 200 °C
- ABS: 230 °C
- PETG: 240 °C
Bed Temperature
The bed temperature also depends greatly on your material. PLA doesn’t actually require heating (but still benefits from it), especially if you use something for bed adhesion, like blue painter’s tape, hairspray, or glue. Ideally, your bed temperature should always be higher than the ambient room temperature.
The bed temperature for ABS should be significantly higher than for PLA, around 110 °C. If you’ll be using your Ender 3 for ABS, then you’ll also probably need to build an enclosure to eliminate excess cooling and prevent warping and layer splitting.
SUMMARY
- PLA: 50 °C
- ABS: 110 °C
- PETG: 70 °C
Speed
Finding your perfect print speed is all about balancing the total time per job with print quality. As your print speed increases, unfortunately, your print quality drops. This is because a slower-moving hot end on finer details is much less likely to mess something up. On the other hand, nobody wants to wait two weeks for a single print.
On average, most users print PLA between 45 and 65 mm/s. You can increase this speed by utilizing OctoPrint and alternative firmware such as Klipper or Marlin. We’d recommend a starting speed of 60 mm/s and decreasing the setting for prints requiring a greater level of detail. ABS requires roughly the same print speed as PLA (45 to 65 mm/s is ideal).
Flexible materials must be printed significantly slower. A print speed of 20 mm/s to 40 mm/s should drastically heighten your chances of success. Because PETG is slightly more stringy than PLA, to combat this, you may want to drop your print speed by 20 mm/s or so. 30 to 55 mm/s works well. It’s best to start on the lower end of the scale and work up.
For larger prints that require less detail, you can raise the print speed on your Ender 3 up to 120 mm/s. Also, travel speed can be increased to 150 mm/s without any issue.
SUMMARY
- PLA: 60 mm/s
- Flexible materials (e.g. TPU): 30 mm/s
- PETG: 40 mm/s
- ABS: 60 mm/s
- Travel speed: 150 mm/s
Layer Height
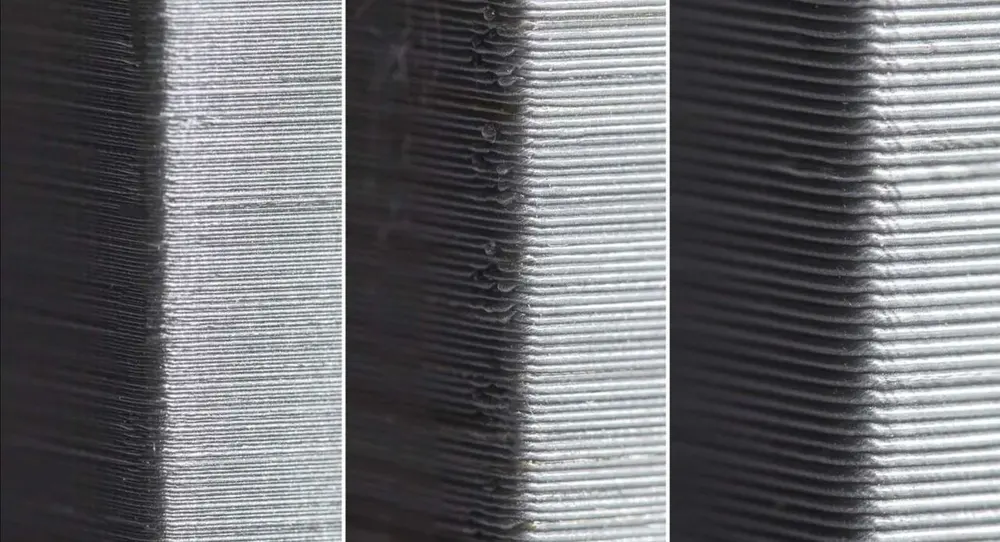
Layer height could be renamed detail, and the outcome would be the same. Halving the layer height doubles the print resolution. In other words, halving the layer height fits twice as many layers into a single print.
The inverse to greater resolution is significantly slower print times. Finding the perfect combination of print speed vs. layer height is essential to high-quality prints in lower time frames.
Layer height can be broken down into “magic numbers”. These magic numbers are essentially the layer heights that work best on a particular printer. For the Ender 3 models, the magic numbers are in increments of 0.04 mm:
- 0.24 mm
- 0.20 mm
- 0.16 mm
- 0.12 mm
- 0.08 mm
Simply put, this is because the Z-axis stepper motor on the Ender 3 will raise the hot end 0.04 mm per step.
SUMMARY
- Fine detail, slow: 0.12 mm
- Coarse detail, fast: 0.20 mm
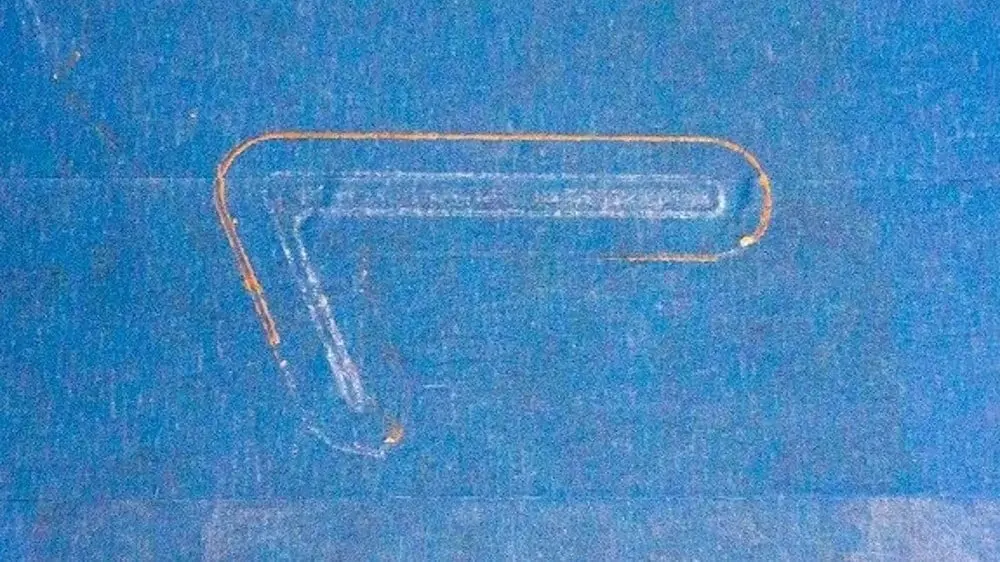
Retraction
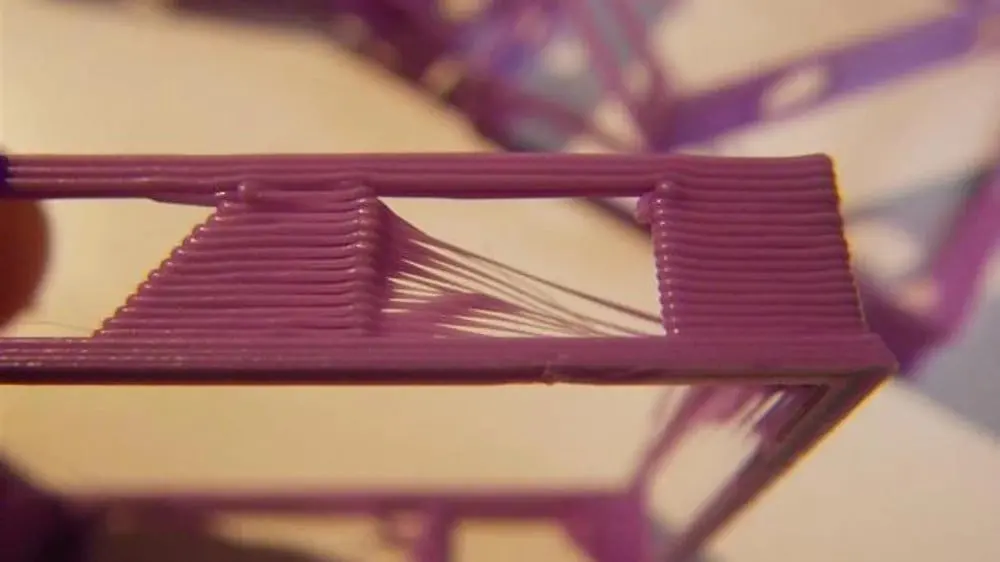
Essentially, retraction is a tool that reverses the extruder motor to relieve pressure on the nozzle during travel. Hopefully, without pressure on the nozzle, no excess material should be extruded.
Retraction is your best weapon to combat oozing and stringing in prints. Retraction is broken down into two main settings: retraction distance and retraction speed.
For a while, the perfect setting was hard to find, and the Ender 3 became known for terrible stringing. That’s long in the past now, and users have worked to find what appears to be the perfect retraction setting for PLA: a distance of 6 mm at a speed of 25 mm/s.
PETG prefers a shorter retraction distance, ideally around 4 mm. ABS benefits from a 6-mm retraction distance but a faster retraction at 40 mm/s. It’s a good idea to play with these settings to find the best ones for you. To do this, you can use retraction test prints on Thingiverse.
SUMMARY
- PLA: 6 mm at 25 mm/s
- PETG: 4 mm at 25 mm/s
- ABS: 6 mm at 40 mm/s
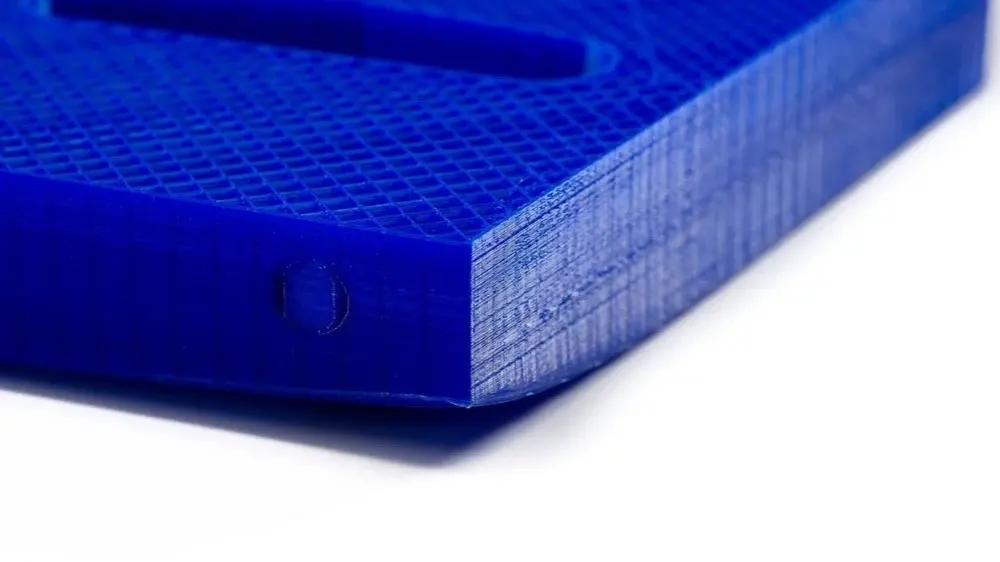
Infill
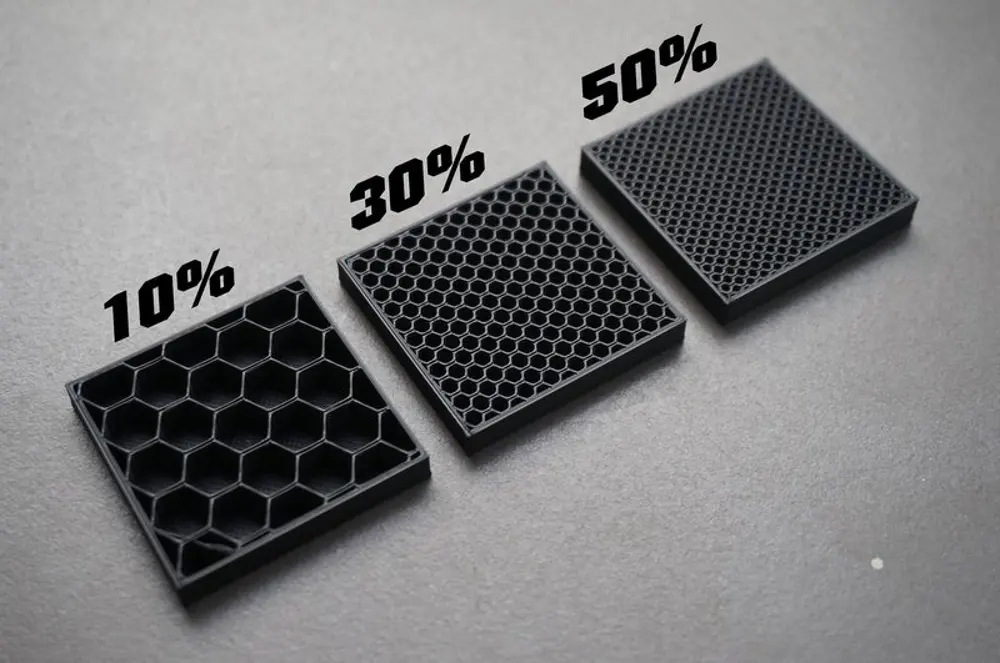
Infill affects both the strength and weight of your print. There is no “perfect” setting for infill, as it purely depends on the purpose of the print. For lightweight, decorative prints, you can drop your infill down to 5% or 10%. This will decrease print time and make the print significantly lighter.
For functional prints, you’ll want a higher infill setting to increase strength and durability. Anywhere from 50% and up is ideal. Some prints may even require 100% infill.
SUMMARY
- Decorative prints: 0-15%
- Standard prints: 15-30%
- Functional prints: 50-100%
Initial Layer
Ensuring your first layer sticks to the print bed effectively is paramount to good print quality. Poor bed adhesion will cause a print to fail almost every time. As such, you should alter your initial layer settings to ensure the print won’t delaminate during the print, which wastes significant amounts of time and filament.
Initial layer height can be increased to 0.20 or 0.24 mm to give you a thicker first layer and improve bed adhesion. These initial layers (we recommend five) should also be slightly slower than your regular print speed. A slower speed gives the first layers more time to bond together and adhere to the print bed.
Decreasing the initial layer speed shouldn’t drastically affect total print time, as very few layers are being slowed down. We find 30 mm/s to be ideal for initial layer speed. Reduce this number if you’re having print adhesion problems. Lastly, the initial fan speed should be set to 0%. Excessive cooling of the earlier layers can cause your print to slightly shrink or warp and consequently pop off of the print bed.
SUMMARY
- Initial layer height: 0.20 mm, 0.24 mm
- Initial layer speed: 30 mm/s, reduce further if you have problems
- Number of slower layers: 5
- Initial fan speed: 0%