Introduction
The STL (Standard Triangle Language) is the industry standard file type for 3D Printing. It uses a series of triangles to represent the surfaces of a solid model. All modern CAD (Computer-Aided Design) software allows you to export their native file format into STL. The 3D model is then converted into machine language (G-code) through a process called “slicing” and is ready to print.
This article will teach you the basic steps you need to follow to correctly export your models for 3D printing.
Step 1. Understand the STL resolution
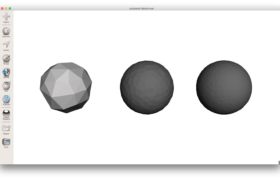
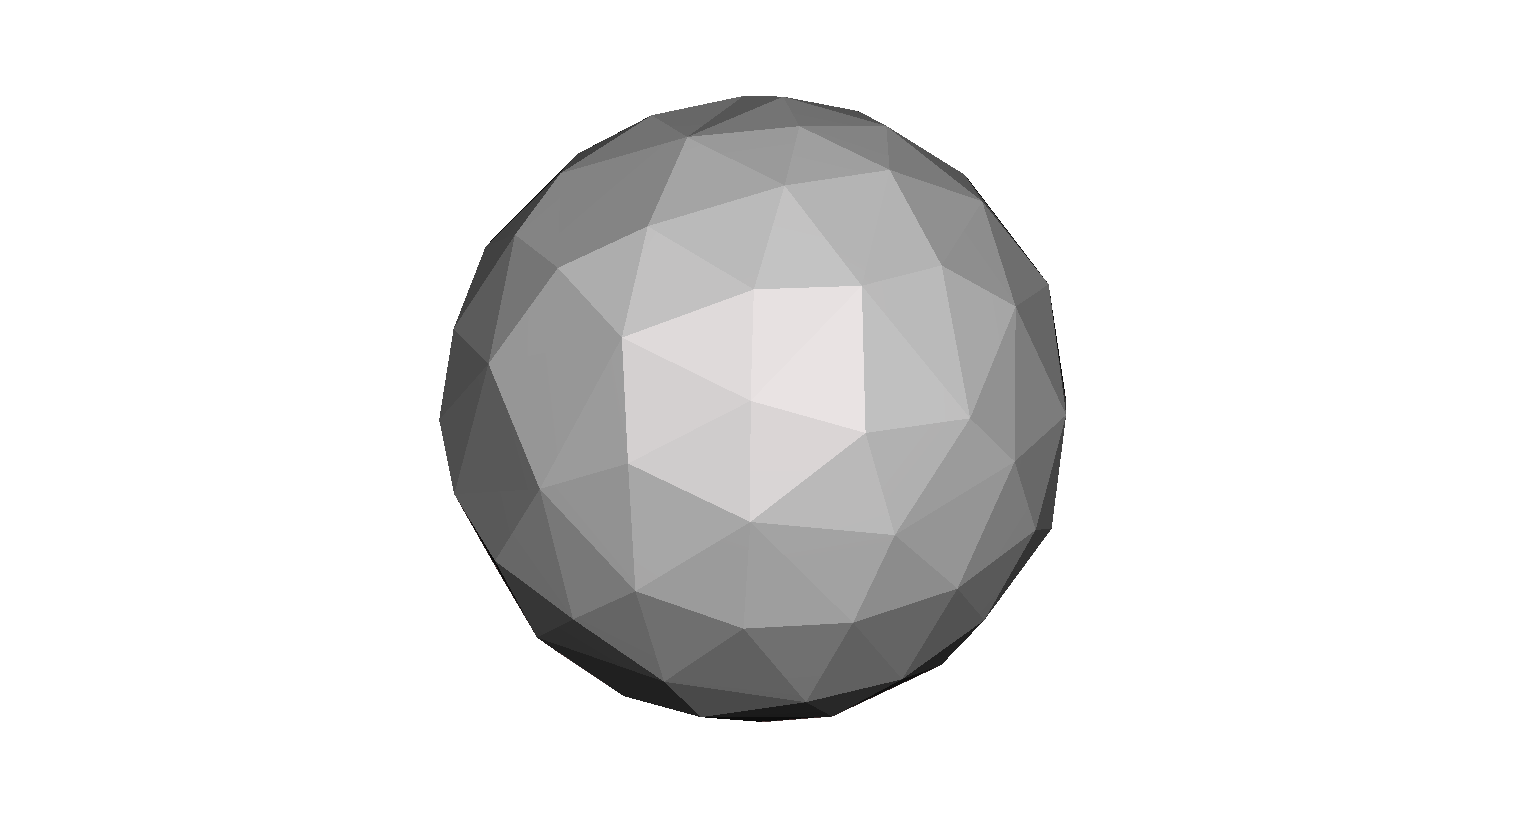
The STL file format uses a series of linked triangles to recreate the surface geometry of a solid model. When you increase the resolution, more triangles will be used, approximating the surfaces of the 3D model better, but also increasing the size of the STL file.

If you export in too low of a resolution, the model will have visible triangles on its surface when it is printed. Most of the times this is undesirable, but it can be exploited to create “low-poly” models with a digital look.
Increasing the resolution above a certain point is also not recommended, as it brings no additional benefit: very fine details cannot be 3D printed, so the size of the file will be unnecessarily increased, making it more difficult to handle and process.
Step 2. Choose the right exporting parameters
You can change the resolution of your STL files by altering the tolerance in your CAD software. When unsure, selecting the “high” preset is the safest option for generating an STL file that is suitable for 3D printing.
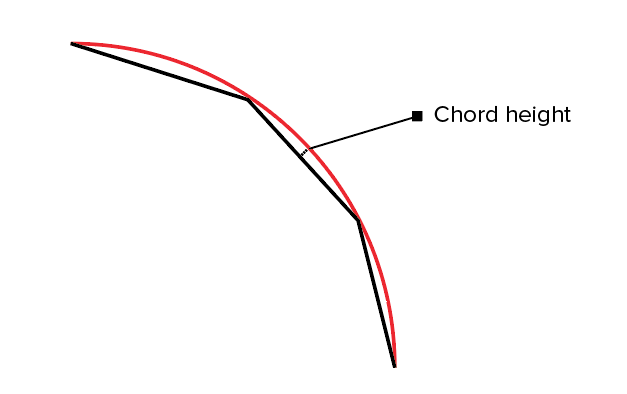
Each CAD package has a different way of specifying the STL resolution, but most use two main parameters: chord height and angle.
The chord height is the maximum distance that your software will allow between the surface of the original 3D model and the surface of the STL file. Using a smaller chord height will help represent more accurate the curvature of a surface.
The recommended value for the chord height is 1/20th of the 3D printing layer thickness and never below 0.001 mm (1 micron). This will always result in an STL file with ideal accuracy for most 3D printing applications. Exporting in a smaller tolerance will not have any effect in the quality of your print, as most common 3D printers are not able to reproduce such a high level of detail.
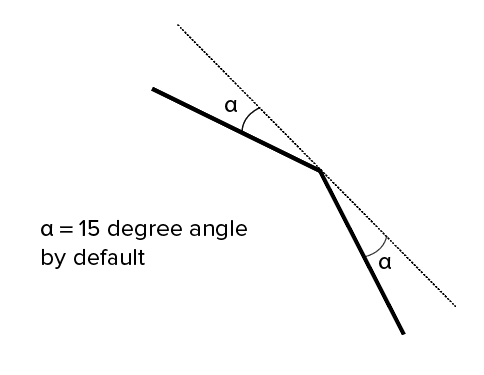
The angular tolerance limits the angle between the normals of adjacent triangles. The default setting is often 15 degrees. Some software also specify this tolerance as a value between 0 and 1. Unless a higher setting is necessary to achieve smoother surfaces, the default value of 15 degrees (or 0) is recommended.
Step 3. Export STL files from your CAD software
All CAD software have their own way to export STL files. Use the following table as a quick reference:
| Software | Description |
|---|---|
| Solidworks |
File > Save As… Set Save As… file type to STL Options > Resolution > Fine (or Custom) > OK |
| 3DS Max |
3DS Max Application Menu > Export > StereoLitho (*.STL) |
| AutoCAD |
Output > Send panel > Export At the Command prompt, enter export. In the Export Data dialog box, enter a filename. Under Files of Type, select Lithography (*.stl) and click Save. Select one or more solid objects. Note: The XYZ coordinates of all objects must be above zero. The file extension .stl is automatically appended to the file name. |
| Fusion 360 |
File > 3D Print Under Refinement / Refinement options, select export settings. Output > untick “Send to 3D Print Utility” > OK > Save |
| Inventor |
File > Print > 3D Print Preview Save Copy As… (top left of window) > Save |
| Onshape |
Right click on [Part Name] on bottom right > Export Under Format, select STL. Specify model units. Select export settings. |
| PTC Creo |
File > Save As… > Save a Copy Change Type to Stereolithography (*.stl). Click OK > a new Export STL dialog will open. Under Deviation Control, change export settings. |
| Rhino |
File > Save As… In the Save As… box, select Stereolithography [*.stl]. |
| Sketchup |
Download Sketchup to DXF or STL plugin. Start Sketchup. Tools > Export to DXF or STL |
| Solid Edge |
File > Save As… Set Save As… file type to STL. Options > Select export options |
| ZBrush |
Use Decimation Master to appropriately reduce the polygon count. Zplugin > 3D Print Hub > Export as STL. |
You can learn more about the different types of CAD software for 3D printing in this article of the Knowledge Base.
Rules of thumb
- Export with a 0.001 mm chord height and 15o angular tolerance for best 3D printing results.
- Avoid exporting unnecessarily large STL files.
- Upload your STL files and we will auto-fix small geometry imperfections.