Resin printers offer you outstanding print quality. Fascinatingly cleanly printed details, wonderfully filigree work and, in addition, little need to rework the printed objects: This all speaks in favor of 3D printing with resin.
But unlike filaments, the resin doesn’t even come in that many different colors. Strictly speaking, the choice is extremely limited.
Resin is available as standard as well as in “Tough”, “Flexible”, “Castable” and with many other properties – but it is mostly black, white or gray.
There are 4 ways to colorize 3D printing resin:
- Dye resin with alcohol-based inks* before printing
- Dye 3D print with alcohol-based inks* after printing
- Paint the 3D Print with acrylic paints* after printing
- Dye hollow bodies of the 3D printing after printing
In this post, you will learn how to do this and what alternatives there are.
No Multicolor Printing
For 3D printers that work with FDM technology, things are relatively simple: devices with multiple extruders can print in multiple colors.
If this is not the case, you can still buy filaments in different colors and print out the different colored parts one after the other. Then assemble your print object and enjoy the multicolored result.
If, on the other hand, you are working with a resin printer, you do not even have this option. This is because the printer only has one resin tank, so for technical reasons you can only print in one color at a time.
This means for your models: they are one color.
But one color plus another color already gives two colors … From this point of view, it should be possible to produce the different parts one after the other, as with the filament printer with only one extruder?
It is possible. But for that, you need colored resin. Resin is usually white when you buy it in stores. After printing, the material shows a slight yellow tint.
Alternatively, you can buy gray or black resins – so there’s not much you can do about color. And black or dark gray resins don’t color well either, because they are already dark.
Buying Already Colored Resin
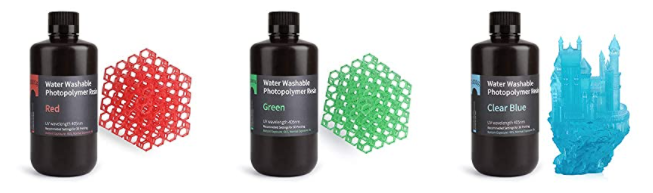
Some manufacturers offer already dyed epoxy resin. The base is usually a transparent or white synthetic resin, into which the manufacturers mix the pigments.
So they can offer blue*, green*, red*, yellow* or other colored resin. The color selection is not that great, but at least there is some choice.
Some service providers even offer to customize the material according to your specifications. However, this is a cost-intensive matter in both cases.
Resin printing is already associated with high material costs. If you buy colored resin, it becomes even more cost-intensive.
And another disadvantage is that you have to use or store the usually rather large amounts of material in a color until you use it.
So if you work with five different colors, you also need the space to store them. Another option is to color the resin yourself. But there are also advantages and disadvantages.
Four Different Options
One of the advantages of printing with epoxy resin is that the resin is not colored and you can do a lot yourself.
You can personalize your 3D prints with colors because you can create your own color using various mixing processes. And that’s exactly what you can’t get in stores.
What is simply a very cool idea in the hobby sector quickly takes on other dimensions for product developers and experts from different industries: The prototype from the 3D printer, the model to illustrate processes or products gets its own unique color scheme.
This creates interesting opportunities.
Of course, there is not only one method of coloring synthetic resin. The methods differ in when exactly the material is colored: before printing, directly after printing, by individual painting or in some other way.
Printing with Dyed Resin
Resin can be dyed even before printing. This works with matt, white resin just as well as with the transparent, colorless material.
For this, you need alcohol-based inks* that dissolve completely in the resin.
By determining the amount of ink in the resin yourself, you can select the color intensity individually.
You also decide how much resin you color – a small amount is enough to check the color result when pouring.
After mixing, you print as usual: The material cartridge and a new tank go into the printer, the file is set according to the material used. You load the print job and start the printer.
This method is particularly suitable when creating multi-part models with individual parts of different colors.
The setup is quite simple. You choose the color scheme individually and it turns out very uniform. Additional post-processing is not necessary.
However, there are also disadvantages. Because usually a whole liter of resin is colored at once (one cartridge), and you don’t want to throw away the colored resin.
It must therefore be used up. Re-coloring and mixing colors is possible, but it remains colored.
You can only use one color per print with this method. In addition, the alcohol-based ink (like any foreign substance) in the resin can lead to misprints.
This method is not suitable when using Flexible Resin* or an elastic resin.
Dyeing SLA Prints after Printing
Individual printed parts can also be colored after printing. To do this, the printed parts made of transparent or light-colored resin are dipped in an alcohol-based ink*.
The ink is mixed with IPA*; for dark and strong colors, double the amount must be used compared to light, delicate shades. And the process is also time-sensitive.
You print your model as usual and then start the wash as intended for the material you are using.
While this process is going on, you mix the alcohol-based ink with the IPA, usually at a ratio of 1:100 (soft tones) or 2:100 (bright colors).
The amount of liquid prepared must be sufficient to completely cover the printed part.
The part is placed in the solution for a sufficient time after the completed wash. 10 minutes is a good guideline, if in doubt, just try it out.
This method is well suited if only certain areas of a model or component are to be colored. Of course, you can only dip the upper half, the lower third or the left side of your component into the color solution.
If you mix enough dye solution, there is no limit to the number of parts that can be dyed at the same time.
Another advantage is that you do not have to color an entire cartridge with resin.
The disadvantage is obvious: the method is not exactly clean.
Paint Printed Objects with Acrylic Paint
Resin prints are extremely precise and allow for detailed, intricate models. The color scheme can be correspondingly complex.
In this case, it is easiest to reach for the brush* and acrylic paints*. This costs a lot of time, but then multicolored models are also possible.
It is important that you do not use just any acrylic paints. The paints must be multi-substrate and adhere to non-porous materials.