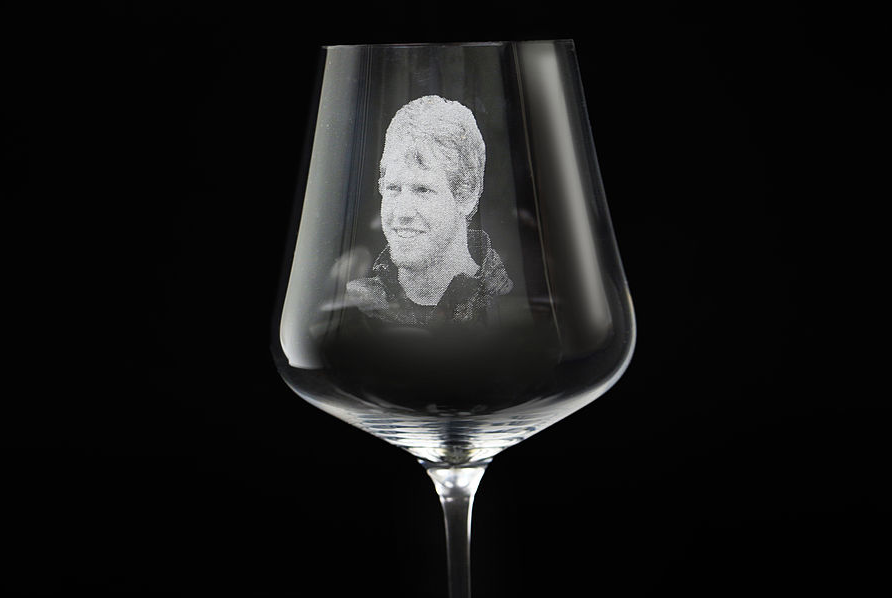
Laser engraving is a fast and efficient way to create highly customizable and personalized products, including wine glasses, beer mugs, bottles, vases, carafes, and more. Here are some helpful tips and tricks for glass processing.
Laser engraving glass products
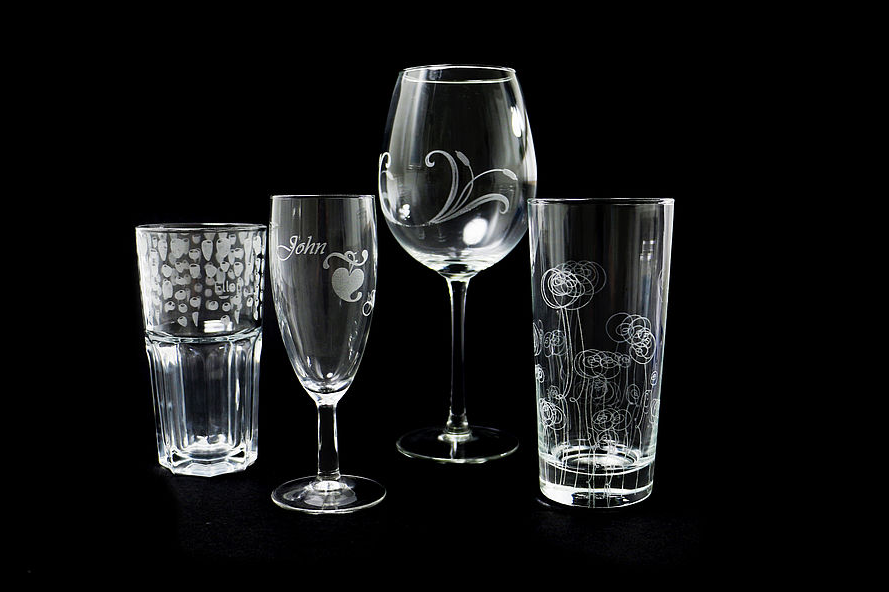
With a CO2 laser engraver, you can use a variety of laser processing techniques on flat materials including mirrors or window glass, round workpieces such as wine glasses or champagne flutes, and even bottles and other cylinder objects. Inexpensive, cast glasses adapt well to laser technology because they typically offer a lower lead content as well as a more homogeneous structure. Expensive, hand-blow glass or crystal glasses may have stresses in the material that are aggravated by the laser beam heat while engraving, which can result in fractures in the material.
You can also laser process mirror glass using a fiber laser system by removing only the reflective layer on the back. This will cause the surface to remain smooth and the glass itself to not be engraved.
What options are recommended for laser processing glass?
There are several recommended methods for laser engraving glass and creating special effects. Here are just a few:
1. Dampened paper towel
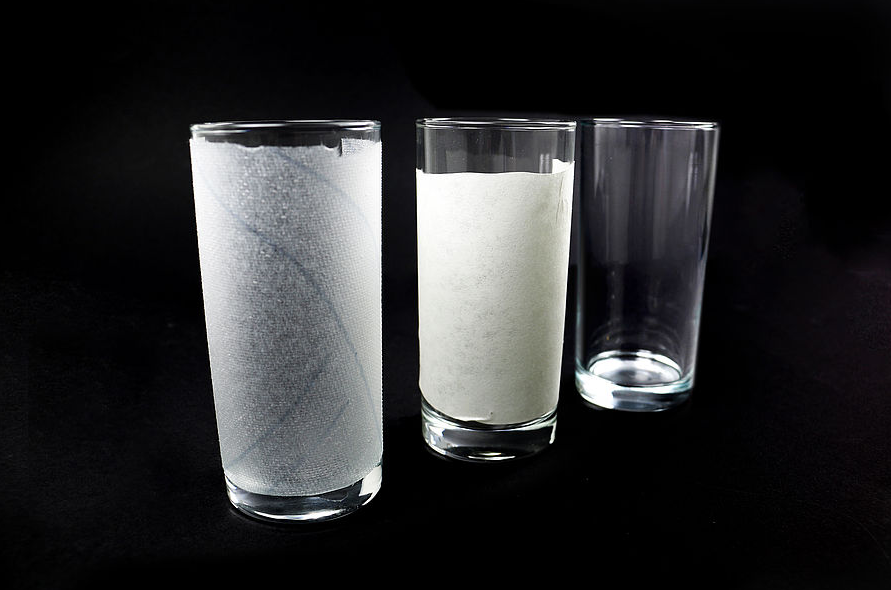
Using a paper towel that is dampened with water will assist with preventing the laser engraving area from becoming rough, and it will also lead to clear, white engraving results.
Prior to starting your laser engraving job, apply a dampened single-layer paper towel to the glass workpiece and verify that there are no overlaps or air bubbles which could affect the engraved image. Turning the Air Assist to OFF will also prevent the paper towel from drying prematurely during the engraving process. Once the engraving is completed, any residue can be easily wiped off and the workpiece can be quickly cleaned.
2. Application tape
In addition to dampened paper towel, application tape can also assist with preventing the surface area of the workpiece from becoming rough. Comparatively, using application tape will result in a grayish engraving color instead of bright white. Just as with the paper towel method, ensure that no air bubbles or overlaps have formed when applying the tape, and post-engraving, simply clean the glass of any leftover residue.
3. Engraving without auxiliary materials
Dampened paper towel or application tape is a recommended processing technique, but is not required for laser engraving glass, however. Effects can be created by making small adjustments, such as changing the graphic color from 100% black to around 70% gray. This will result in any effects from heat on large surfaces to be minimized, which will optimize your finished product. You can also go to the print settings, select the rasterization type “Ordered Dithering,” but keep the same parameters. This will decrease the amount of heat that enters the material, as well as reduce the possibility of the surface becoming rough.
Engraving glass that has curves and handles
Glasses with a curved shape can be easily engraved with the use of a rotary engraving attachment. For more detailed instructions, see Tips and Tricks Rotary Attachment.
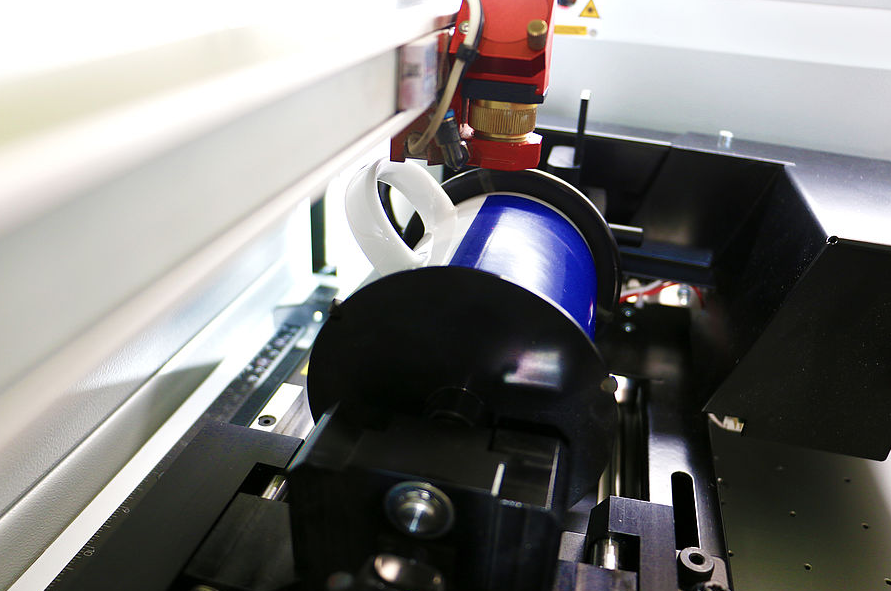
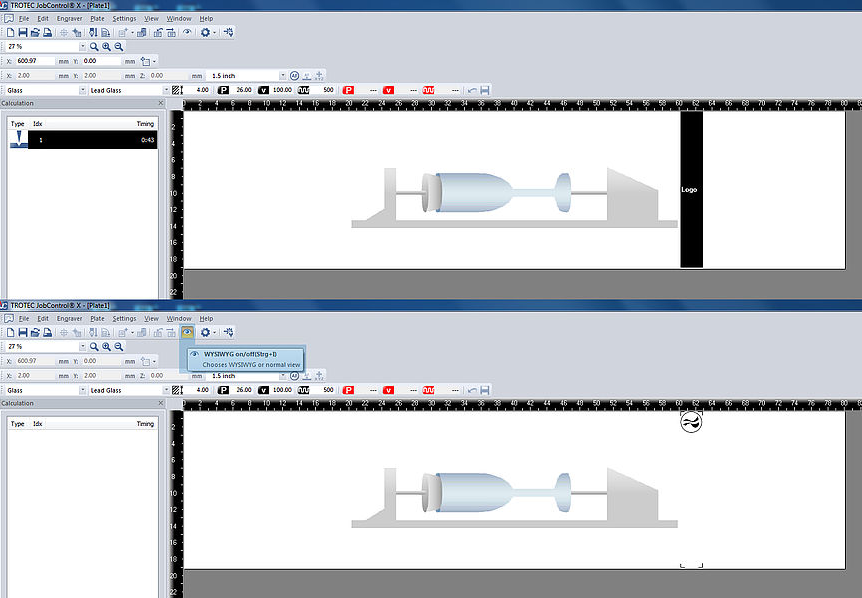
Glasses that have a handle can also be laser engraved with the use of a rotary engraving attachment. It is very important to verify that the glass workpiece is correctly positioned to avoid the handle from rotating into the engraving field. Start with moving the Y-axis (rotary motion) to the very top and clamp the glass with the handle positioned slightly above the laser beam. With this technique, there is no risk of collision between the glass and laser head since the workpiece is rotated backwards. For all handled glasses, ensure that the glass circumference is large enough for the length of the graphic being used to avoid the image being placed too close to the handle. You can also verify the positioning in the JobControl® laser software by using the “What you see is what you get” function. (WYSIWYG)
How can I see where my graphic will be engraved?
The exact positioning of your graphic can be seen in the laser software, by using the “What you see is what you get” function (WYSIWYG) and the crosshairs. If you are using the crosshairs, simply move the Y-axis to the target position for engraving, and then place the job on the plate to the crosshairs. By repositioning the Y axis again, you can verify the dimension of the job on your workpiece and fix any faulty positioning.
How to get the best effect when laser engraving a photo onto glass
When laser engraving a photo onto glass, we recommend using a grayscale matrix of 70% black. This will reduce the amount of heat that is applied to the workpiece, resulting in a more favorable finished product. Using an average resolution of 500 dpi or higher, as well as the rasterization type “Ordered Dithering” is also recommended to maximize the image data.
