This article intends to show an amateur’s first experience of using 3D printing technology to make an innovative garage kit. If you have tried using clay to create a garage kit but feel distressed that you can’t figure out the ideal look, then the 3D printing technology may be an alternative for you.
On the left is the rendering of the digital model, and on the right is his finished work.

At first, we want to briefly introduce 3D printing technology. 3D printing is an emerging technology that has developed rapidly in recent years. Compared with traditional molding technology, it has advantages such as high molding accuracy, high material utilization, and perfect connection with computer technology. It can meet the processing and molding needs of high-precision and high-complexity parts and has a wide range of applications.
In terms of price, the price varies widely between different types of 3D printing technologies. The selective laser sintering technology (SLS) he uses is a relatively expensive type. The principle of powder sintering technology is to cut the digital model into thin layers, and then spread the powder layer by layer for sintering. Because the entire printing barrel must be covered no matter how large the cutting area is, the direct cost is only related to the height. However, in actual printing, many models are always printed together. Before printing, the positions of models are arranged more compactly, and the shared cost will be much lower than the direct cost.

There are many 3D modeling software. CAD and Inventor are commonly used by students in engineering and structure. Maya and Zbrush are commonly used in animation and game production.
CAD and Inventor are accurate in modeling, but the surface construction ability is not strong, which is suitable for building “angled” models, such as various workpieces; Maya and Zbrush have strong ability in curved surface and abnormal body construction, and it is also commonly used in the construction industry. If you are applying to be a designer in a garage kit company, proficiency in using modeling software is necessary.
I used the software Rhinoceros as all the above software is too difficult for a green hand. Rhinoceros requires less in hardware, has a small size, and is relatively easy to learn. Not only can you build curved surfaces flexibly, but there are also a large number of plug-ins to expand functionality, for example, the plug-in Grasshopper can help you achieve parametric modeling.

Open the main interface of Rhinoceros 5 (64-bits), you can see four views, which are TOP, FRONT, RIGHT, and PERSPECTIVE. There is an instruction call window at the top, where the input instructions can directly call functions or run plug-ins (provided the instructions are memorized). Below the command window is a horizontal menu, and on the left is a vertical option bar. You can find most modeling operations. On the right is a multi-function window, where you can view the camera position, manipulate layers, change display settings, etc. Below are the real-time coordinate display and some auxiliary functions.

Some of the most frequently used functions in the modeling are track sweep (single track, double track), loft, deformation tools (extend, bend, taper, etc.), curve creation (copy edges or borders, draw curves on surface), circular arrays, rotation molding, extraction (extraction of curves, extraction of planes, etc.), Boolean operations (collection, difference, intersection, etc.), and basic operations such as scaling, rotation, segmentation, translation, shearing, etc.
The theme of the work is Halloween, added with other artistic elements. The final project plan consists of two parts: the armillary sphere and the innovative garage kit. Here are some screenshots during the modeling process.
Puff skirt (four layers totally)

Another layer of the skirt (lace skirt)

The upper layer of the skirt (petal skirt)

Skirt bottom

Legs and feet (at this time the leg posture has not been adjusted)

Arms and hands

Chest

Cape

The full image of the upper body

Hair braids

Rabbit ears and hair

The full view of the hair

Armillary sphere

The adjusted armillary sphere

Center sphere (with lights inside)

Gear base

Devil pumpkin

Magic hat

Adjust the position of all the parts in the software.

After completing the modeling, you can render the image.

Can’t wait to print the model! However, this 3dm format file cannot be printed directly, and repair software is needed to ensure the thickness and tightness of each part. Then use the special slicing software to perform the layering process. Finally, import it into the host of the printer for reading before printing. So the process is a little bit complicated.
Before printing, load the clean steel drum into the printer with a cart.

Through the printer door, you can see the internal working platform. When the laser head is sintered, the internal temperature will be very high.

Printing is completed after about 36 hours. At this time, the temperature of the internal material is still around 1000 degrees. It takes about 36 hours to cool down before moving on. Let’s take a look at what the freshly made material looks like – a bucket of powder. But the model is buried in it. You need to be very careful when digging the model out of it.

Many parts have been dug out one after another. You may want to ask why it is divided into such small pieces. Yes, we can 3D print a whole object, but at that time we just want to improve space utilization, reduce costs, and facilitate painting in the later steps.

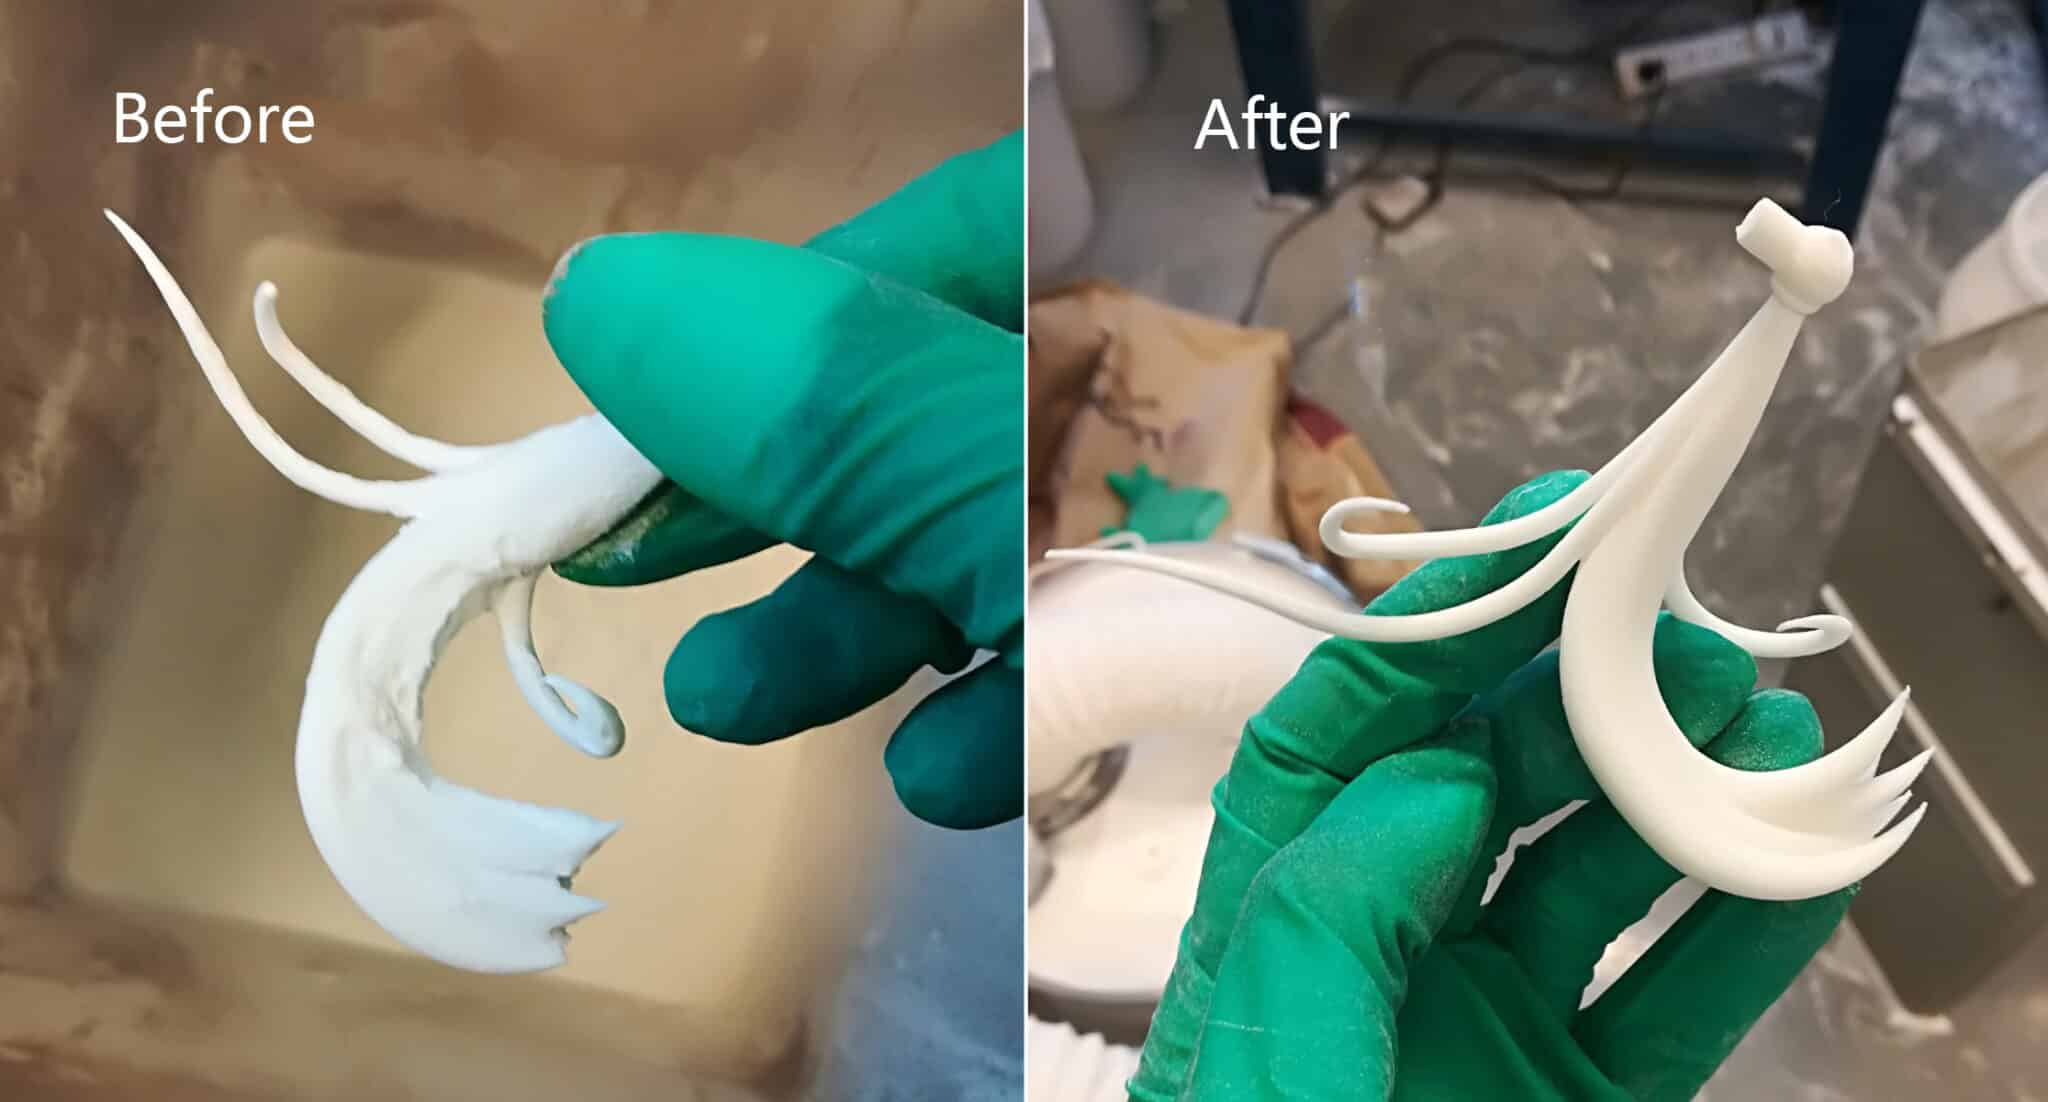
As you can see, the parts that have just been dug are all powdered. These powders are very fine and have strong adhesion, which cannot be removed by ordinary methods, so we used a sandblasting machine. The sand sprayed from the blast gun head can remove the powder adhered to the parts, in the meantime, the sand does not have strong adhesion and can be easily removed with an air gun. The inside of the blasting machine is like this.

What is the difference between before and after blasting?
We found one missing piece after counting all the parts. Fortunately, it is not a key component.

Next is the painting work. Strictly speaking, every part should be polished once, because the SLS-printed surface is really rough, but there is really no time for us. Before I have done the color matching. The character part is mainly in cold and dark tones.


The iron wire will be used during the final assembling. The work is now complete!


The middle sphere is lighted inside. You can turn on the light, and the armillary sphere looks more beautiful.

Now we can analyze the advantages and disadvantages of SLS technology.
The details are better than I what expected. Many sharp parts are printed impressively, especially the ends of hair. As for the front and back hairstyles, although the gap in the hair ends was not printed successfully, the lines were still visible. The fingers of both hands are thin, but they were printed well. Some other details such as lace and folds on the skirt are well described. In addition, on the parts that are designed with jacks and inserts, the material has a certain elasticity, which shows excellent assembly performance.
However, the shortcomings are still obvious. The rough surface is the most noticeable problem. Due to the operation of the printer, the surface of the part will leave traces of slicing layers; the uneven intensity of the laser spot during laser sintering also makes the part surface grainy. Grinding and polishing can improve the surface, but the workload will be large. In addition, although the details are better than expected, there is still a gap compared with those handmade products out of clay.
Another serious problem is the loose material caused by the SLS molding method. The material is loose and the surface of the part is not dense enough so that liquids such as fluid glue and pigment can penetrate into the material and cannot be kept on the surface of the material, which will cause difficulty in assembly, low coloring efficiency, dull color after coloring, metallic paint and gloss paint Post-processing problems such as gloss effects cannot be exhibited. If the surface is treated to indicate the density, it will increase the workload and the processing cost.