It’s a fact of life that most things can be improved upon, and 3D printed parts are no exception. If you’ve never seen one firsthand, most additive-manufactured parts look a little ugly when they first emerge from the build chamber, which is why FacFox’ standard post-build process is to—depending on the 3D printing process—remove any support structures and then apply a light bead or water blast to eliminate excess material and achieve a consistent surface texture.
For many customers, this works well, but some customers seek a number of secondary finishing options, which are available to make prototypes and end-use parts more aesthetic, more functional, or more representative of the final production-level product.
The application of each option largely depends on the material used to actually 3D print the workpiece—you can’t dye metal, for instance, just as you can’t electro-polish plastic, but you get the idea. The message here is that prototypes and low-volume production parts can be taken well beyond the basic “fresh out of the printer” stage if necessary.
| SECONDARY OPERATIONS FOR 3D PRINTING |
|---|
|
Plating for 3D Printed Parts
Consider plating. Manufacturers most often associate plating with machined metal parts, but 3D-printed ones are also candidates, and even some that are made of plastic can be, too. For example, the thermoset resin used with stereolithography (SLA) can be made stronger and more durable through electroless nickel plating, which is a great way to mimic a cast aluminum or magnesium part for prototyping or light-weighting purposes.
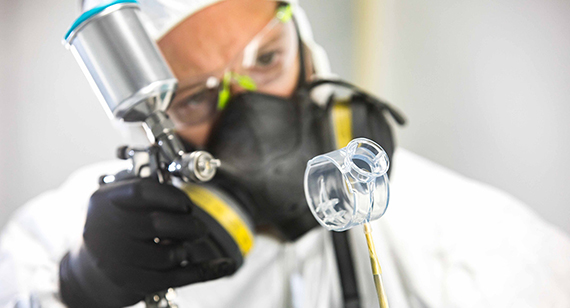
Painting Can Add a Finishing Touch to Printed Parts
Suppose you’re a designer for an aftermarket automotive parts supplier and want a replica of your company’s line of side-mirror housing for an upcoming trade show. This is an application for SLA printing.
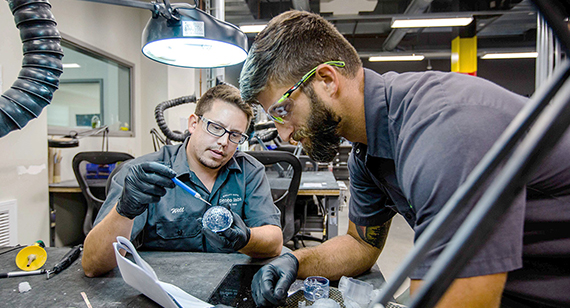
Some sanding and polishing will be needed to make the surface smooth, after which the prototype can be masked off and painted with whatever colors you like—just send the Pantone numbers with your design upload, together with a CAD model or sketch indicating which color goes where. The parts will be sprayed with an automotive-grade paint. Clearcoat is also available.


Dyeing of 3D-Printed Parts
SLA parts can also be dyed black, green, red, blue, or yellow. The finished parts are simply bathed in hot dye for a short while for a consistent color. This option is one of the fastest, lowest-cost ways to make printed parts cosmetically appealing. There’s no chance of masking off certain areas like there is with painting, but for SLA, selective laser sintering (SLS), PolyJet, and Multi Jet Fusion (MJF) parts, especially those made of translucent acrylic or polycarbonate-like materials, this is often an excellent option.
Apply Stickers, Decals to Printed Parts
If you’re old enough, you might remember the rub-on action figure transfers you played with as a kid, but there’s a modern equivalent available that provides a great way to attach company logos, safety warnings, and pretty much any graphic necessary to increase your part’s attractiveness or functionality. FacFox doesn’t supply such products, but can apply them for you. One caution, though: Adhesive and thermal-transfer decals won’t stick to the rough surface typical of some 3D-printed parts, making sanding or otherwise smoothing of the target surface a prerequisite to decal application.
Textures Can Improve the Finish of 3D-Printed Parts
Textures are all around us. They’re used to make parts less slippery, more comfortable to hold, or simply give them a cool new look. When prototyping parts that will later be injection-molded, it’s possible to apply a spray texture to mimic a Mold-Tech brand-like finish used in many mold cavities. This same technique can be used to apply a soft-touch paint or urethane clear coat to a 3D-printed part, a process that also improves weather and sun resistance on the UV-curable materials used with SLA.
Polishing Printed Parts
Just as part surfaces can be roughened with bead-blasting or spray-on texture, they can also be polished to a high gloss. As mentioned earlier, some level of smoothing is needed to apply paint and decals, but with a little elbow grease, highly cosmetic surfaces can be taken even further.
If this is a requirement, be sure to identify your finish expectations on your CAD model or drawing, and if you have any questions about the best way to finish any given material, feel free to call a FacFox applications engineer.
Give Printed Parts the Heat Treatment
The DMLS process generates enough heat to melt metal, so it’s only logical that virtually all 3D-printed metal parts at FacFox undergo a heat-treating operation afterward to eliminate heat-induced stress and potential warping. That said, heat treatment can also be used to harden metals, strengthen them, make them less prone to cracking and fatigue, or make them more pliable. If you’re looking for an extremely tough but quite “hardenable” 3D-printable metal, for example, look no further than stainless steel 17-4PH, the stuff of jet engines, nuclear waste casks, and a variety of mechanical components used regularly in the aerospace industry. Similar uses exist for the other metals available at FacFox, some or all of which may need heat-treating to meet the final design requirements.
What about the design rules of secondary operations for 3D-printed parts? Aside from clearly communicating your needs, the most important things to remember are as follows:
| HIGH-REQUIREMENT OPTIONS FOR METAL 3D PRINTING |
|---|
| If needed, 3D-printed metal parts can take a trip to the machine shop if a highly accurate, smooth surface is specified. Other high-requirement operations for DMLS include boring or reaming close tolerance holes or tapping of those that require threads. And depending on the material, customer-supplied inserts of various kinds can be heat-staked or glued into place. |
- Using high-resolution 3D printing in a process like SLA produces smoother, more accurate surfaces, but at a slower build rate and therefore higher cost.
- Thin walls much below 0.04 in. (1mm) or so are prone to warping when placed in a hot dye bath or blasting cabinet, as are delicate workpieces and large, flat panel shapes.
- Stiff materials like glass-filled nylon are better in this respect, although mineral-filled nylons are fairly lubricious, making paint adhesion a bit more difficult to achieve.
- FacFox technicians will need a way to hold the workpiece for painting, dyeing, or plating—a small, coat hanger-sized hole is a great place if available, or the part can sometimes be set on a non-cosmetic surface.
Finally, be aware that several basic finish levels are available, starting at unfinished to standard finishing (described at the beginning of this design tip) to the custom finish options just listed (and combinations thereof).
As always, if you have questions or concerns, feel free to contact one of FacFox’ applications engineers at info@facfox.com to discuss options.
