Whether you’re a beginning or seasoned CAD user, you’ve likely heard of Blender. Learn what the Blender software is and what it is used for!
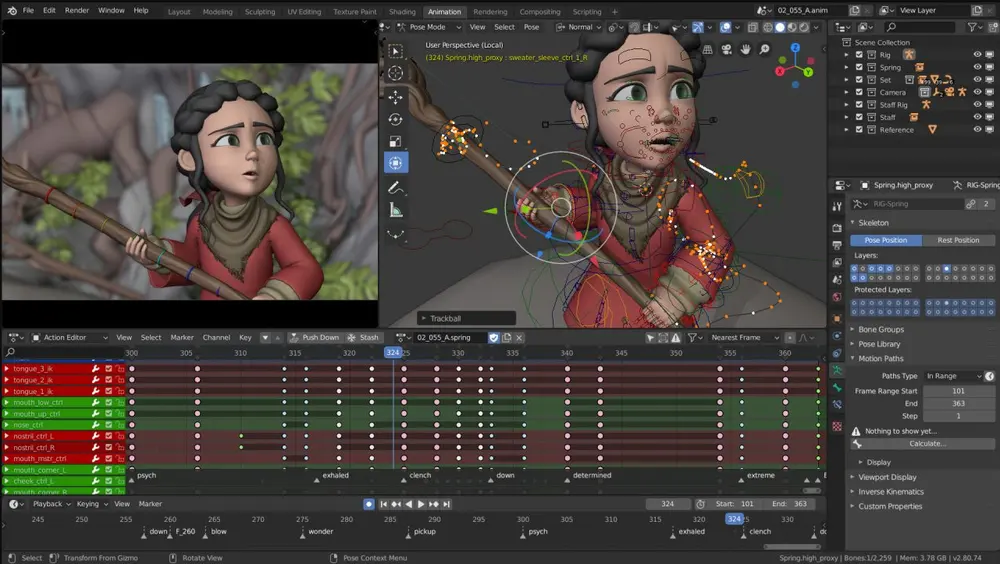
Blender is a free and open-source 3D creation suite that supports pretty much every aspect of 3D development. With a strong foundation of modeling capabilities, there’s also robust texturing, rigging, animation, lighting, and a host of other tools for complete 3D creation. This software is great whether you want to deal only with static models or get into the world of animation.
As a bit of background, Blender software was developed out of the Blender Foundation, a nonprofit organization formed in 2002. In 2007, the spin-off Blender Institute was created and now hosts the foundation, which has become a home base for continued development and creative projects.
Even though it’s free, Blender is accessible and valuable for a wide range of users, from the beginner hobbyist to the professional animator. Even NASA uses it for many of its public models! Since it’s continually being refined by advanced users, it may present a bit of a learning curve for the total amateur.
At the heart of it, Blender remains all about access: Giving people creative power so that they can build whatever is in their imagination. For those who are wanting to make their own models for 3D printing, it’s an invaluable tool!
In this article, we’re going to cover all things Blender, starting with what you need to get it up and running on your computer. Then, we’ll dive into the most popular features and give you some resources if you want to get started or need a little help. Finally, we’ll let you know some good alternatives to Blender.
Now, let’s get into the mix!
Prices & Licensing
As you may have gathered, one of the best things about Blender is that it’s completely free!
Blender has been released under the GNU General Public License, which allows people to:
- use Blender, for any purpose,
- distribute Blender,
- study how Blender works and change it, and
- distribute changed versions of Blender.
This means anything you create in Blender is not only your sole property, but you can also sell and distribute your creations to your heart’s content.
If you would like to support the Blender Foundation, it operates largely on donations as well as merchandise sold through the Blender Institute’s online store.
System Requirements

Another great feature is that Blender is totally cross-platform compatible, so it will run happily on Windows, Mac OS, or Linux.
If you’d like to download Blender, feel free to read the system requirements on their website.
If you don’t want to install Blender on your computer, you can run it off a USB stick as it’s completely self-contained. This means you can take it with you, though you’ll still need a powerful enough computer to be able to handle the program. It may not be as efficient when it comes to rendering on computers with low RAM. (Python 2.5 needs to be installed and it’s recommended to use a USB 3.0 drive.)
Blender doesn’t need a lot in terms of hardware requirements and has the following minimum recommendations:
- 64-bit dual-core 2GHz CPU with SSE2 support
- 4 GB RAM
- 1280 × 768 display
- Mouse, trackpad, or pen and tablet
- Graphics card with at least 1 GB RAM, OpenGL 3.3
Computers that are more than 10 years old may have a bit of a hard time running Blender. Regardless, you’ll want to make sure your OS is up to date.
Features & Functions
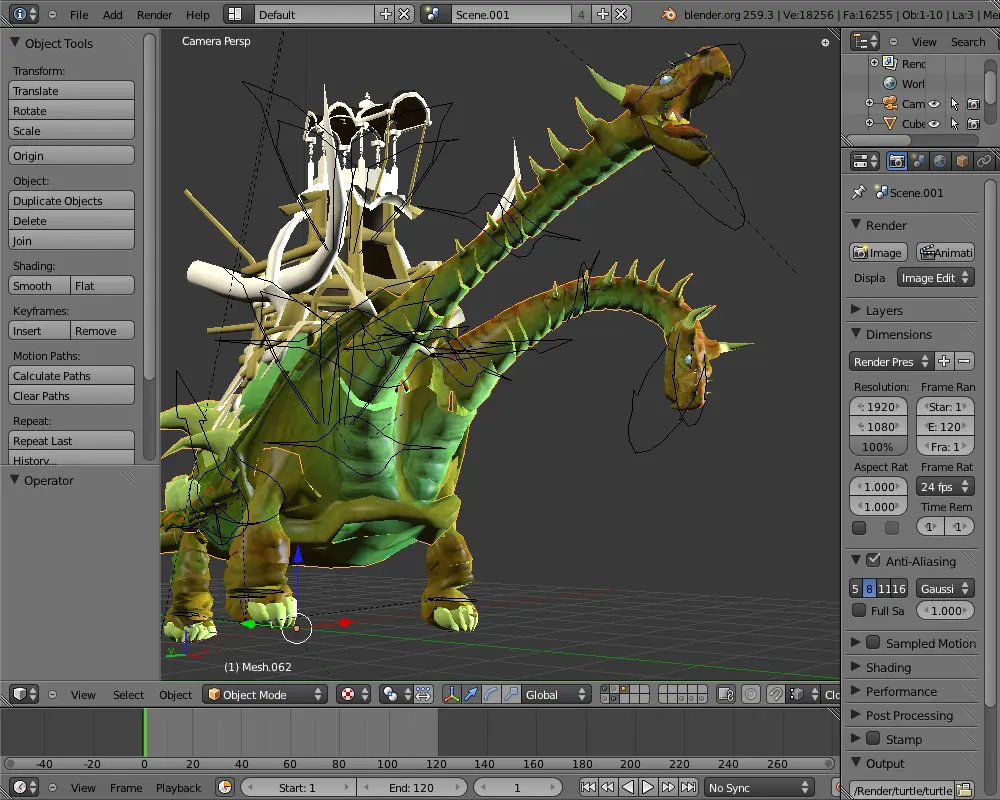
Blender is chock full of useful tools, but some will be more relevant to beginners than others. For many coming to Blender, the most popular tools are modeling, sculpting, and texturing, as well as animation. Those creating objects for 3D printing may not even go beyond modeling and sculpting.
However, for those who are interested in exploring the more advanced 3D techniques and tools, you’ll want to check out the 2D/3D hybrid Grease Pencil, physics simulations, scripting, and visual effects.
With that, let’s jump into more detail about the core features offered in Blender.
Modeling & Sculpting
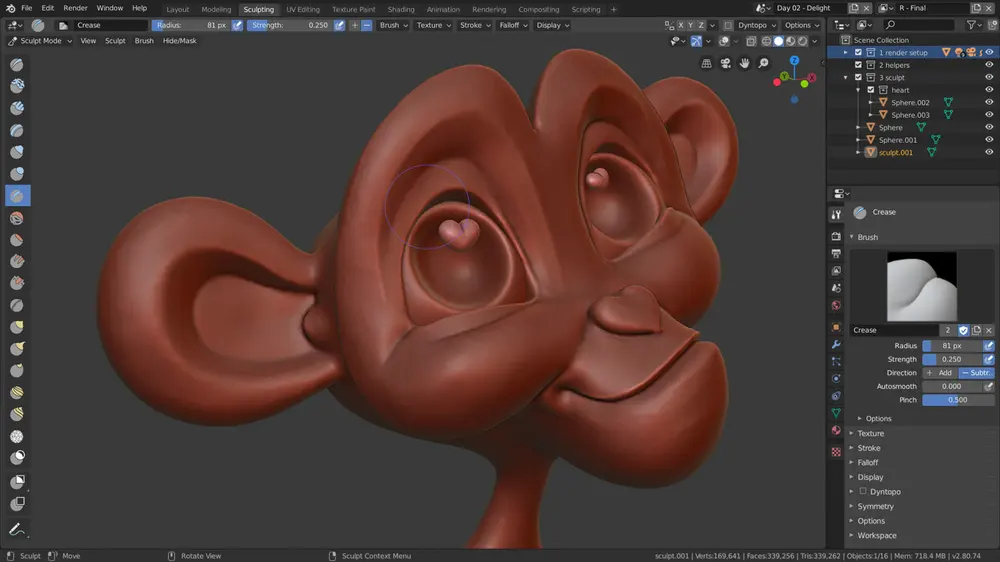
The most powerful and useful features that Blender offers are its 3D modeling and sculpting tools. After all, there’s no 3D art without 3D objects!
There are a number of ways you can approach creating a 3D model in Blender, and the latest version (2.8) makes it even easier to utilize these methods. You can freely change between mesh editing and sculpting tools with a single quick command.
TYPES OF MODELING
Mesh-based modeling is the most commonly used approach, also called surface modeling or box modeling. This method works on a polygon to polygon basis, where objects are constructed out of individual surfaces, sometimes even one vertex at a time.
Similar to this method is the curve-based method, called NURBS modeling in Blender, which instead uses lines to define objects. This approach involves drawing guiding structural lines, which are then used to generate the mesh.
Sculpting has a variety of tools used to ‘push’ and ‘pull’ the mesh in different ways, similar to how a traditional artist might sculpt clay. This method works best when there are a lot of polygons, and is generally used to create highly detailed and textured objects.
Texturing & UV Unwrapping
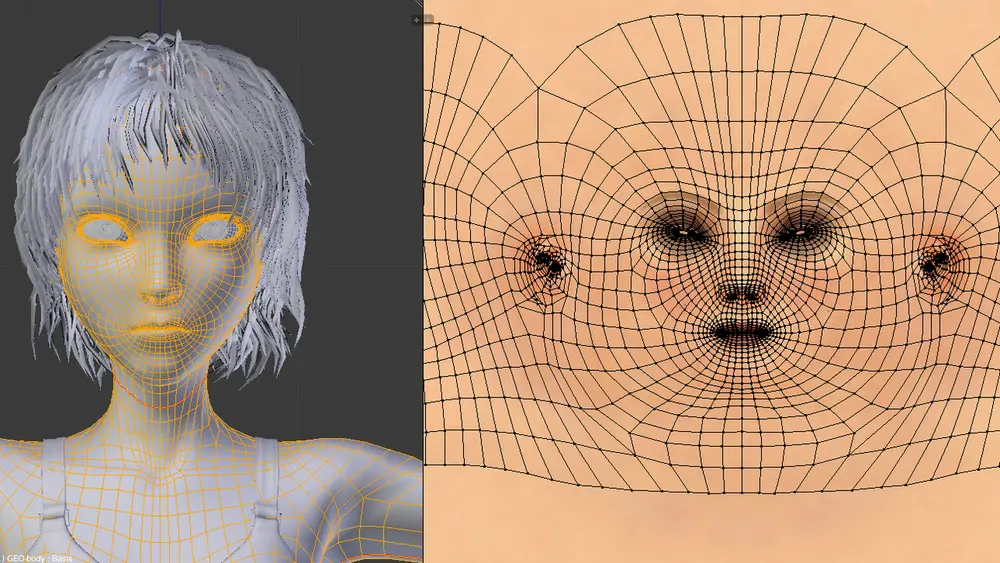
Once you’ve created a model, if you aren’t rushing off to 3D print it, you may want to make it look pretty with some color! This is where texturing and UV mapping come in to play.
Blender offers a powerful engine for the creation of materials and textures. These allow you to create a huge variety of appearances for your objects.
The UV unwrapping tool lets you flatten out the surface of your model so you can paint on your own texture. You can then adjust all sorts of things such as opacity, diffusion, light reflection, or back-lighting to get just the effect you are looking for.
Rigging & Animation
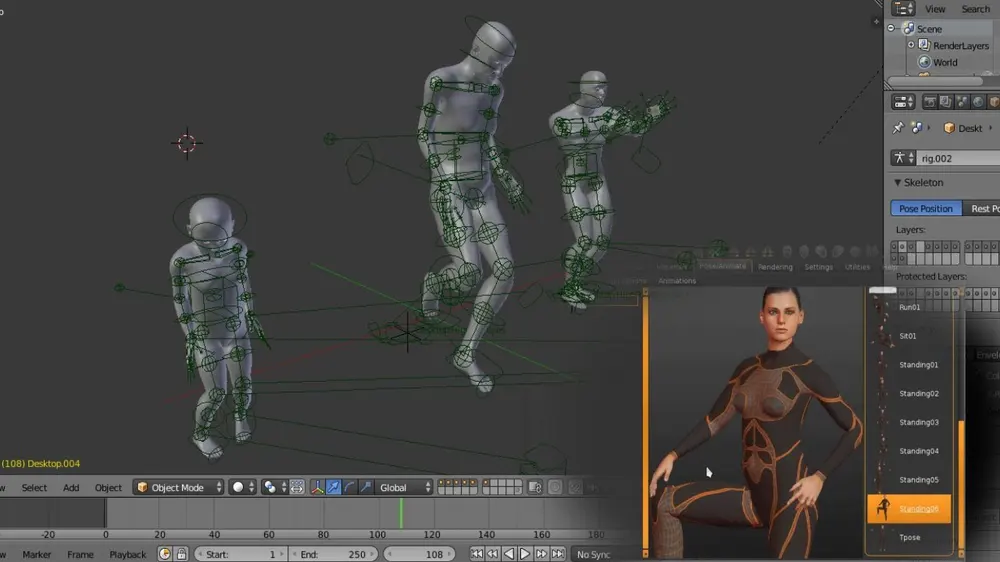
If you don’t want to see your model just sitting around looking pretty, you may want to explore Blender’s rigging and animation tools. These will allow you to essentially put a skeleton inside your model and make it move and dance however you choose!
You don’t need to use rigging for basic animation: You can animate just about any movement in Blender by ‘keying‘ it into the animation timeline. This is basically a stop-motion method, where you create points in the animation timeline. This is all you need if you want something to fly around or move from point A to point B.
For more complex animation, especially if you want to animate a character, you’ll need to use Blender’s rigging tools. With these, you can get your model moving exactly the way you want.
What’s great is that Blender will automatically fill in the movement in between your keyframes. You just need to set the starting and ending pose, and Blender will fill in the movement in between. It can take some fiddling though, which is where the art of the animator comes in.
All the Rest
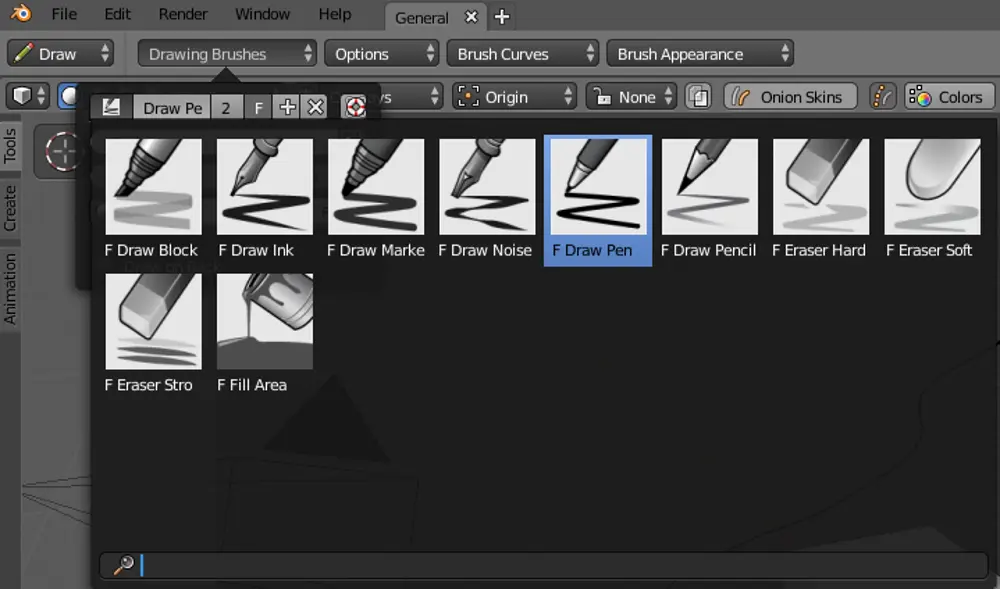
Beyond the primary tools, there’s a lot to discover in Blender!
- The Grease Pencil is a fascinating and popular tool that allows you to paint in 3D space using 2D brushes. You can create 2D animations using a hybrid workspace.
- Physics simulations such as gravity, cloth, and generated hair are fun to use. Other cool ones to play with are fire, smoke, or liquid particle effects.
- Blender’s powerful rendering engine lets you output your images and designs in a variety of formats and resolutions.
- There are lots of video editing and visual effects that can turn your renders into fully-qualified animations.
- Blender’s built-in scripting lets you shape the program to your needs.
With all that and more, it’s easy to see why so many people use Blender!
How Does It Drive?

With so many features, Blender may be a bit overwhelming at first. However, once you’ve gotten to know the workflow, it’s easy to adapt. For 3D modeling beginners or those who have come from other programs, it might not always be so intuitive. Fortunately, there are plenty of resources to improve your skills, which we’ll go more into a bit later.
Blender’s interface is very straightforward, with all your main tools on the left, all your properties and options to your right, and your main controls down at the bottom. You can modify and change your Viewports (the window you’re seeing a model or scene in) in a variety of ways, or use dual monitors to give yourself more space to work.
The release of Blender 2.8 offers a greatly improved system for quick commands and radial menus that let you get to the tools you need in as few clicks as possible. The new Eevee rendering system lets you preview right in the Viewport, without needing to render every time you want to check how something will appear.
Although there are a lot of bells and whistles available, it’s still relatively easy to get in and get going!
Use Cases & Applications
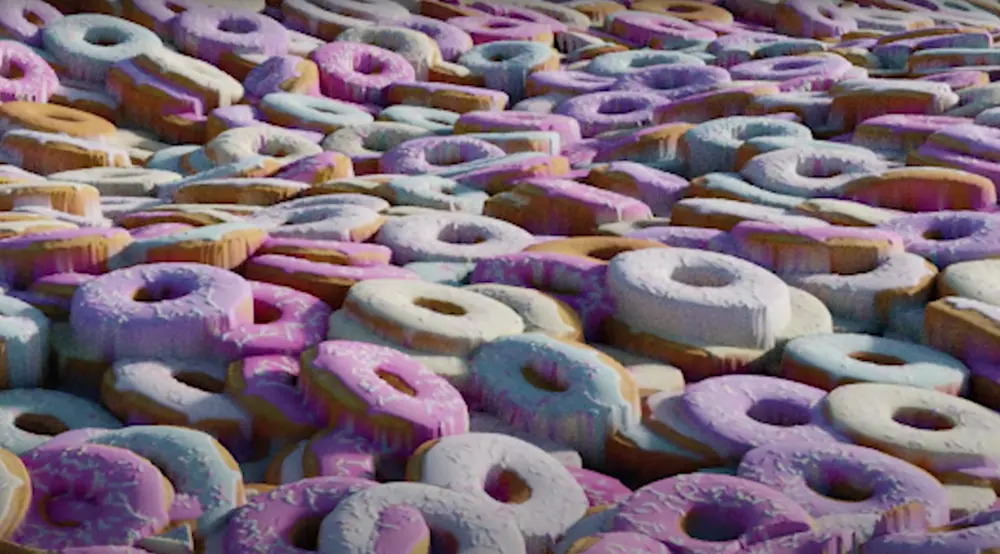
Blender appeals to a broad range of users, though it seems to best fit those who already have some understanding of 3D modeling. Largely, it’s used by hobbyists for creative design, artwork, and object creation for 3D printing. Within the 3D printing community, Blender’s often the program of choice for editing or adjusting pre-existing 3D models.
Blender is also commonly utilized for prototyping, but it may not be as effective for engineering uses as some other programs. For high-end visual graphics such as in film, Blender’s not usually the go-to choice, though there’s a growing stream of animated features emerging that show it’s increasing popularity as an animation tool.
Community & Company Support
There’s a fantastic community surrounding Blender, boosted by the fact that it’s open-source, meaning there’s a lot of help and advice to be found. From tutorials to threads, you can find your answers to all things Blender either on their support page, WikiBooks, CG Cookie (paid service with a free trial), Open Source or even right here on All3DP.
There are also communities that are more specific to particular parts of Blender, such as materials. If you aren’t sure what you want to design or are looking for inspiration, there’s a great community at Blendermada with a huge materials database.
Alternatives
While Blender is a powerful tool in its own right, you might also want to explore some other modeling and animation options that are out there.
If you’re looking for another free software that’s nice and accessible to beginners, then SketchUp might be for you. It offers both a free version and a paid upgrade. It also has pre-made models built-in for you to use and play with as you get started.
On the other hand, if you have a little bit more in your budget for a powerful animation tool, you might find Cinema 4D to be a worthwhile investment. In many ways, Cinema 4D is similar to Blender, but with more emphasis and power devoted to film production and high-end imagery. This is a good step up if you want to get into something slightly more professional.
If you’re really ready to become a pro, and pay a professional price, you can look at either 3ds Max or Maya. They are also both similar to Blender, but definitely in the professional range in terms of power and focus. These two are cutting edge in the industry, but in many ways, their workflows aren’t so different from Blender.
There’s plenty of software out there that can be used for all your modeling and animation needs, including the more specialized like ZBrush for sculpting, but, overall, Blender’s a great place to start!
- 3DS Max
- Autodesk Maya