Creating realistic materials takes time, not only practicing but also studying real-world materials. We’re all still learning but it’s a fun process to be involved in.
Materials enable you to determine what objects will look like in the finished render. Materials hold properties of diffuse, reflection, and refraction as well as bump and displacement. 3ds Max ships with a selection of different material types and each has its own set of unique properties. We’ll be focusing less on the individual types of materials and more on how you can use the interface to create your materials. We’ll also go into detail about what maps are and how they can be used in conjunction with materials.
Step 1: Compact vs slate material editor
Before around 2010 there was only one place to edit your materials and it was just called the material editor. Then came along a new and improved editor called the slate editor. The original one was then renamed to ‘compact editor’ and now 6 years later belongs in the dark ages, although I appreciate some people do prefer still to use it. I think though for new users it’s better and more intuitive to learn about the slate editor and that’s exactly what we’ll be doing.
Step 2: Material/Map Browser
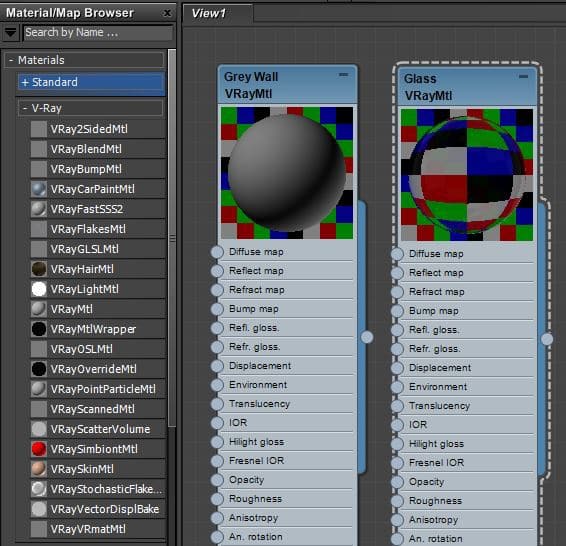
Open the slate material editor by pressing the ‘M’ key. You’ll be confronted with a node-based interface with a panel on the LHS called the ‘Material/Map Browser’. All of the materials are listed first followed by the maps and depending on what renderer you have activated a different set of materials and maps will appear. For example, if you have V-Ray active then you’ll get a load of materials and maps which Chaos Group has developed for specific use with their renderer.

Step 3: Materials
In that browser the first section is materials. I like to think of materials as the primary node that can be applied to any object we want. So you’ll have a glass material which is separate from concrete material. Each material will have a whole set of properties that make it unique. 3ds Max by default does give you access to a load of basic materials but I’d recommend utilizing whichever one’s ship with your renderer of choice.
Step 4: Maps
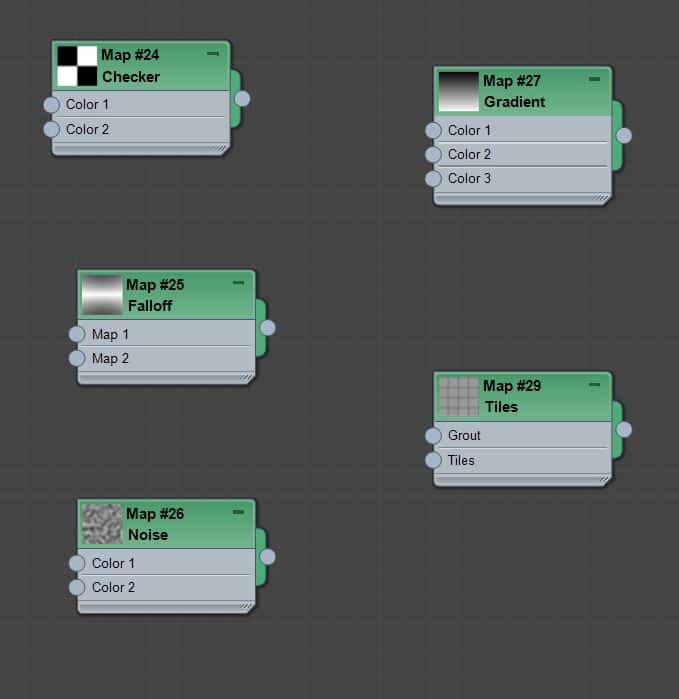
Underneath materials in the LHS panel is the Maps section. Maps are basically nodes that can be plugged into properties of the materials. For example, there is a bitmap map type. This enables you to load bitmap files and it can be plugged into the properties of a material such as its diffuse or bump map properties. A material could therefore be made of many maps.
Step 5: Active view
The large middle section is called the ‘Active View’. This is where the nodes of your materials and maps live. You can drag any of the materials or maps from the LHS panel into your ‘Active view’. You can move them around to your heart’s content. You can even quickly duplicate these nodes by shift+dragging.
Step 6: Active view continued
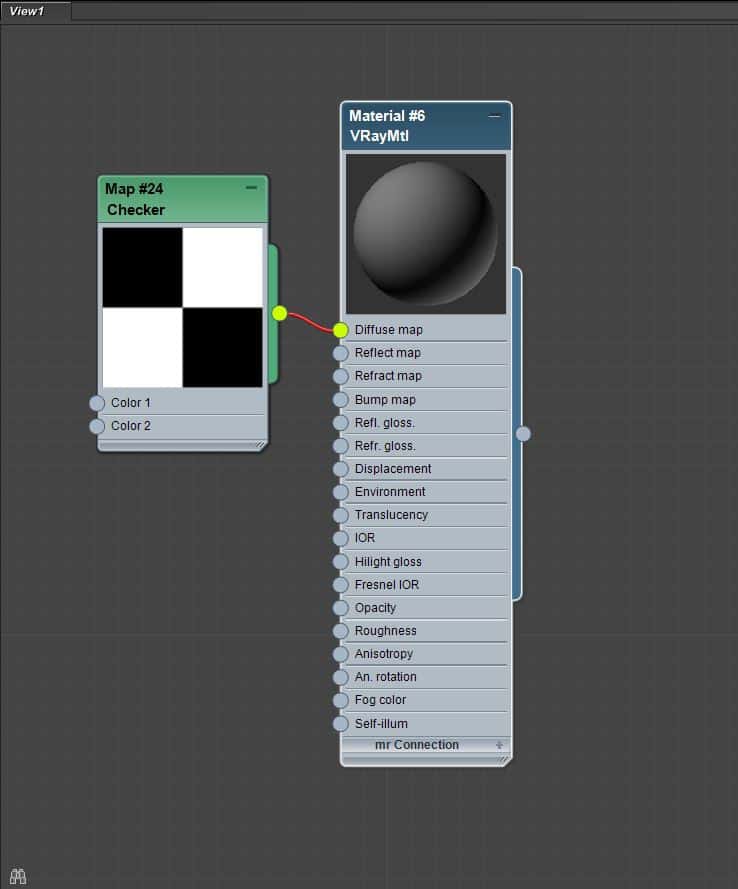
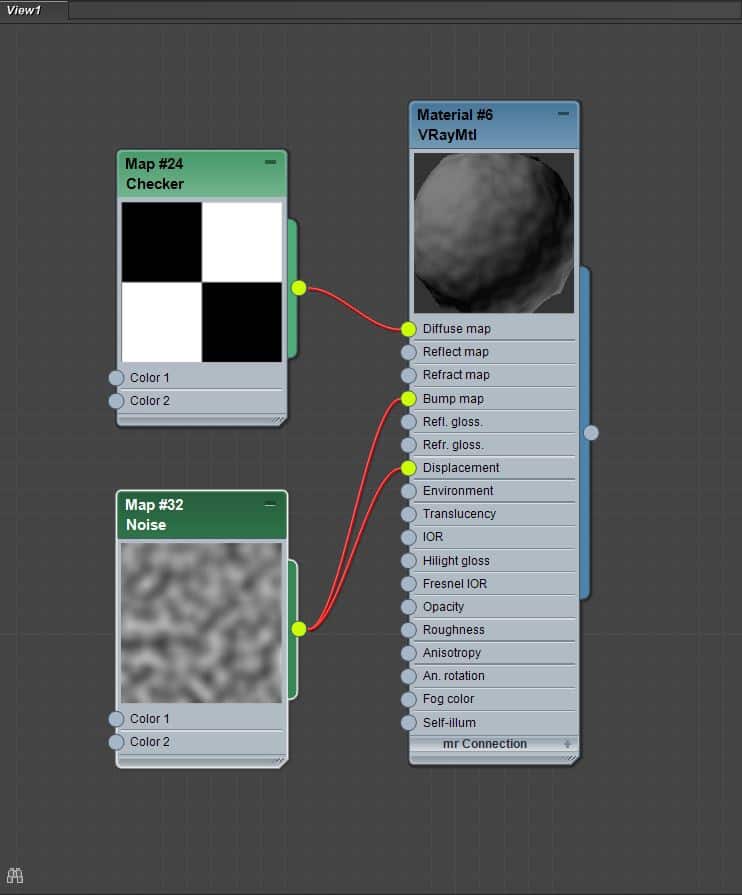
You’ll notice that a standard material for example has a series of dots along its side. These enable you to plug map nodes into the properties of the material. Do this simply by dragging from the node of a map to one of these dots. It’ll turn red if the connection is invalid. One of the beautiful things about the slate material editor over the compact version is that you can visually connect the same map into multiple materials. This saves endless amounts of time during the material creation process.
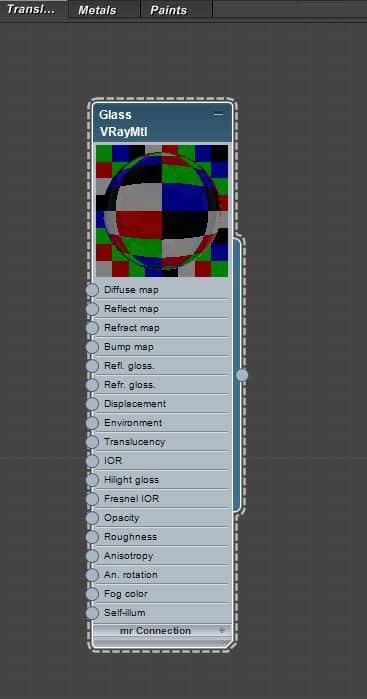
Step 7: Parameter Editor
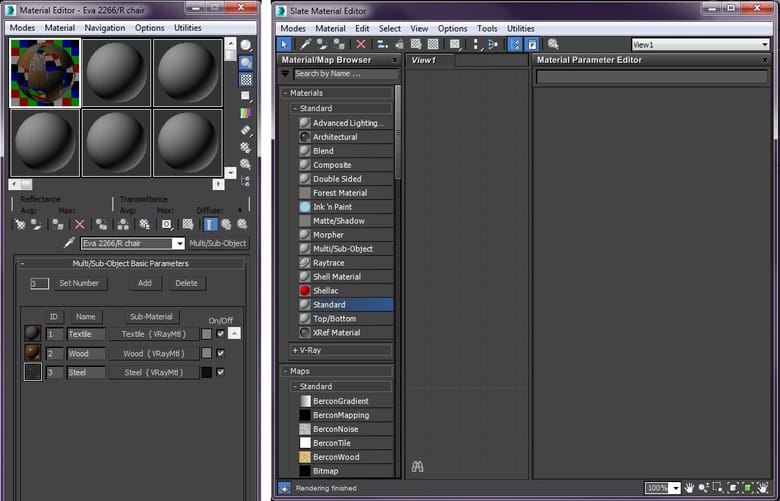
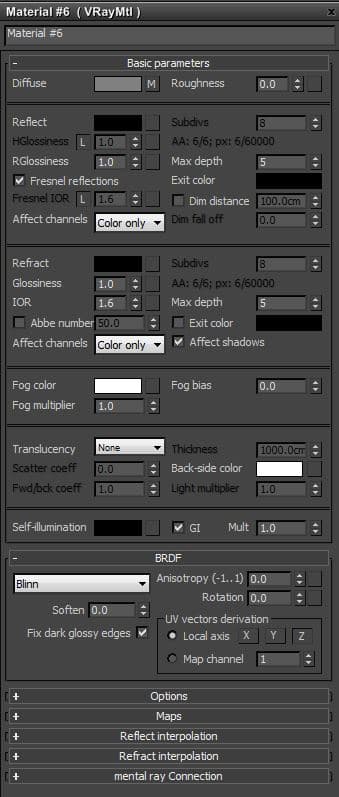
With a material selected (double-click on it) you’ll notice that on the right-hand side you get a load of properties that are specific to that material. These can all be edited and adjusted to get your desired result. The thumbnail associated with the material will update interactively. You can even use the sliders to animate properties over time such as making material more transparent over the period of a few seconds for example. Just double-click on another material to see its properties instead.
Step 8: View Navigation
In the bottom right-hand corner, you’ve got some icons that drive navigation tools. You can either use these or you can use shortcuts. I’d always recommend using shortcuts as it’ll speed up your workflow. Pan using Ctrl+P. Zoom with Alt+Z. Simply use the Z key to zoom extents selected. There are several others and I would highly recommend getting used to them.

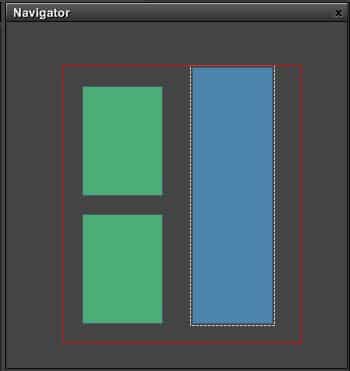
Step 9: Navigator
The other way to navigate around your active view is to use the navigator which is located in the top-right corner. The red shape indicates what is being viewed currently in the active view. You can move this box around by simply clicking and dragging. This is a brilliant tool if you’ve got a really complex active view.
Step 10: Views
The other way to manage really complex material setups contained within a scene is to use views. These are essentially tabs whereby each tab can contact a different set of materials. This is perfect if you want to keep all the wall materials in one place and all the translucent materials in another. This will keep your interface responsive and ensure that you find the exact materials in double-quick time. It’s also especially helpful in studio contexts when other people might be handling your files.
Step 11: Apply the material to the selected object
The final thing to cover is how you actually apply your materials to your objects! Obviously you need to know how to do this. With your material selected in the active view, simply go to the top toolbar and find the icon which says ‘Assign material to selection’. Click this icon and your material will be transferred over to the object in your scene that is selected. Once that’s done you can move onto the next material you need to create.

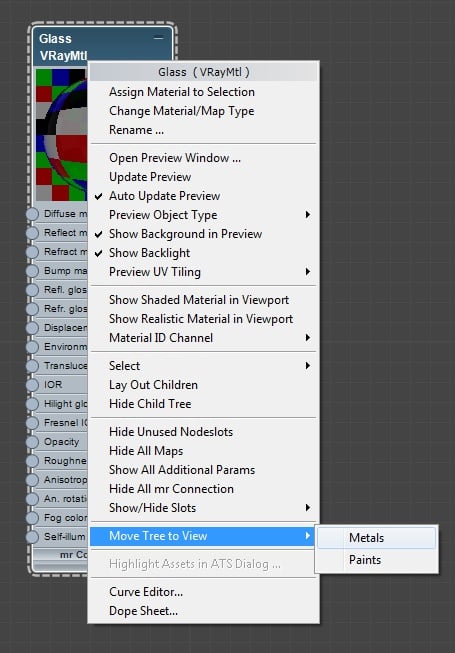
Top tip 1: Moving node trees to other views
In an attempt to keep things organized or to duplicate node trees you may come across the requirement to move a node tree to another view. To do this just right-click on your material and go to ‘Move Tree To View’ and simply select the view you want.
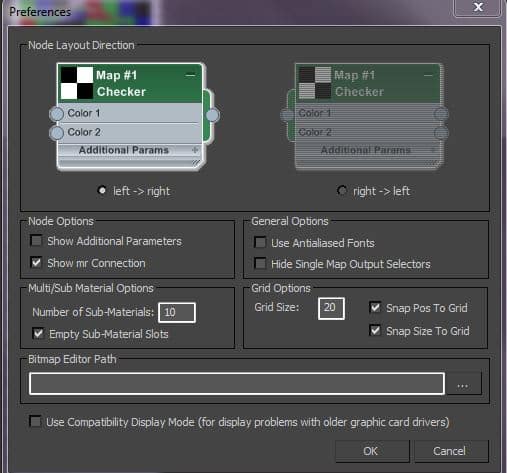
Top tip 2: Customise the interface
You may think as you use the editor that you’d prefer the node direction to be the other way round. Well fear not! 3ds Max have given you the ability. Simple go to ‘Options’ and ‘Preferences’.