

What is Material Jetting?
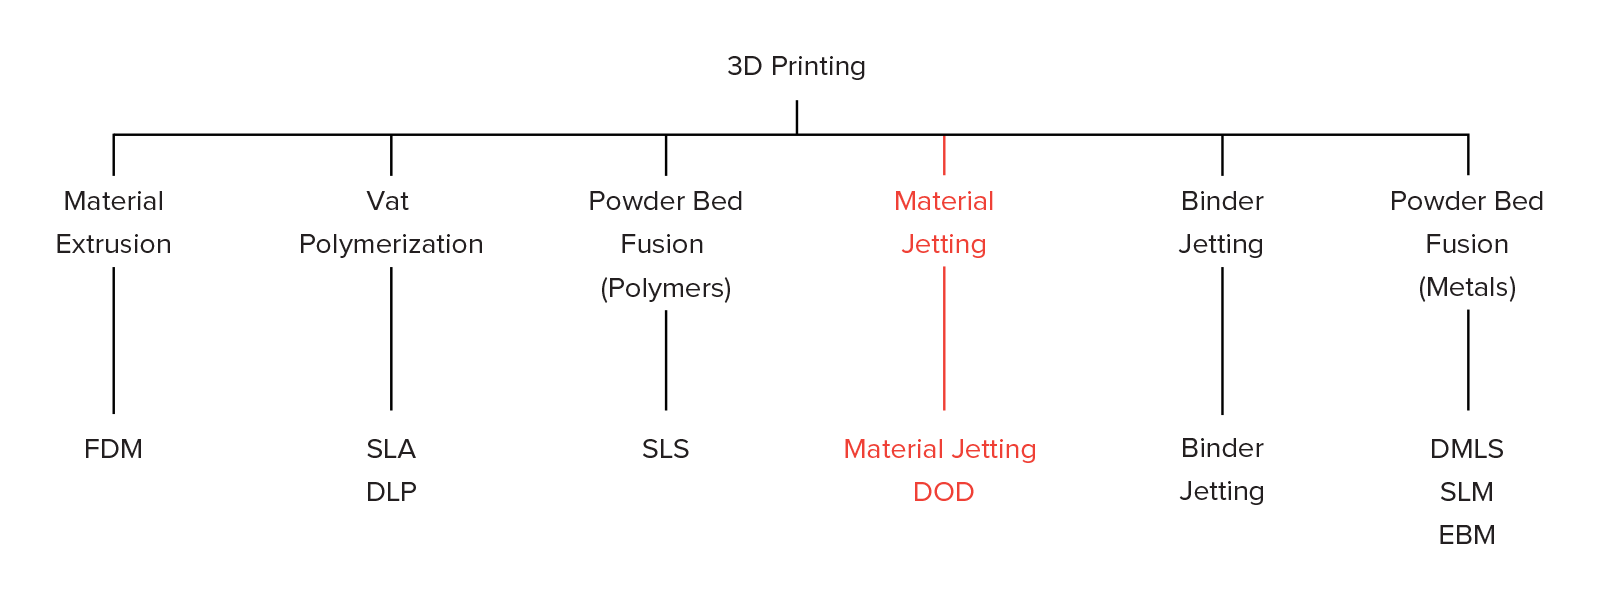
Material Jetting (MJ) is an additive manufacturing process that operates in a similar fashion to 2D printers. In material jetting, a printhead (similar to the printheads used for standard inkjet printing) dispenses droplets of a photosensitive material that solidifies under ultraviolet (UV) light, building a part layer-by-layer. The materials used in MJ are thermoset photopolymers (acrylics) that come in a liquid form.
MJ 3D Printing creates parts of high dimensional accuracy with a very smooth surface finish. Multi-material printing and a wide range of materials (such as ABS-like, rubber-like and fully transparent materials) are available in Material Jetting. These characteristics make MJ a very attractive option for both visual prototypes and tooling manufacturing. Nevertheless, material jetting has some key limitations that we present in this article.
A variation of the MJ process uses Drop-On-Demand (DOD) printheads to dispense viscous liquids and create wax-like parts. DOD is used almost exclusively for manufacturing investment casting patterns though and for this reason we will not discuss it here further.
How does material jetting work?
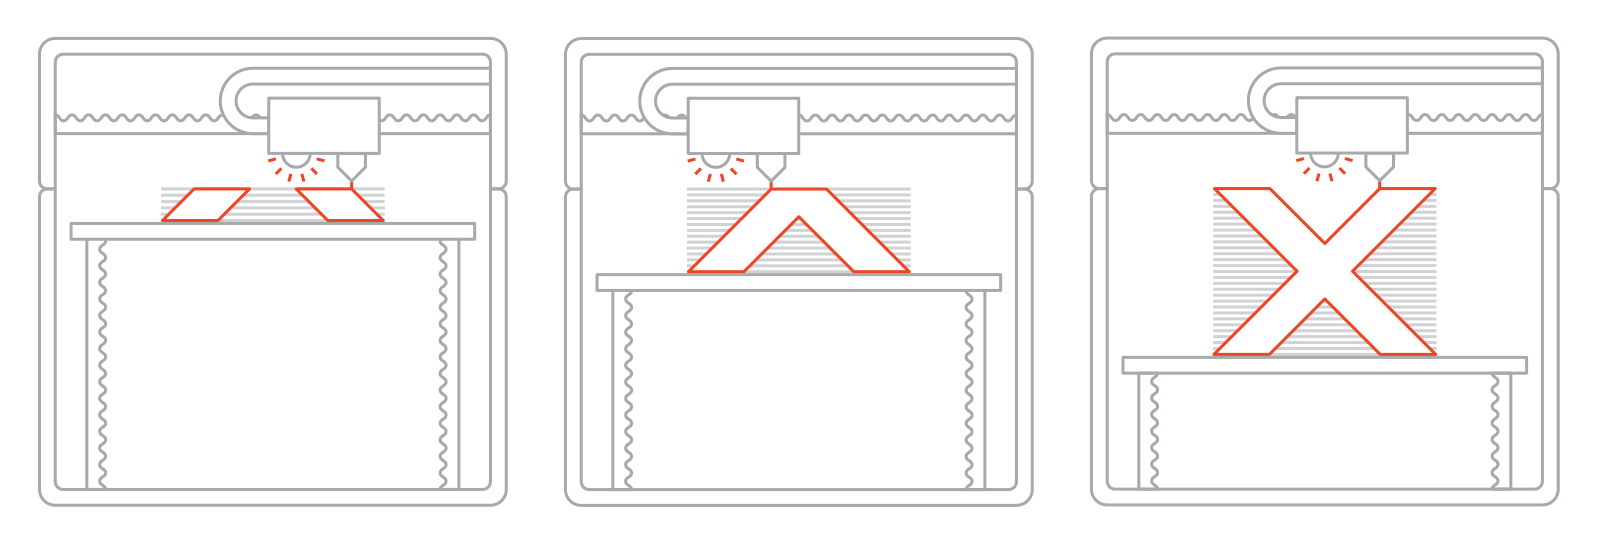
This is how the MJ printing process works:
I. First, the liquid resin is heated to 30 – 60oC to achieve optimal viscosity for printing.
II. Then the printhead travels over the build platform and hundreds of tiny droplets of photopolymer are jetted/deposited to the desired locations.
III. A UV light source that is attached to the printhead cures the deposited material, solidifying it and creating the first layer of the part.
IV. After the layer is complete, the build platform moves downwards one layer height and the process repeats until the whole part is complete.
Unlike most other 3D printing technologies, MJ deposits material in a line-wise fashion. Multiple inkjet printheads are attached to same carrier side-by-side and deposit material on the whole print surface in a single pass. This allows different heads to dispense different material, so multi-material printing, full-color printing and dispensing of dissolvable support structures is straightforward and widely used. Support structures are always required in material jetting and need post-processing to be removed.
In Material Jetting, the liquid material is solidified through a process called photopolymerization. This is the same mechanism that is used in SLA. Similarly to SLA, material jetted parts have homogeneous mechanical and thermal properties, but unlike SLA they do not require additional post-curing to achieve their optimal properties, due to the very small layer height used.

Characteristics of Material Jetting
Printer Parameters
In Material Jetting, almost all process parameters are pre-set by the machine manufacturer. Even the layer height is linked to each specific material, due to the complex physics of droplet formation. The typical layer height used in Material Jetting is 16 – 32 microns.
Material Jetting is considered one of the most accurate 3D printing technologies. MJ systems have a dimensional accuracy of ± 0.1% with a typical lower limit of ± 0.1 mm (sometimes as low as ± 0.02 mm). Warping can occur, but it is not as common as in other technologies, such as FDM or SLS, because printing happens at near room temperature. For this reason very big parts can be printed with great accuracy. The typical build size is approximately 380 x 250 x 200 mm, while large industrial systems can be as big as 1000 x 800 x 500 mm.
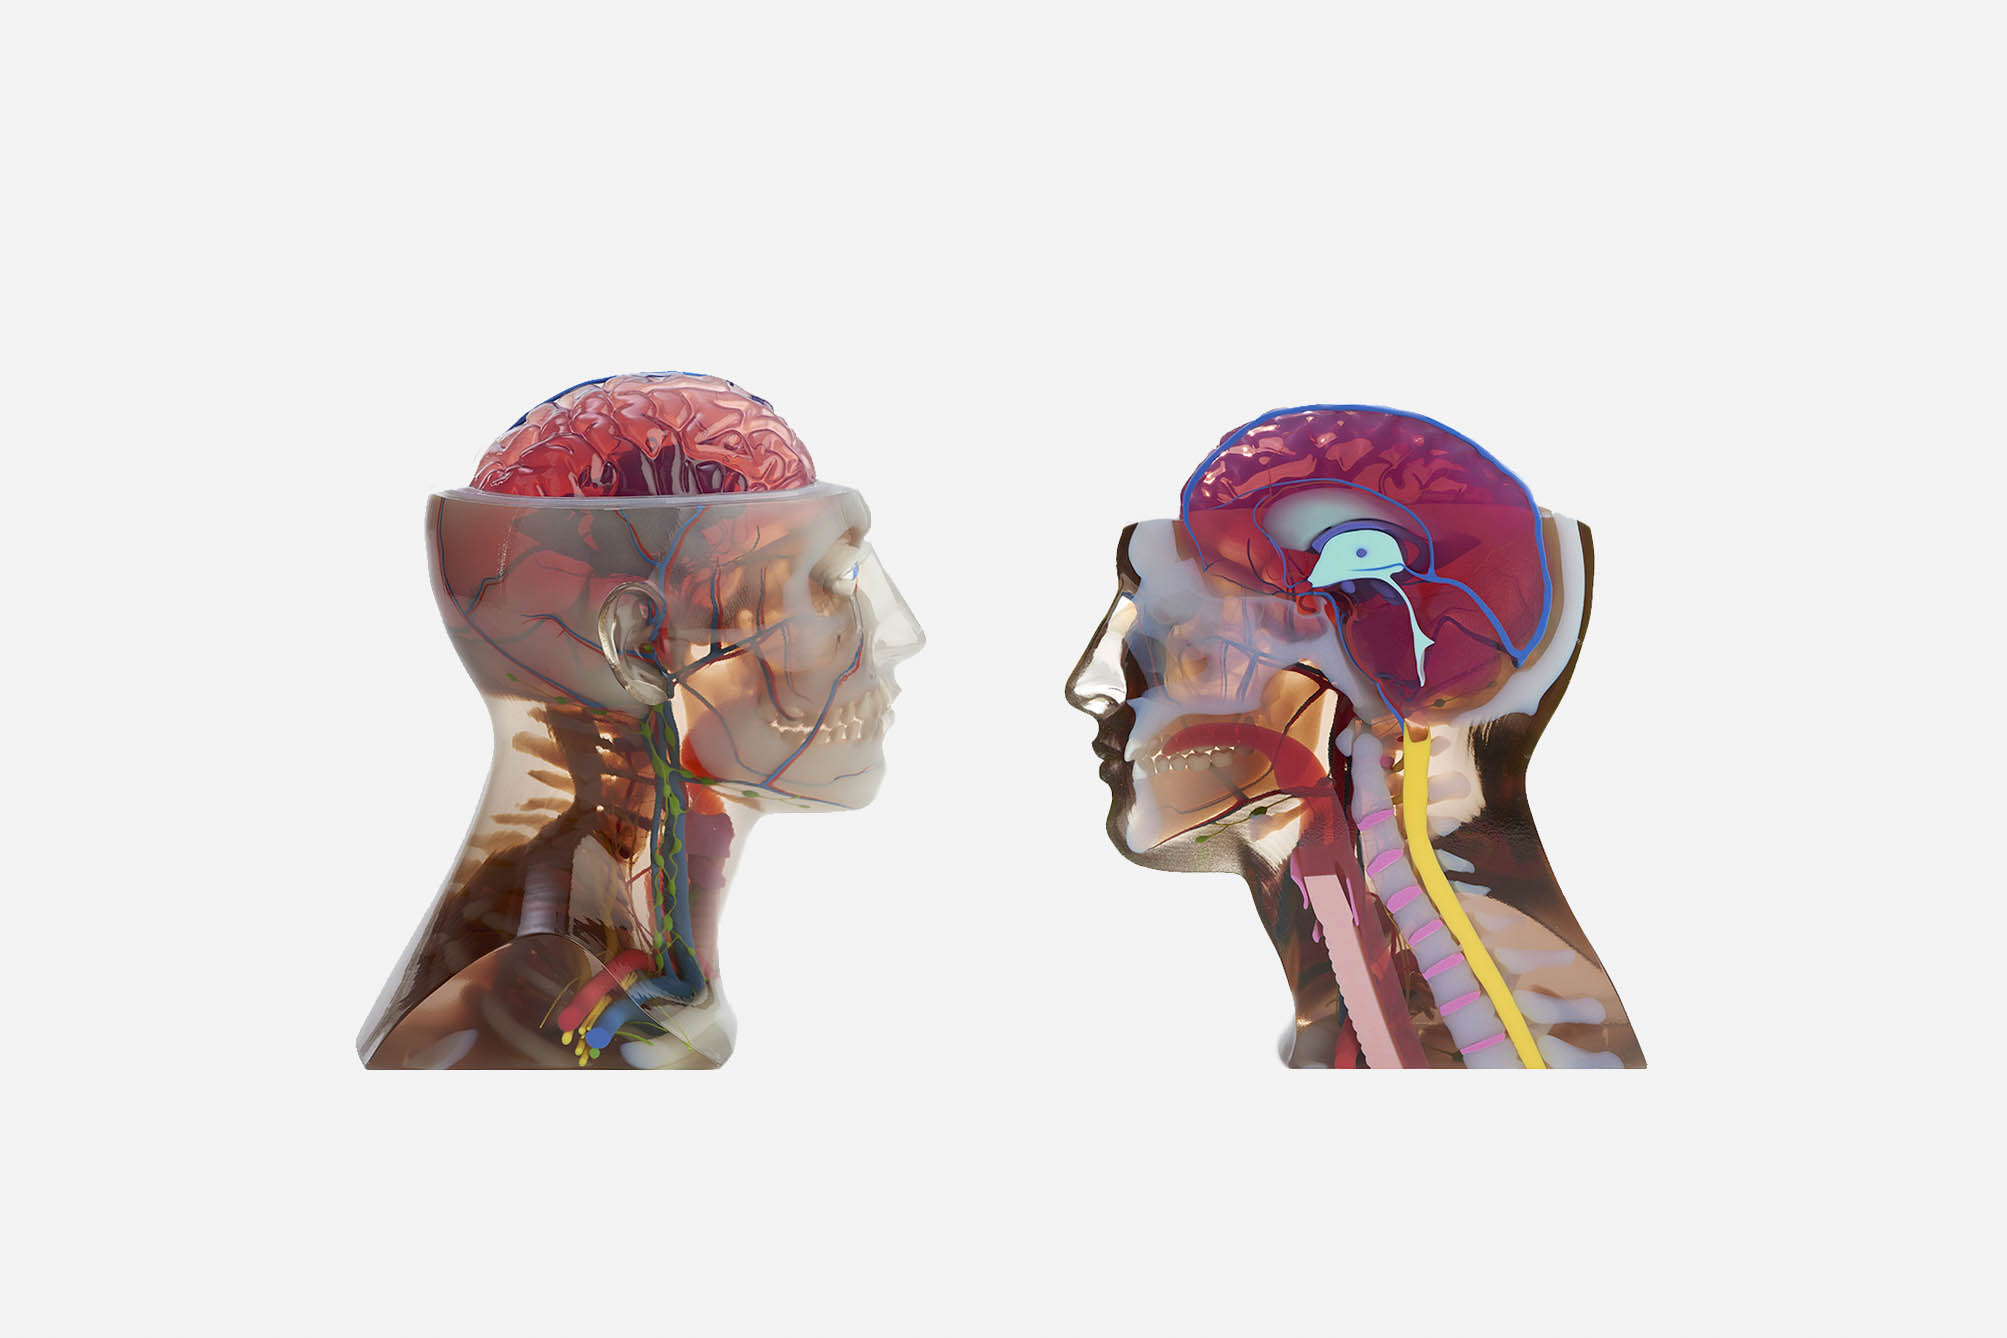
Multi-material & Full-color printing
A key advantage of Material Jetting is the ability to produce accurate multi-material and multi-color prints that represent end products.
Multi-material and multi-color printing in MJ can be employed in three different levels:
- At the build area level, different parts can be printed in different materials or colors simultaneously, speeding up the manufacturing process.
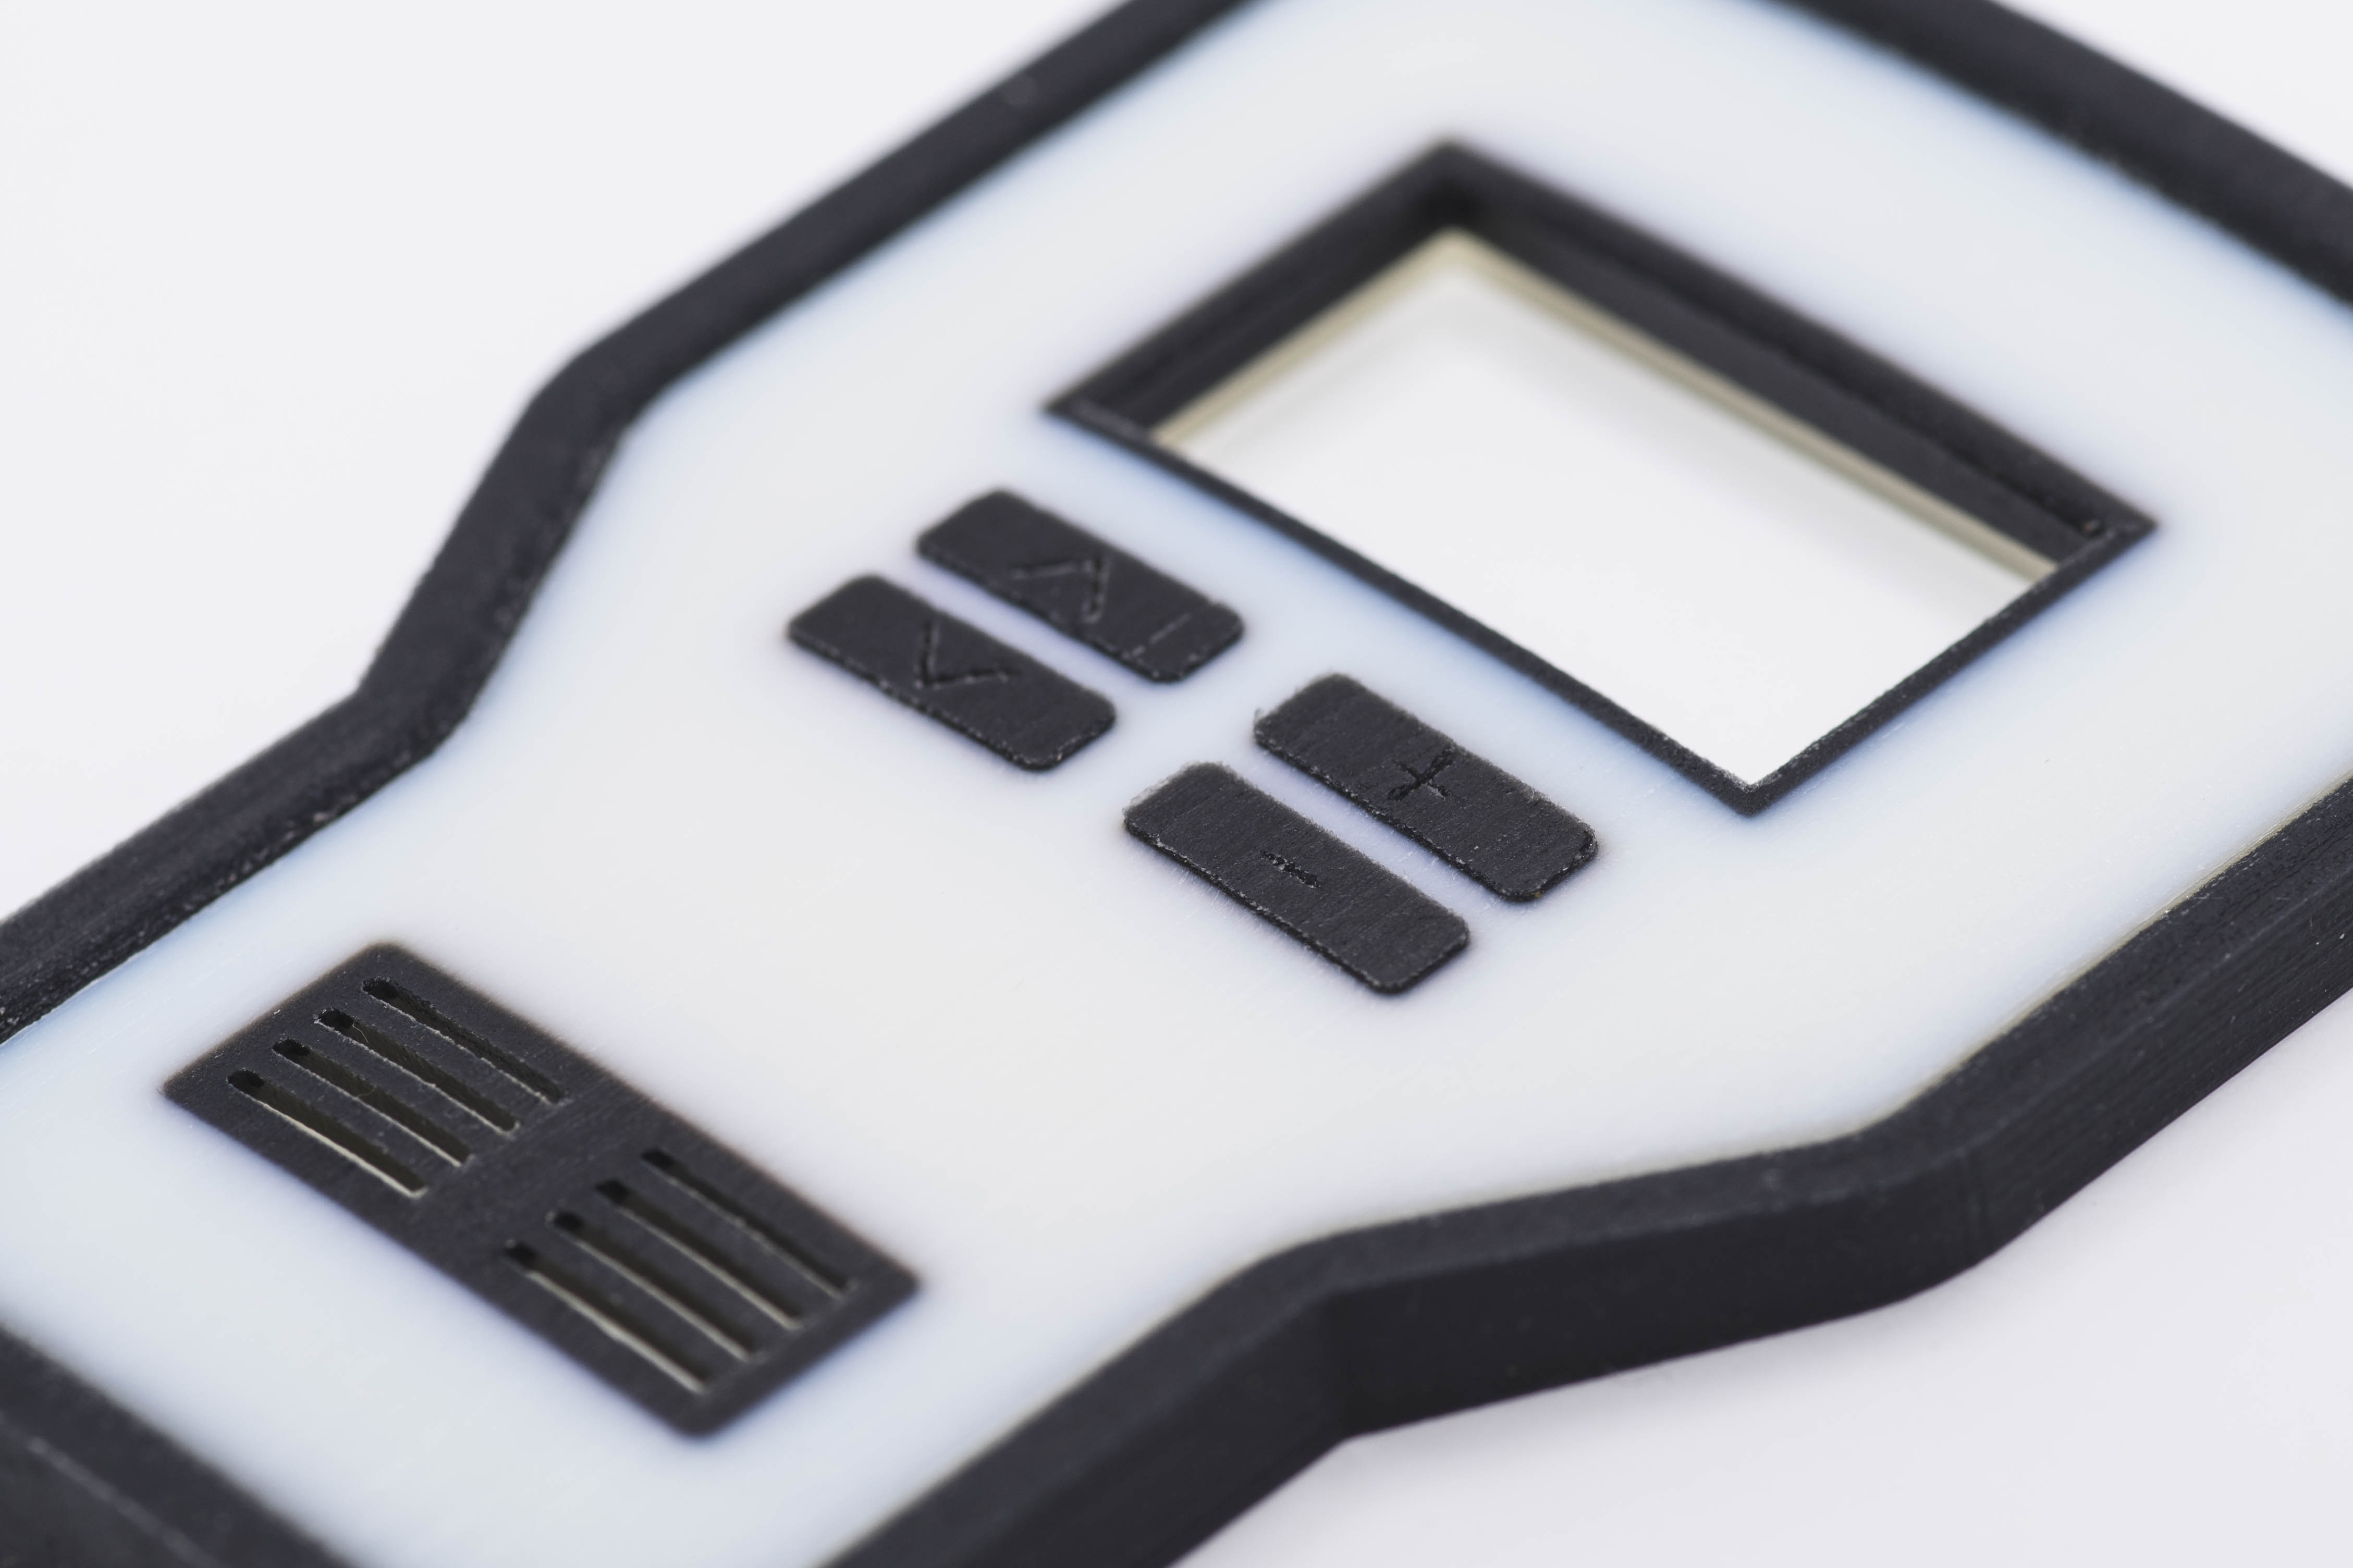
- At the part level, different sections of a part can be designated to be printed in different material or color (for example creating a stiff case with flexible buttons for prototyping with haptic feedback).
- At the material level, two or more printing resins can be mixed in different ratios before dispensing, creating a “digital material” with specific physical properties, such as hardness, stiffness or hue.
To designate a different material or color to particular areas of the part, the model must be exported as separate STL files. When blending colors or material properties to create a digital material, the design must be exported as an OBJ or VRML file, because these formats allow the designation of special properties (such as texture or full color) on a per face or per-vertex basis.
Support structure
Support structures are always required in Material Jetting. Supports are always printed in a secondary dissolvable material that can be removed after printing using pressurized water or by immersion in an ultrasonic bath.
Material jetted parts can have very smooth surfaces with little to no indication of support after removal.
Part orientation in MJ is more flexible compared to other 3D printing technologies, like FDM or SLA. It is still important though, as the extensive use of support material also increases the overall cost.
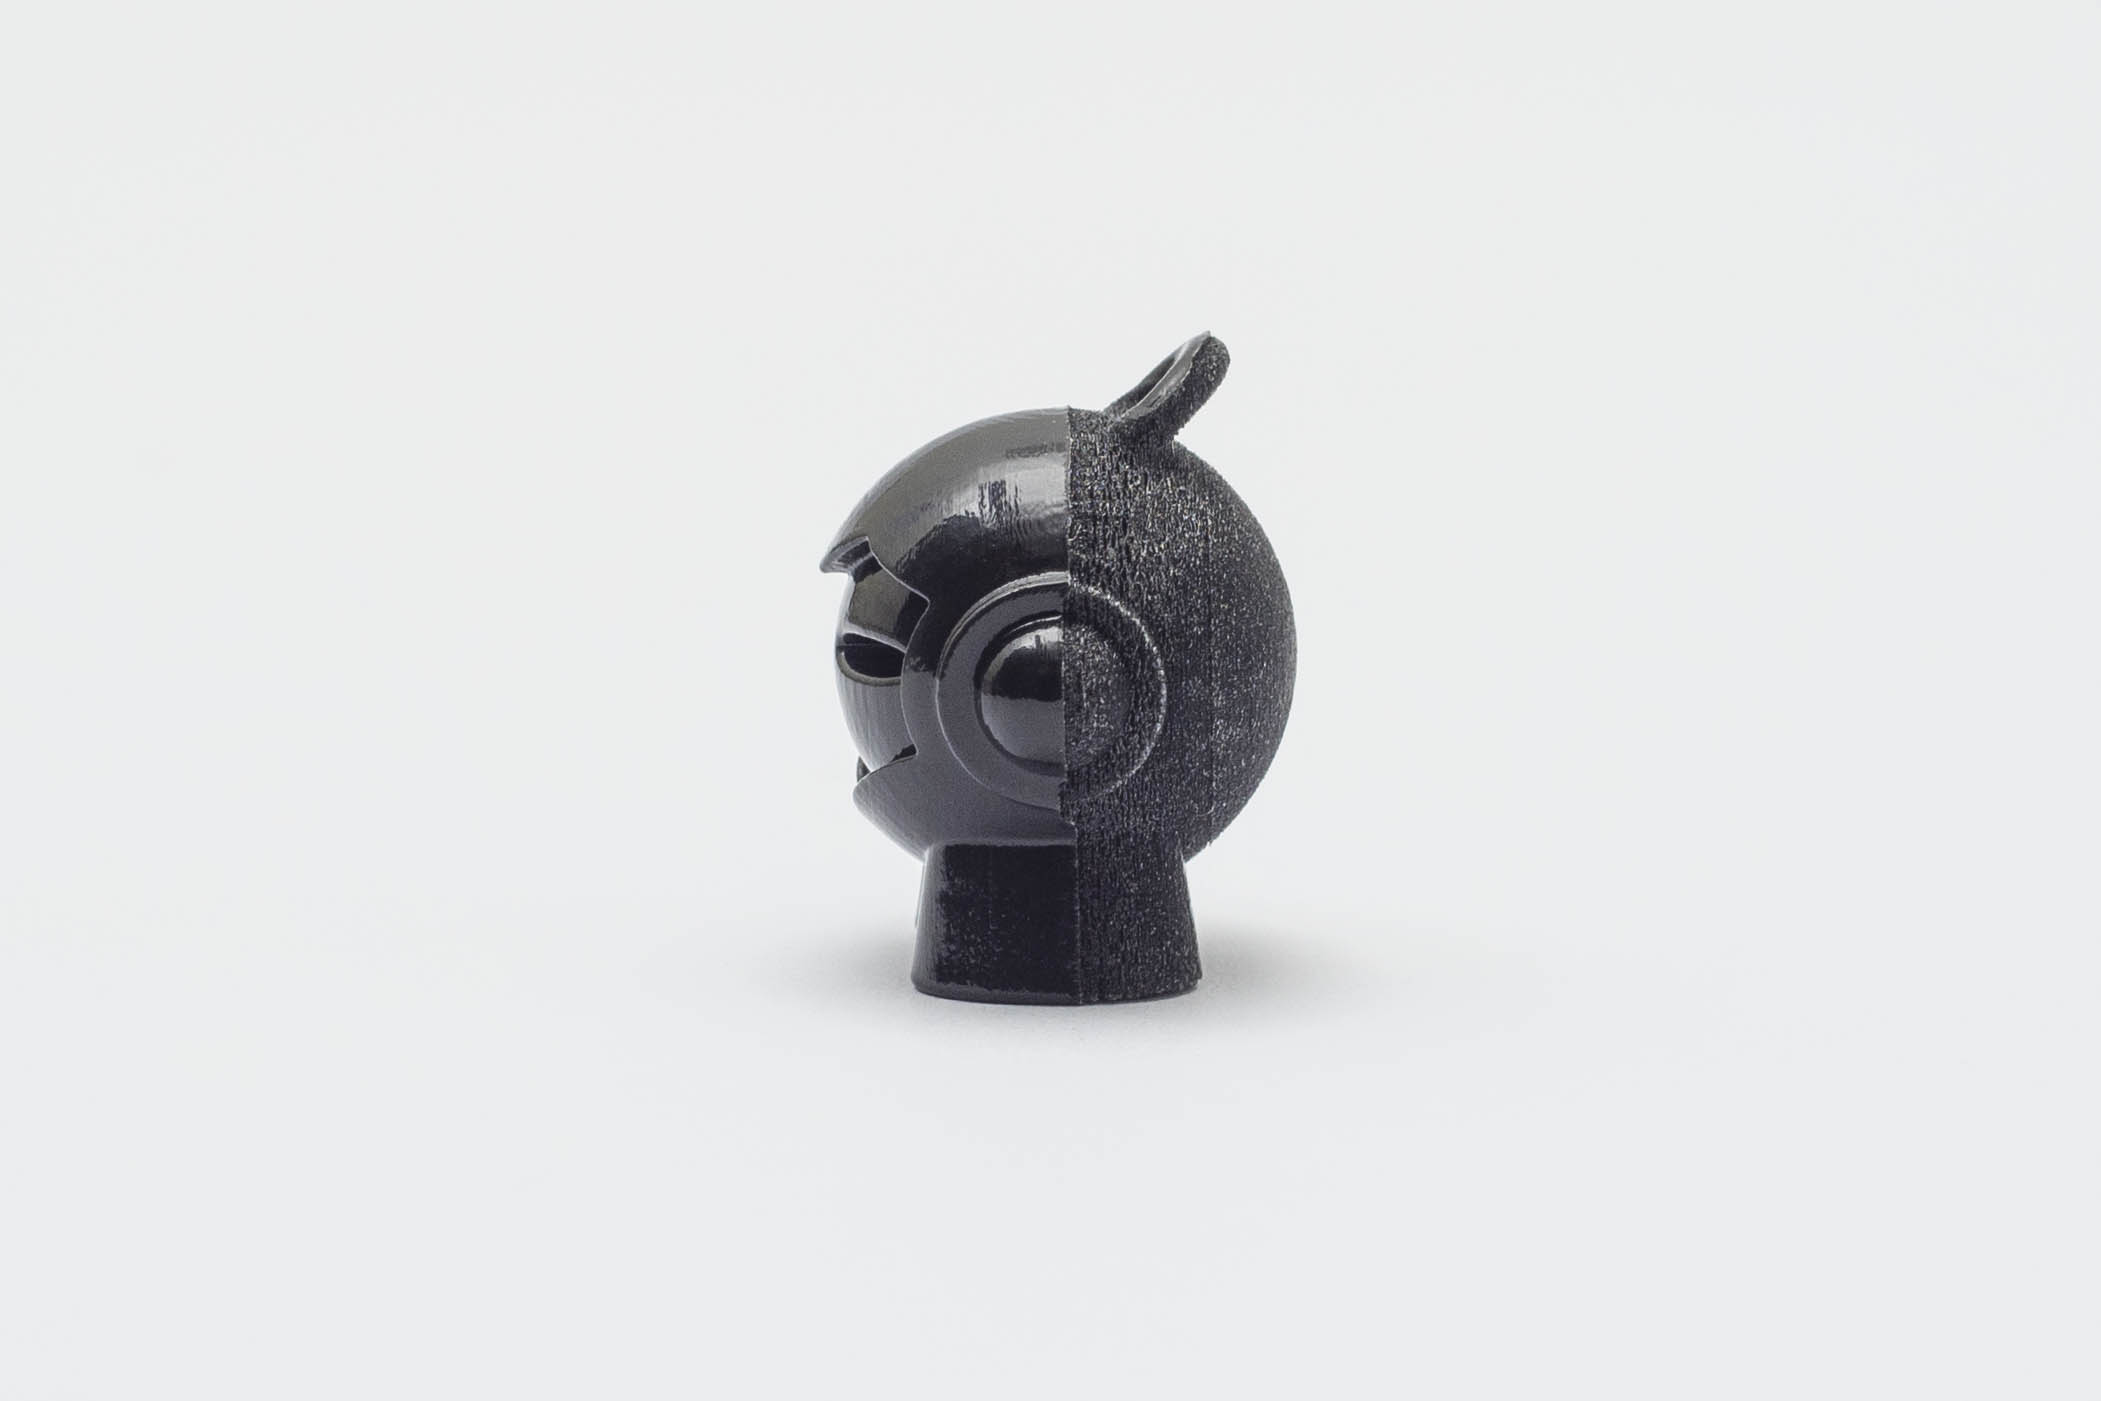
Matte vs. glossy
Material Jetting offers the option of printing parts in either a glossy or matte setting.
In the glossy setting, support material is added only when it is structurally required (i.e. for overhangs). Surfaces not in direct contact with support will have a glossy finish, while supported areas will be matte. In the matte setting, a thin layer of support material is added around all the whole part, regardless of orientation or structural requirements. This way all surfaces have a matte finish.
The glossy setting should be used when a smooth shiny surface is desired. The cost of printing glossy is lower, as less material is used. The drawbacks of using this setting are the non-uniform finish of the printed parts and the slight rounding of the sharp edges and corners on the top, glossy surfaces.
The matte setting should be used when accuracy and uniform surface finish are a requirement. The cost of the matte setting is slightly higher, as more material is used and additional post-processing time is required. Notably, parts printed in the matte setting also have a relatively lower surface hardness.
Common Material Jetting Materials
Material Jetting uses thermoset photopolymer resins that are similar to the those used in SLA in terms of properties and limitations (they are brittle, have a low heat deflection temperature and are susceptible to creep). They come in a less viscous, ink-like form and have a much higher cost per kilogram (approx. $300 – $1000).
Multi-material printing is a key strength of MJ, as it enables the creation of accurate visual and haptic prototypes. Speciality materials optimized for specific industries are also available, such as materials for tooling (injection molding, thermoforming etc) and medical applications.
The following table summarizes the advantages and disadvantages of the most commonly used MJ materials:
| Material | Characteristics |
|---|---|
| Standard |
Rigid opaque plastic
Simulates injection molded parts
Brittle
|
| Flexible |
Rubber-like
Customizable hardness
Poor elongation at break
|
| Simulated Polypropylene |
Simulates PP parts
Good flexural strength
Brittle
|
| Simulated ABS |
High temperature resistance
Used for tooling & low-run injection molds
Brittle
|
| Castable |
No ash after burnout
Optimized for investment casting
|
| High temperature |
Good temperature stability (up to 80oC)
High strength
Brittle
|
| Transparent |
Glass-like appearance
Can be post processed to 100% clear
|
| Medical grade |
Sterilizable
Short-term biocompatible
Used in dental and medical applications
|
Benefits & Limitations of Material Jetting
The key advantages and disadvantages of the technology are summarised below:
- Material jetting can produce smooth parts with surfaces comparable to injection molding and very high dimensional accuracy.
- Parts created with Material Jetting have homogeneous mechanical and thermal properties.
- The multi-material capabilities of MJ enables the creation of accurate visual and haptic prototypes.
- Material jetted parts are mainly suitable for non-functional prototypes, as they have poor mechanical properties (low elongation at break).
- MJ materials are photosensitive and their mechanical properties degrade over time.
- The high cost of the technology may make Material Jetting financially not viable for some applications.
Detailed [](/knowledge-base/how-design-parts-material-jetting-3d-printing/)design guidelines of each of the aspects discussed here are given in later articles of this section of the Knowledge Base. The main characteristics of material jetting are summarized in the table below:
| Material Jetting | |
|---|---|
| Materials | Acrylic photopolymers (thermoset) |
| Dimensional accuracy | ± 0.1% (lower limit of ± 0.05 mm) |
| Typical build size | 380 x 250 x 200 mm (up to 1000 x 800 x 500 mm) |
| Common layer thickness | 16 – 32 microns |
| Support | Always required (printed using dissolvable material) |
Rules of Thumb
- Material Jetting is ideal for creating realistic visual and haptic prototypes with very smooth surfaces that resemble injection molded parts.
- Material Jetting offers engineering materials that can be used for tooling and injection molding manufacturing.
- Material Jetting can produce very large parts (as big as 1000 x 800 x 500 mm) without compromising on accuracy (typically ± 0.1%).
- For multi-material or multi-color prints, export your designs as multi-part STL files. If gradients are needed use the OBJ or VRML file format.