
A child’s drawing may look simple, but it can hold a whole little world: a favorite animal, an imaginary friend or a character with its own story. Turning that drawing into a 3D printed toy makes the idea something the child can see from every side and hold in their hands.
You do not need to know 3D modeling to begin. A clear drawing and a few notes are often enough for the first concept. The process usually involves creating a 3D preview, checking it with the family, building a printable model and producing it in full color.
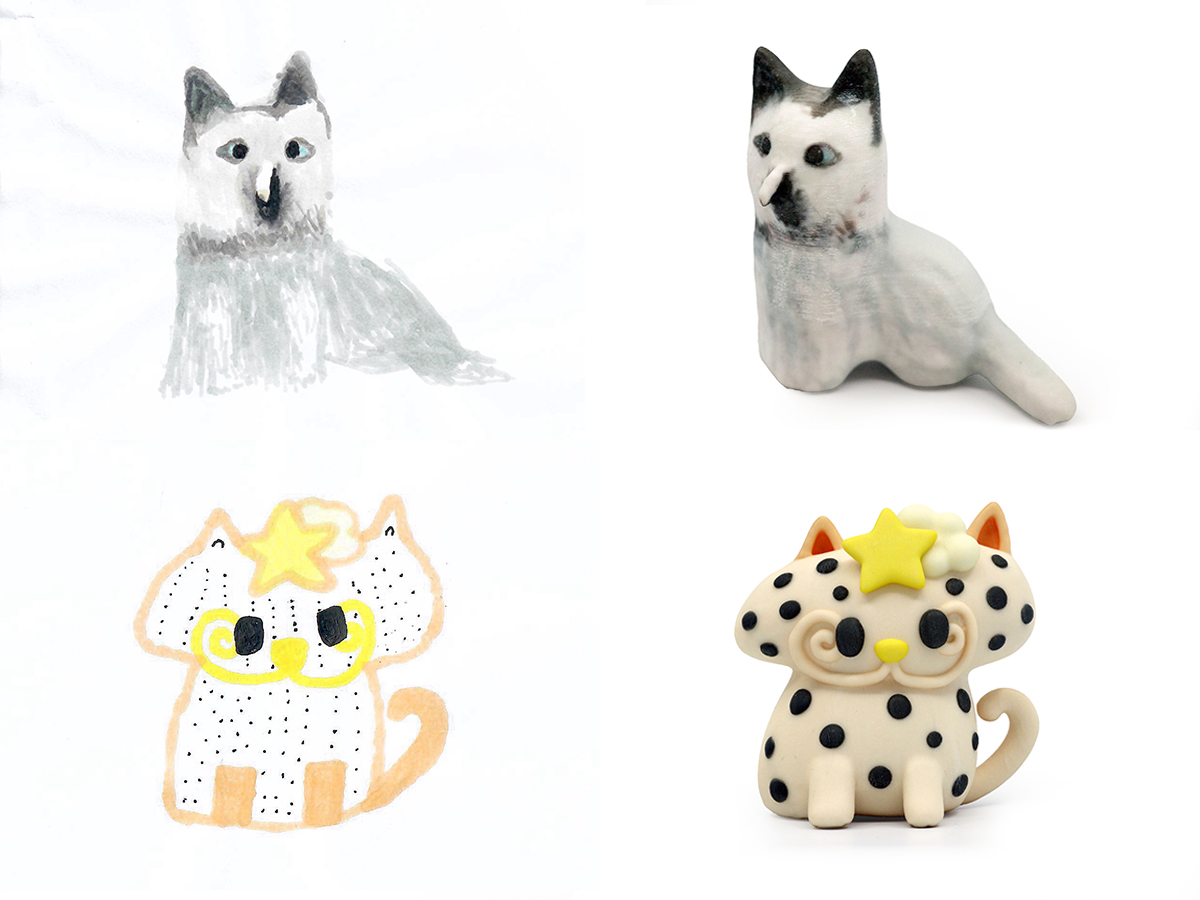
This beginner-friendly guide follows two real projects: an Owl-Dog based on a watercolor painting and a Polka-Dot Star Cat whose colors and spots were adjusted before printing.
The Process at a Glance
| Stage | What Happens | What You Can Check |
|---|---|---|
| 1. Drawing and wishes | We collect the drawing, preferred size and important details. | Colors, expression, markings and accessories |
| 2. 3D concept | The flat drawing becomes a preview of a three-dimensional character. | Overall look and personality |
| 3. Revisions | We correct details before making the final model. | Anything the child says “doesn’t look like mine” |
| 4. 3D model and check | A complete model is created and checked for printing. | Front, sides, back and small features |
| 5. Full-color printing | The approved character is printed as a physical keepsake. | Final scale and expected surface finish |
1. Begin with the Drawing
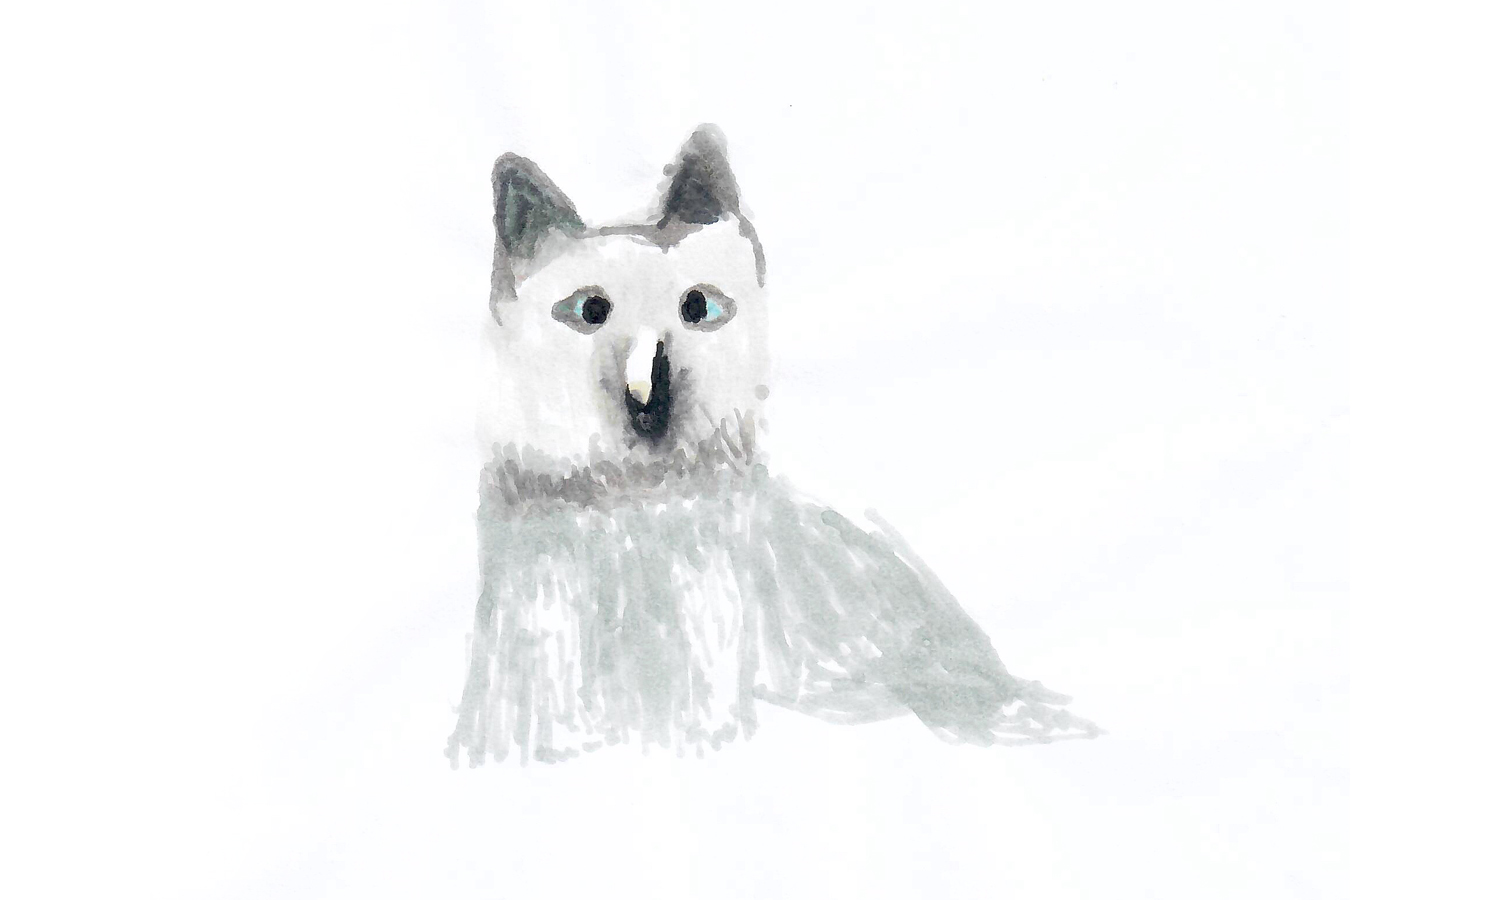
A clear photo or scan is the best starting point. Try to photograph the paper straight on in soft, even light, without shadows or fingers covering the picture. Please also tell us which details matter most. A tiny star, a yellow nose or a favorite pattern may be part of the character’s identity.
If possible, ask the child to draw more than one view. A simple front, side and back view can make the result much more accurate. These extra drawings do not need to be neat or perfectly matched. They simply help us understand features that the front view cannot show, such as a tail, the back of the ears or where a pattern continues.
2. Turn the Drawing into a 3D Concept
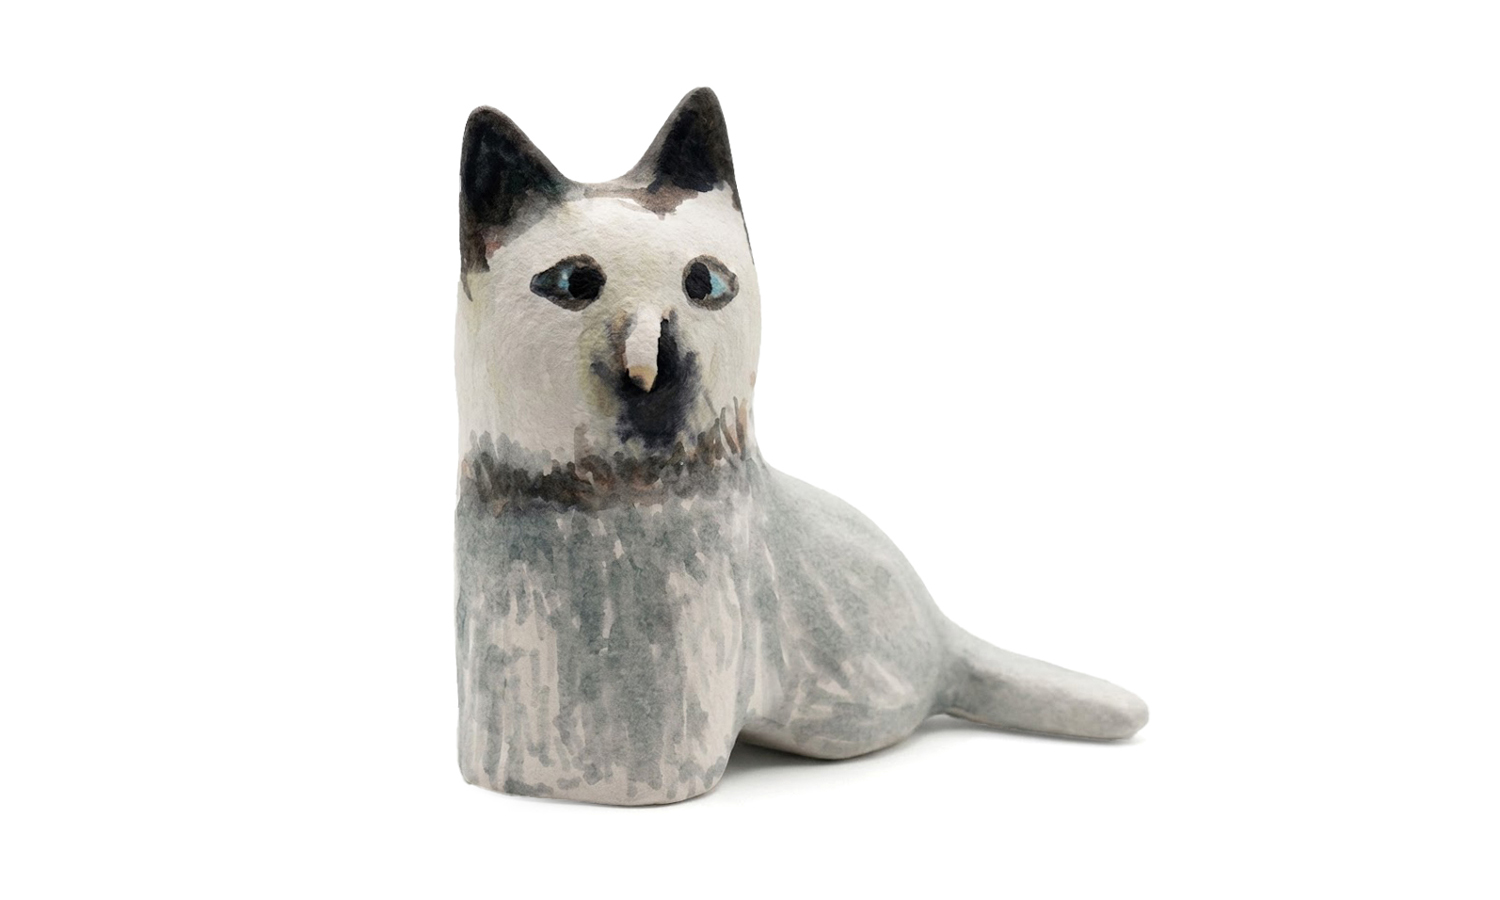
The first preview helps everyone imagine how the character might look as a toy. Tools such as Gemini can help develop this concept, while a designer guides the shape, pose and appearance.
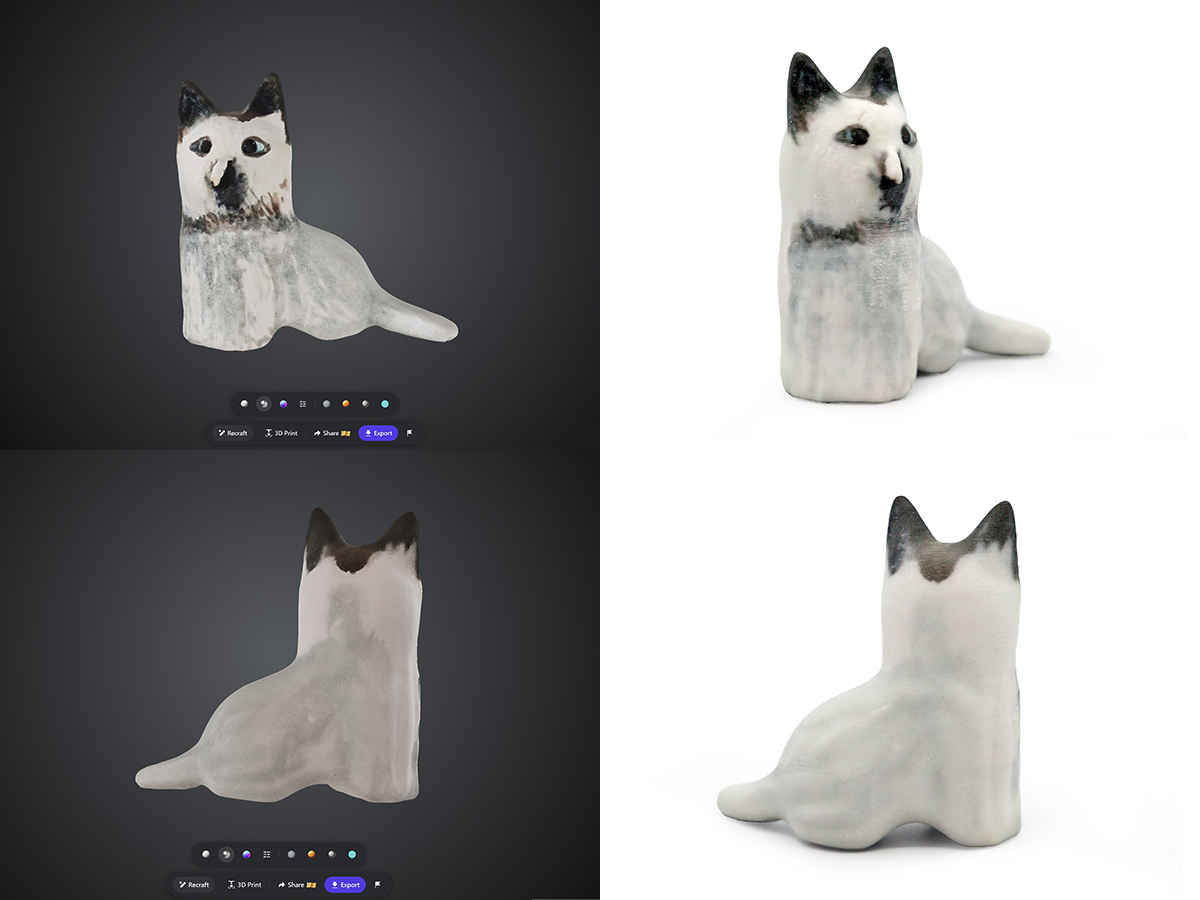
This step is not about making everything perfectly realistic. It is about keeping the charm of the original drawing. For the Owl-Dog, the goal was a soft, matte figurine that still felt like the child’s watercolor artwork rather than a completely redesigned cartoon.
The concept is a starting point, not the final printable file. It gives the child, parent and designer something clear to discuss together.
3. Make Revisions Before Modeling
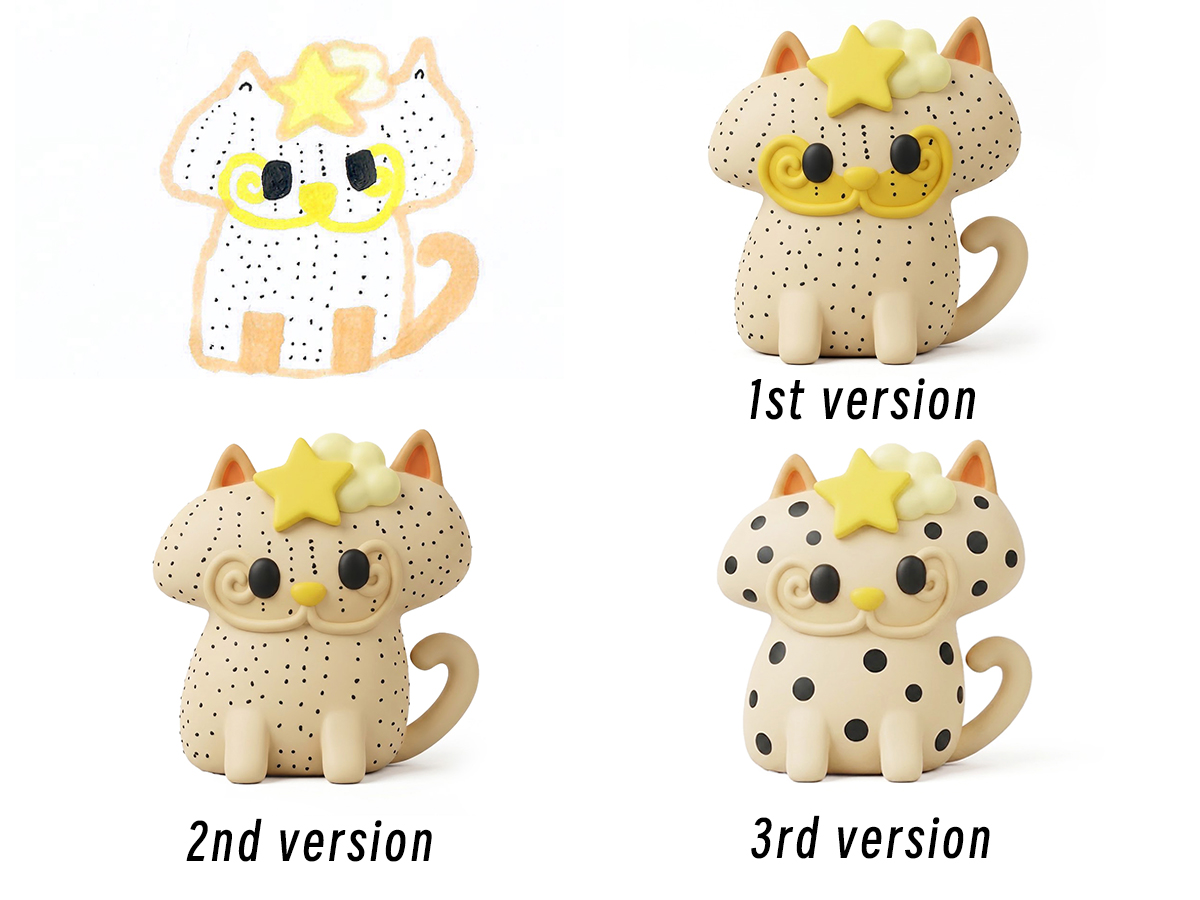
Small corrections are much easier before printing. We recommend showing the preview to the child and asking a simple question: “Does this still feel like your character?”
The Polka-Dot Star Cat needed two useful revisions. First, the yellow area around its mouth was reduced so only the nose and whisker details stayed yellow. Then its black spots were made larger and less crowded. Neither change was complicated, but together they made the toy feel much closer to the drawing.
4. Create and Confirm the Full 3D Model
A single drawing only shows one side. When software such as Tripo3D creates a complete model, it must invent the unseen side and back. That interpretation may be attractive, but it is not necessarily what the child imagined.
This is why human confirmation is essential. Before printing, the family should review views from the front, both sides and the back. If only one drawing is available, pay special attention to the tail, back markings, hidden limbs and accessories. When several drawings are provided at the start, there is much less guesswork.
Front, side and back views should be approved before printing because unseen areas are interpreted during 3D model creation.
5. Check That the Toy Can Be Printed
The last digital check is simple but important. Very thin ears, whiskers, tails or pointed decorations can break easily. Some details may need to be made slightly thicker, joined to the body or rounded at the tip.
These small changes are made to protect the character, not to change it. If you would like more detail, see our guide to minimum feature thickness for small 3D printed figurines.
6. Print the Character in Full Color
For these two projects, we used Mimaki full-color 3D printing. The printer uses CMYK color together with white and clear UV-curable inks, so the model can be produced with its colors already on the surface.
In a typical opaque full-color part, the model has a white core beneath a thin colored surface region. Mimaki’s public materials explain this structure, but they do not give one fixed thickness for the colored region because it can vary with the prepared print data and production settings. It is therefore better to think of the color as being concentrated near the surface, rather than as color running all the way through the model. You can see the principle in Mimaki’s official 3DUJ-553 guide.
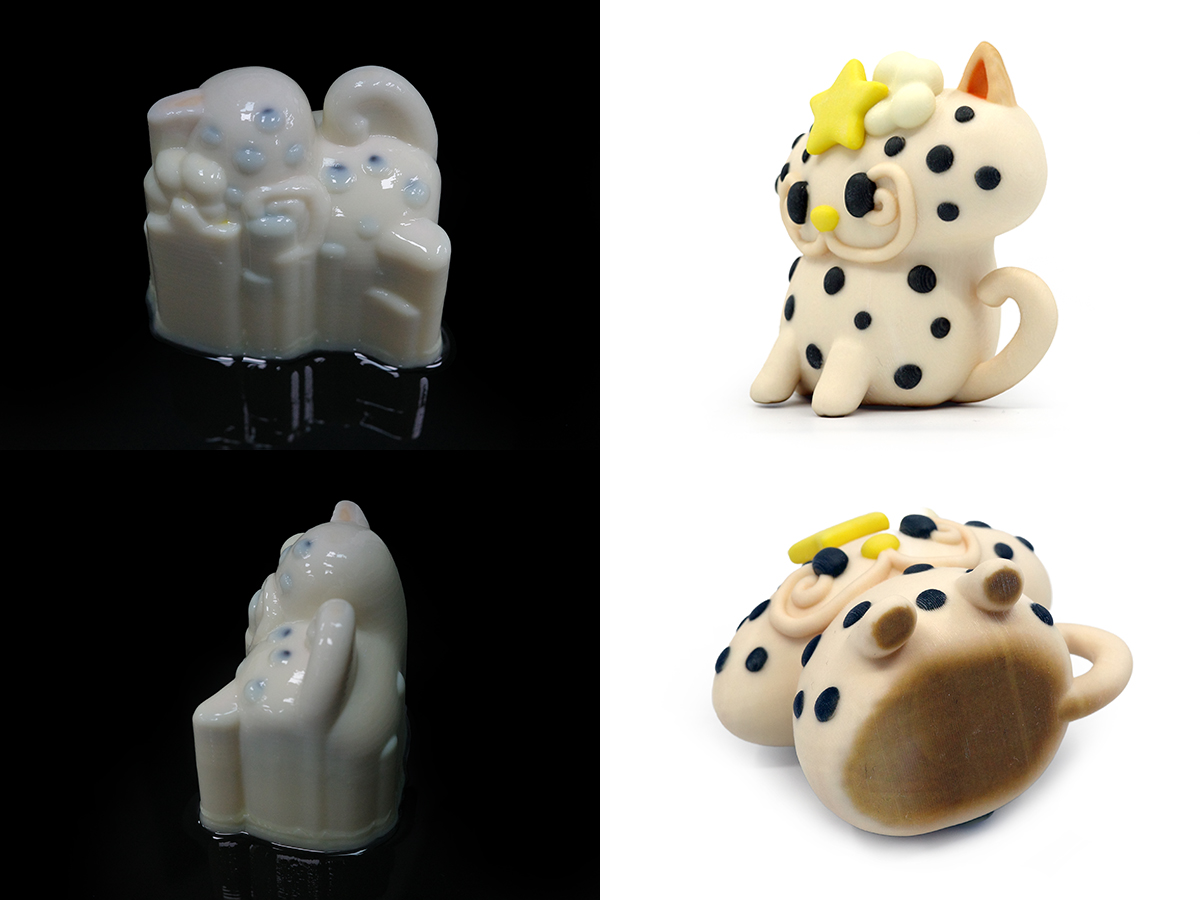
Fine layer lines may still be visible, especially under close light. Sanding them can also remove color and reveal the white material below. For this reason, FacFox normally does not sand Mimaki full-color prints simply to hide every layer line. If a customer specifically requests sanding, we first assess the shape, the printed colors and the risk to fine details, then carry out only careful, limited sanding where appropriate. Some layer lines may remain.
The Star Cat also shows another honest limitation: if the digital spots have soft or uneven edges, printing will reproduce them rather than automatically turning them into perfect circles. The quality of the physical toy begins with the quality of the approved digital model.
The finished Owl-Dog and Star Cat keep the personality of the original drawings. Close inspection may still reveal fine print layers and small differences from the screen preview.
What Will Match—and What May Change?
The finished toy can closely follow the character’s main colors, expression and recognizable features. However, a drawing, a screen image and a physical print reflect light differently. Exact color matching cannot be guaranteed, very fine painted marks may soften, and invented side or back details depend on the references supplied and the approved 3D model.
For most families, the happiest result is not a perfect copy of every pencil line. It is a toy that is clearly their character and still carries the warmth of the original drawing.
What Should You Send Us?
To begin, send a clear scan or photograph of the drawing, any front/side/back views available, the preferred finished size and a short note about the details that must not change. You can also mention whether the child prefers a matte or slightly glossy appearance and whether the figure is mainly for display.
If you only have one drawing, that is still enough to discuss the project. We will simply need you to check the interpreted views more carefully before printing.
Is It a Display Figure or a Play Toy?
These custom pieces are usually best treated as keepsakes or display figures. If the item is intended for regular play, especially by a young child, tell us before ordering. Small detachable features, sharp tips, impact strength and material suitability may require a different design or additional evaluation. A custom print should not automatically be treated as a certified children’s toy.
A Little Drawing, Made Real
The most rewarding part of this process is seeing a child recognize their own idea in three dimensions. With a clear drawing, thoughtful revisions and a careful review of every side, even a simple sketch can become a one-of-a-kind keepsake.
If you would like to create one, send the drawing and your preferred size to FacFox. We can help you understand what is possible, what may need to change for printing and which details deserve the most care.