
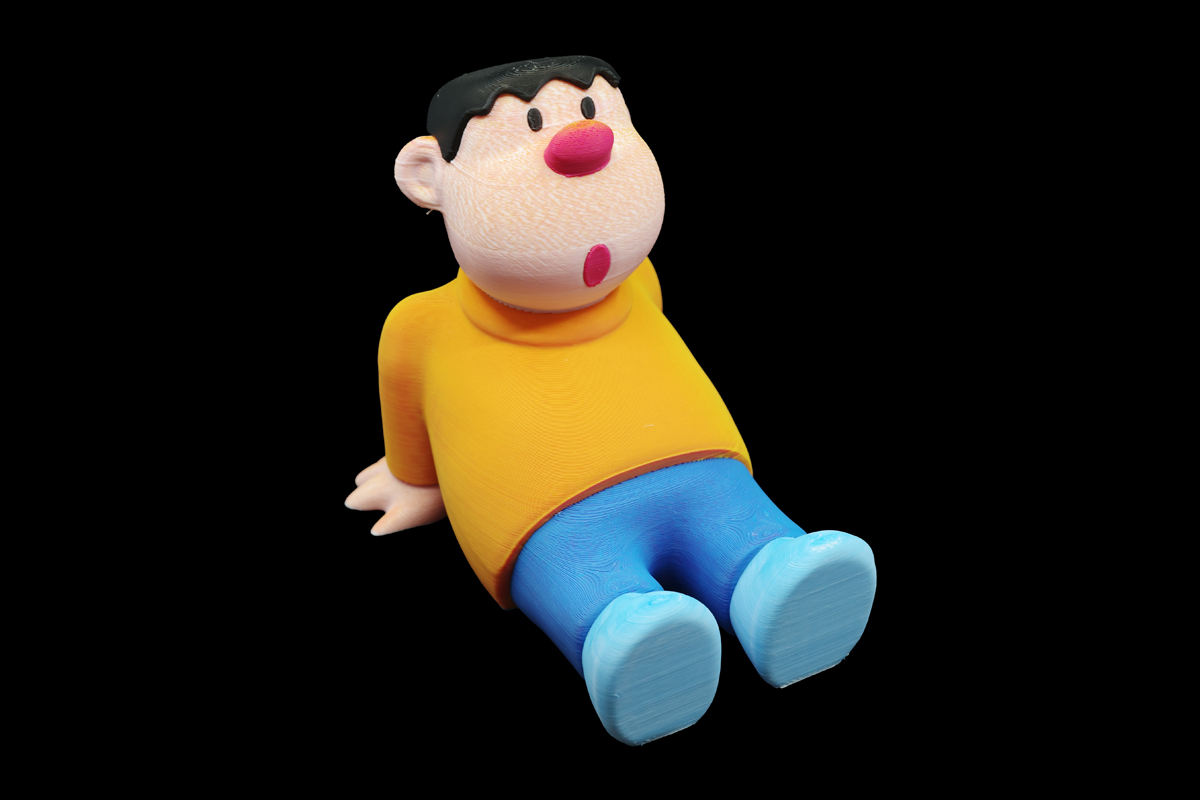
Only days after Bambu Lab officially introduced the H3C on November 3, 2026, a new unit arrived at FacFox. Naturally, we did not begin with a plain calibration cube. Our first substantial trial was a large, seated cartoon-style figurine designed to test layered color mixing, repeated tool changes, overhangs and the visible surface quality of a real multicolor print.
The short verdict is encouraging, but not magically perfect: the H3C produced clean color boundaries, convincing blended tones and a complex support-free model, while recognizable FDM layer lines and rougher downward-facing areas remained visible. That makes it an interesting addition to our production options—not a universal replacement for every other 3D printing process.
What Makes the Bambu Lab H3C Different?
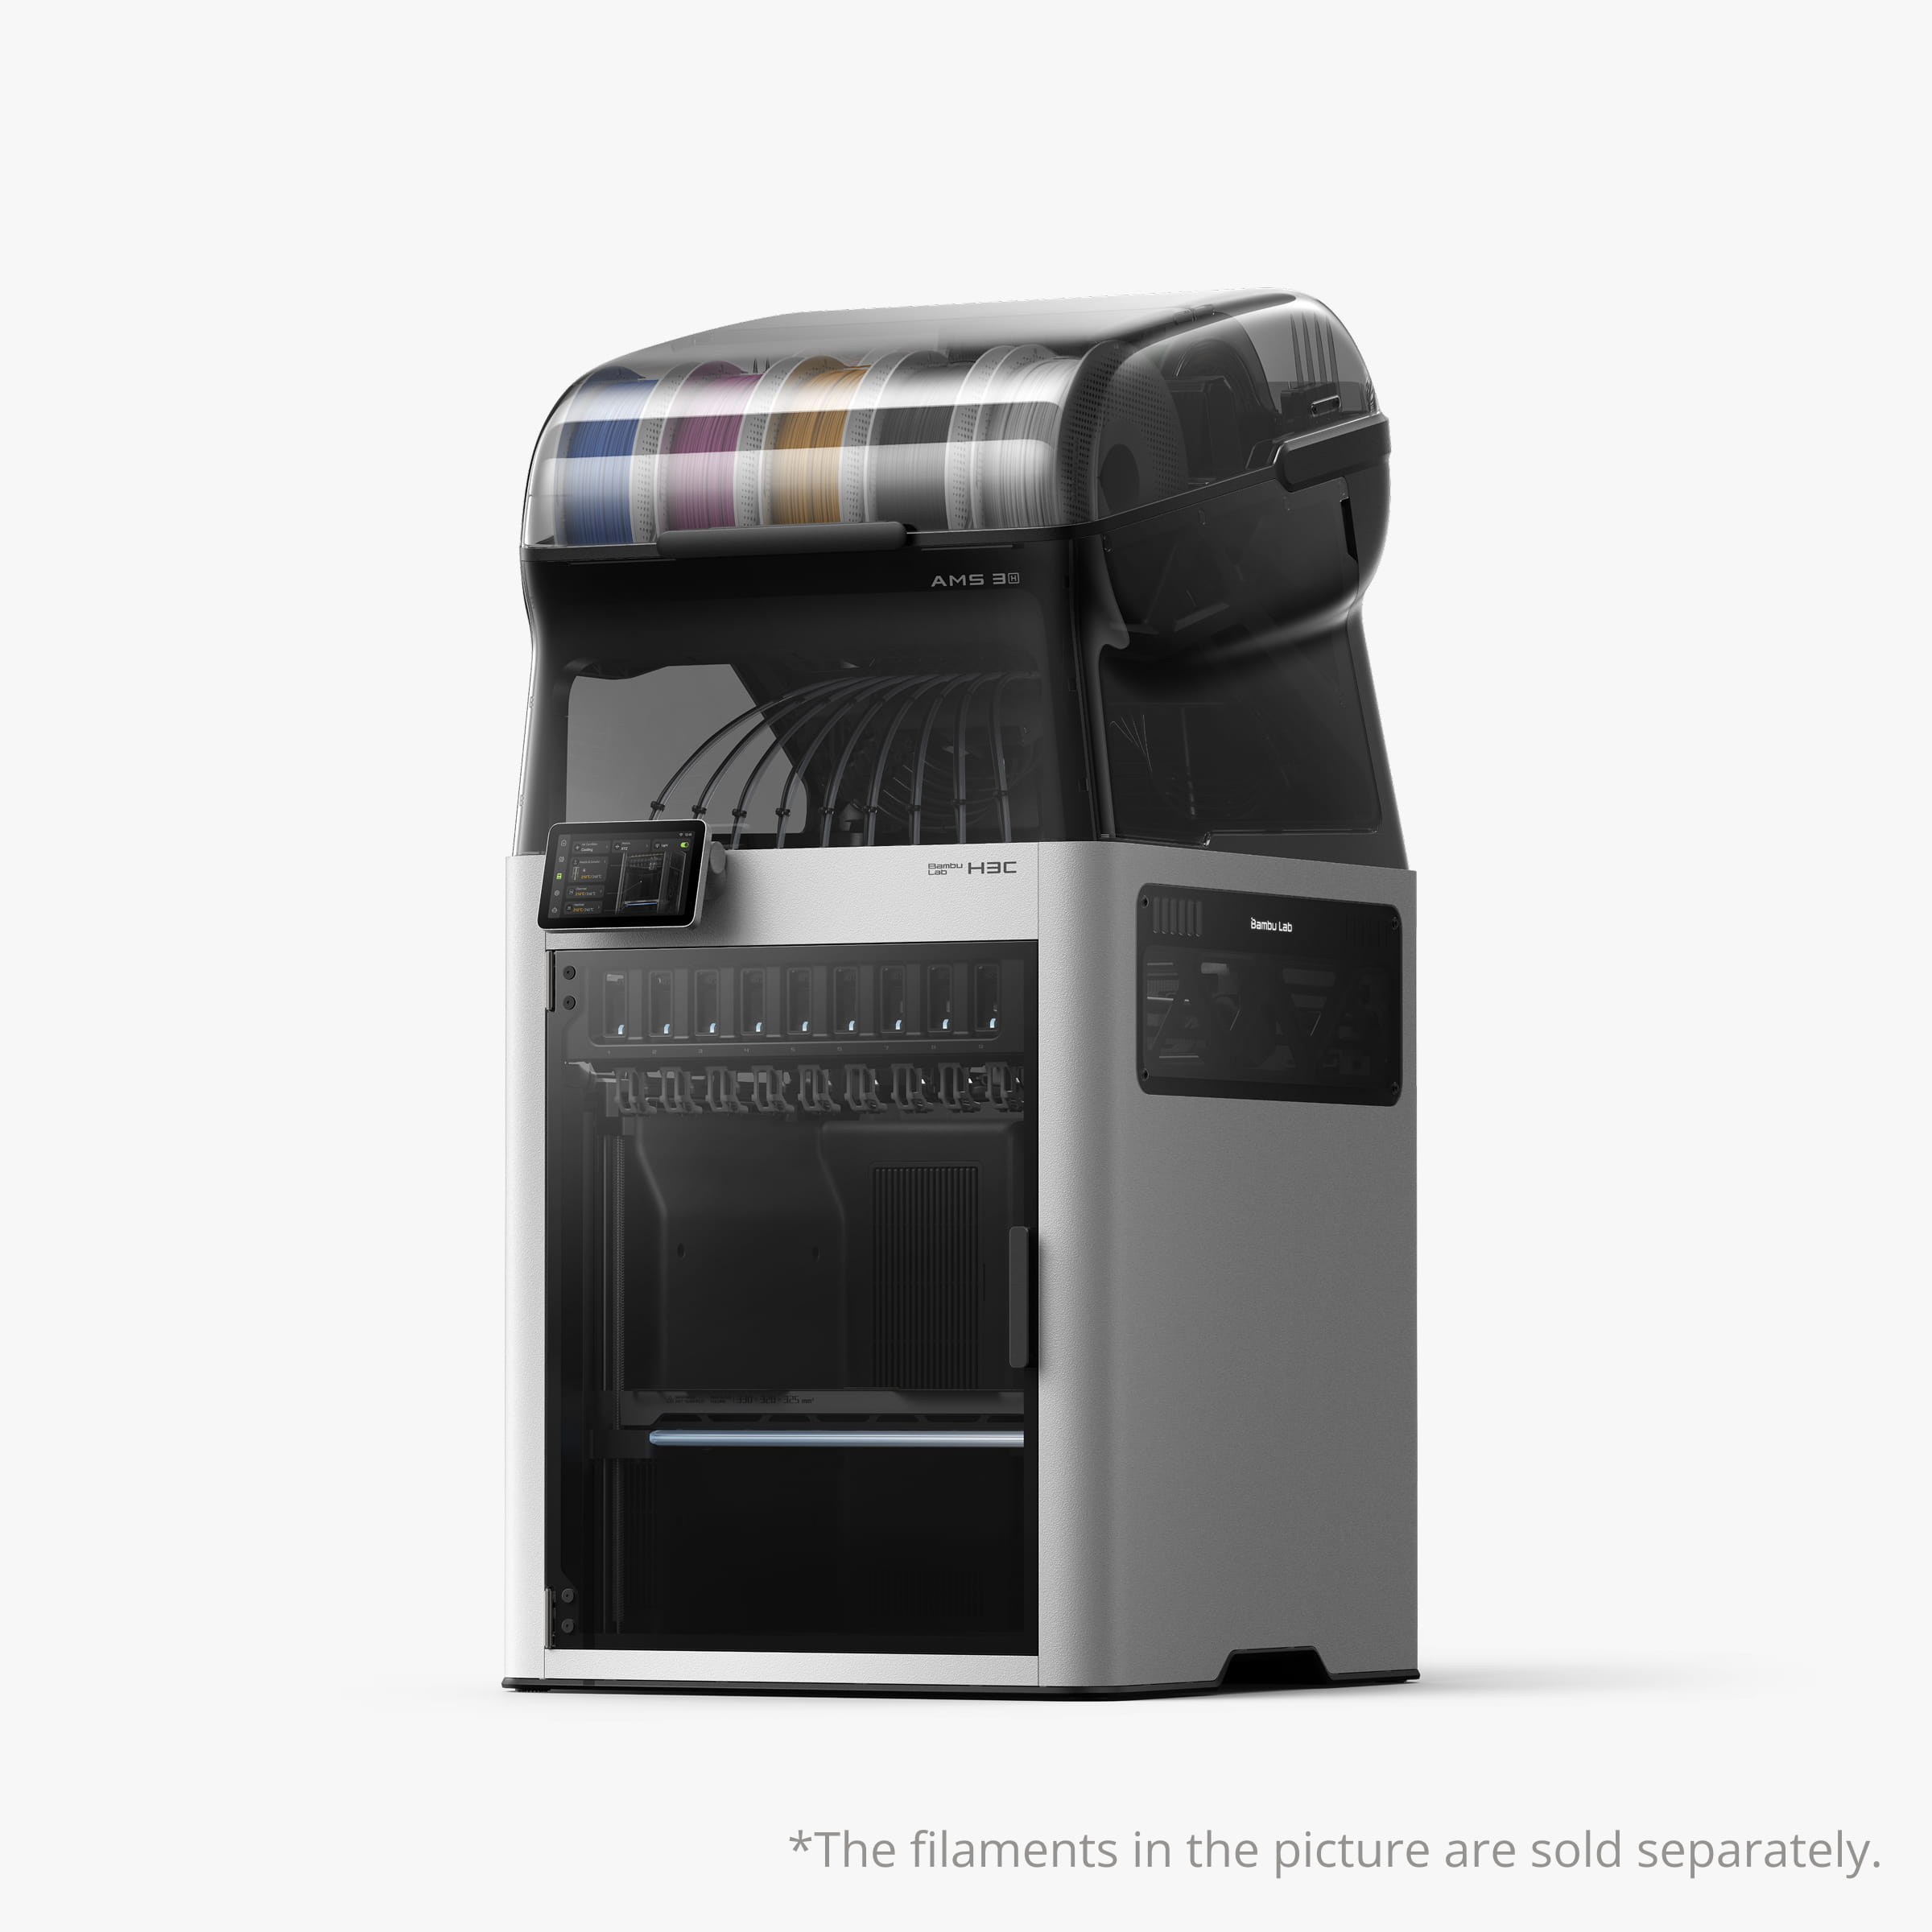
The H3C is Bambu Lab’s third-generation flagship desktop machine and its first purpose-built tool-changing platform. Its SwapTek system can carry up to nine independently fed and heated PrintTools. A waiting tool can be preheated before use, and Bambu Lab states that a complete switch can take as little as six seconds.
This approach differs from a conventional single-nozzle multicolor printer. Instead of repeatedly retracting one filament and purging the next color through the same nozzle, the H3C parks one complete tool and collects another. It can therefore reduce color-change time and purge waste, especially on models requiring frequent changes. It does not make auxiliary material disappear entirely, however, as our test’s prime tower demonstrates.
| Build volume | 330 × 320 × 325 mm |
|---|---|
| Tool capacity | Up to 9 independently fed PrintTools |
| Claimed tool-switch time | As little as 6 seconds, including the physical tool change |
| Maximum nozzle temperature | 350°C |
| Maximum controlled chamber temperature | 65°C |
| Maximum bed temperature | 120°C |
| Maximum travel speed / acceleration | 1,400 mm/s / 25,000 mm/s² |
The machine can also combine different nozzle diameters within one job. A larger nozzle may build internal regions quickly while a smaller nozzle handles fine external features. Its FlexFeed system supports standard 1.75 mm filament and a dedicated 2.85 mm path for very soft TPU, including materials rated down to 75A.
The accompanying AMS 3H provides nine sealed filament slots, including two active drying positions capable of reaching 85°C. The H3C’s heated chamber, hardened-steel nozzles and filtration system also extend its potential beyond decorative PLA into materials such as ABS, PC, PA-CF and PET-CF, subject to the geometry and application.
Specifications in this section are based on Bambu Lab’s official H3C announcement.
Five Filaments, More Than Five Visible Colors
One of the H3C’s most eye-catching capabilities is its CMYKW color system. Bambu Lab’s PLA Palette uses cyan, magenta, yellow, black and white base filaments. By arranging selected colors in thin stacked layers, the slicer can create more than 180 combinations from five inputs.
This should not be confused with inkjet-style photorealistic full-color printing. The effect is produced by layered filament colors, so viewing angle, lighting, wall structure and layer direction can influence the result. On our model, the warm skin tone and pink-to-orange transitions are clearly more nuanced than a conventional one-filament-per-color print. At close range, however, the colored strands also form a visible directional texture.
According to Bambu Lab’s PLA Palette introduction, four of the five base filaments are opaque and the black component is translucent. We therefore would not attribute every visible line simply to “transparent filament.” The appearance is better understood as a combination of FDM layer geometry, layered color placement and directional reflections.
Our First Print: What Worked Well
1. Clean Registration Across Repeated Tool Changes
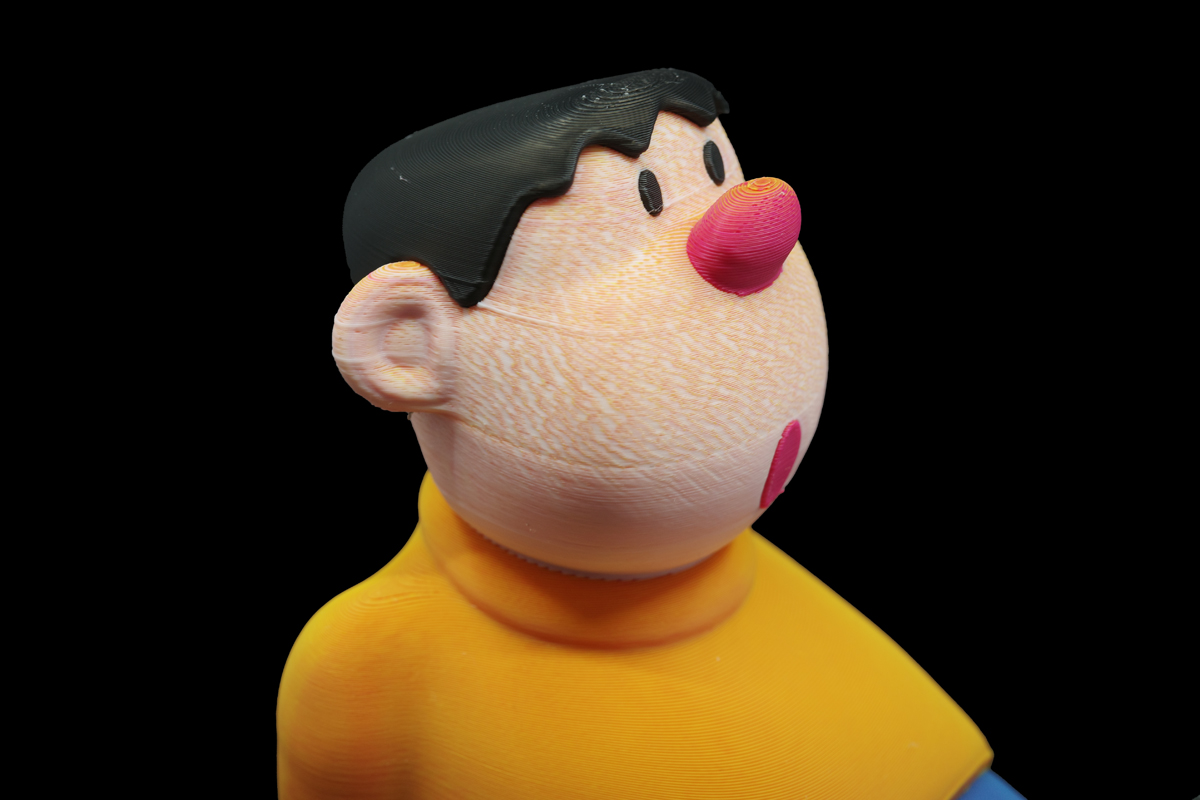
The strongest result is the consistency between colors. The black hair meets the face cleanly, the small dark eyes remain well defined, and the pink nose retains a crisp outline. We did not observe an obvious repeated shadow or major XY offset along these front-facing color boundaries, despite the large number of tool changes required by the model.
2. Convincing Color Blending
The face is not a flat peach color. Fine warm and pale strands combine into a more varied tone, while magenta and orange create livelier transitions around the nose and clothing. From normal viewing distance, the result reads as a richer palette rather than five isolated filament colors.
3. Ambitious Support-Free Geometry
We printed the seated figure without conventional supports. The chin, ears, raised shoes, lower hair edges and curved body all completed without a major collapse. For a first trial, retaining the overall silhouette across these overhangs was a strong result and reduced the labor and marking associated with support removal.
Where the First Test Still Shows FDM Limitations
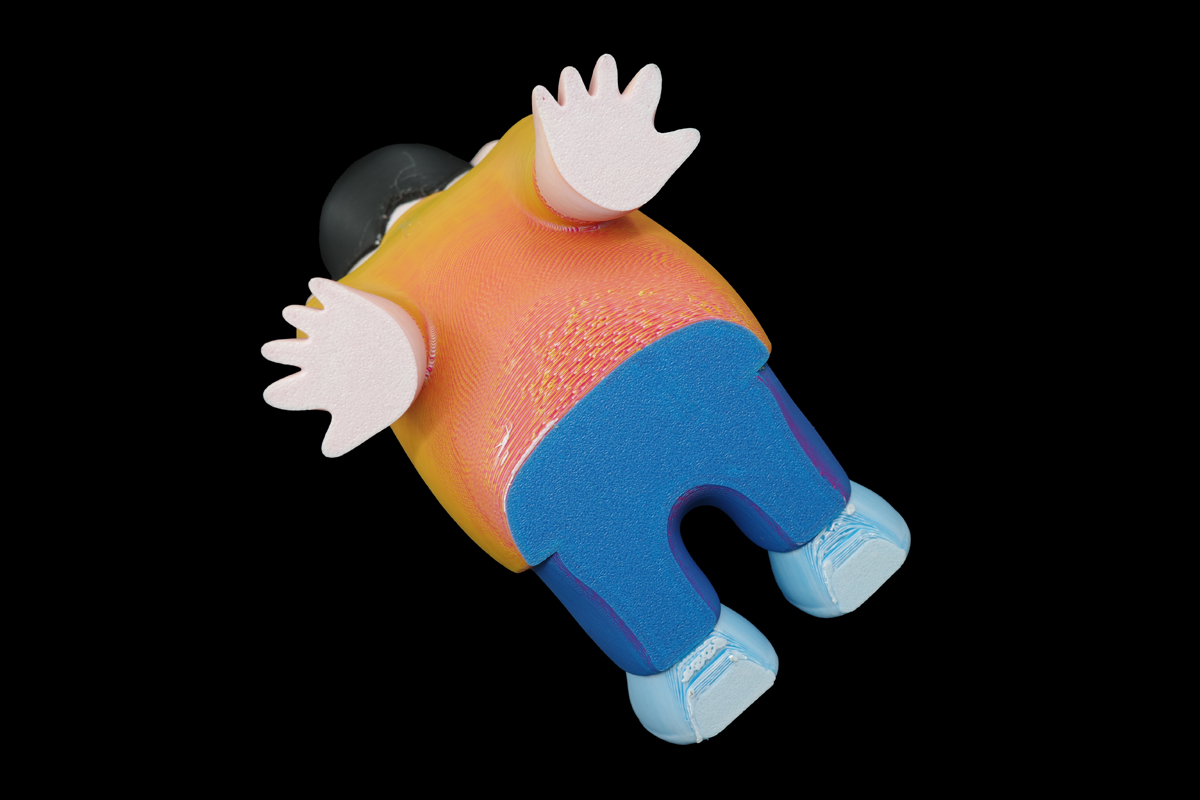
A useful test should show more than the best viewing angle. The front of the figurine is visually successful, but the back and underside reveal the trade-offs more clearly.
Layer lines remain visible. They are especially noticeable across rounded areas such as the face, shirt and shoes. The layered color technique can make some of these lines more apparent under directional light because adjacent strands reflect light differently.
Downward-facing surfaces are rougher. The underside of the shirt, hands and shoes shows less consistent extrusion, small strings and local blobs. These defects do not mean the entire print failed; they show what was sacrificed to complete a difficult model without conventional supports. A different orientation, localized supports or adjusted cooling and speed could improve these regions, but each change would affect print time, support marks or color planning.
It is too early to treat one successful figurine as a complete machine qualification. We still plan to evaluate mixed nozzle sizes, softer TPU, dimensional prototypes and engineering materials. This first print mainly demonstrates the H3C’s multicolor and tool-changing potential.
Why Is There Still a Prime Tower?
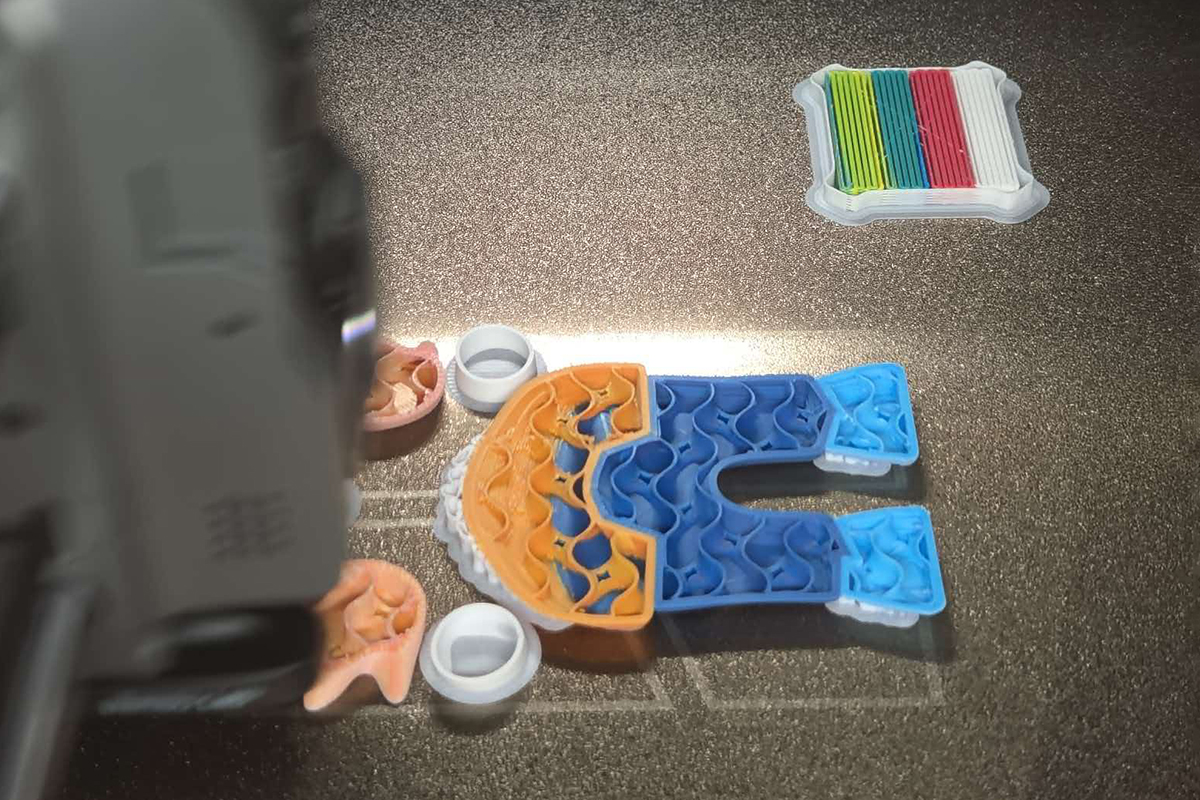
The small striped block beside the model is a prime tower. Although separate tools avoid repeatedly flushing one nozzle from one color to another, a parked hot nozzle may still ooze slightly or lose stable internal pressure. Before returning to the model, the printer deposits a short path on the tower to re-establish consistent flow and help remove material hanging from the nozzle tip.
For layered PLA Palette colors, consistent extrusion width also matters to the perceived blend. The tower is therefore not evidence that the tool changer has failed; it is a quality-control structure. At the same time, it is important to be accurate: tool changing can substantially reduce purge waste, but it does not guarantee a waste-free multicolor print. Independent testing has made the same distinction; see the Tom’s Hardware H3C review.
Where the H3C Fits in FacFox’s Printing Services
The H3C gives FacFox another useful option for multicolor concept models, designer toys, educational models, display prototypes, personalized products and multi-material functional prototypes. Its tool-changing architecture may be particularly valuable when a project requires frequent color changes, different nozzle sizes or combinations of rigid and flexible materials.
It is not automatically the best process for every colorful part. SLA may be preferable when very fine detail and a smoother surface are the priority. Mimaki or PolyJet can be more suitable for photographic full-color models and complex color graphics. MJF, SLS and industrial FDM may be better choices for different mechanical or production requirements. The right answer depends on the geometry, size, quantity, viewing distance, required color fidelity, mechanical performance, budget and delivery schedule.
If you would like to test a model on the new Bambu Lab H3C, send FacFox your 3D file together with its intended size, use, color requirements and preferred material. Our team can evaluate the model, recommend a suitable process and prepare the orientation, slicing strategy and finishing plan for your project.
FacFox purchased the Bambu Lab H3C for its own production and evaluation. This article is not sponsored by Bambu Lab. The cartoon-style test model was used solely to evaluate printing performance; any recognizable character rights remain with their respective owner.