Whether for a personalized gift or for decorations around the home, creating a 3D print from a photo presents many opportunities for enhancing the world around you.
There are many ways you can 3D print from photos, and you needn’t be a professional 3D artist. All you need are photos in high resolution and an ounce of 3D printing skills. And, of course, time.
Creating a 3D model may be the only difficult part of the process, and there’s usually no way around this. You will have to learn a few tricks. Thankfully, there’s plenty of easy-to-use software out there.
How to Turn a Picture Into a 3D Model
Techniques for creating 3D models from photos depend on the number of photos. While a single photo is okay, multiple photos guarantee a more detailed and accurate 3D model.
For a single photo, methods include:
- Smoothie 3D, a free online platform,
- the extrude tool, found in many CAD programs,
- an AI-powered tool, and
- lithophanes.
In the following, we’ll look at each of these four methods in detail before moving on to multiple-photo conversion.
Single Photo: Smoothie 3D
Smoothie 3D is a free online platform used in the creation of 3D models from a single picture. The software uses one image to create an online digital model that resembles what you get when you use a scan or photogrammetry.
Unfortunately, this software won’t be of much help if you need asymmetrical models with plenty of details. In fact, Smoothie 3D will require a bit of “drawing” (on the app) in order to turn those parts into textured 3D models. This process should take a short time if you are familiar with the software interface.
Once your modeling phase is done, you may decide to print yourself or send your design to a 3D printing service.
Smoothie-3D provides a simple solution and makes 3D printing a photo as easy as possible. The best part is that no prior modeling experience is required, and neither do you have to download any software on your PC.
Single Photo: Extrude Tool

An extrude tool creates new geometry from faces, vertices, or edges. It will help you create the third axis from your 2D file (picture) based on some algorithms. You will end up with new geometry, and your model will have volume.
This tool is mostly found in computer aided design (CAD) software. Your task is therefore to choose the CAD tool that best suits you, whether that’s a professional tool or something a little less pricey.
Single Photo: AI
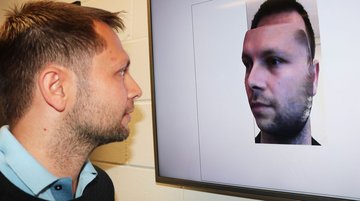
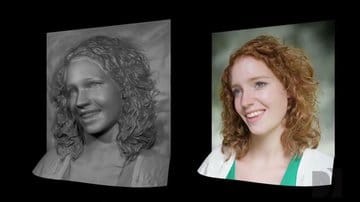
In September 2017, the world was introduced to an AI-powered tool that can turn your face photo into a 3D model. The tool was the result of research from two UK universities, who detailed their research in this paper. According to The Verge, the researchers taught the AI system how to extrapolate a face from a single photo by feeding it many photographs and corresponding 3D models.
Having the ability to create such 3D models with ease could have several applications in today’s digital world, including the much-hyped area of VR. It also makes it super easy to 3D print from photo.
Single Photo: Lithophanes
A lithophane is an image “carved” into a translucent material, whereby a backlight reveals the contents. They’ve been around since the early 1800s, though they haven’t always 3D printed.
Thicker areas prevent light from passing through, appearing darker, while thin areas appear brighter.
To create a lithophane, you will first need to create a 3D model from your photo. Here are some tools you can use:
- Image to Lithophane (free and readily accessible)
- PhotoToMesh
- Cura (13.11 and above)
Once you have your STL file, load it into your slicer program to slice it into layers that will guide your printer. Then print.
Formlabs recommends a high-resolution SLA (stereolithography) printer over conventional FDM printers. They argue that FDM printers produce thick layers, which will affect the appearance of your image.
What About Multiple Photos?

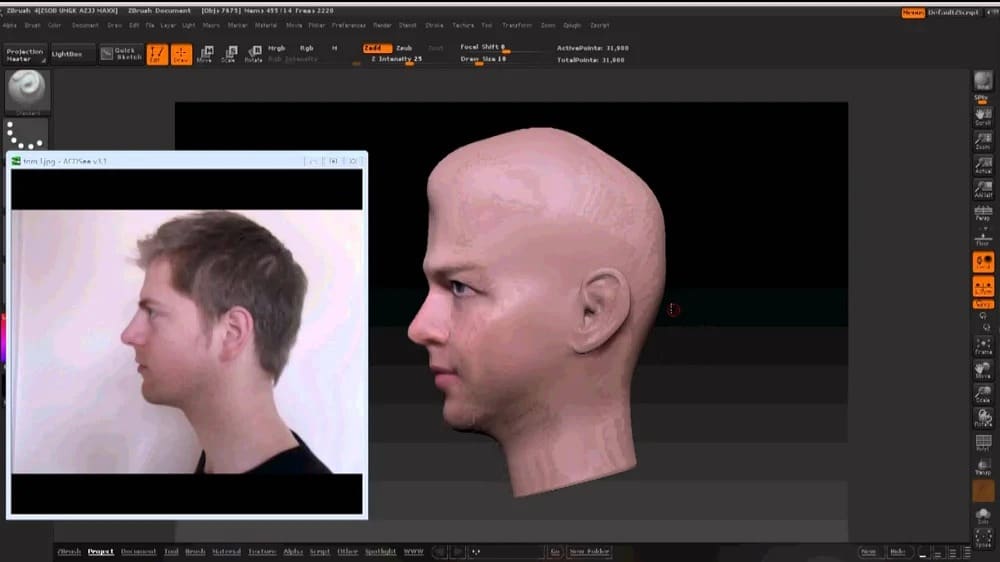
Several options present themselves when using multiple photos. The first, of course, is to simply make use of some of the same tools described above. If, however, you’re interested in a more detailed model, you can seek the services of a 3D designer or take on the task of learning tools like Zbrush or, yourself.
Finally, there’s the option of photogrammetry, which involves taking several photos of your subject and collecting a series of points in space from the images. If you choose this path, be sure to take plenty of pictures of your object in as many angles as possible. Then, upload your photos to photogrammetry software to generate a 3D printable file.
Take note of the fact that you need high-quality images if you want to get an excellent rendering of your 3D model. 3D printing from photo largely relies on the quality of your pictures.
Multiple Photos: Optimizing Your Pictures
To optimize your pictures, you’re going to need the following:
- A high-resolution digital camera: You need digital files, and you need them in high quality.
- A lighting device. Proper lighting is key to improving your shoot.
- A tripod: You’ll want to stabilize your subject and your camera as much as possible.
A couple of things to watch out for when shooting:
- Overexposure
- Even lighting
You are some photo editing programs you can use:
- iPhoto
- Adobe Lightroom
- Adobe Bridge
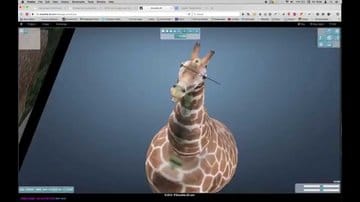
Multiple Photos: 3D Modeling
If possible, take 30 to 40 pictures at different angles and ensure they are of high quality before uploading them to your photogrammetry software like. Here are a few example tools:
The magic of 3D scanning happens through some algorithms. Once you have a good set of photos, most of the work is left to the software.
Multiple Photos: Inspecting Your Model

It should be easy to immediately notice any issues with your model. Nevertheless, keep changing the viewing angles because some flaws are difficult to detect at first glance. Be especially keen with the structural details.
Some flaws you can fix using smoothing and sculpting tools. But if you feel your model looks too different from the original object, you may need to take a new set of photos. This may be the better option in order to avoid the frustration that can come from repairing models. Just remember, the more accurate your photos, the better.