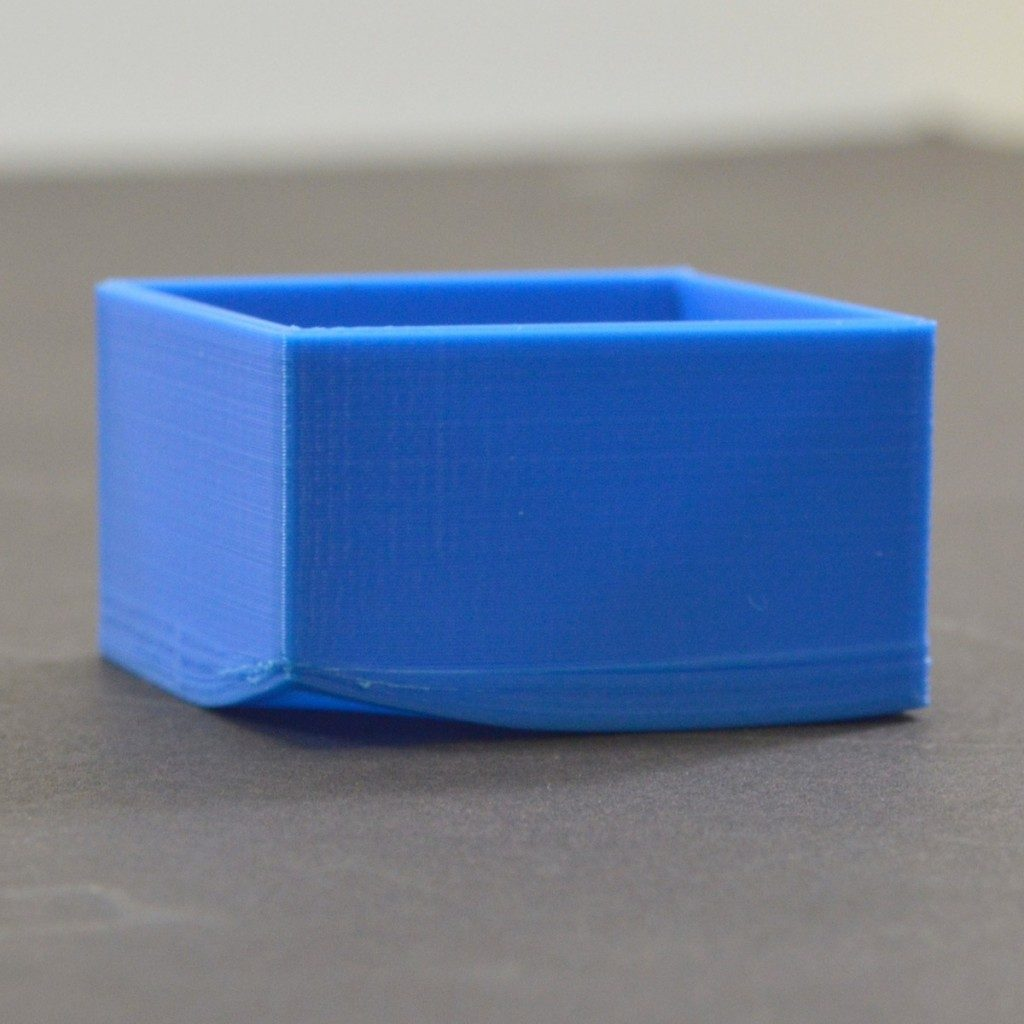
As you start printing larger models, you may start to notice that even though the first few layers of your part successfully adhered to the bed, later on the part begins to curl and deform. This curling can be so severe that it actually causes part of your model to separate from the bed, and may cause the entire print to eventually fail. This behavior is particularly common when printing very large or very long parts with high-temperature materials such as ABS. The main reason for this problem is the fact that plastic tends to shrink as it cools. For example, if you printed an ABS part at 230C and then allowed it to cool to room temperature, it will shrink by almost 1.5%. For many large parts, this could equate to several millimeters of shrinkage! As the print progresses, each successive layer will deform a bit more until the entire part curls and separates from the bed. This can be a challenging issue to solve, but we have several helpful suggestions to get you started.

Common Solutions
Use a Heated Bed
Many machines come equipped with a heated bed that can help keep the bottom layers of your part warm throughout the print. For materials such as ABS, it is common to set the heated bed temperature to 100-120C, which will significantly reduce the amount of plastic shrinkage in these layers. To adjust your heated bed temperature, click on “Edit Process Settings”, select the Temperature tab, and then choose your Heated Bed from the list on the left-hand side. You can double-click on the temperature setpoint to edit the value.
Disable Fan Cooling
By now, you probably realize that cooling can be a problem for parts that tend to warp. For this reason, many users prefer to disable any external cooling fans entirely when printing with materials such as ABS. This allows all of the layers to stay warm for a longer period of time, increasing your chance of success. You can verify your fan speed settings by clicking on the Cooling tab of your process settings in Simplify3D.
Use a Heated Enclosure
While a heated bed can keep the bottom layers of your part warm, it may struggle to keep the upper layers of the part from contracting once you start printing taller and taller objects. In this situation, you may find it useful to place your printer inside of an enclosure that can help regulate the temperature of the entire build volume. Some machines may already include an external enclosure specifically for this reason. If your machine does include a heated enclosure, make sure to keep the doors closed during the print, which will keep the heat from escaping.
Brims and Rafts
If you have already tried all of the other suggestions, but your parts are still curling later on in the print, then you can also try including a brim or a raft with your print. These features will help hold the edges down and may warp less, since they are typically only a few layers tall. If you want to learn more about these options, please read our tutorial on Rafts, Skirts and Brims.

Add a Comment
You must be logged in to post a comment