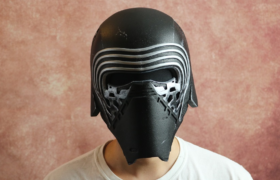
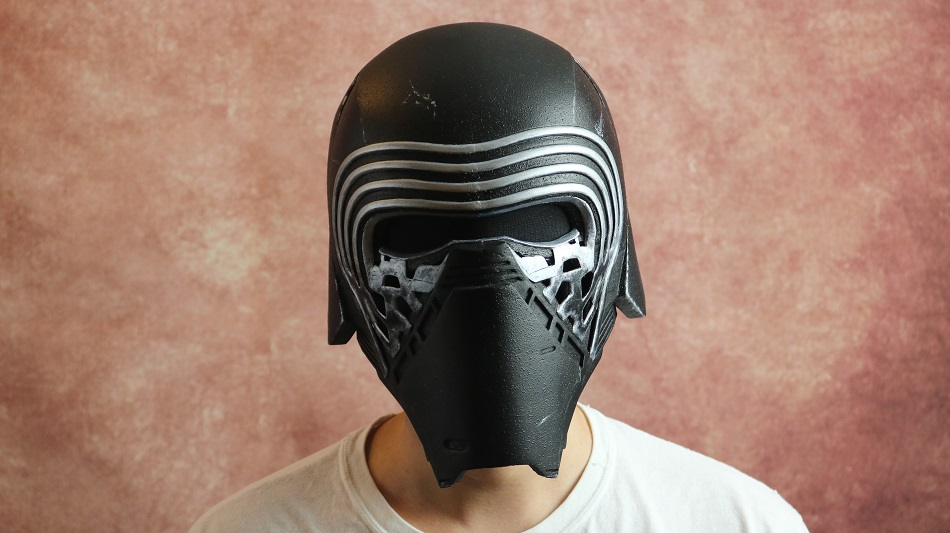
One of the coolest things that you can make with a 3D printer is a helmet that you can actually wear. The best part is that no matter what size 3D printer you have, you can still print a full-sized helmet.
So how do you 3D print a helmet? If your 3D printer is too small to print the helmet in one piece, then you can split it into separate parts and join them up later.
In this article, I’ll share with you the things that I’ve learned about the process. This is just one example but you could do this to every single part such as shoulders, biceps, forearms, chest, back, abs, cod, thighs, shins, boots and more.
Finding a 3D Model of the Helmet
The first thing that you’ll need if you want to 3D print a helmet is the 3D model. Just search on Thingiverse.com, and if it’s a well-known helmet then somebody has probably already made a model of it and posted it there. If you can’t find anything on Thingiverse, then try just searching the web for it. Sometimes people post their 3D models on other websites.
For example, you could search something like “so-and-so helmet STL file,” or “so-and-so helmet 3d model for 3D printing.” In case you don’t know, an STL file is just the type of file that a lot of objects for 3D printing are saved as. If there is a 3D model out there then searches like that should be able to locate it. Sometimes people will design objects for printing and then sell the files, so it might not be free, but at least it’s already designed.
If you’ve searched Thingiverse and the rest of the internet and still haven’t found a 3D model for your helmet, then you have a few options of what to do. You can either design a 3D model yourself, or try to find someone else to do it.
The easiest way would probably be to hire someone to design the helmet for you, unless you know how to make 3D models yourself. Websites like Fiverr.com have a lot of people you can choose from who can design the model for you. Prices can range anywhere from $5 to hundreds of dollars, but usually for something like a 3D model of a helmet it shouldn’t cost that much.
If you want to try designing the helmet yourself, there are different 3D modeling programs that you could use. One good one that’s very popular is called Blender. I’ve tried to use it before, and it’s quite difficult to learn how to use, but once you get used to it it can be a very effective tool. Also, it’s completely free, and there are a lot of tutorials online on how to use it. If you have the time and are willing to learn Blender, it can be a good option.
Then there are programs that you can buy, like Simplify3D, AutoCAD, and Solidworks. There are many more, but these are the ones I hear people use the most. I personally haven’t used any of them, so I recommend you look them up to see which one might be best for you.
Tips for Scaling a Helmet to Fit Your Head
If you are unsure about the scale, please do not print the full piece from the begining. There is a way to save filament and test things out with minimal cost and time.
Helmets need to be sized bigger especially if you are going to install hinges or servo motors inside. Our models are mostly scaled for a 6 foot tall 3D avatar but because we followed the proportions of a CGI model to avoid a bubble head look, in most cases, you can increase the scale by 5 ~ 10%. Some people scan their head into an stl file, and then fit the helmet on the virtual head. The test will get you the right size so that your helmet will fit perfectly.
Once you scale the helmet to your size, you can use that helmet as a guide for future helmets. Simply open up another helmet that you need to scale and put it next to the “perfect fitting” helmet. Use the “perfect fitting” helmet as a guide to scale up/down the other helmet to the same size.
Here is an example from Do3D. The software in this video is Autodesk Netfabb, but almost every software has a slicing tool.
Splitting the Helmet
If you have a small to medium sized 3D printer, then you probably won’t be able to print a full-sized helmet in one piece. You can turn to an online 3D printing service company like FacFox and custom one with our industrial 3D printer.
If you have a 3D printer big enough to print your helmet in one piece, then that will save you the trouble of having to assemble multiple pieces later on. However, it can take a very long time to print something as big as a helmet all at once. I’m talking multiple days for some helmets. For a print that long, if just one thing goes wrong, then the whole thing could be ruined. But with FacFox’s industrial 3D printer, things as large as helmets can be printed in one day and post-processed in another day.
So even if you have the capacity to print a helmet in one piece, you might still want to split it. Some helmets that you find online will have a complete version along with a version that has already been split into parts. If you can find one like that then that’s great, but there can still be some issues.
If it was split along smooth lines, like the one I printed, then it can be hard to match the pieces up exactly right. This can lead to other pieces being misaligned, and if it’s bad enough then you might have to start over. You can fix this by either lining everything up as carefully as you can, or by adding what’s called registration marks.
Registration marks can be bumps, pegs, or any other shaped protrusions that stick out of one side of piece and line up with holes on the other piece. Having these will make it easy to fit the two pieces together so that they line up perfectly. If your helmet has already been split and they didn’t put any registration marks, then it would pretty hard to put them in yourself. The best way to add them is to do it when you split the helmet.
It’s actually not very difficult to split a 3D model by yourself. There are multiple programs you can use to do it, but the one I use is Meshmixer. It’s a free software that lets you edit 3D models in many different ways, including splitting and adding registration marks. I found a good video that explains step-by-step how to do this, so I’ll link it here. It’s probably easier for you to watch it than if I try to explain it.
If your helmet has any protrusions, like horns or spikes, then it might be better to slice those off and print them separately. It can cause issues with needing support later on when you print, and that can limit your options for how you orient the piece.
Print Orientation and Supports
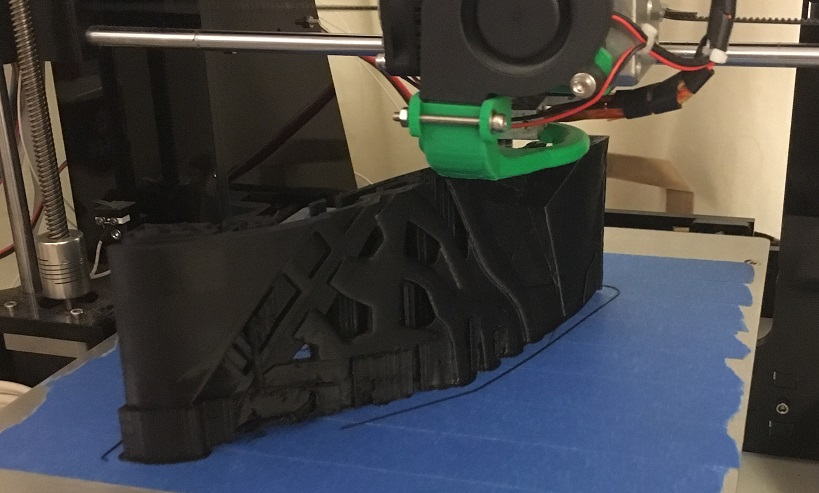
Because pretty much any helmet will be at least somewhat dome-shaped, it’ll probably need supports. No matter how you orient it, because of the curvature, some parts are going to have a steep overhang. If you print your helmet in one piece, then you’ll probably want to orient the helmet right side up, so that any support material will only contact the inside of the helmet. This will make the surface easier to finish.
If you print your helmet in parts then you have a bit more flexibility with how you orient each piece. I recommend that you print them so that any flat surfaces, like the lines that you split the helmet along, are flat against the print bed. This will make sure that at least that part will come out exactly right. Again, even if you print the helmet in multiple pieces, I recommend that you orient them so that any supports are only needed on the inside.
Any irregular shapes that you cut off to print separately should probably be printed so that the flat part where they were sliced is face down on the print bed. Unless that would cause it to need excessive supports, in which case you might want to orient it so that it needs as little support as possible. Sometimes it’s a trade-off between making one side perfectly flat, and making the piece easier to clean up later on.
Joining the Parts
Once you have your parts printed, you’re ready to assemble the helmet. Of course if you printed it in one piece then you don’t need to worry about this process. If you added registration marks to your parts, then you can start assembling once you have two pieces ready. Sometimes it takes a bit of sanding to get the pegs to insert fully into the corresponding holes, but once you do that it should fit together perfectly.
If your parts don’t have any registration marks to help you line them up, then I recommend that you wait until you have all the pieces printed before you put them together. The reason for that is that if you make a small mistake, even just the slightest misalignment, it can throw the whole helmet out of whack.
When I made my helmet I made this mistake and assembled each piece as soon as they were done printing. I lined them up pretty well, but they were still probably a half a millimeter off, and that caused them to not line up perfectly. Luckily I didn’t join the seams fully, and only tacked them together as I went. That made it a bit easier to adjust them so that they fit together well enough. Still, if I had waited until I had all the pieces, then I could have made them fit better, especially at the top where four pieces joined together.
As for how to permanently join the pieces together, this depends on the material that you printed in. Most people nowadays print with PLA, which is notoriously difficult to glue together. I used PLA for my helmet and the best way that I found to join the pieces together was to weld them with heat. I used a wood-burning tool with a flat tip, but a soldering iron would also work.
If your pieces have registration marks, then you can put the whole thing together and start welding it from the inside first. Make sure that everything fits together perfectly, and then when you weld it it’ll be permanently joined. Starting on the inside will make the whole helmet rigid and secure, so that when you weld the outside seams it won’t move around.
If you have a soldering iron with an adjustable temperature, then you can set it to around the same temperature that you used to print the PLA. This should melt it just enough so that it can join together. For me, since I used a wood-burning tool with no way to adjust the heat, it was too hot and produced smoke. If that happens to you, just make sure that you do it in a well-ventilated area.
The welding process is fairly simple. You just move the tip of whatever tool you’re using to weld along the seams of the helmet. It should melt the PLA around the seams, and you can use the tip to kind of push the plastic around so that it mixes together. Then when it cools it should be one solid piece.
You can also use another piece of PLA filament and melt it into the seam, which is what I did. I wanted a little more plastic in there so that my tool wouldn’t melt a hole through the helmet. I think it also makes the weld a little stronger than if you didn’t add any extra material.
If you print your helmet in something like ABS, then that’s much easier to just glue together. I haven’t personally used ABS to print before, but I’ve read that a lot of glues work well on it. You can also make a slurry of ABS and acetone, which sort of dissolves the material and will meld the parts together pretty well.
Sanding
To prepare your helmet for painting, you have to smooth out the surface as much as you can to get rid of the layer lines. You can do this by either sanding the surface down, or by using a primer paint that is specifically designed to fill gaps. I haven’t used the filler primer myself, but I’ve heard that it works well. I’m not sure if it would fill in small details though, so it might not be the best option for some helmets.
In my case I sanded the entire helmet with a coarse sandpaper until it was mostly smooth, and then I went over it again with a finer grit sandpaper. At first I did it by hand, but when I realized how slow the progress was going, I switched to an oscillating Dremel tool to speed things up.
One tip that I have is that you should frequently clean out your sandpaper, because it can get clogged with plastic very quickly. Also, I think that the sanding process would have gone much faster if I had changed out the sandpaper more often. Instead I only changed it out a few times during the whole process. It probably lost most of it’s sanding capability long before I stopped using it. So save yourself a lot of time and only use the sandpaper while it’s fresh. As soon as it stops working as well, switch it out.
Be careful not to sand too much, because normally 3D prints don’t have very thick surface walls, unless you printed it completely solid. If your wall thickness is only a millimeter or two, then be very careful to only sand away just enough material so that it becomes smooth. If you go any deeper you’ll go through to the infill material, and your print will be ruined.
If you want your helmet to have a super smooth finish, then you should sand down to around at least 360 grit. Normal primer and paint won’t hide many imperfections, so the smoother you can sand down the surface of your helmet, the smoother it will turn out. For my helmet I only went to 240 grit, because I knew that I’d be adding texture to it later, so a smooth finish wasn’t necessary.
Priming and Painting
Once you have your helmet as smooth as you want it, you can start the painting process. In my opinion, because it’s very difficult to get anything to stick to PLA, it’s best to always use a primer before you paint. I know that some people skip this step, but I think that it’ll give you a much longer-lasting paint job.
For my helmet I just used a normal gray primer. I gave it one coat, let it sit for an hour, and then gave it another coat. Then I let it dry for about a week. That might seem like too long of a time to wait, but in the fine print of the primer can it says that for plastic, maximum adhesion occurs after 5-7 days. So I decided to stay on the safe side and wait a week before I continued.
For a smooth finish on your helmet, you can apply paint after the primer, but in my case I wanted my helmet to have some texture. I used a stone texture spray paint after the primer and let that dry before I painted it.
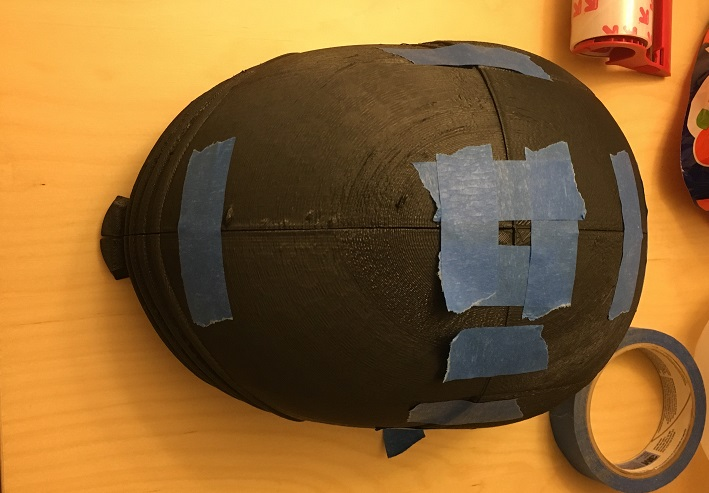
My helmet was pretty simple to paint because most of it is all black, with some silver parts that I hand-painted later. If you have areas that need to be different colors, then you can use masking tape to section them off. Be very thorough when you mask areas off, because any mistakes will mean you’ll have to fix it later. The better a job you do taping things off, the better it should turn out the first time.
After I had the whole thing painted, I went over it with a matte clear coat spray. They also make medium gloss or high gloss clear coats if you want that kind of finish. I think that a clear coat is a good idea because it’ll help to protect the paint, so that any scratches or bumps have less of a chance of damaging the actual paint.
Finishing
Once you have your helmet painted, you can add the finishing touches. This can be things like a visor, a cloth screen on the inside, straps, or padding. I put padding inside my helmet to give it a snug fit and keep it from wobbling around on my head. I also glued a thin black sock material around the eye and face holes so that people won’t be able to see into my helmet. If you do this, I recommend you use a very thin material so that you can still see out, or stretch it so that it becomes more see-through.
Conclusion
I hope that this article helps you as you try to 3D print your own helmet. It can be a long and arduous process to go from nothing to a finished product, but I think it’s completely worth it. Hopefully you learned a bit from my mistakes and tips, and I wish you luck with your projects.