Polyamide is one of the most popular 3D printing materials used by professional 3D printing companies. Its advantages are manifold:
- It is available at a reasonable price;
- It can include interlinking and interlocking parts;
- It can be finished in various ways (dyed, smoothed, spray-painted, given a velvet finish).
Today we will explain why Polyamide is such a great all-rounder and how SLS 3D printing in nylon plastic really works.
The Base Material: It All Starts With Powder
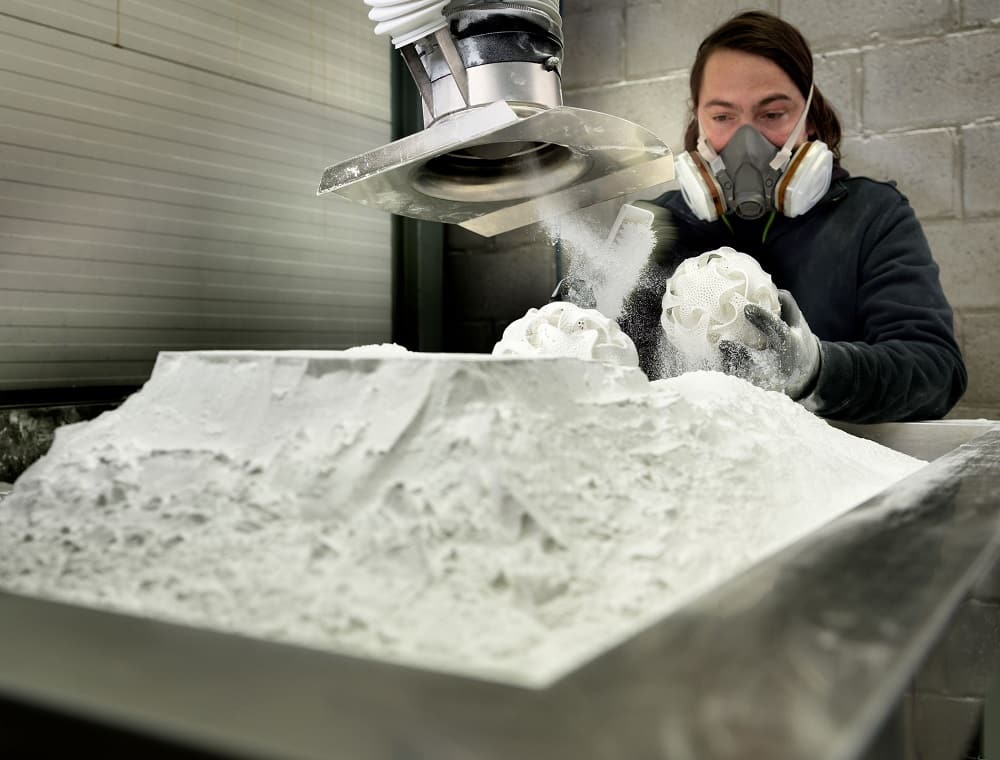
Unlike most home printers, Polyamide prints are not created using a plastic filament. In fact, Polyamide models are constructed from a white, very fine, granular powder. This powder-based material will give you unbelievable design freedom… and as you can see below it will give us quite some work freeing the sintered models from the un-sintered powder. But we will come back to that in just a minute.
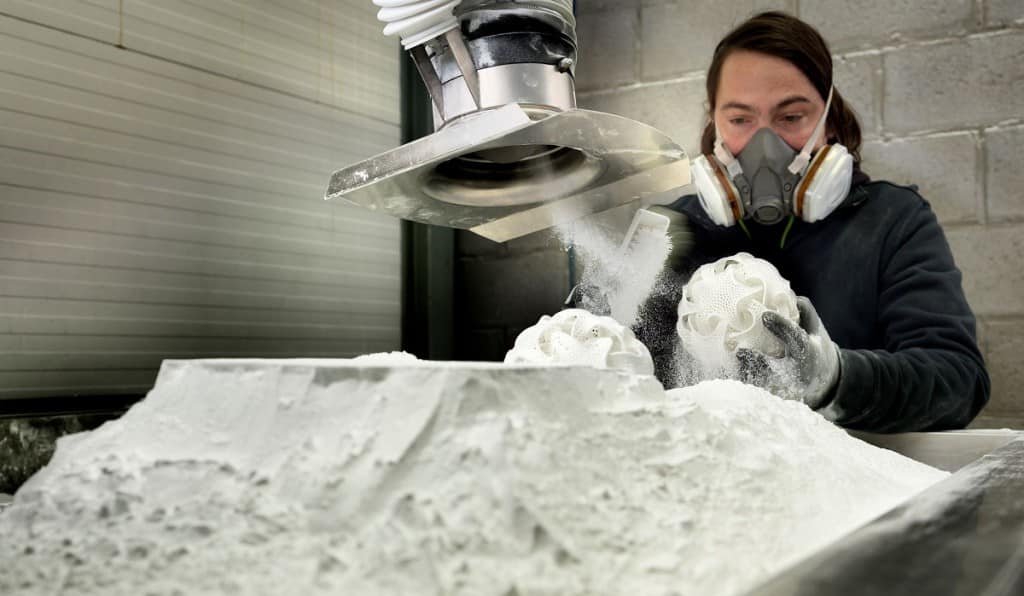
Polyamide 3D printing in our factory. Photo by Flanders Investment & Trade (FIT) (c) Arthur Los.
Moving on, it is important to note that the powder used by 3D printers cannot be any kind of powder. Since it will be used for ultra-thin printing layers, the powder must be perfectly shaped in order to even out. Consider rocks and marbles; you could easily put rocks on top of each other to build a pyramid. However, building a pyramid with marbles would be way more difficult, as the perfectly shaped spheres would just even out and your pyramid wouldn’t stand a chance. Similar to the marbles, the polyamide powder needs to have the perfect shapes of spheres since each and every printing layer needs to have exactly the same height (and we’re talking about microns here).
Another important feature of the powder is its melting point, which is set at 170°C/338°F. You will see in a second why this detail matters.
The Printing Process for Polyamide: Laser Sintering
To create your 3D print, a laser in the printer melts the Polyamide powder together. So here’s how it works: A super-thin layer of polyamide is spread out by a roller. The print chamber of the 3D printer then heats up to a temperature slightly below 170°C/338°F. At this point, the powder does not melt since it has not reached its melting point. And now the magic happens: a laser touches those areas of the layer that are part of your design, raising the temperature of those areas just above 170°C/338°F, and voilà, your part is sintered (well, one layer of your part). The 3D printer will continue to spread out one layer of powder after another, and the laser will systematically touch the correct spots of each layer and sinter the object together.
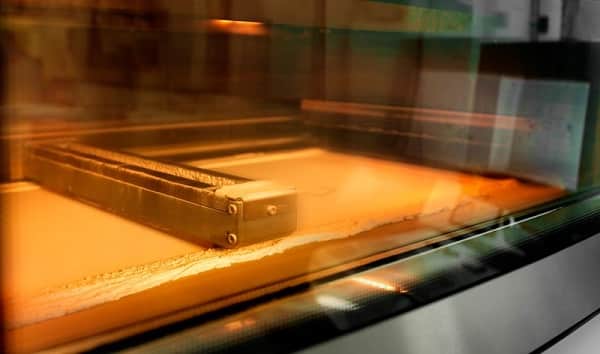
To observe this process in action, take a look at the following video:
After Printing: Cooldown and Digging
While the printing process itself can take up to 1.5 days, the cooldown phase can take even longer. Once the printing job is done, it is not possible to immediately grab the 3D prints – the cooldown can take up to two days. Once this period is over, the result is a big block of powder with the sintered models contained inside. This means that we need to start digging for the printed parts.

The Final Touch: Finishing Your Polyamide 3D Print
Once the above steps have been completed, post-production processes will begin.
First, your 3D prints will be cleaned with vacuum cleaners and high-pressure air guns. Since your object was created within a comfy bed of powder, there are no support structures that need to be cut away.
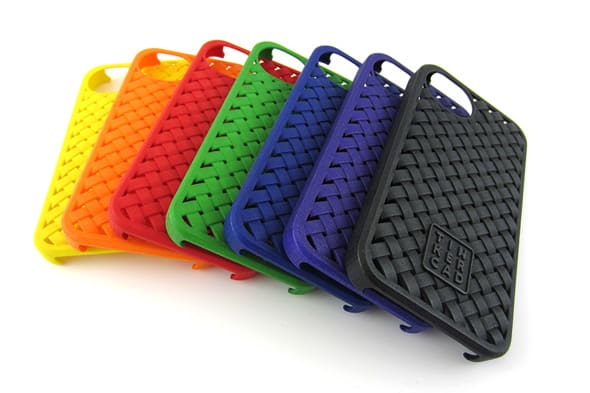
Second, we will apply the finish of your choice (the exact steps depend heavily on the choice you made when placing your order). Your Polyamide print can be polished, dyed, spray-painted, or get a velvet finish.
- Natural: The natural surface of polyamide has a sandy, granular look, and is slightly porous.
-
Dyeing: To color polyamide, we submerge your model into a bath containing color pigment. This dyeing process is also referred to as pigmentation or impregnating.
-
Satin: The satin finish is achieved with a blasting process, giving the surface of your model a uniform color and satin-smooth look.
-
Polishing: To polish models, we use a mechanical smoothing process. Your model is put into a tumbler with pebbles that smooth your model while the tumbler vibrates at a high frequency.
-
Velvet: The process of adding a velvet finish to your models is called flocking. First, a suitable adhesive is applied to the surface. Then, the flock is applied, penetrating the surface of the adhesive to create the desired velvet finish. It not only changes the way your model looks but also how it feels. Electrostatic flock applicators charge the flock particles, which are then attracted to the grounded surface they are attached to. The electrostatic charge ensures that all fibers end up standing at right angles to the surface, resulting in a velvet finish. Velvet fur is fairly resistant to friction.
-
Spray Painting: We can spray paint your 3D-printed model in black or white.
-
Waterproof: For the sealing of your design, we process your polyamide part with an aqueous solution to fill small pores and close its outer surface or skin. Depending on the design, it is applied manually or by dipping the part. This finish is only available in white.